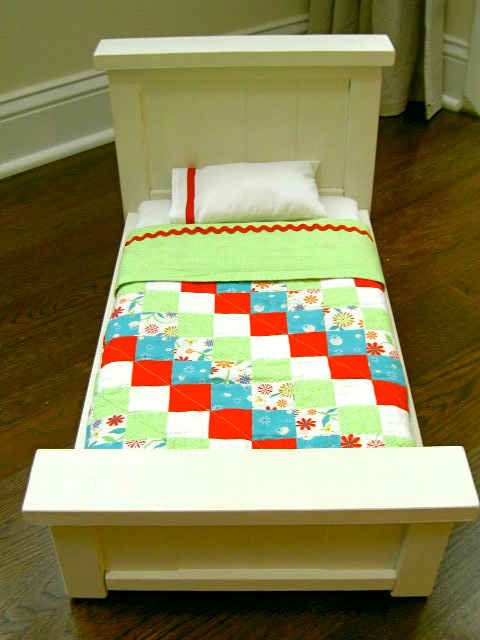
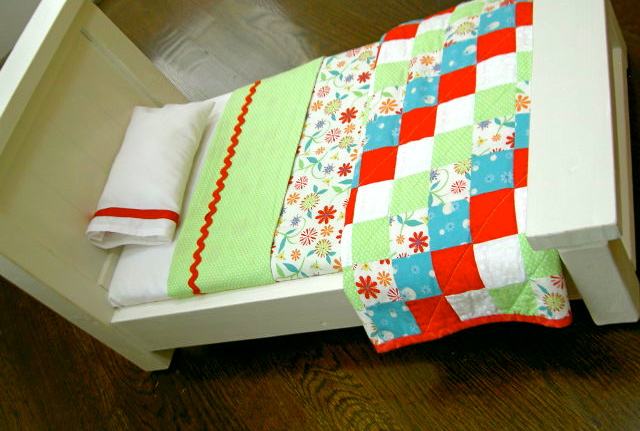
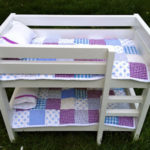
Farmhouse doll bed complete with bedding:
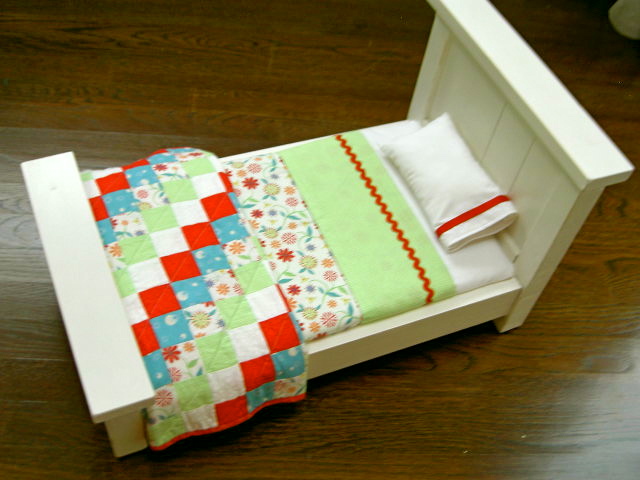
It’s been a while since I made a doll bed, this one went to a school friend for her birthday.
I agonized over the fabric color selections trying hard to stay away from pink.
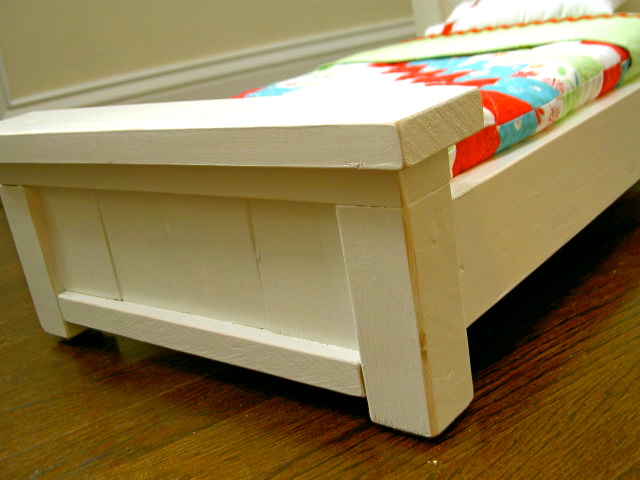
The bed is a modified version of Ana White’s plans here. I left out one slat in the headboard and footboard narrowing the width by 2.5″. Ana’s plans make a very wide bed, almost wide enough for two dolls.
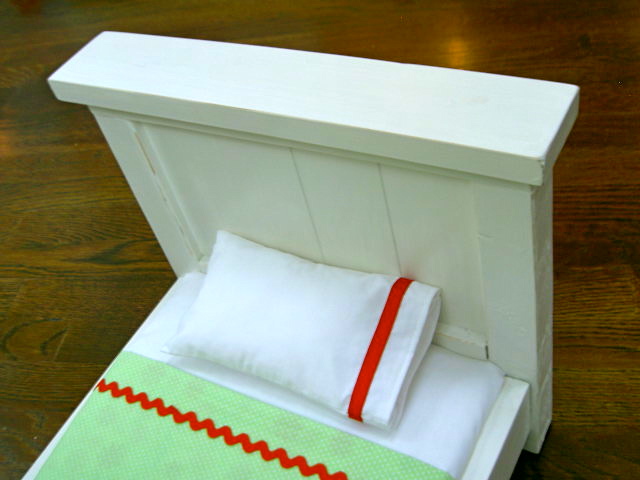
This version fits one American Girl doll perfectly:
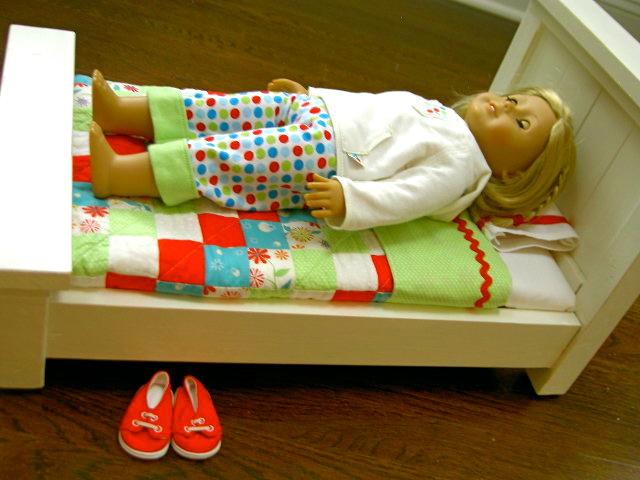
I used pine boards and furring strips primed and painted Behr Swiss Coffee, lightly distressed and sealed with satin poly.
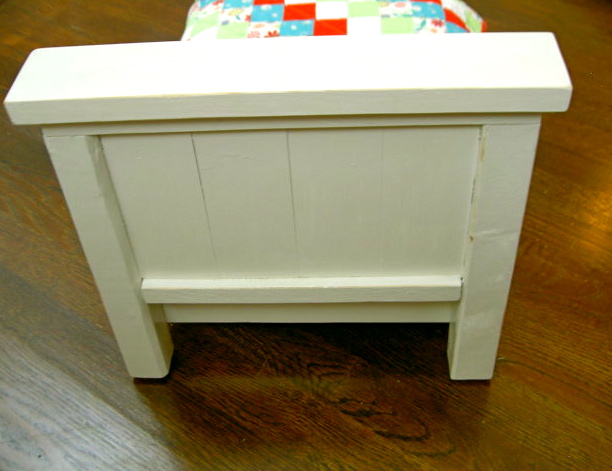
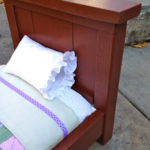
View of the back of the headboard:
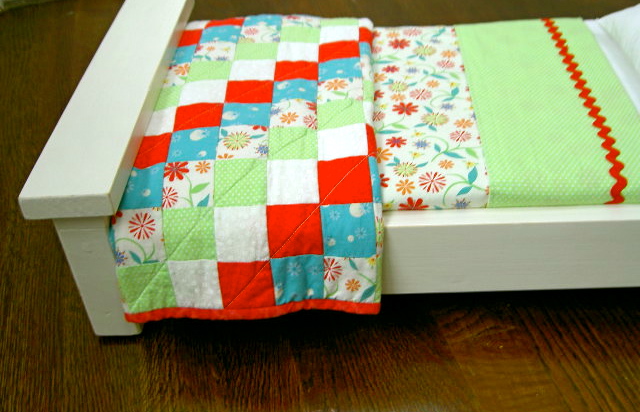
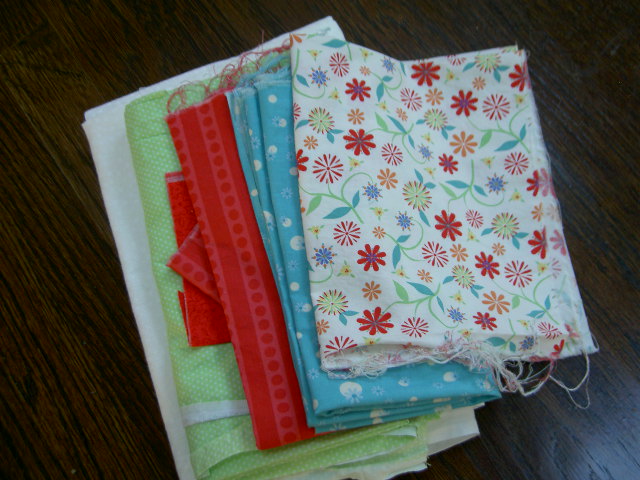
Here’s how I made the quilt, sheet and mattress:
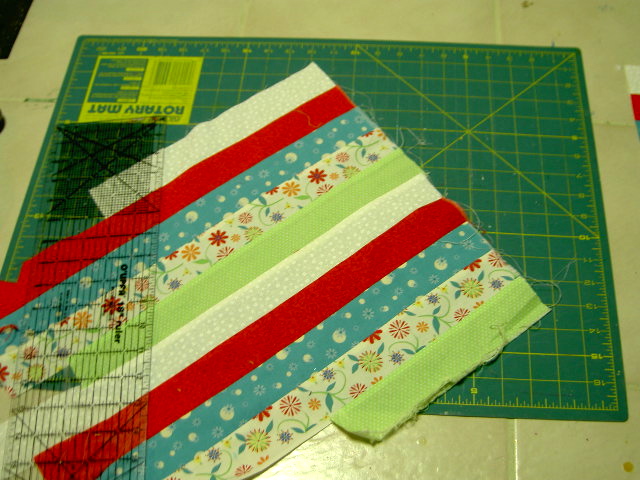
1. Select fabrics:
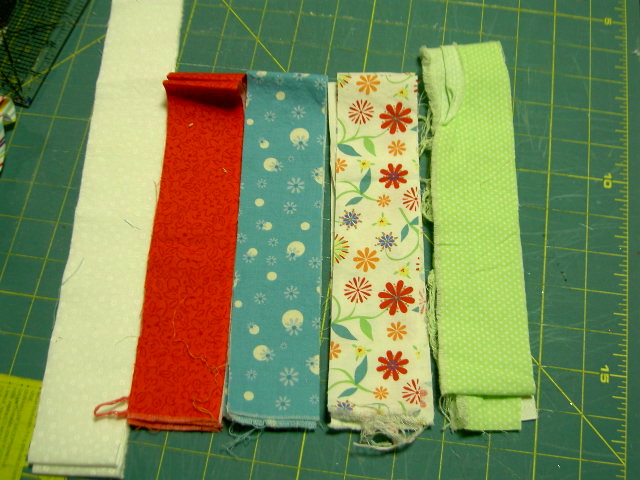
2. Cut 2″ strips:
3. Sew strips using 1/4″ seam allowance in desired pattern:
4. Slice into 2″ sections:
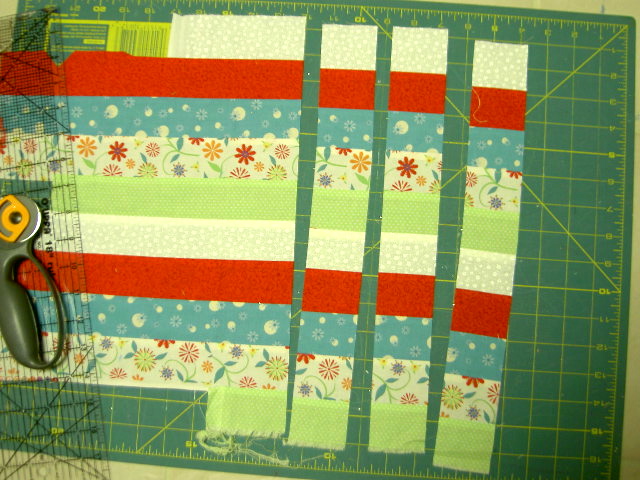
5. Arrange pattern, you will have to make accommodations by attaching additional pieces to get pattern correct:

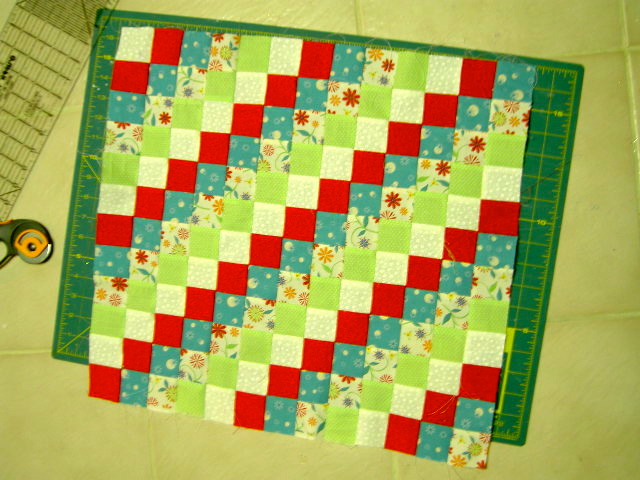
6. Sew all strips together to create quilt top:
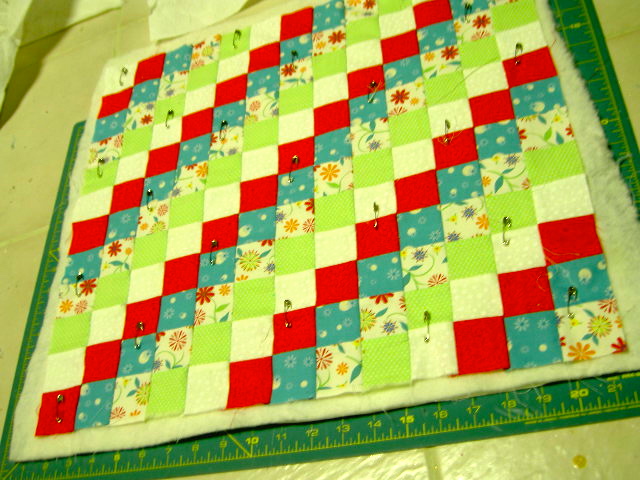
7. Make quilt sandwich: backing fabric, batting, quilt top:
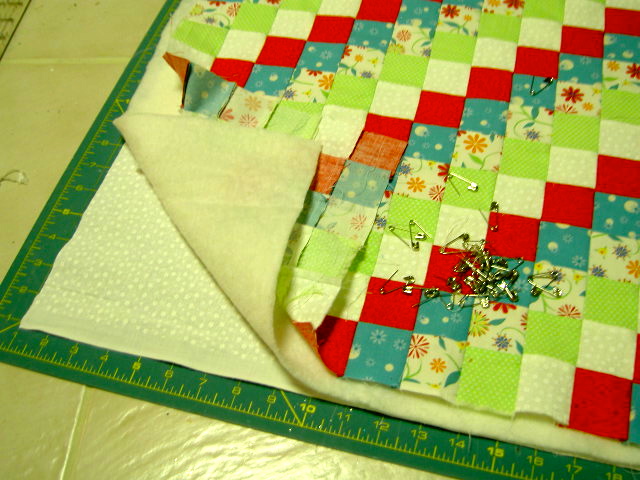
8. Pin all pieces together at 4″ intervals, starting in center to keep all layers flat.
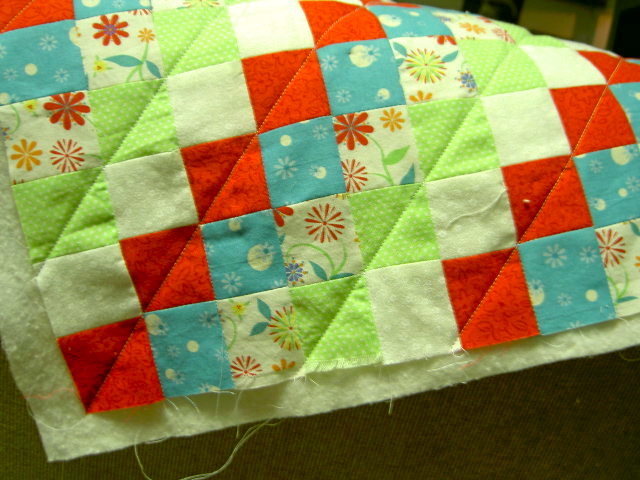
9. Quilt as desired, I choose the red and green rows to quilt on the diagonal:
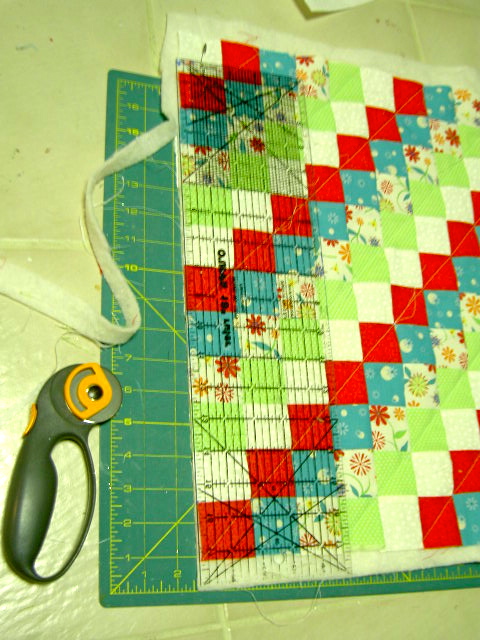
10. Trim up all edges even:
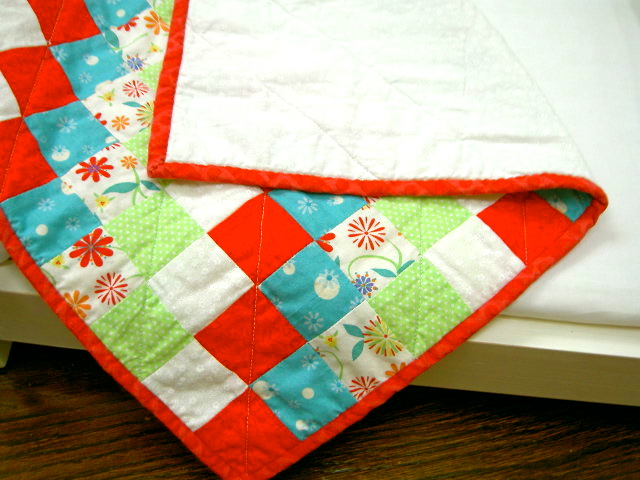
11. Make binding, I used 1 1/2″ width:

12. Sew on binding with 1/4″ seam allowance:

13. Fold binding over and hand stitch closed to back:
Wash and dry to get that worn, quilt look.
14. For the sheet simply sew two fabric pieces wrong sides together leaving a 3″ opening.
(Add decorative ric rac before sewing together.)
Turn right side out and press, top stitch around edge for finished look:

15. Mattress is 1″ foam wrapped with batting, covered with solid white cotton fabric.
All wrapped up in cellophane for gift giving.

Sleep tight American Girl!
I’m linking up to:
Whatcha Got Weekend @ Lolly Jane
SAS @ Funky Junk
Weekend Wrap Up @ Tatertots & Jello
Sundae Scoop @ I Heart Naptime
Sister Sunday @ Sisters of the Wild West
Sunday Showcase Party @ Under the Table & Dreaming
Just Something I Whipped Up @ The Girl Creative
DIY Fall Festival @ The DIY Showoff
Made by You Mondays @ Skip to My Lou
Making the World Cuter @ Making the World Cuter
Nifty Thrifty @ Coastal Charm
Tuesday Treasures @ My Uncommon Slice of Suburbia
Tutorials & Tips Tuesday @ Home Stories A to Z
Good Life @ A Beach Cottage
Delightfully Inspiring @ Delightful Order
Transformation Thursday @ The Shabby Creek Cottage
Strut Your Stuff @ Somewhat Simple
Share Awesomeness Thur @ The 36th Avenue
Flaunt it Friday @ Chic on a Shoestring
Tickled Pink @ 504 Main
Frugal Friday @ The Shabby Nest
SAS @ Just a Girl
Feathered Nest @ French Country Cottage
Remodelaholics Anonymous @ Remodelaholic
inspiration board @ Carolyns Homework
Textiles @ Freckled Laundry
All Things Furniture @ Perfectly Imperfect
Furniture Feature Friday @ Miss Mustard Seed
POWW @ Primitive & Proper
Textiles @ Freckled Laundry
All Things Furniture @ Perfectly Imperfect
Furniture Feature Friday @ Miss Mustard Seed
POWW @ Primitive & Proper
Wow! This is a darling project. I'm sure the recipient will be thrilled!
Jamie – you never cease to amaze me. Is there anything you can't make?! Great job! Take care, Laura.
B is for Beautiful!
too sweet jaime.
So cute Jaime! Love the little quilt! We have a doll bed on the "To Do" list at our house too. We're going to try the bunk bed.
Oh my gosh that is the nicest birthday present EVER! You are so talented!! These would make fabulous Christmas presents – you should sell the whole ensemble!
Thanks for the tutorial on the quilt and sheet. I actually counted the squares on an earlier version to create one for my niece. Wish we could have a craft play date!
Well that's about the cutest dang thing I ever did see!
I've seen the plans on Ana's website, but haven't had the occasion to try one.
The fabrics you chose are what makes it! Love, love, love them!!!!!
You've created an heirloom for the lucky recipient!!!
What an incredible gift for a lucky little girl, Jaime! The bed and the bedding are simply precious. Thanks for the quilt tutorial, too–you make it seem so easy. 🙂
Take care,
Erin @ Carolina Country Living
so cute! what poly do you use that won't yellow over white?
CUTE! I have some nieces that would go crazy for something like this.
This is so sweet. I love the colors in the quilt! My daughter has the very same AG doll and a couple of homemade beds made by her Grandfather. Her Grandmother is a sewer, I have to send her a link to your blog!
I would love for you to link up to my party going on now. Make the Scene Monday @ Alderberry Hill.
Wow! This is amazing! I love love love the quilt!
Priscila @ jensennp.blogspot.com
So pretty!! Would LOVE it if you would link this up at my turquoise lovin' party! (I'm also including red for the holidays) http://www.sweetlittlegals.com/2011/11/turquoise-lovin-14.html
So cute! I want that bedding in king size! 🙂 Great job!
That is just so clever! I have a doll cradle that I've made for stepdaughter's baby girl, but when it comes to the bedding and quilt, I'm just too scared to try it. I bet your friend's girl will be thrilled!
This is SO cute! You did an amazing job & I love your fabric choices. Thanks for linking up so we could all see.
XO, Kate
This is the most amazing little miniature bed.
I would love if you came and checked out my linky party at http://www.eyehearttoday.blogspot.com
I LOVE this! Way to go. I love the quilt-so cute. Would love to have you come link up at my Handmade Christmas link party if you have some time! http://cupofdelight.blogspot.com/2011/12/link-party-delightfully-handmade.html
I want one!
Thanks for sharing how you made the beautiful doll quilt. I have just ordered a rotary cutting set off Amazon, and I am very excited to make my very first quilt soon.
I came across the Ana White doll bed plan a while back and asked my dad to create two for my girls for Christmas. I'm doing the bedding, but because of distance, I'm winging it with the sizing looking at her plans, and then I came across your gorgeous bedding inspiration : ) Wondering if you'd share the dimensions of you top sheet? I'm worried to start cutting fabric in case I make it too short to tuck in! Thanks for your help!