• Home
  • Blog
  • About
  • Contact
    • Disclosure
    • Privacy Policy
  • SHOP
  • Widget area for main menu

    • Email
    • Facebook
    • Instagram
    • Pinterest
    • Twitter
    • YouTube
  • Skip to primary navigation
  • Skip to main content
  • Skip to primary sidebar

Jaime Costiglio

build - paint - sew

  • BUILD
    • BEDS
    • BENCHES
    • DESKS
    • DRESSERS
    • GAMES & TOYS
    • SCRAP WOOD
    • SHELVES
    • STORAGE
    • TABLES
  • TOOLS
  • PAINT
    • CRAFTS
    • FURNITURE
    • HOME DECOR
  • SEW
    • GIFTS
    • HOME DECOR
    • POUCHES
  • HANDBUILT HOLIDAY
    • 2021
    • 2019
    • 2018
    • 2017
    • 2016
    • 2015
    • 2014
    • 2013
  • GIFTS
    • BABIES
    • KIDS
    • FOR HER
    • FOR HIM
    • TEACHERS
    • WEDDINGS
  • SEASONAL
    • 4TH OF JULY
    • FALL
    • HALLOWEEN
    • CHRISTMAS
    • SUMMER
    • SPRING
    • ST. PATRICK’S DAY
    • THANKSGIVING
    • VALENTINE’S DAY
    • WINTER
  • SALTBOX PROJECT
    • BATHROOMS
    • DINING ROOM
    • EXTERIOR
    • FAMILY ROOM
    • FOYER / MUDROOM
    • KIDS BEDROOMS
    • KITCHEN
    • LIVING ROOM
    • MASTER BEDROOM
    • PLAYROOM
  • SCROLL SAW

DIY Camp Bunk Bed for Dolls

December 17, 2012

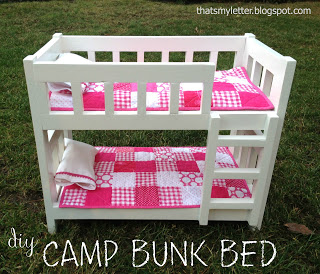
Build: camp bunk bed

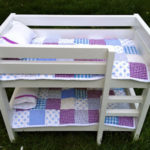
Just in time for Christmas you can build this camp style bunk bed to fit American Girl dolls or any 18″ doll.
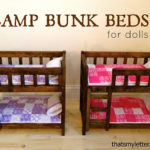
Ana White designed beautiful plans here for the camp style bunk beds.

We modeled the new plans after the Pottery Barn Kids Camp Bunk Bed:
image via potterybarnkids.com
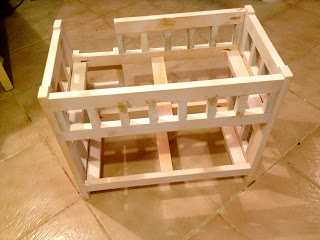
Only our version is doll size with open slatted ends:
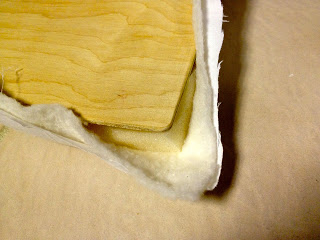
This time around I actually made the mattress part of the bunkie board.  
Before installing the 1/4″ plywood bunkie board I cut foam to fit, wrapped in quilt batting then white cotton fabric and stapled to underside exactly like a chair cushion.
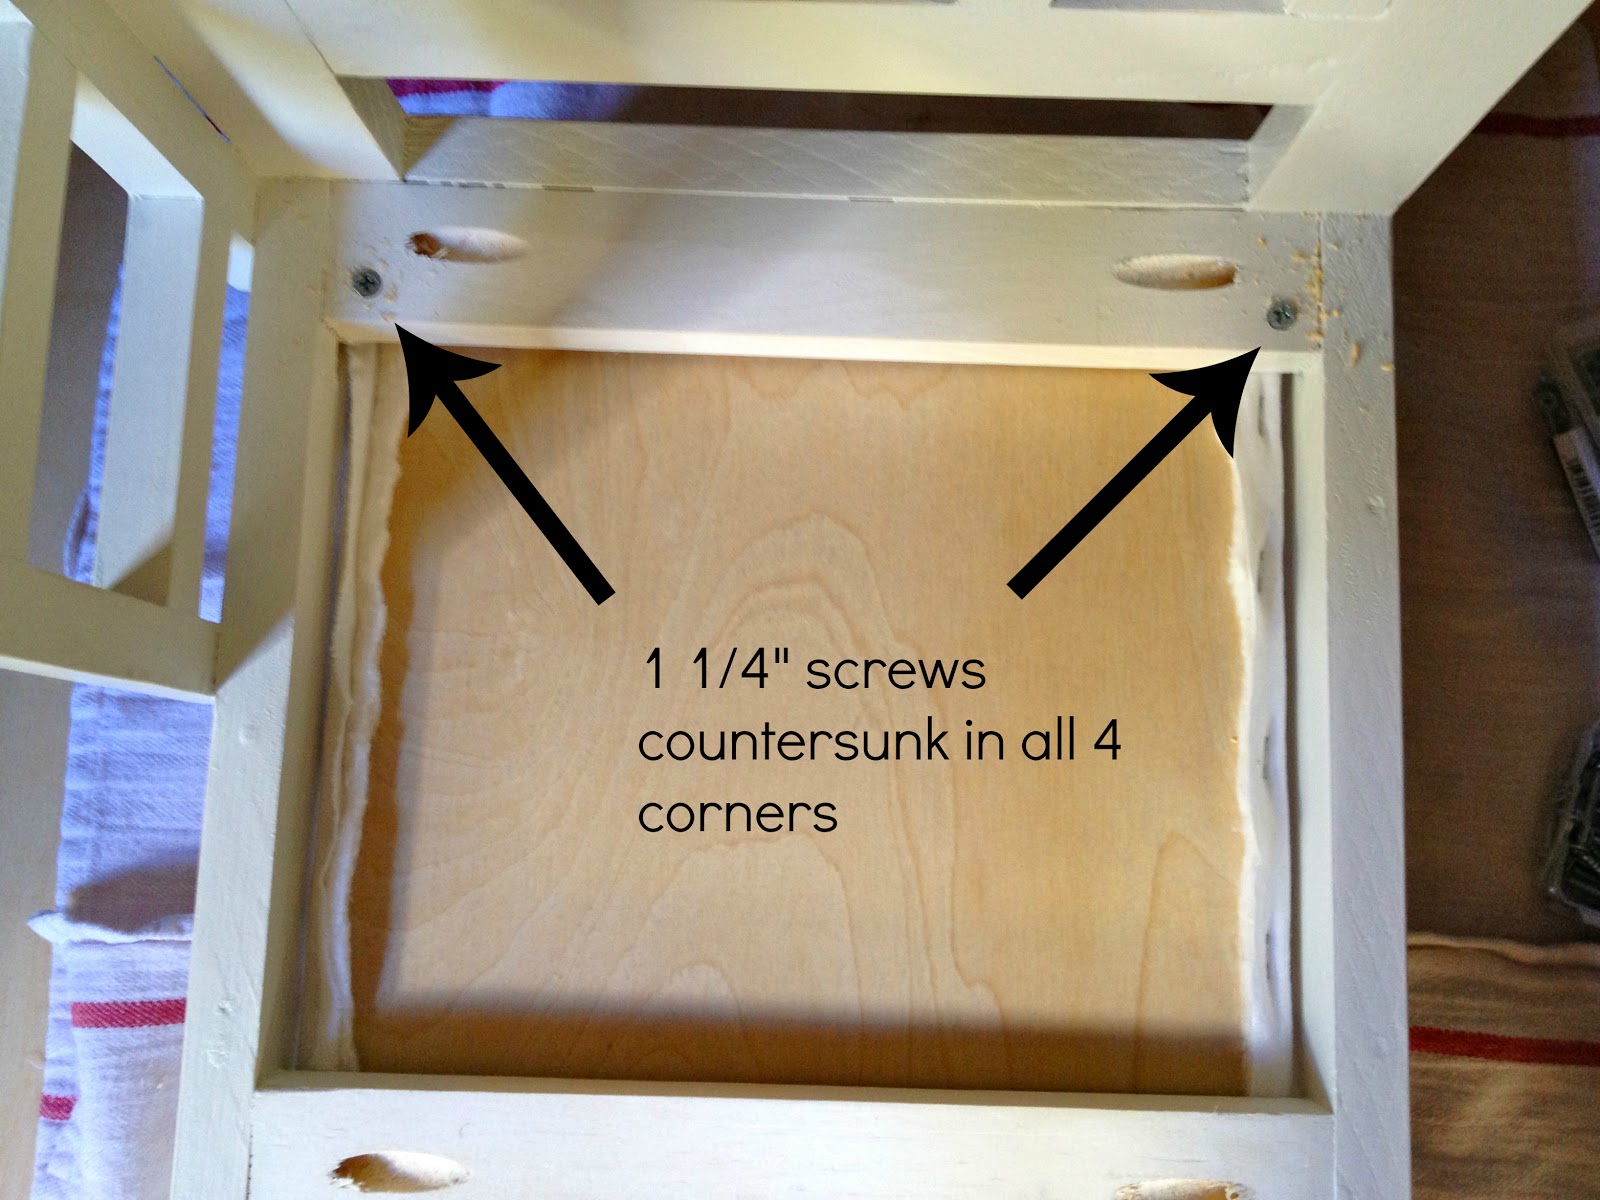
Then I secured the board to the bed from the underside:
(Be sure to do the top bunk first!)
The finish is Benjamin Moore soft chamois high gloss enamel.
Distressed on the edges then sealed with Minwax clear satin wipe-on poly.

Here’s how to make the camp bunk bed:

1. Cut pieces as per Ana’s plans here:
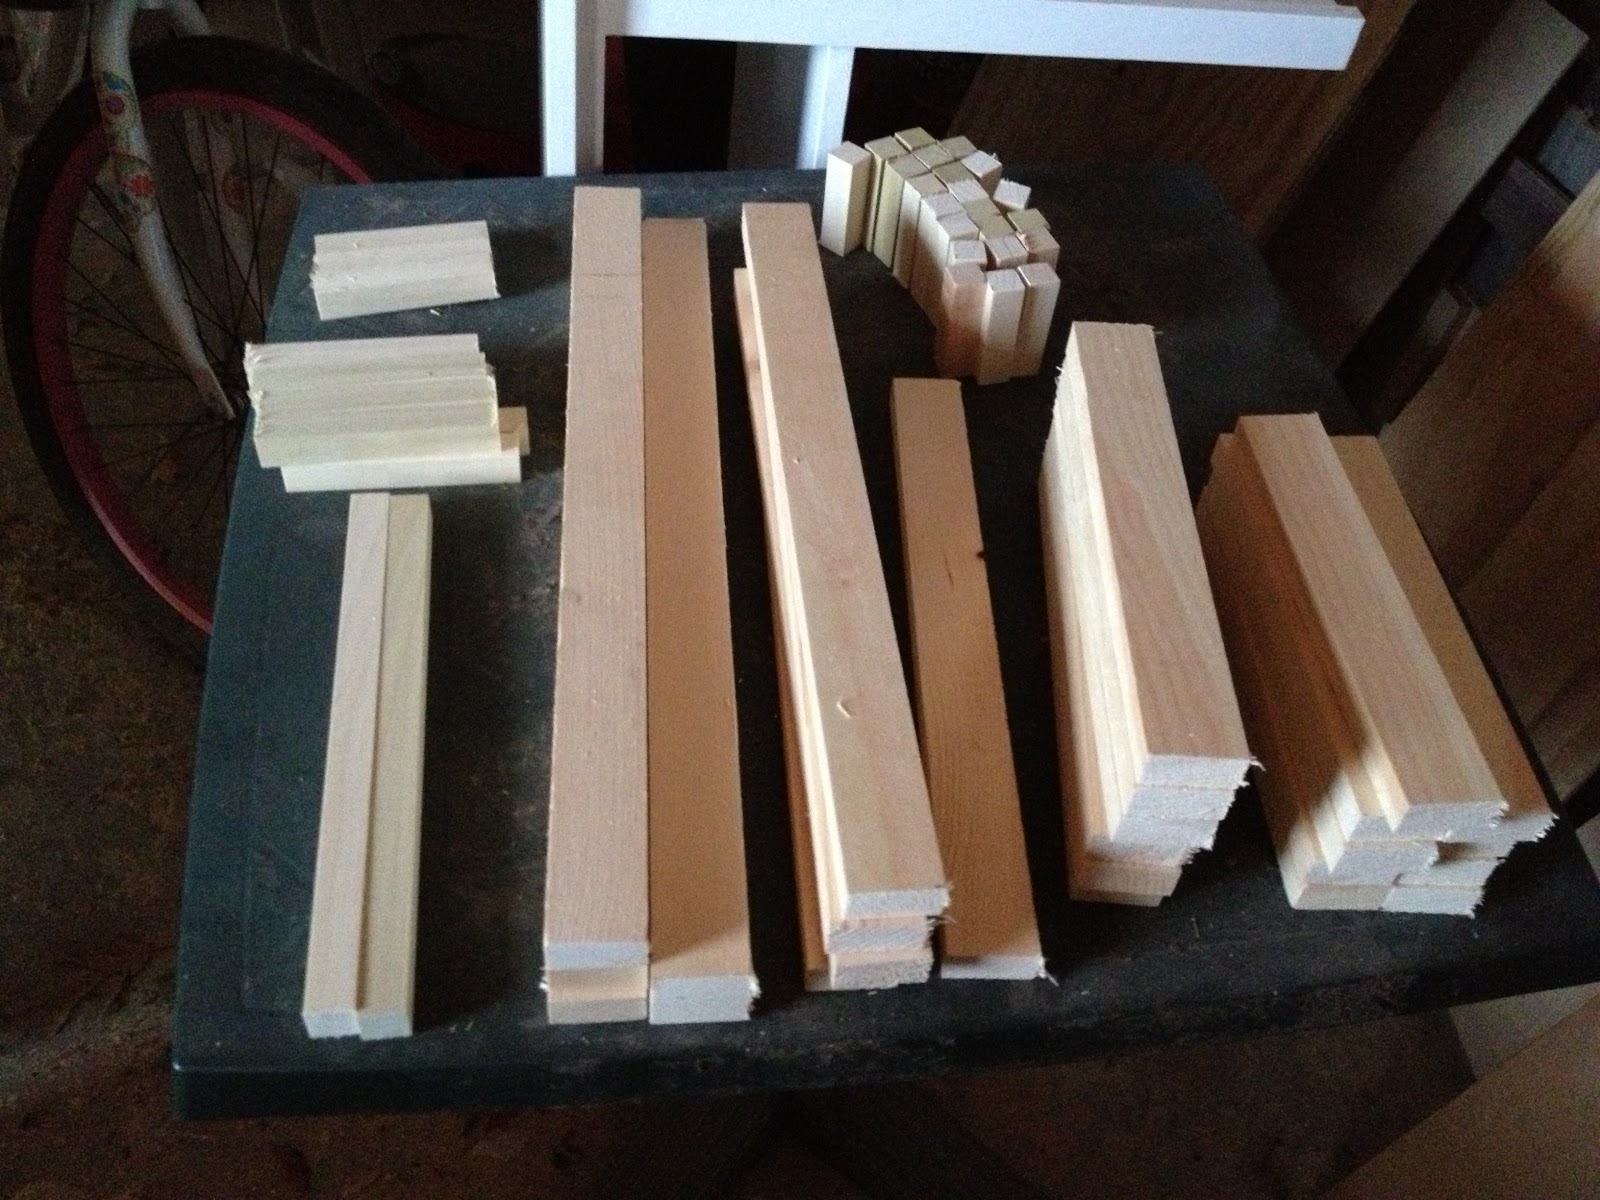
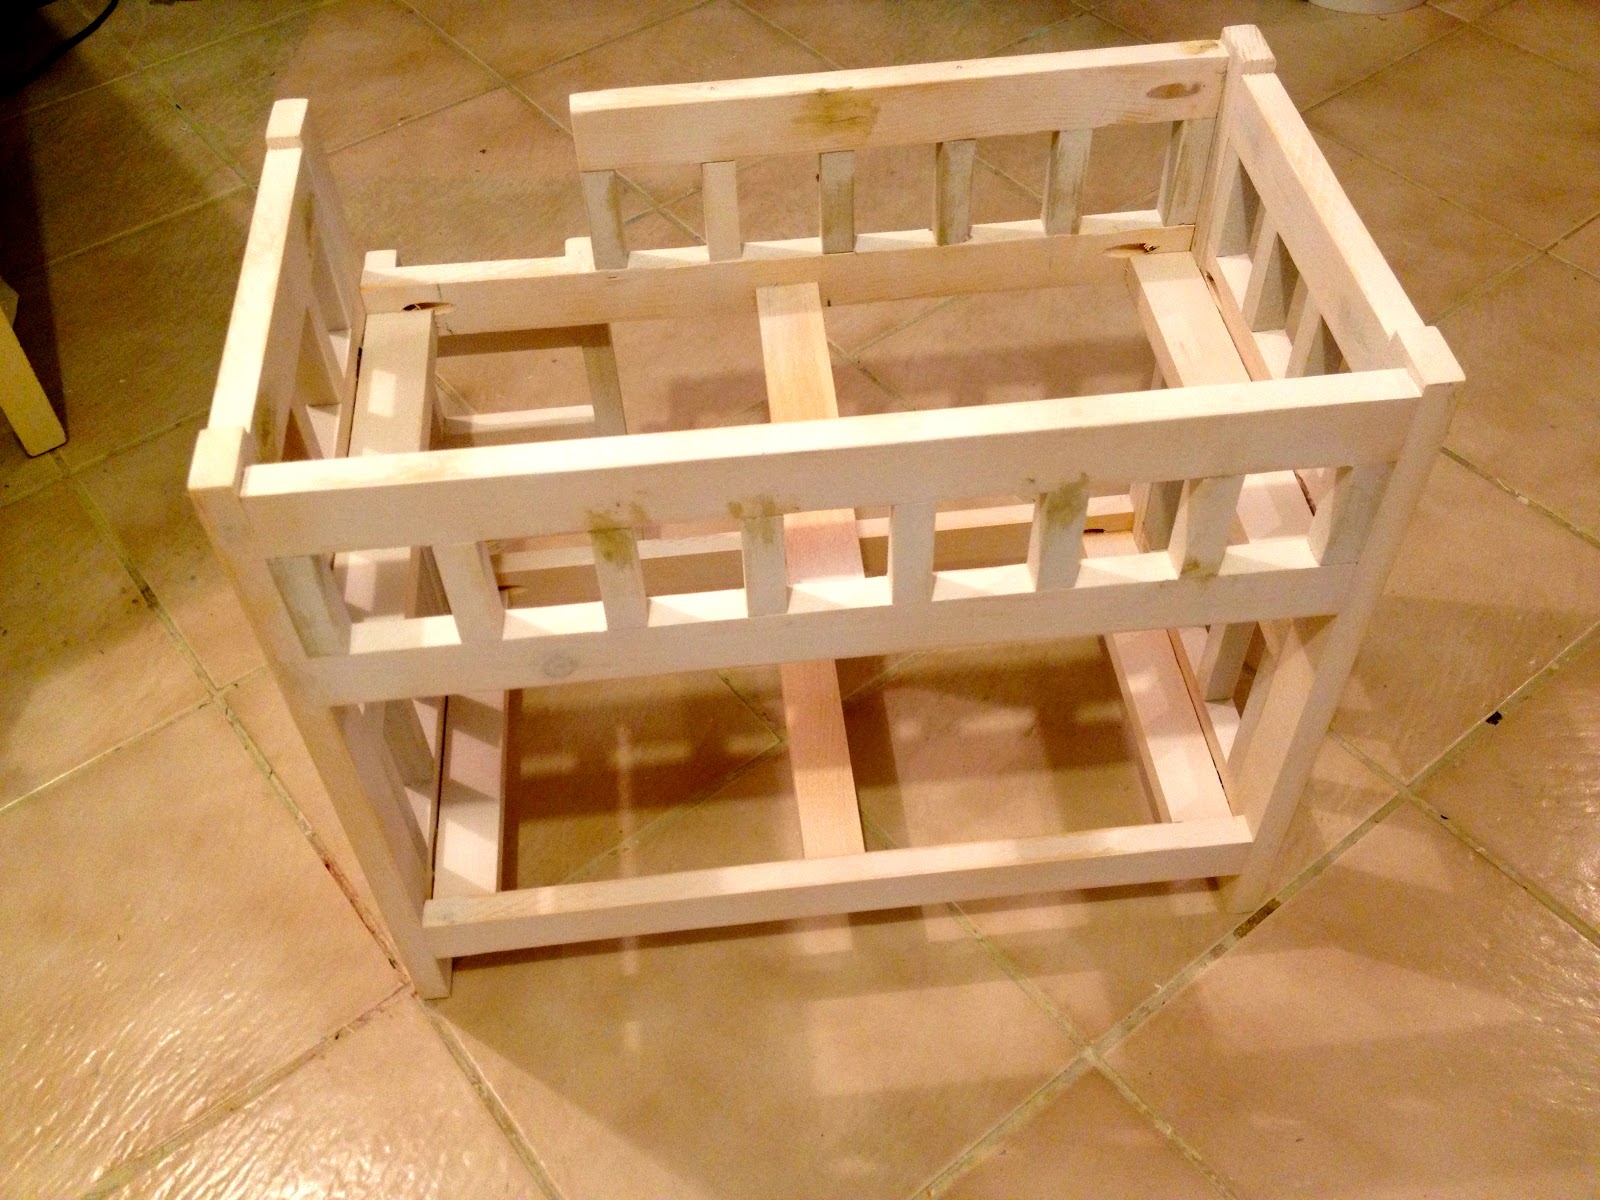
2. Assemble.  Hot glue will work here for all the tiny short 1×1 pieces:

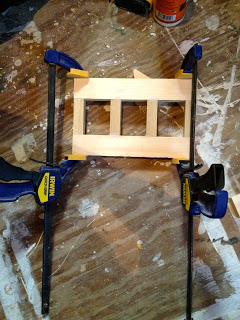
3. Use pocket holes if you can to assemble the sides together:

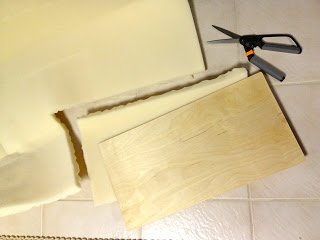
4. For the mattress cut 1″ foam to fit board (I use foam mattress topper, be sure to put ‘bumpy’ side against board and smooth side up.):
5. Cut quilt batting and fabric at least 2″ larger all around.
Layer cotton fabric, then batting, then foam mattress and lastly wood board:
(** Foam is upside down in this picture, be sure to put the bumpy side agains the wood and smooth side up.)

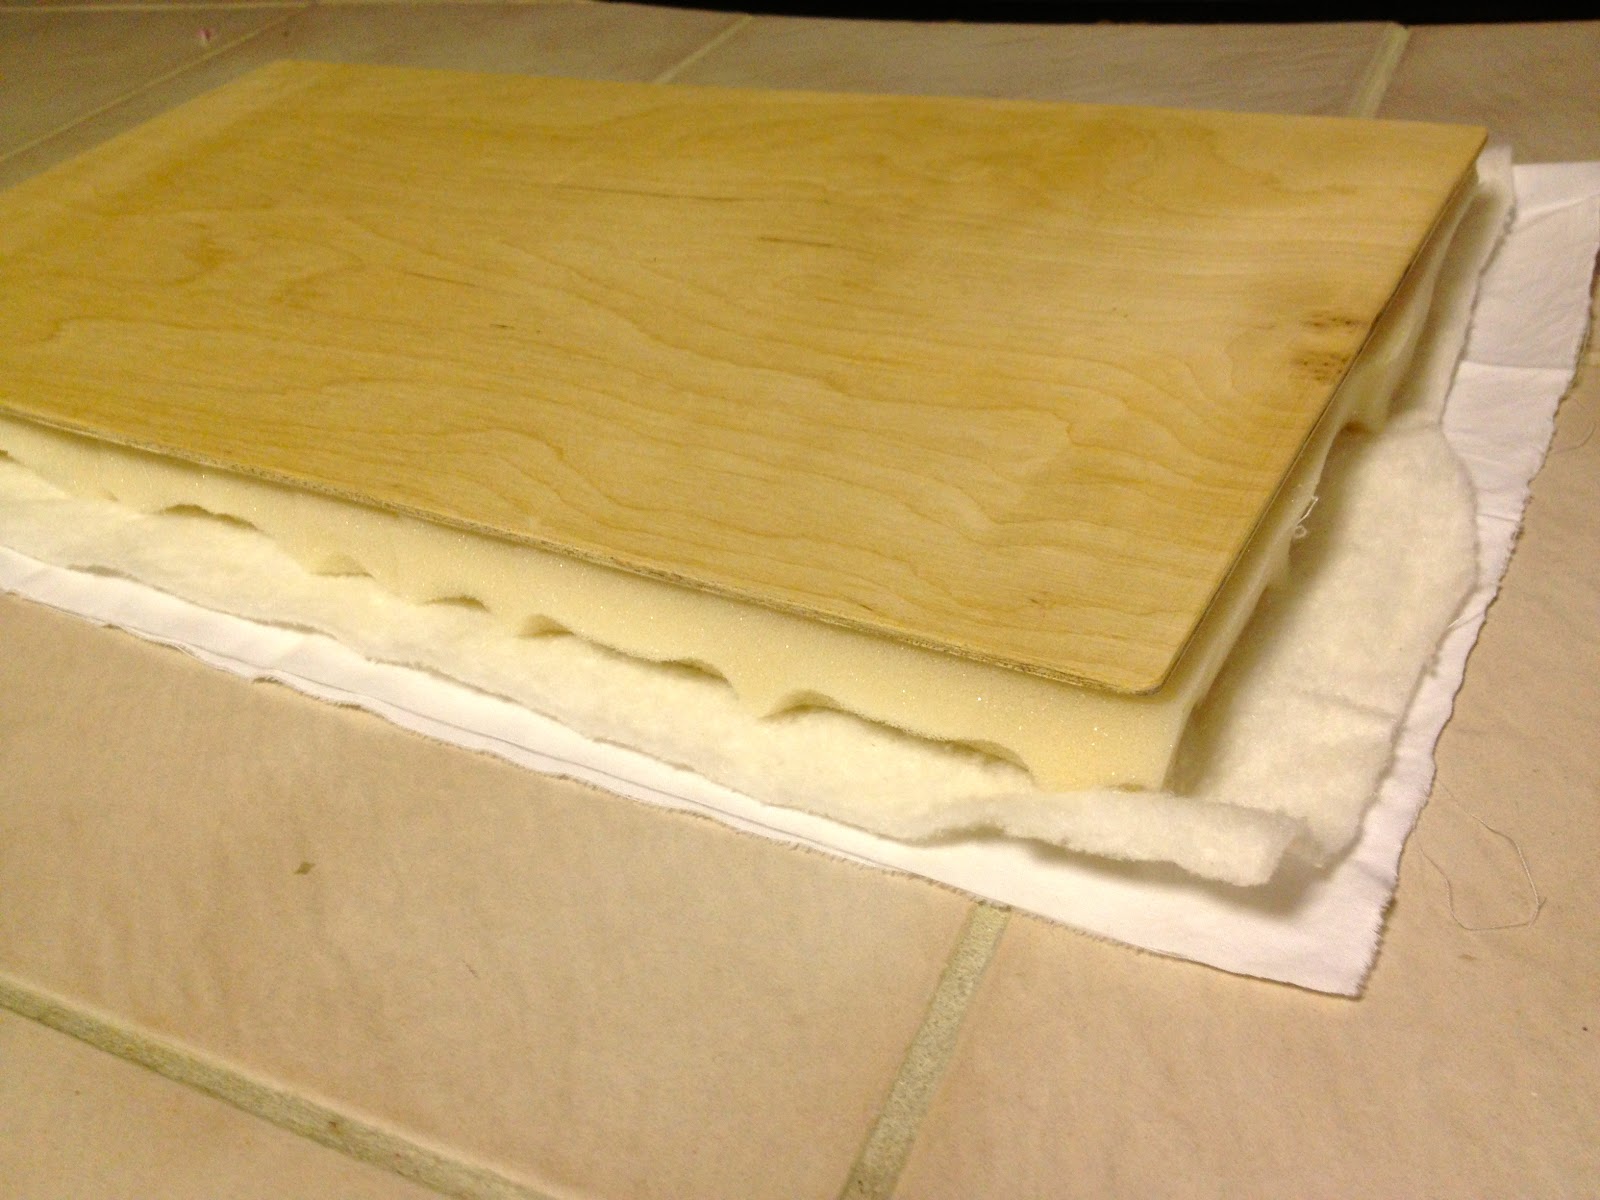
6. Be sure to sand board corners smooth and rounded to avoid poking a hole in the fabric:

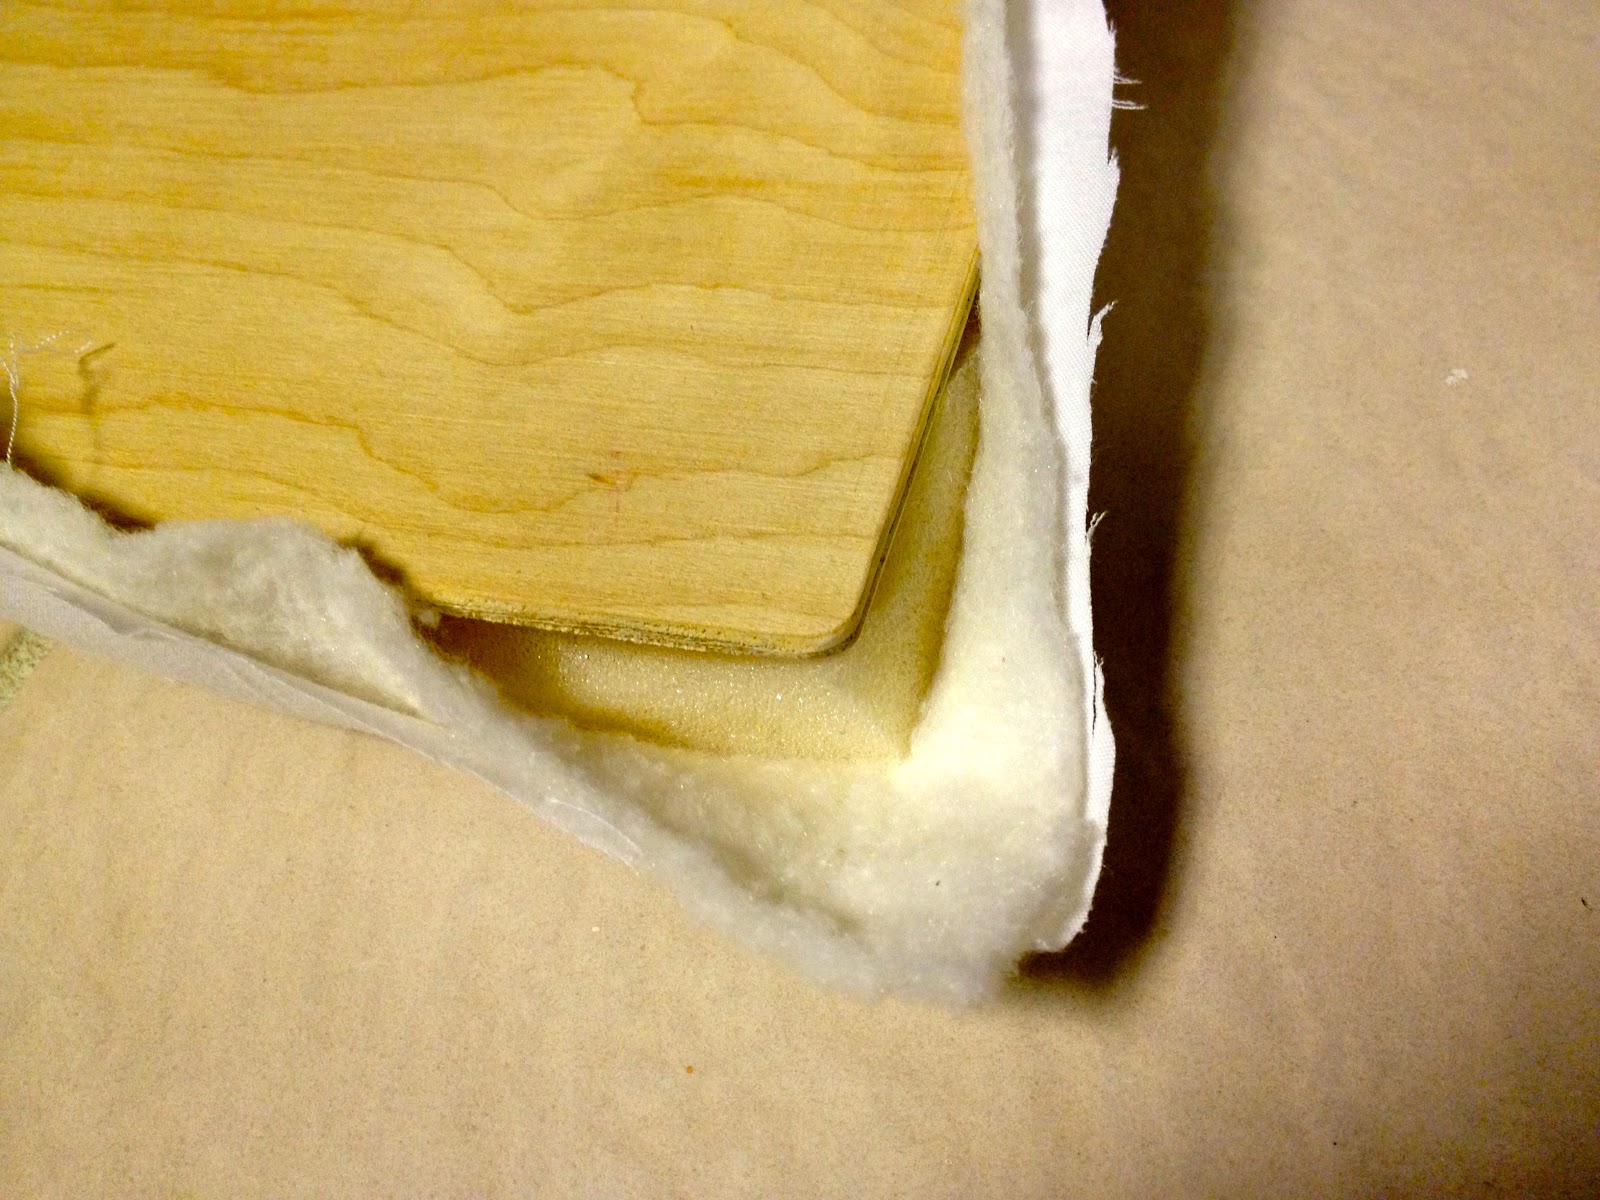
7. Pull fabric and batting up onto back of board and staple.
Begin in the middle of the longest side then go opposite, then go middle of short side, then opposite side and then keep adding staples to each side, pulling fabric taught as you go.
(No picture of finished mattress board sorry.)
Trim excess fabric and batting before securing to bunk.
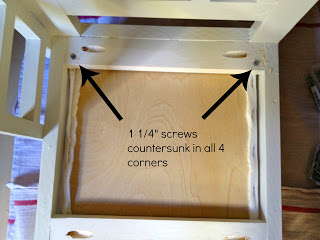
8. Predrill holes in all four corners and secure board with 1 1/4″ screws:
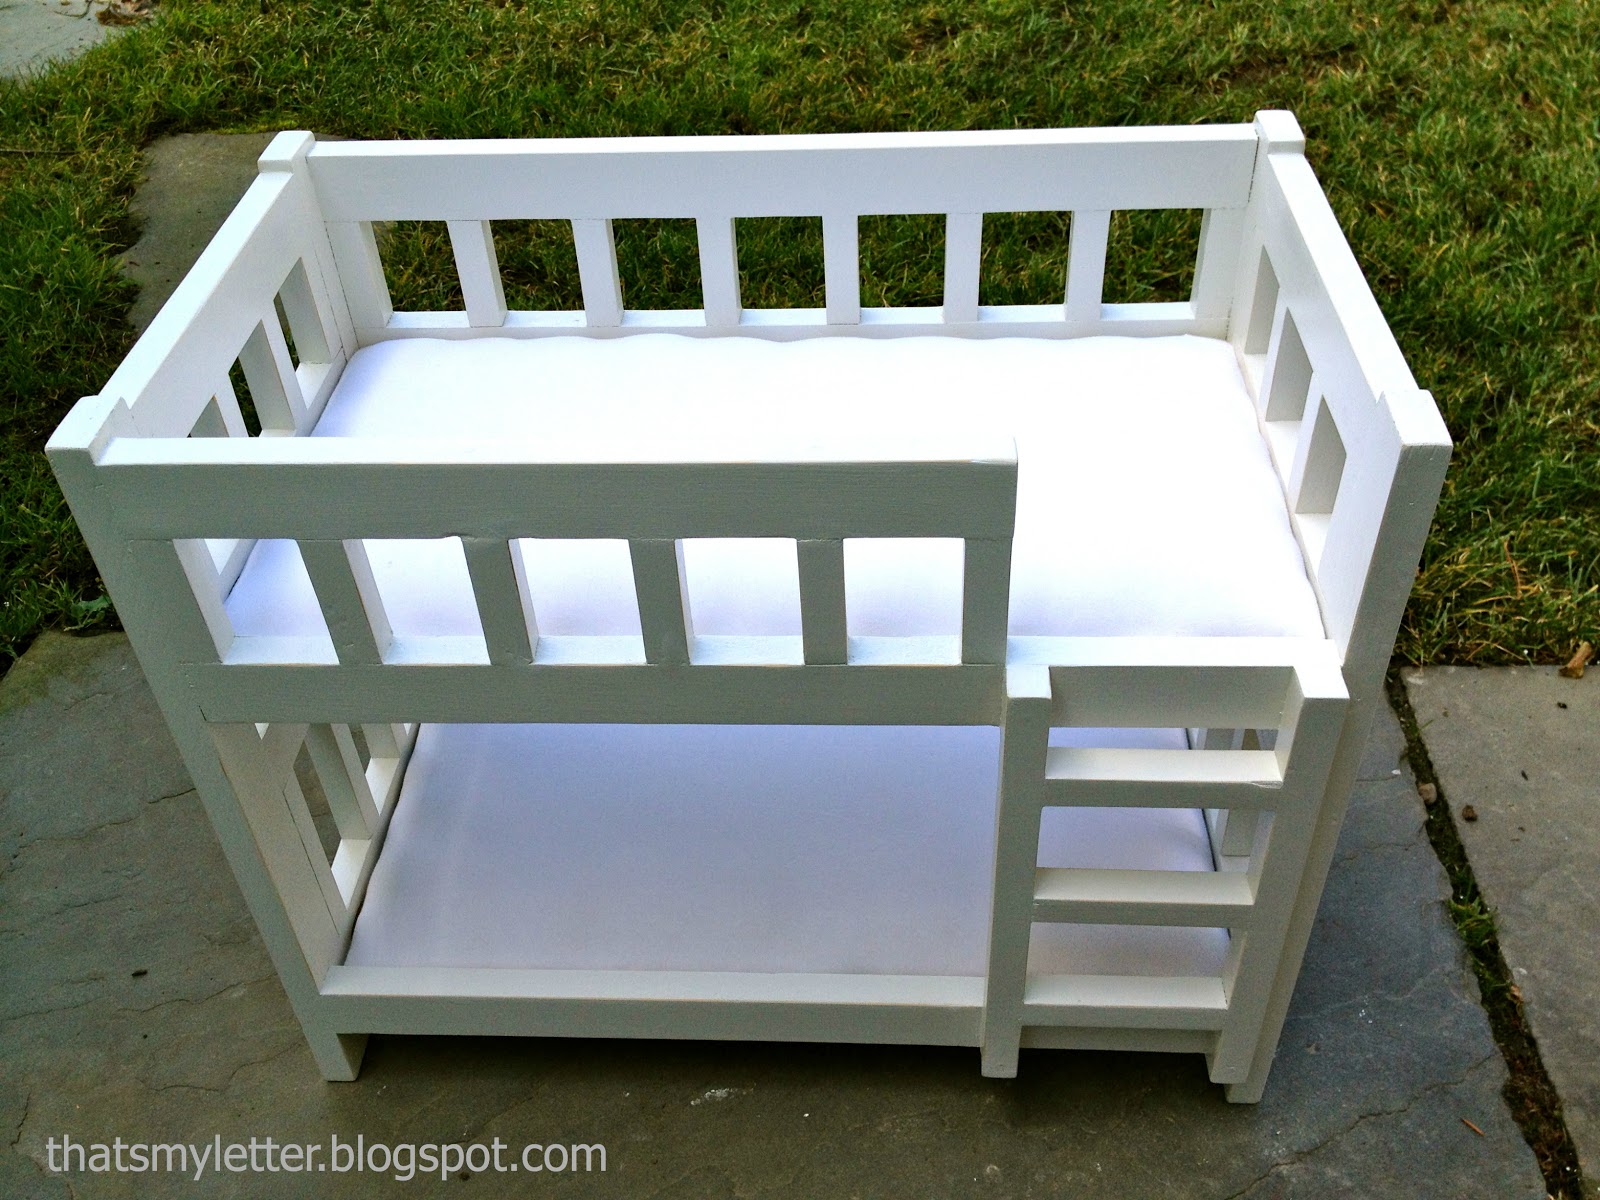
Add your pillows and quilts:

You may also like...

  • DIY Doll Bunk BedsDIY Doll Bunk Beds
  • DIY Doll Size Camp Bunk BedsDIY Doll Size Camp Bunk Beds
  • DIY Doll Crib with Storage DrawerDIY Doll Crib with Storage Drawer
  • DIY Kids Play BarnDIY Kids Play Barn
Share this post:

Filed Under: BEDS, BUILD, DIY, FURNITURE, FURNITURE, GAMES & TOYS, GIFTS, KIDS, PAINT2 Comments

Reader Interactions

Comments

  1. Kathy Gossen says

    December 21, 2012 at 1:20 PM

    Oh how cute! Hubby, where are you? This is so fun! My girls would love it.  I'd  love to have you link this us to Titus 2 Tuesday this week on Cornerstone Confessions.. I hope to see you there. 
    Kathy
    

    Reply
  2. Diana - FreeStyleMama says

    December 23, 2012 at 1:55 AM

    Very cute!

    Reply

Leave a Reply Cancel reply

Your email address will not be published. Required fields are marked *

Primary Sidebar

Hi! I’m Jaime

Jaime Costiglio

Hello!

Thank you for stopping by.
Join me for lots of DIY.

Read more

Get new posts via email

Handbuilt Holiday: Gift Project Plans

handbuilt holiday gift project plans

Collection of DIY gift project plans to build.

The Home Depot Tool Prospective

THD Prospective

Tools to consider for the DIYer.

Archives

The Home Depot Logo
Copyright © 2023 Jaime Costiglio · Custom site by Moonsteam Design

Privacy Policy