Build: diy wood framed canvas tote with leather handle
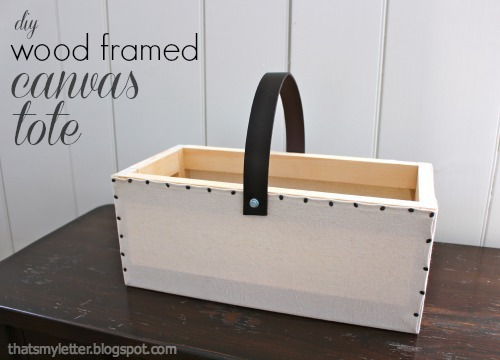
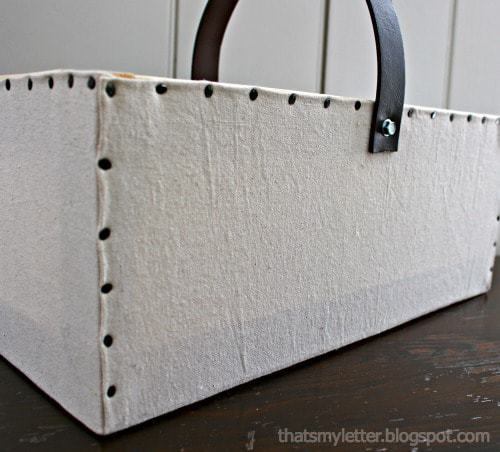


Build a simple wood frame, wrap it with drop cloth canvas and secure using carpet tacks then add a leather handle for a unique carrying tote or storage bin.

The wood frame gives good support and strength while the drop cloth keeps the tote lightweight.
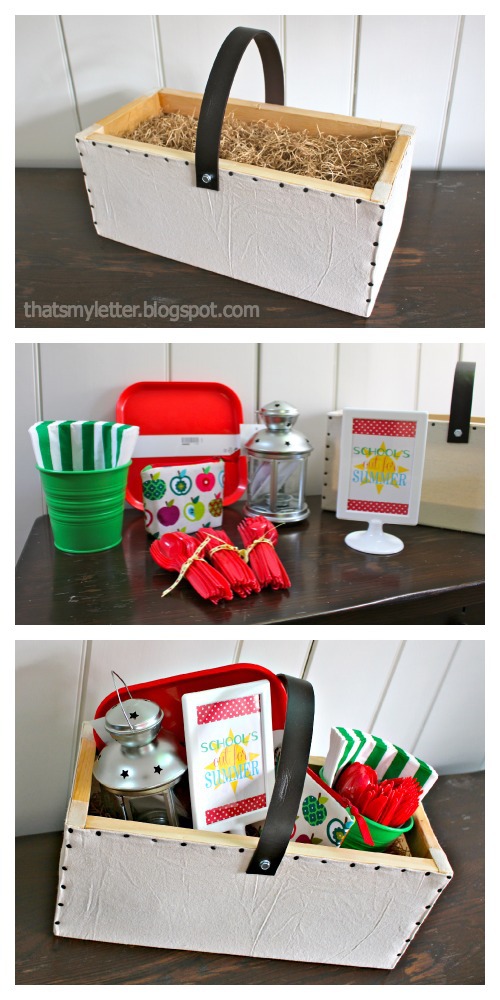
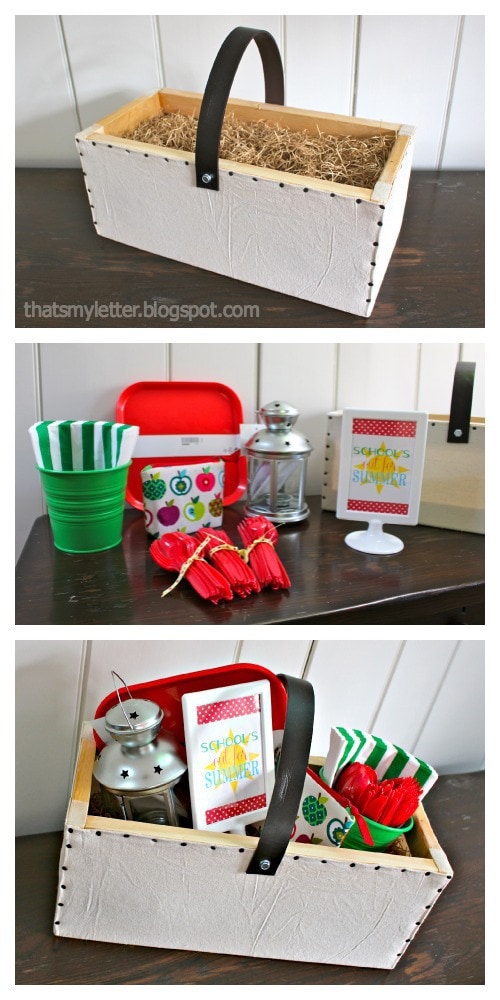
I made one for each teacher and filled with summer time entertaining essentials:
– red plastic plates
– striped napkins
– red utensils
– green flower pot
– lantern
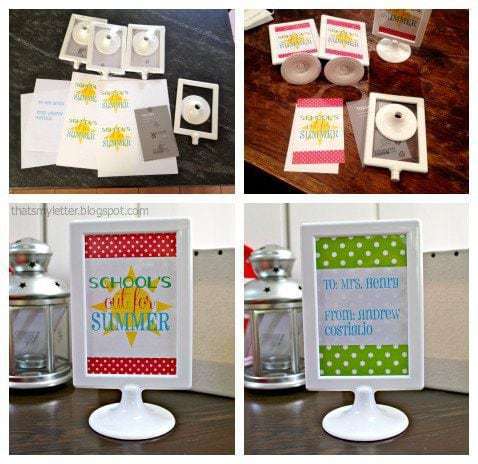
– two sided frame (used as a tag)

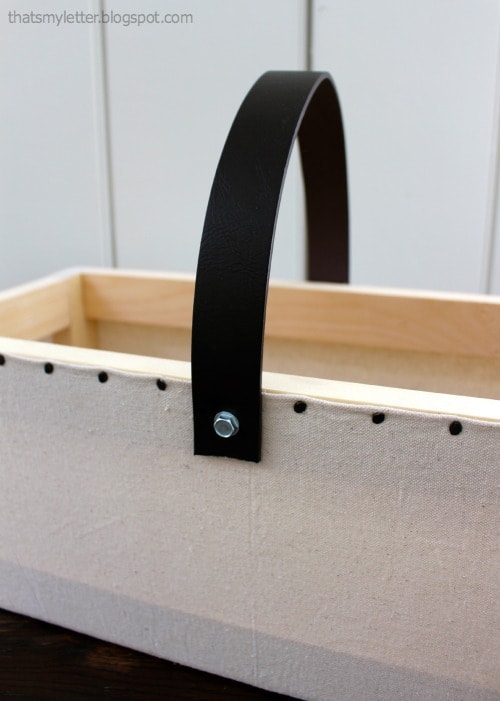
I love the contrast of the drop cloth canvas against the black carpet tacks and industrial look of the leather belt handle.

The ‘school’s out for summer’ sign was made with simple graphics, below is a link to my free printable.
Cut the printout to fit the frame and include the tag on the back side of the frame.
How to build a wood framed canvas tote:
lumber cuts:
4 – 1×2 @ 16″ (long sides)
4 – 1×2 @ 7″ (corner supports)
4 – 1×2 @ 5″ (short sides)
1 – 1/4″ plywood @ 17 1/2″ x 8″
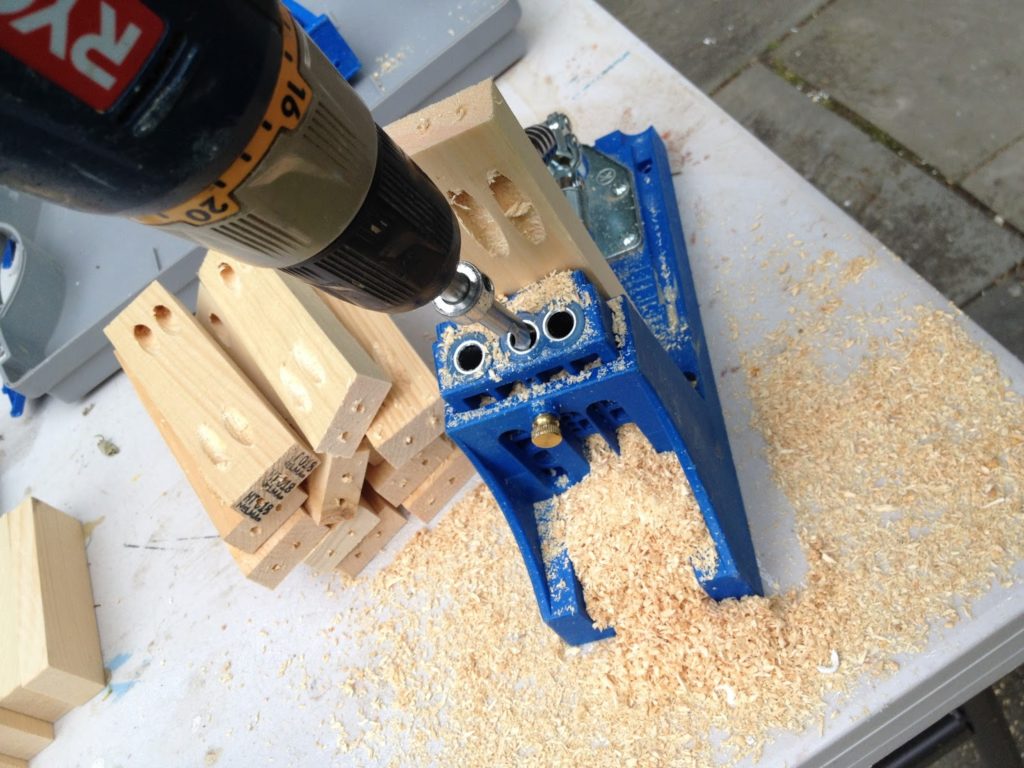
Step 1: Use your Kreg jig make pocket holes in both ends of all 5″ short side pieces.
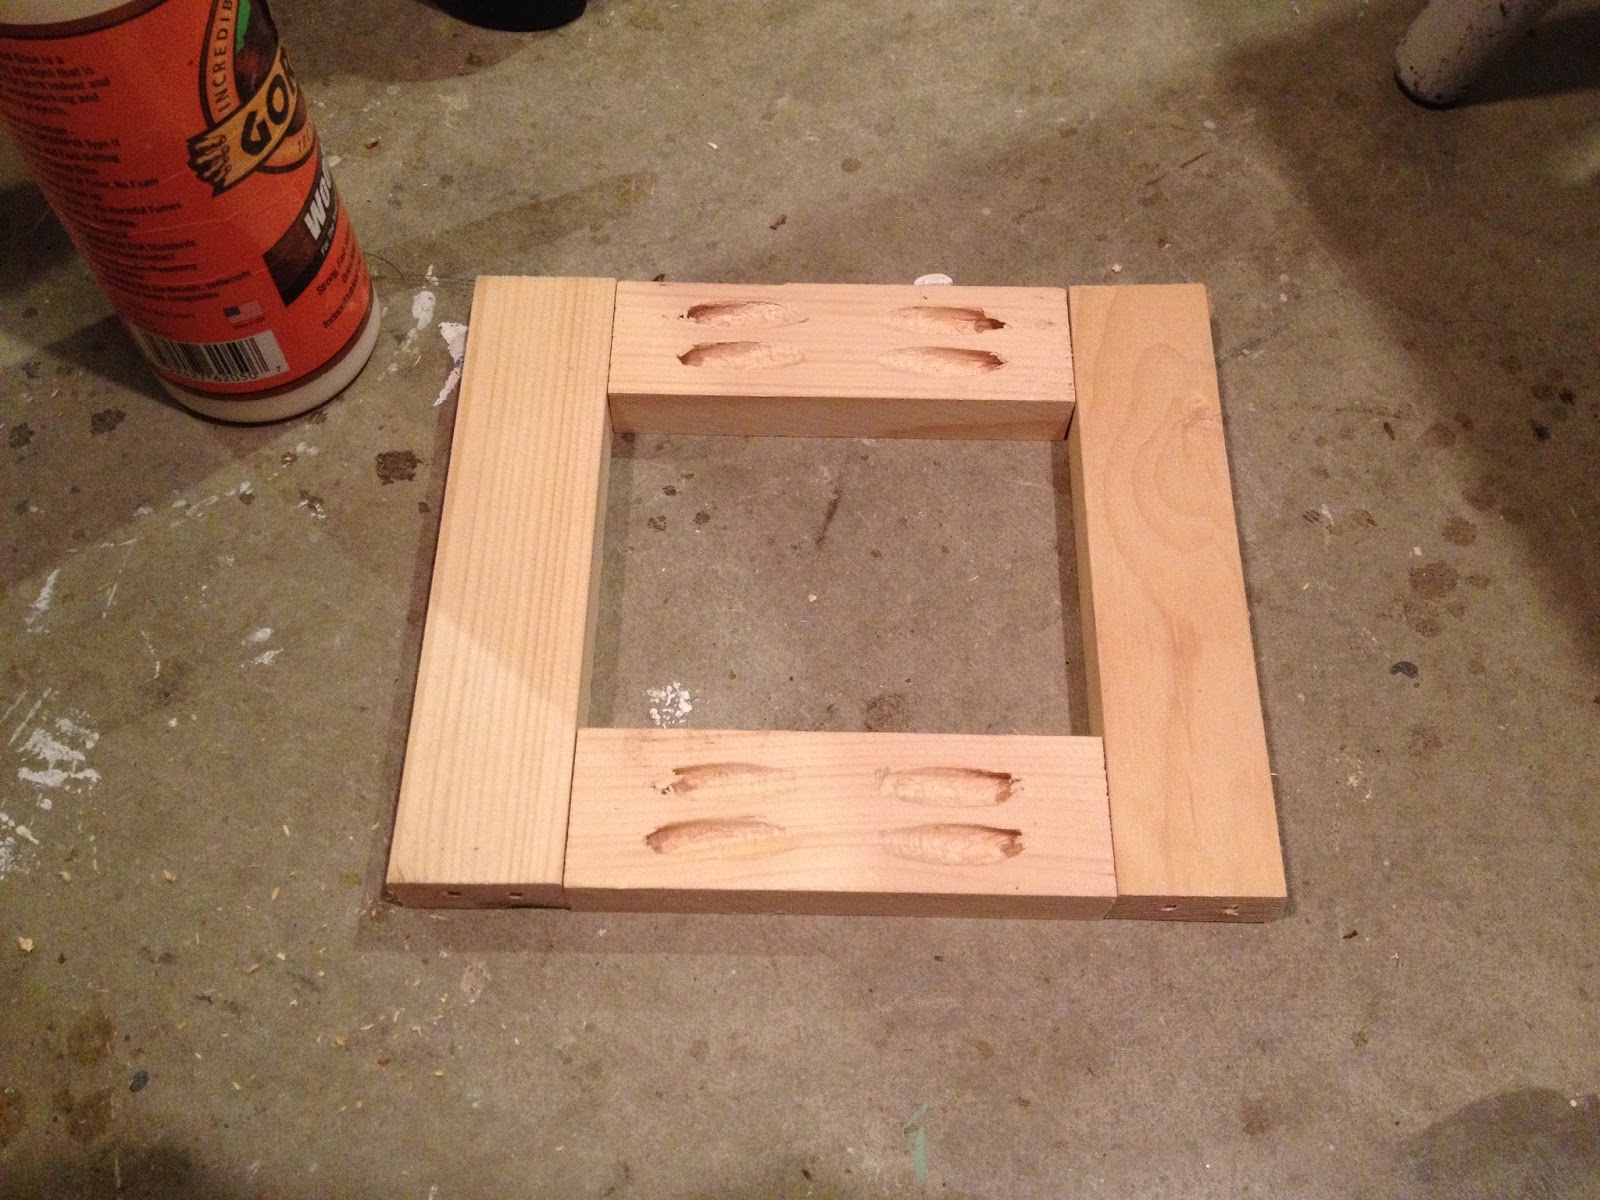
Step 2: Construct one end as shown.
Repeat for other end.

Step 3: Attach long sides using glue and finish nails. Be sure to keep pocket holes to outside so they will be hidden by canvas.
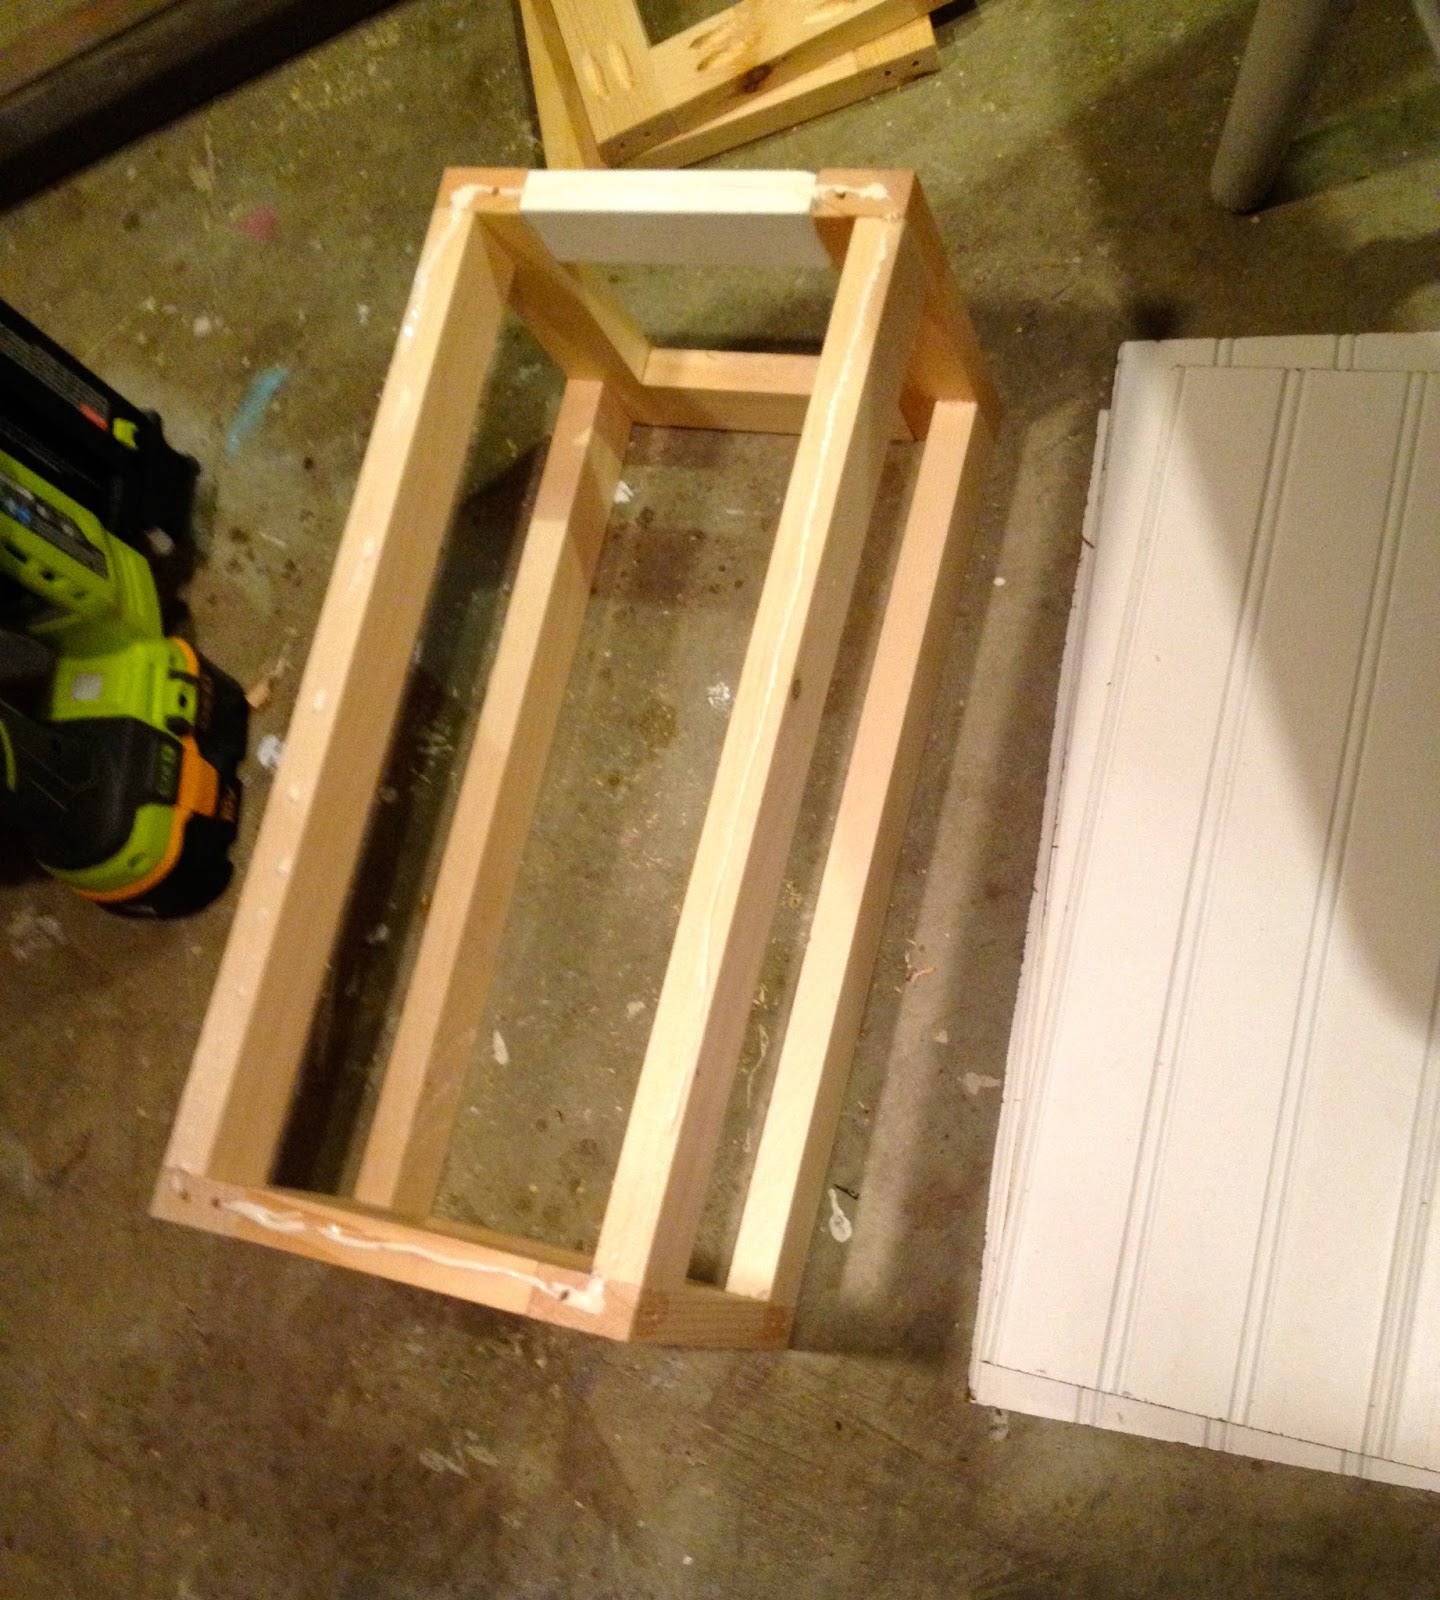
Step 4: Attach other short end to long ends.
Step 5: Attach plywood base using glue and finish nails.
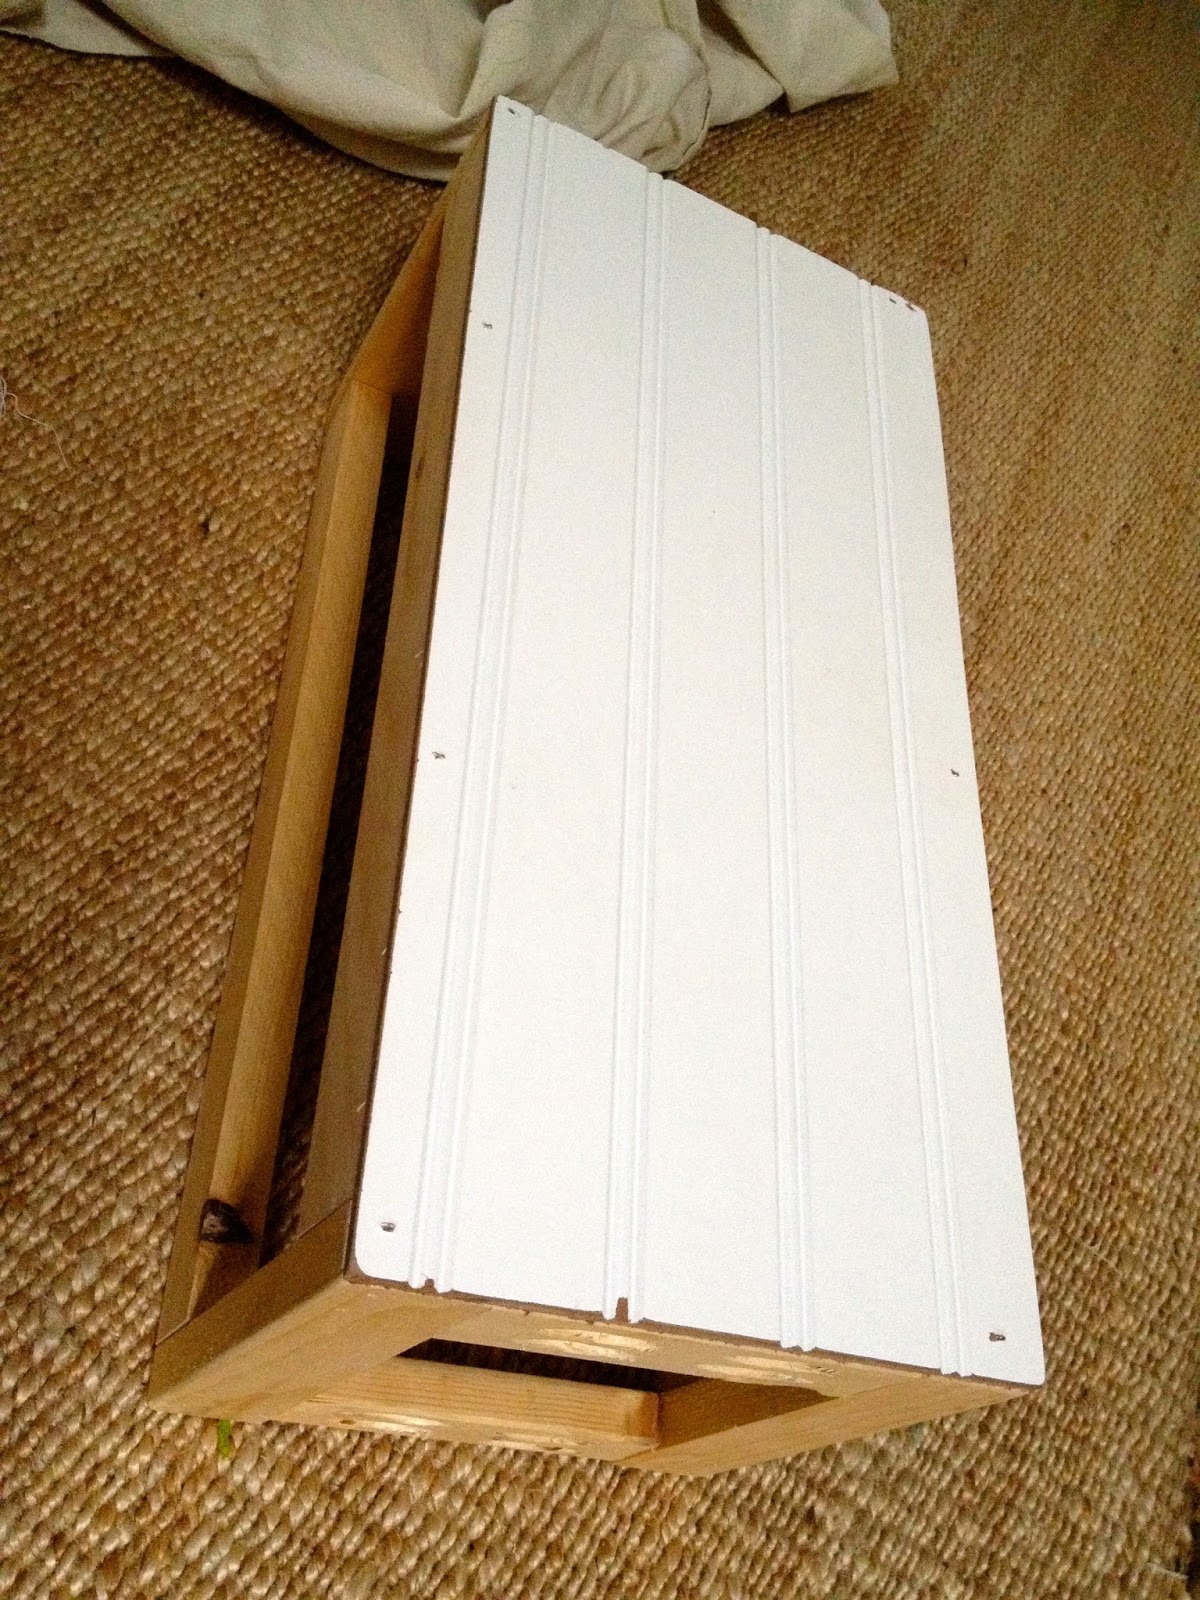
Sand corners smooth and round to avoid puncturing canvas.

Step 6: Cut canvas drop cloth to fit wood frame.
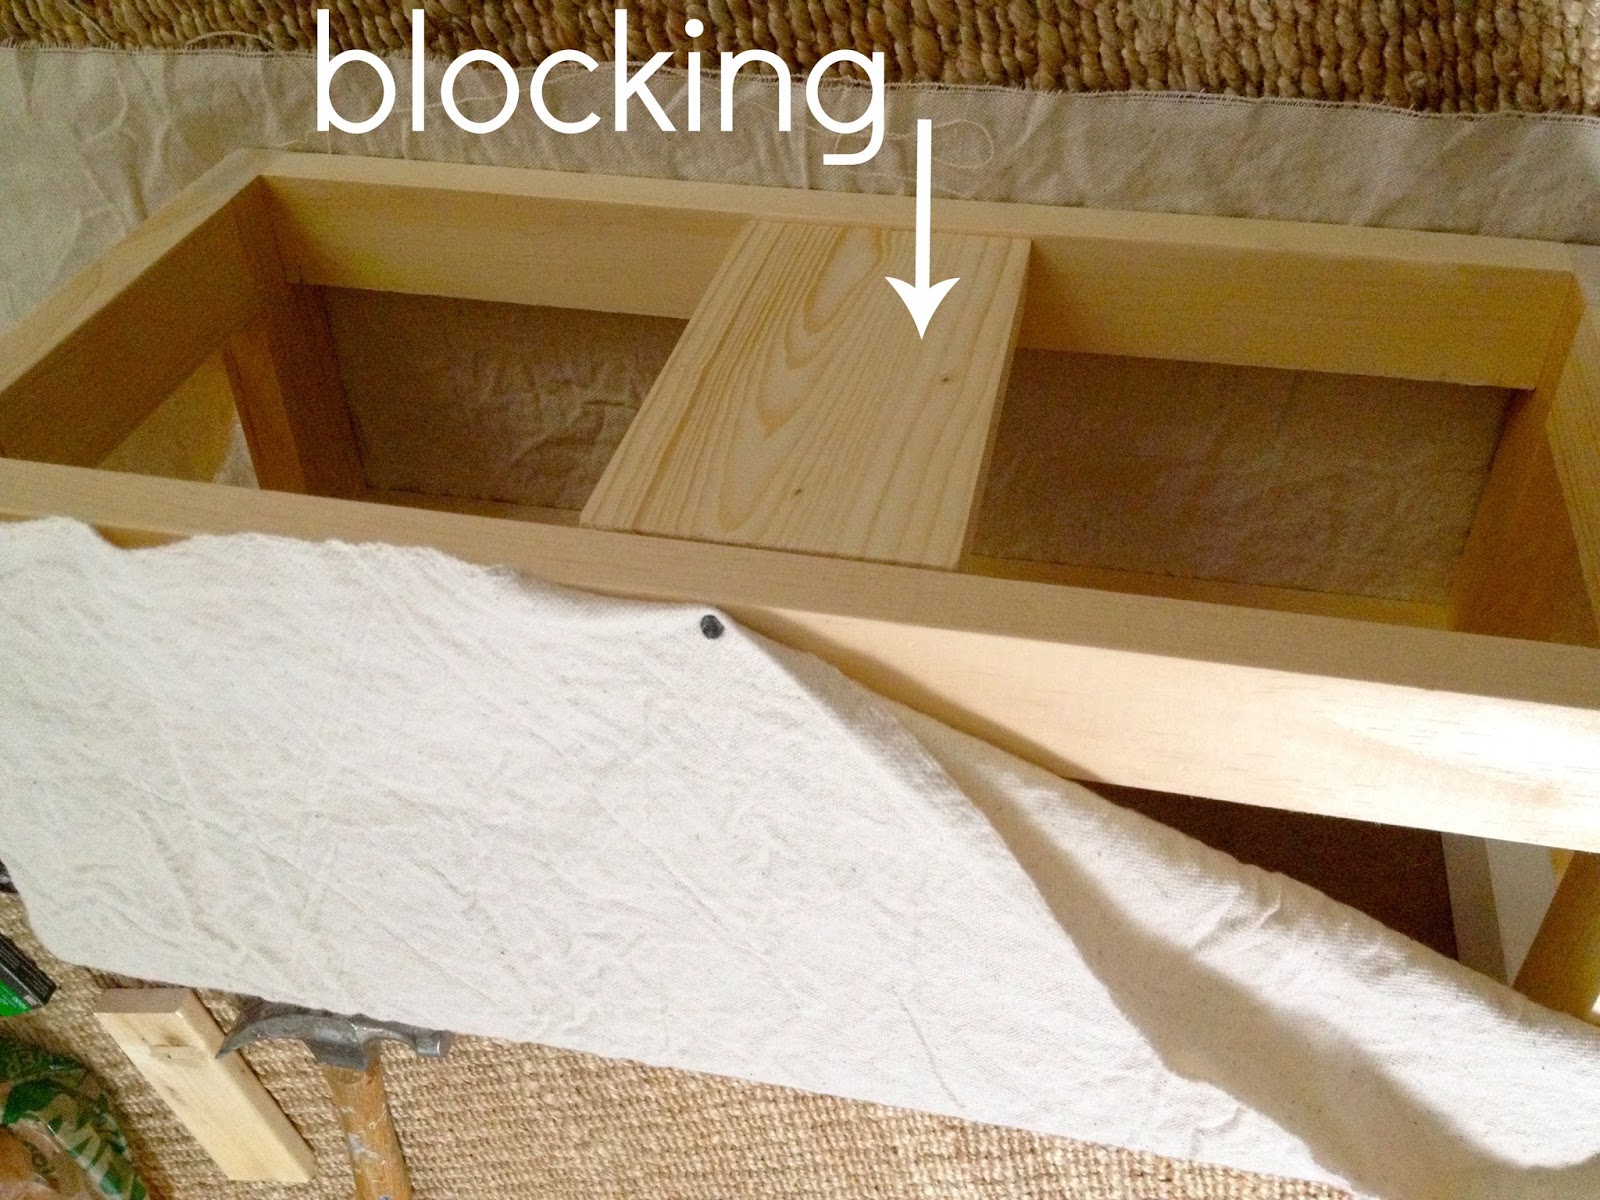
Step 7: Shimmy wood blocking cut to fit between long sides. This prevents sides from shifting under the pressure of the hammering.
Begin at center of long side, fold canvas under 1/4″ raw edge and hammer carpet tack into wood.
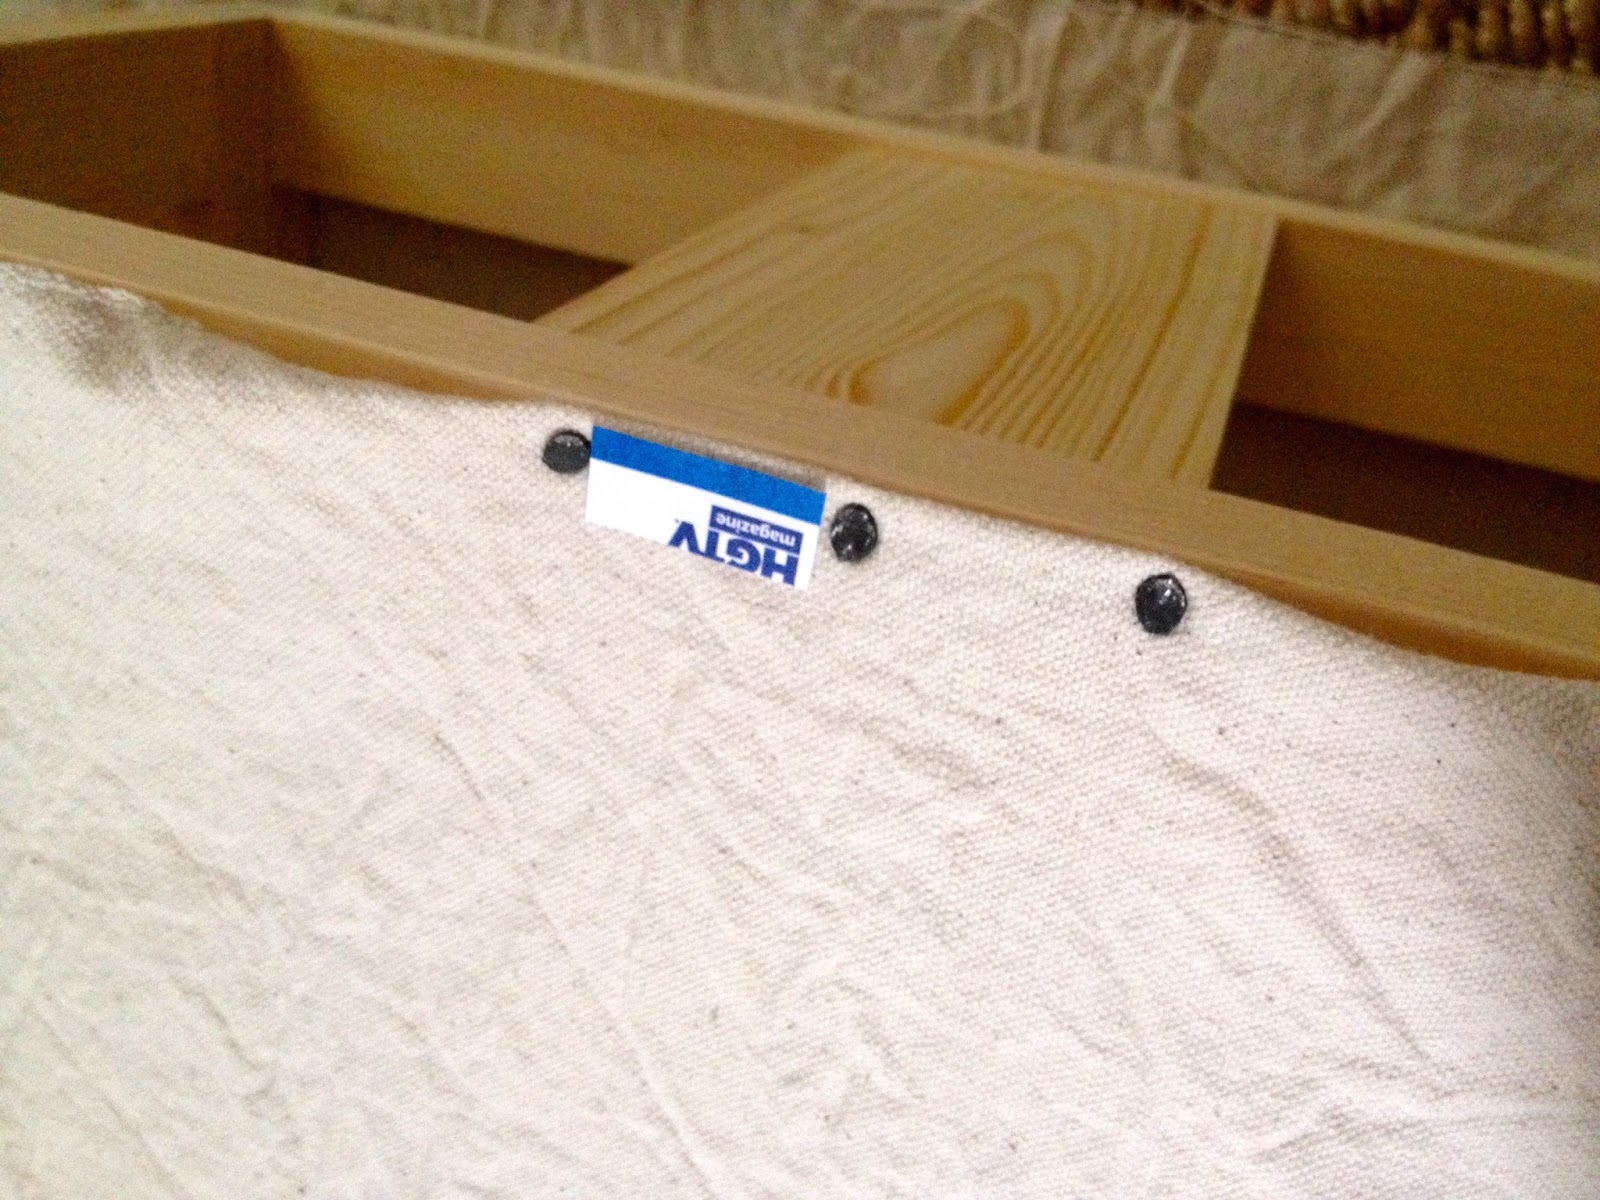
Step 8: Make a spacer template about 1″ for equal spacing. Continue attaching canvas to frame with carpet tacks.
Now flip frame over and begin other side going back and forth pulling canvas taut. Do the same for the short sides.

Step 9: Staple canvas to frame just inside long side.

Step 10: Trim off excess canvas fabric. Be sure to leave enough to fold under raw edge.

Step 11: Fold under raw edge and pull taut, starting at bottom hammer carpet tacks in place.

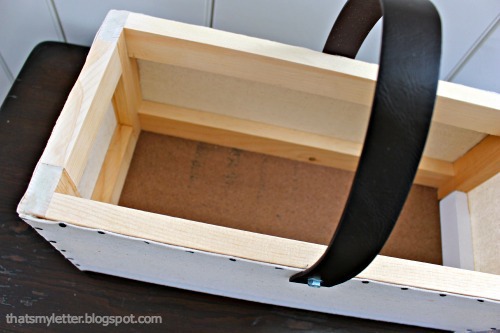
Step 12: Cut leather belt about 15″l. (I used 1/2 of a men’s XL leather belt for each tote.)
Predrill hole through leather and into wood long side at middle.
Step 13: Screw leather handle into place.

Step 14: Fill with goodies and give as gifts.


Such a great gift!
Love this gift! What a versatile box.
How cute & I could think of many uses especially as gifts !! Thank You for sharing
Such a great idea! I might be able to use this idea right away in my own home. Thank you! 🙂