• Home
  • Blog
  • About
  • Contact
    • Disclosure
    • Privacy Policy
  • SHOP
  • Widget area for main menu

    • Email
    • Facebook
    • Instagram
    • Pinterest
    • Twitter
    • YouTube
  • Skip to primary navigation
  • Skip to main content
  • Skip to primary sidebar

Jaime Costiglio

build - paint - sew

  • BUILD
    • BEDS
    • BENCHES
    • DESKS
    • DRESSERS
    • GAMES & TOYS
    • SCRAP WOOD
    • SHELVES
    • STORAGE
    • TABLES
  • TOOLS
  • PAINT
    • CRAFTS
    • FURNITURE
    • HOME DECOR
  • SEW
    • GIFTS
    • HOME DECOR
    • POUCHES
  • HANDBUILT HOLIDAY
    • 2021
    • 2019
    • 2018
    • 2017
    • 2016
    • 2015
    • 2014
    • 2013
  • GIFTS
    • BABIES
    • KIDS
    • FOR HER
    • FOR HIM
    • TEACHERS
    • WEDDINGS
  • SEASONAL
    • 4TH OF JULY
    • FALL
    • HALLOWEEN
    • CHRISTMAS
    • SUMMER
    • SPRING
    • ST. PATRICK’S DAY
    • THANKSGIVING
    • VALENTINE’S DAY
    • WINTER
  • SALTBOX PROJECT
    • BATHROOMS
    • DINING ROOM
    • EXTERIOR
    • FAMILY ROOM
    • FOYER / MUDROOM
    • KIDS BEDROOMS
    • KITCHEN
    • LIVING ROOM
    • MASTER BEDROOM
    • PLAYROOM
  • SCROLL SAW

DIY Kids Table with Chairs

December 26, 2011

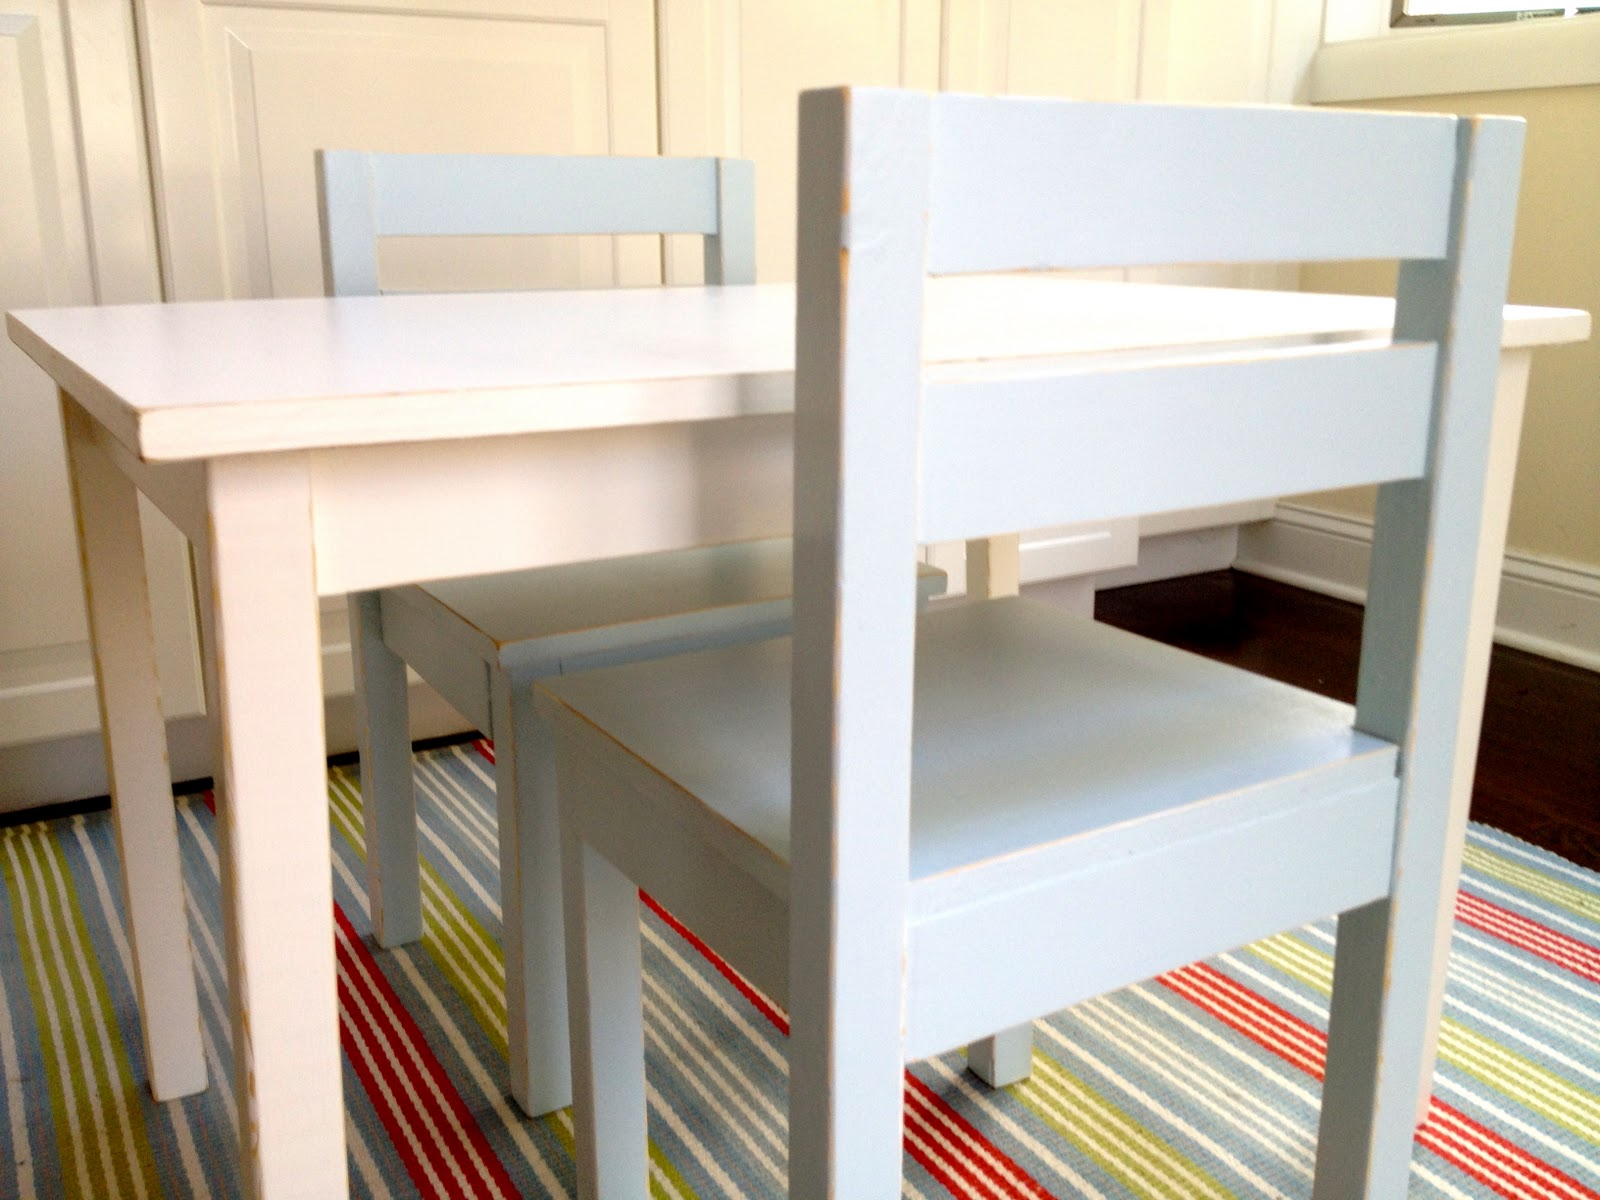
How to build a kids table and chairs.

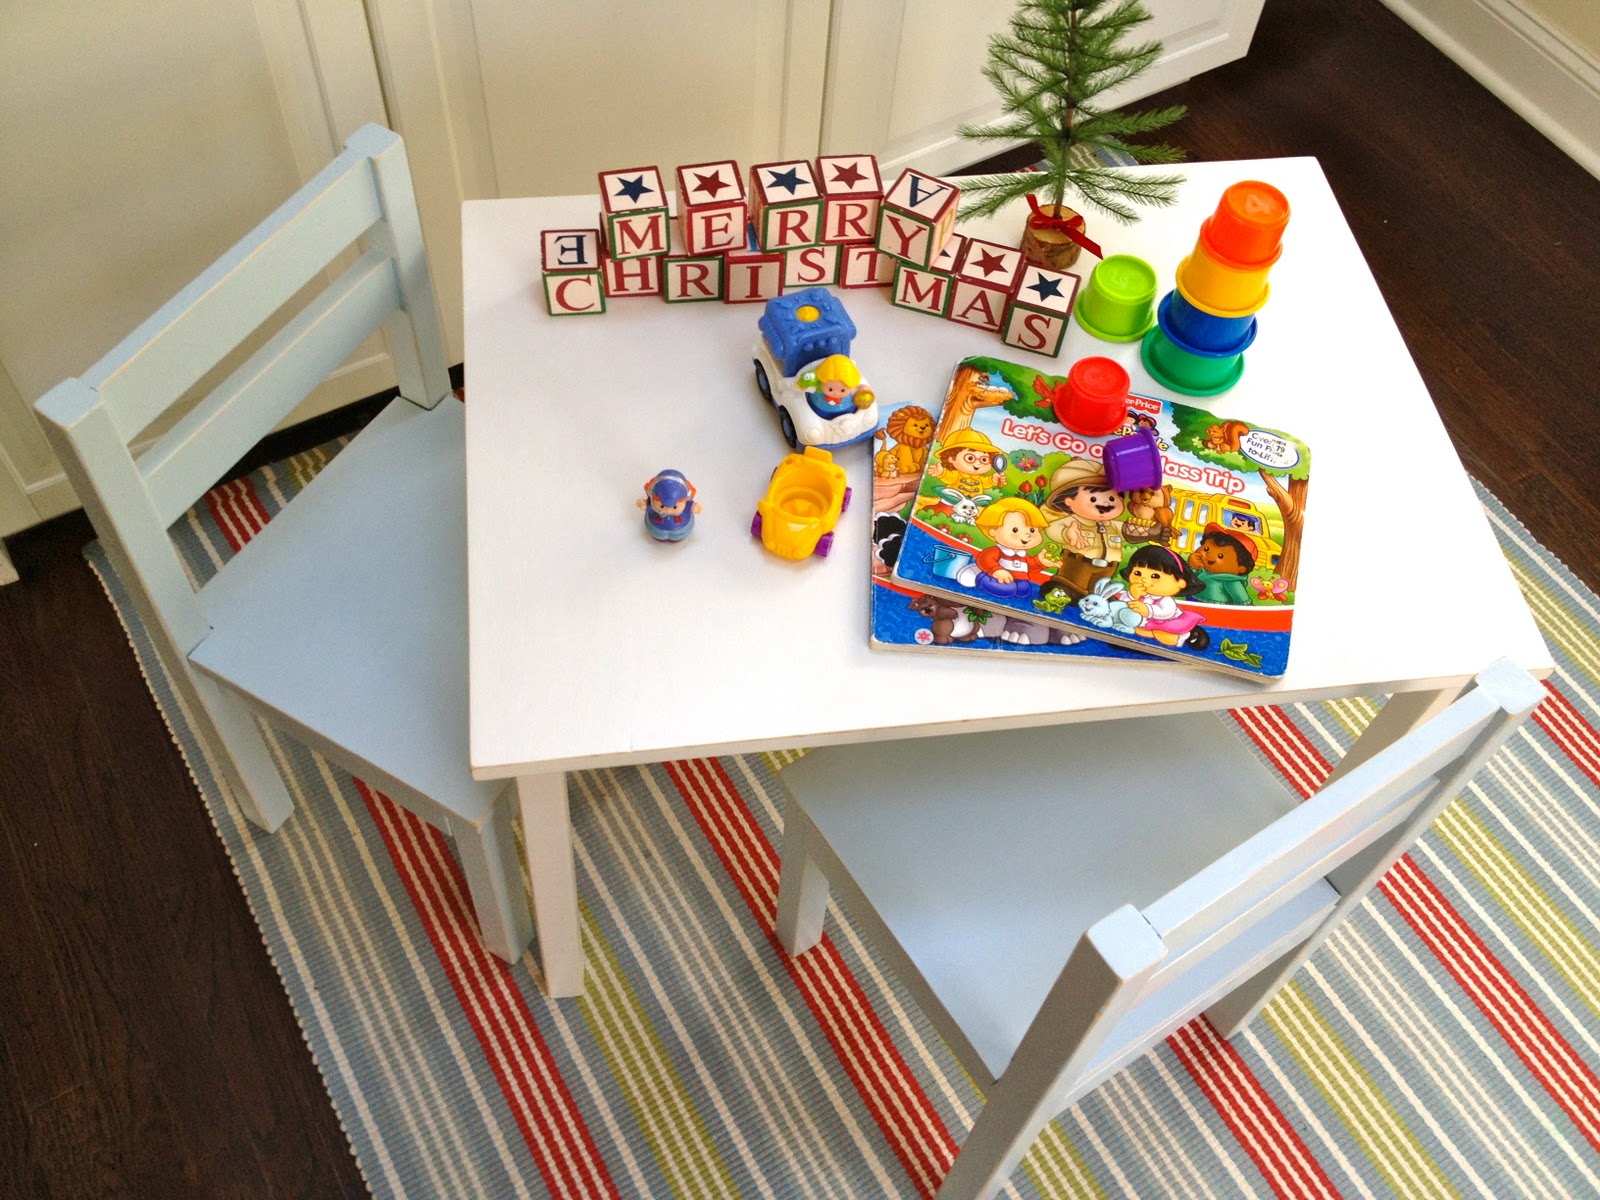
Finished in time for Christmas
I used Ana White’s plans for the Clara table here and the chairs here.
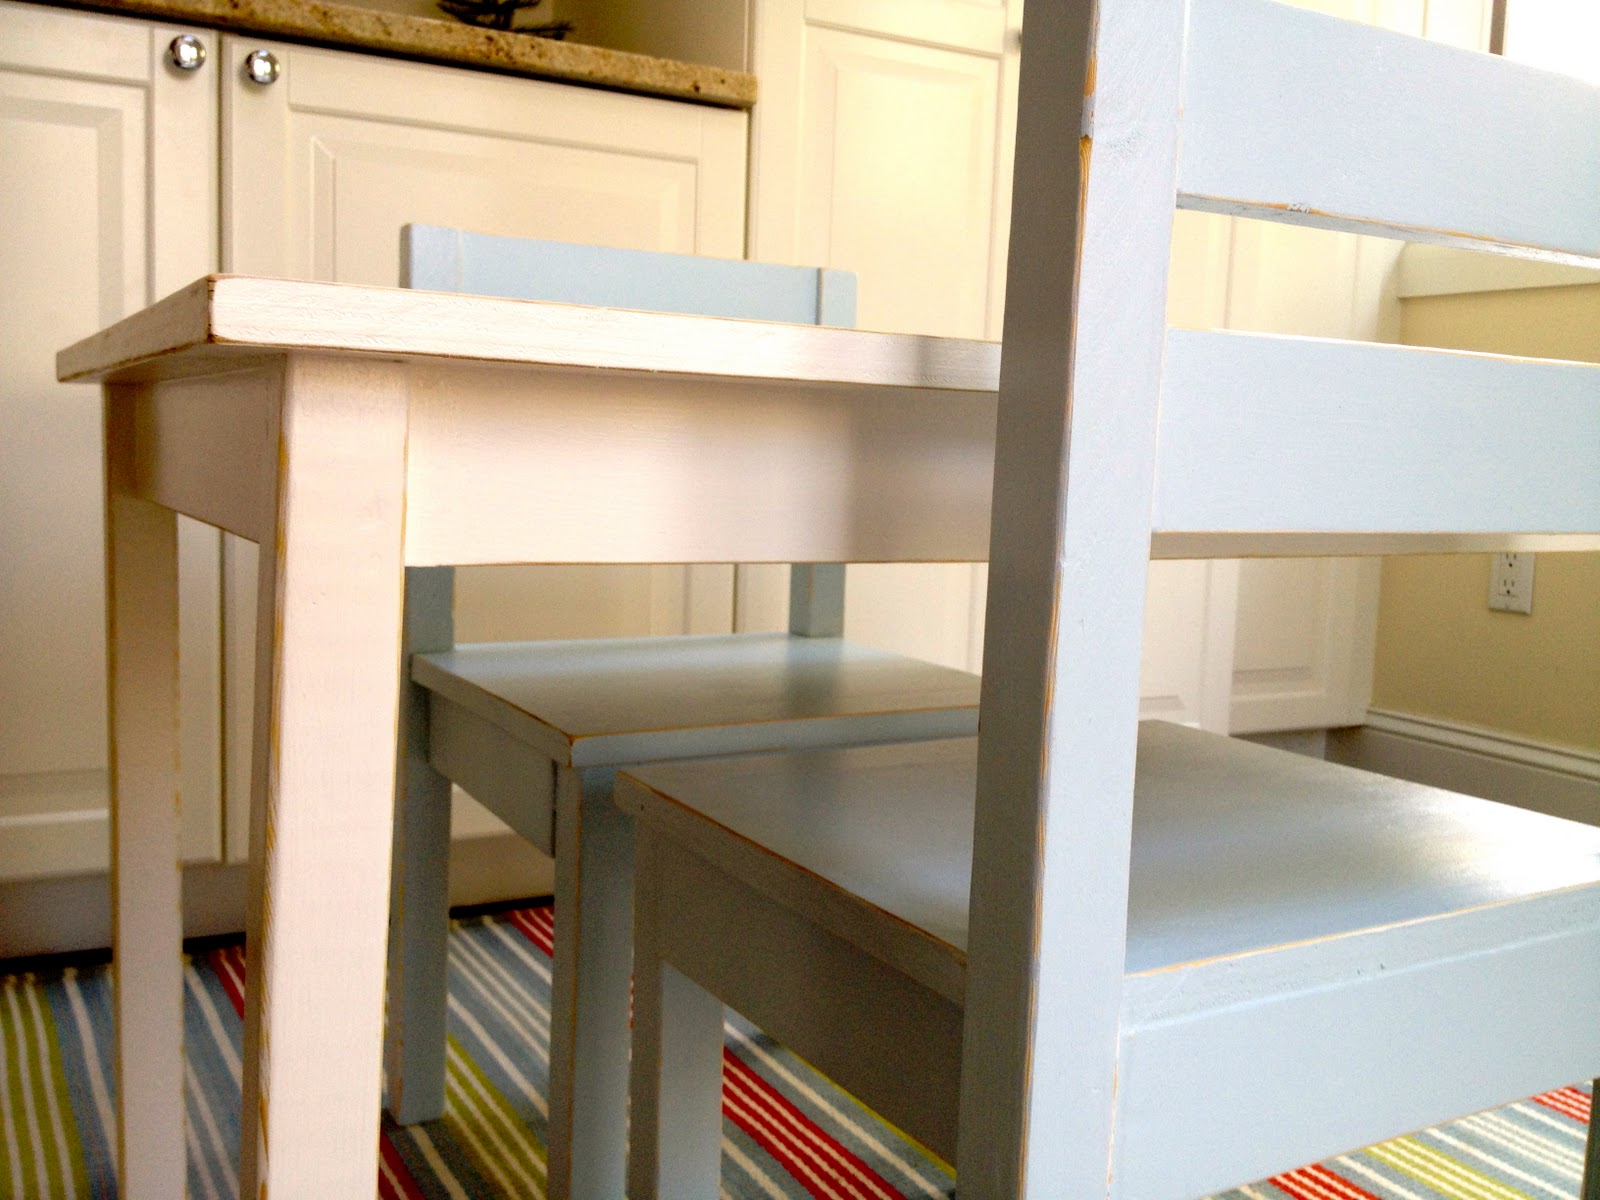
I modified the chairs using 2×2 for the legs for a different look and more stability.
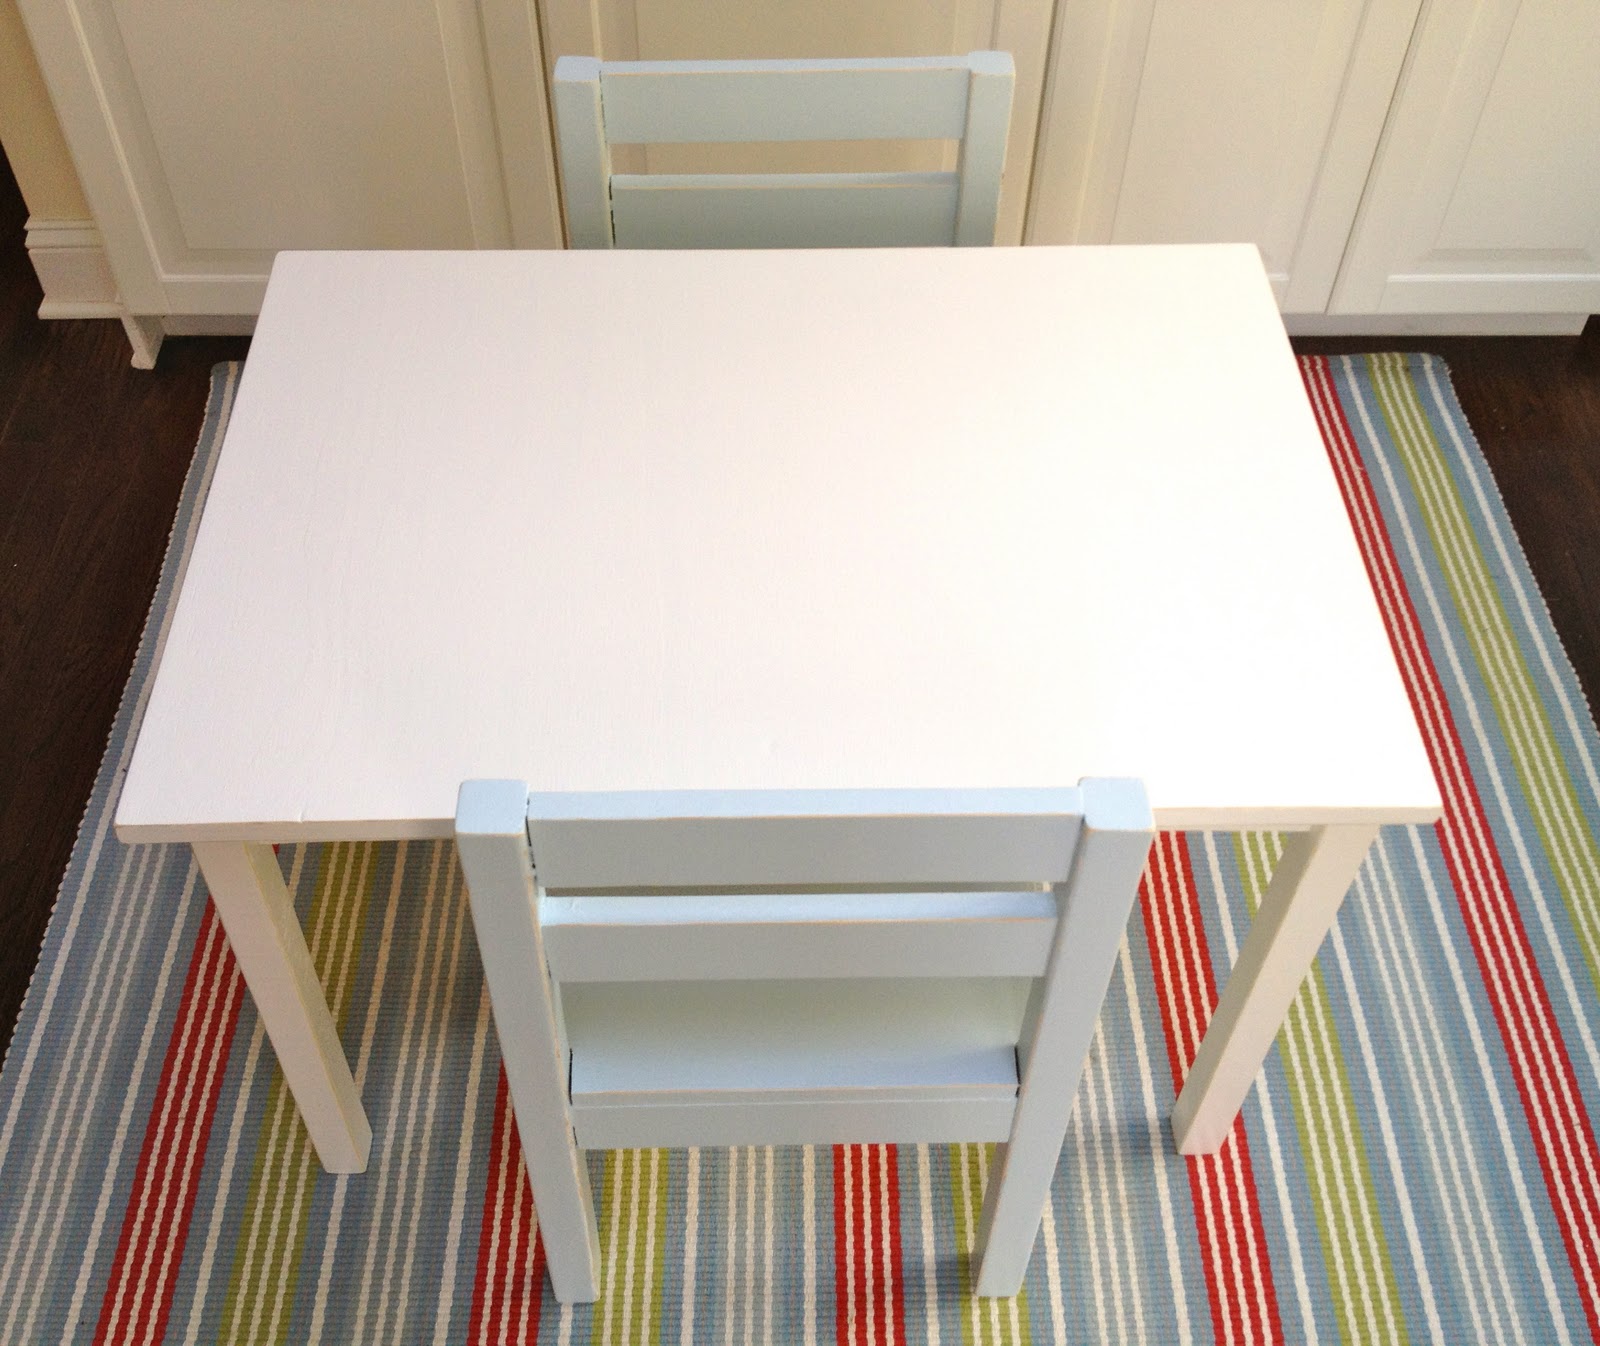
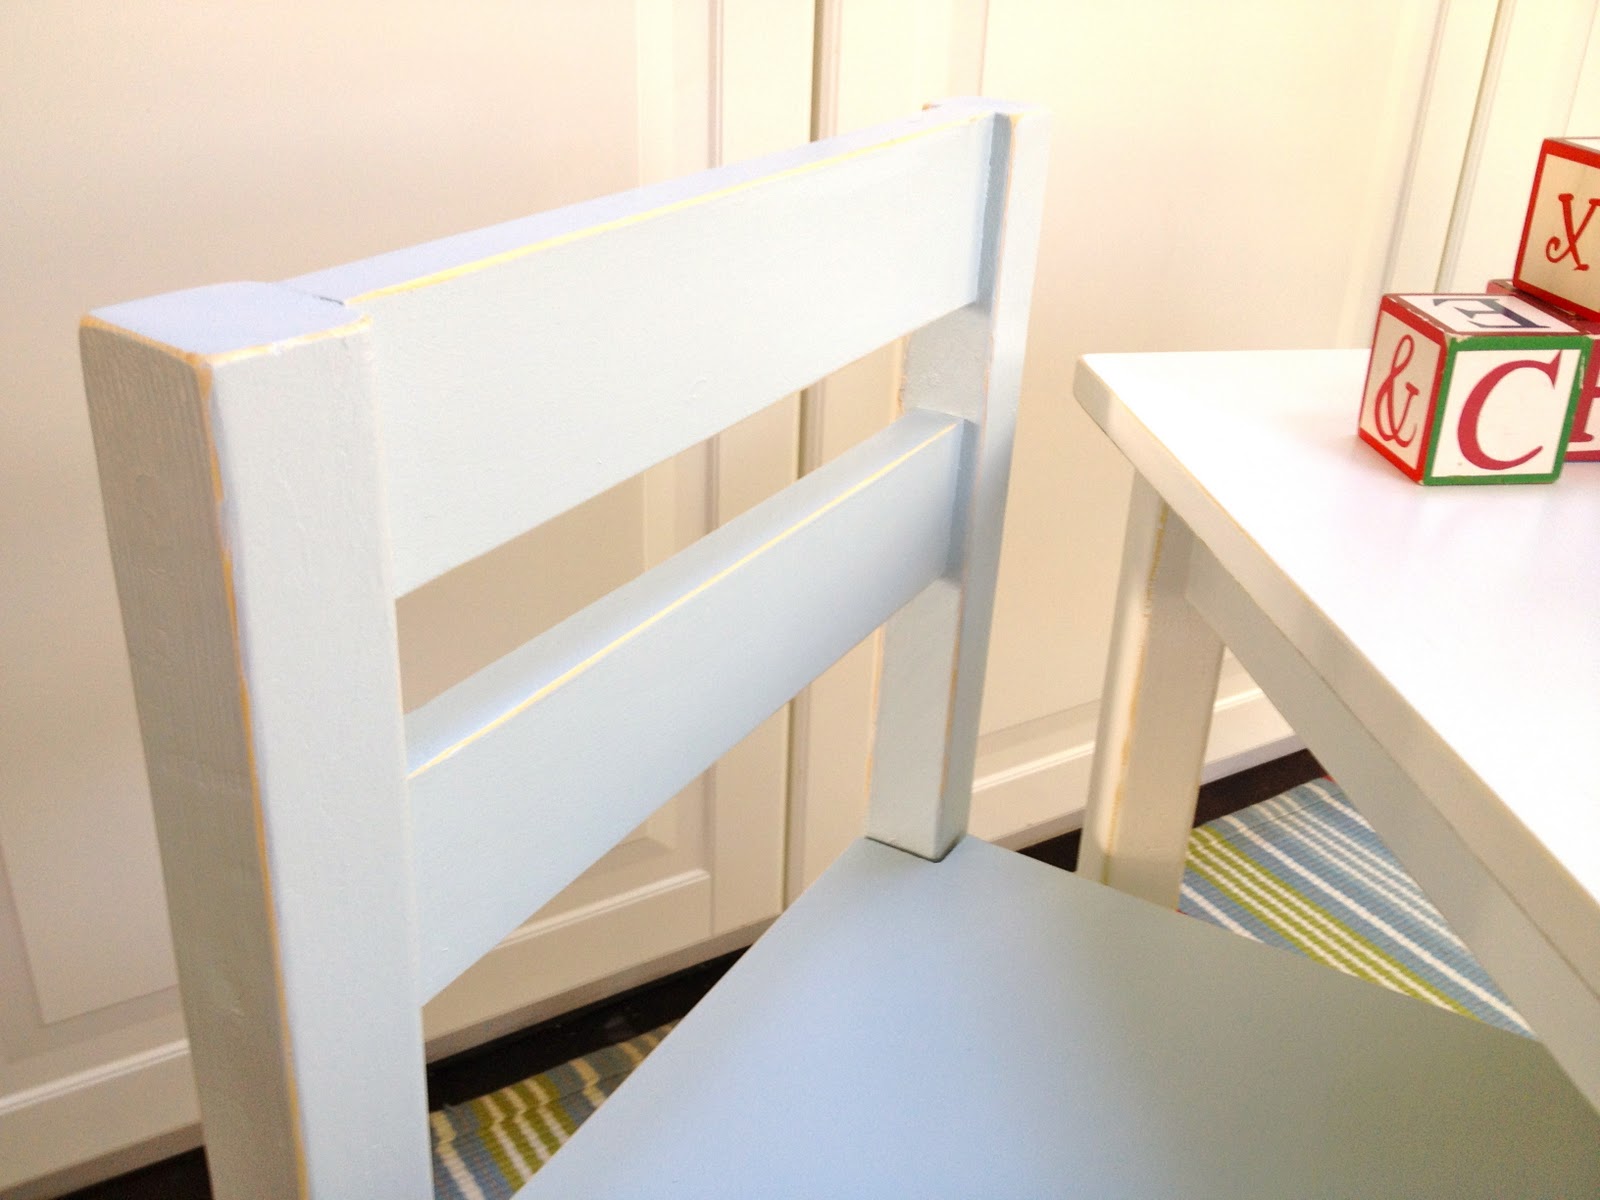
The distressed edges:

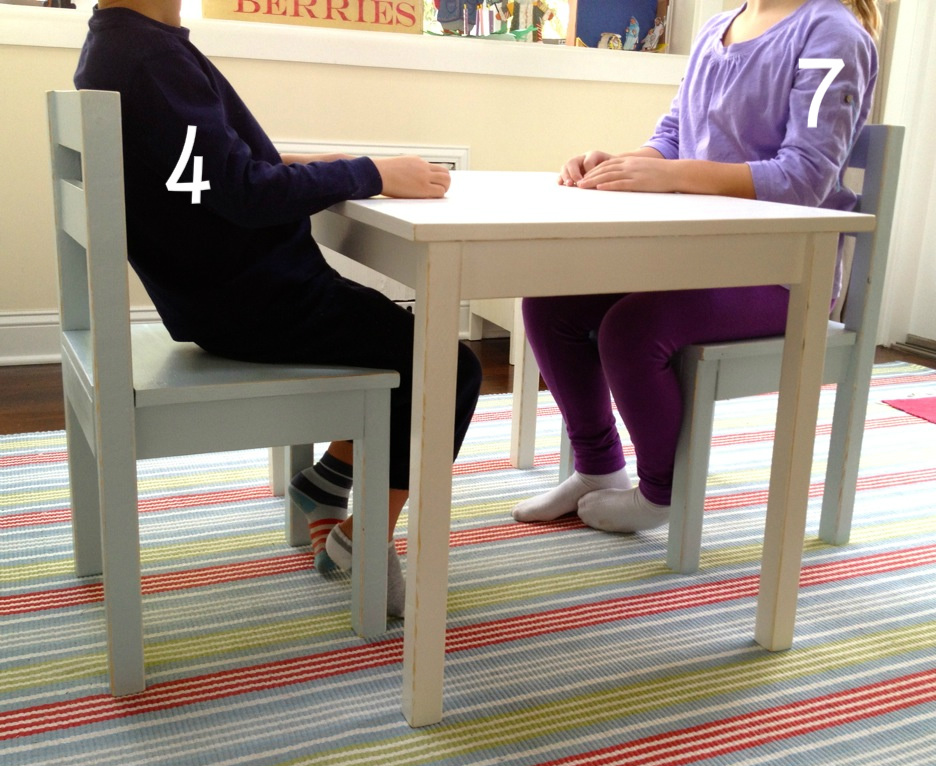
This table fits young kids perfectly.
Here’s my 4 and 7 year old:
And here’s Lily at 14 months old:
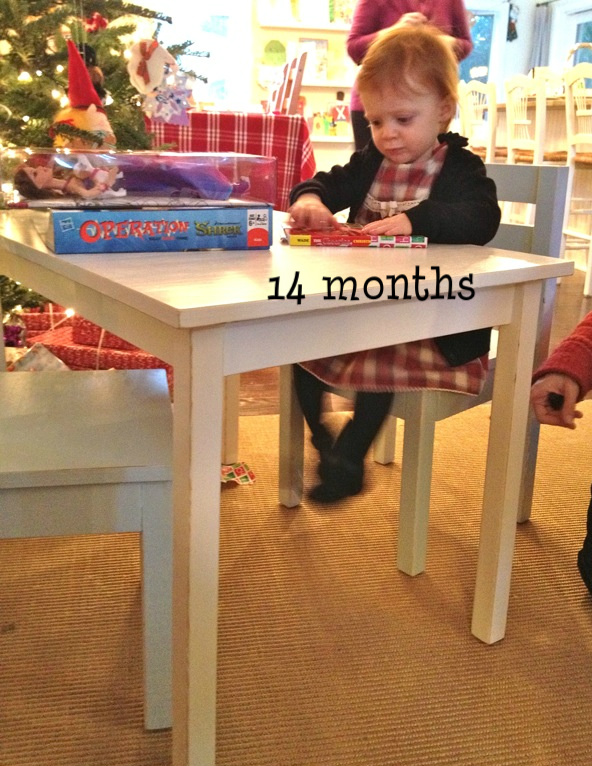
She won’t outgrow this table for at least five more years.
Here’s how I made the table and chairs:

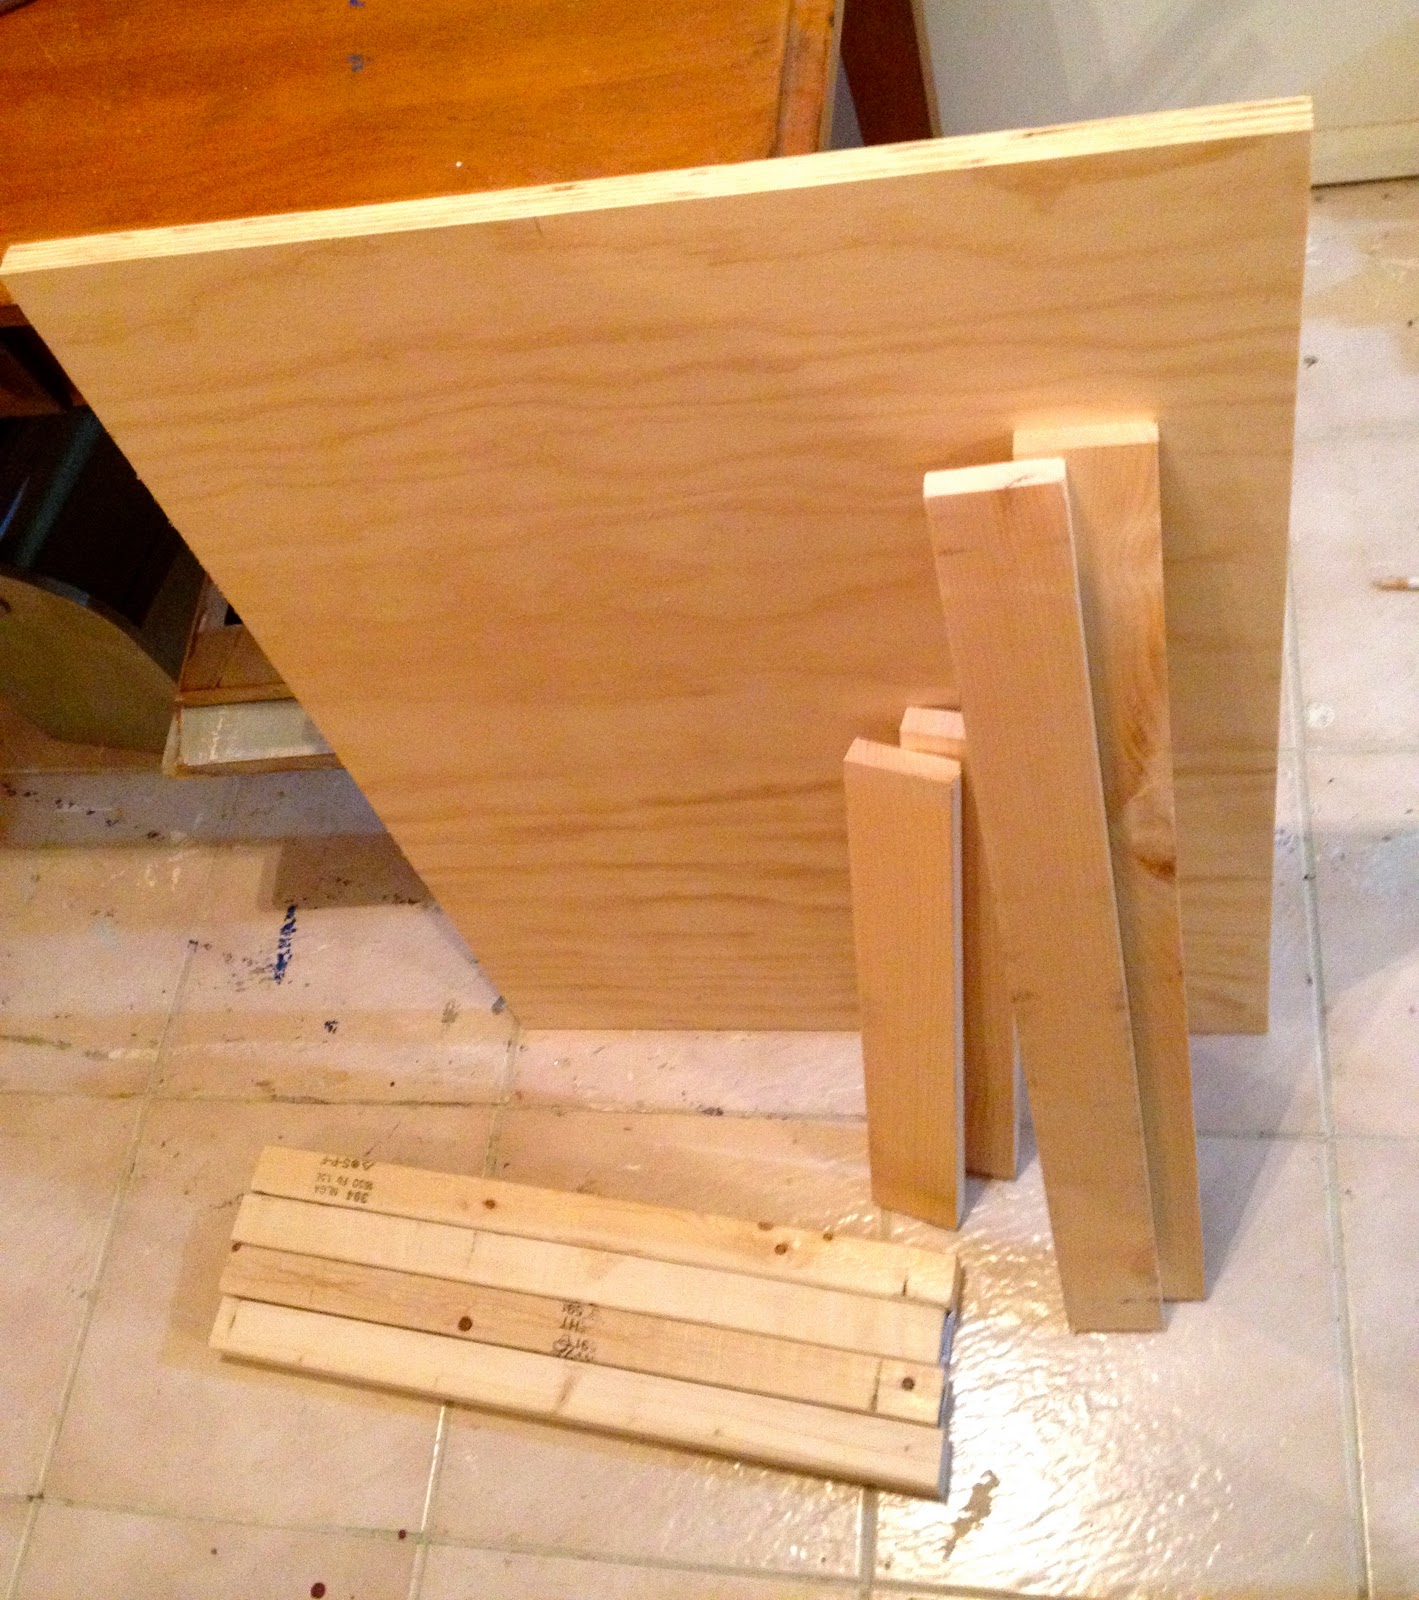
1. Cut wood according to plans.
Use Ana White’s Clara table plans here and chair plans here.
** I modified the chairs using 2×2 for the legs.
Pieces for one chair:
(minus the seat, I used one solid piece for seat)
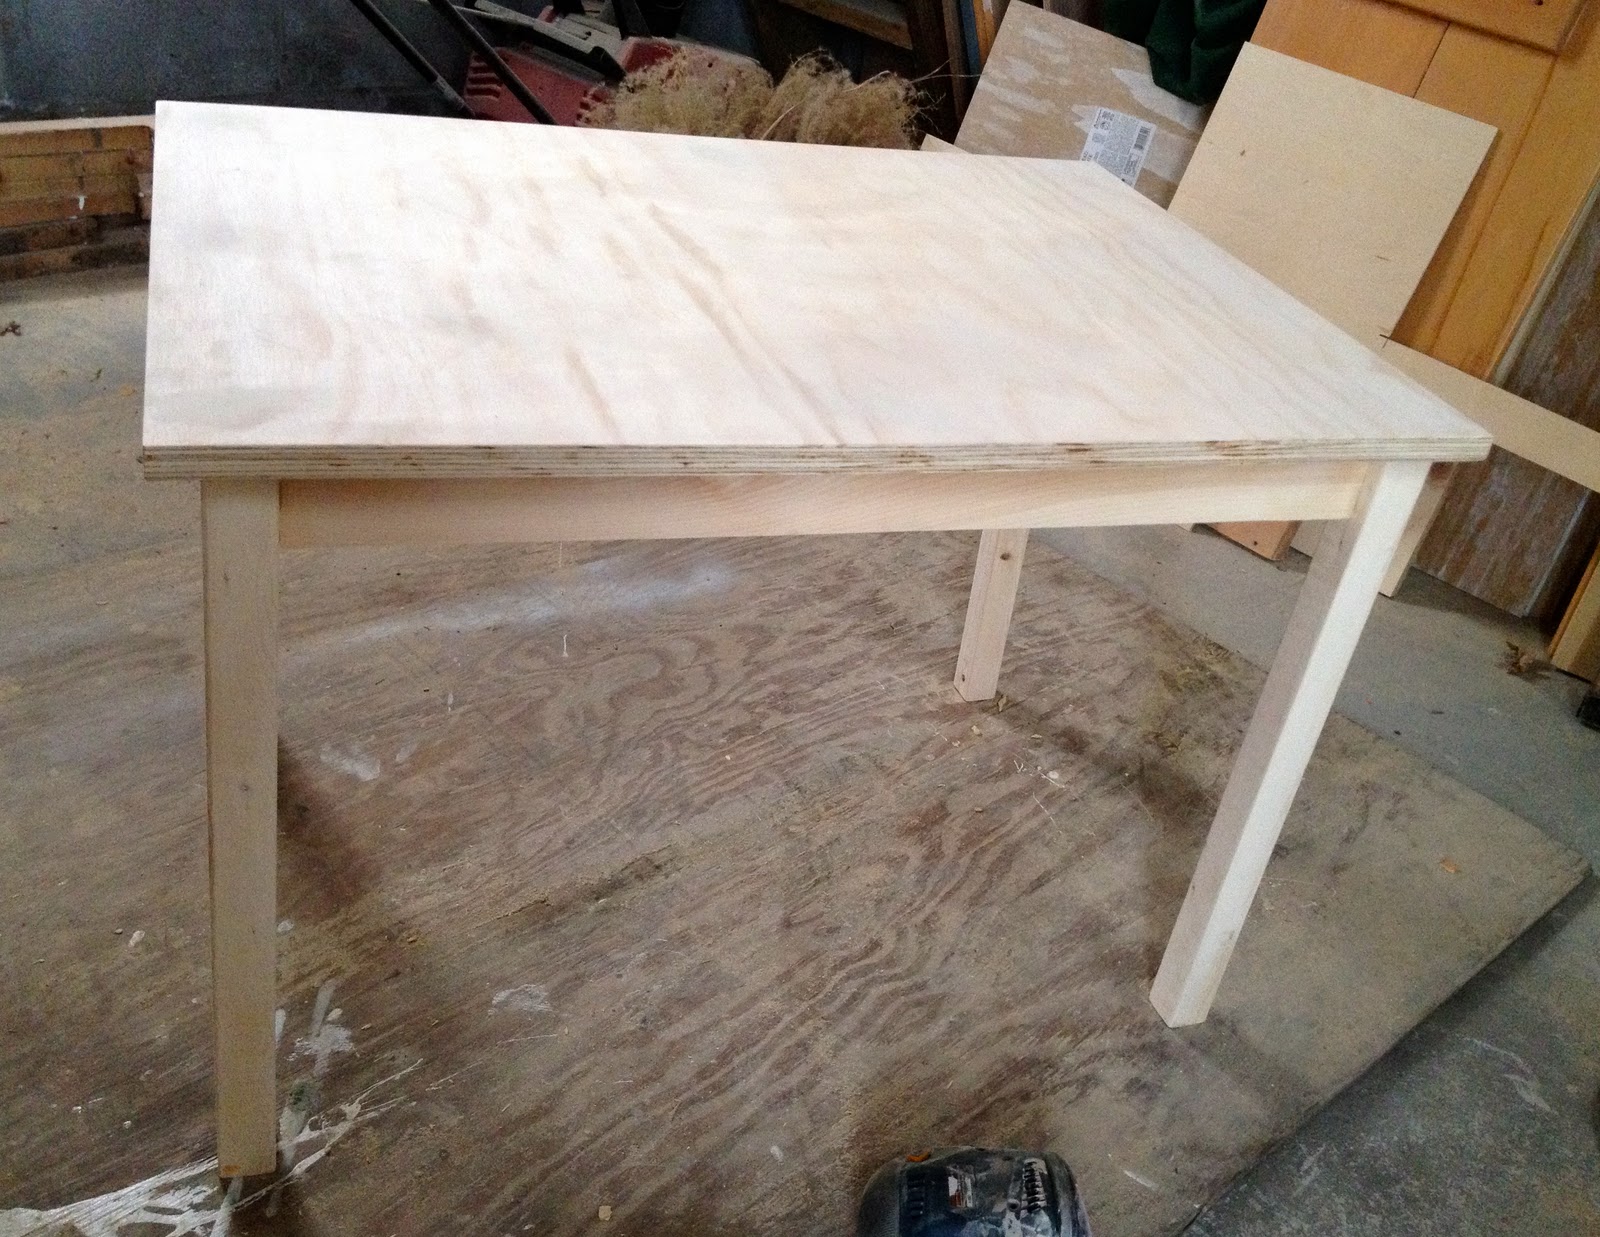
Pieces for table:
** I used one solid piece for table top.

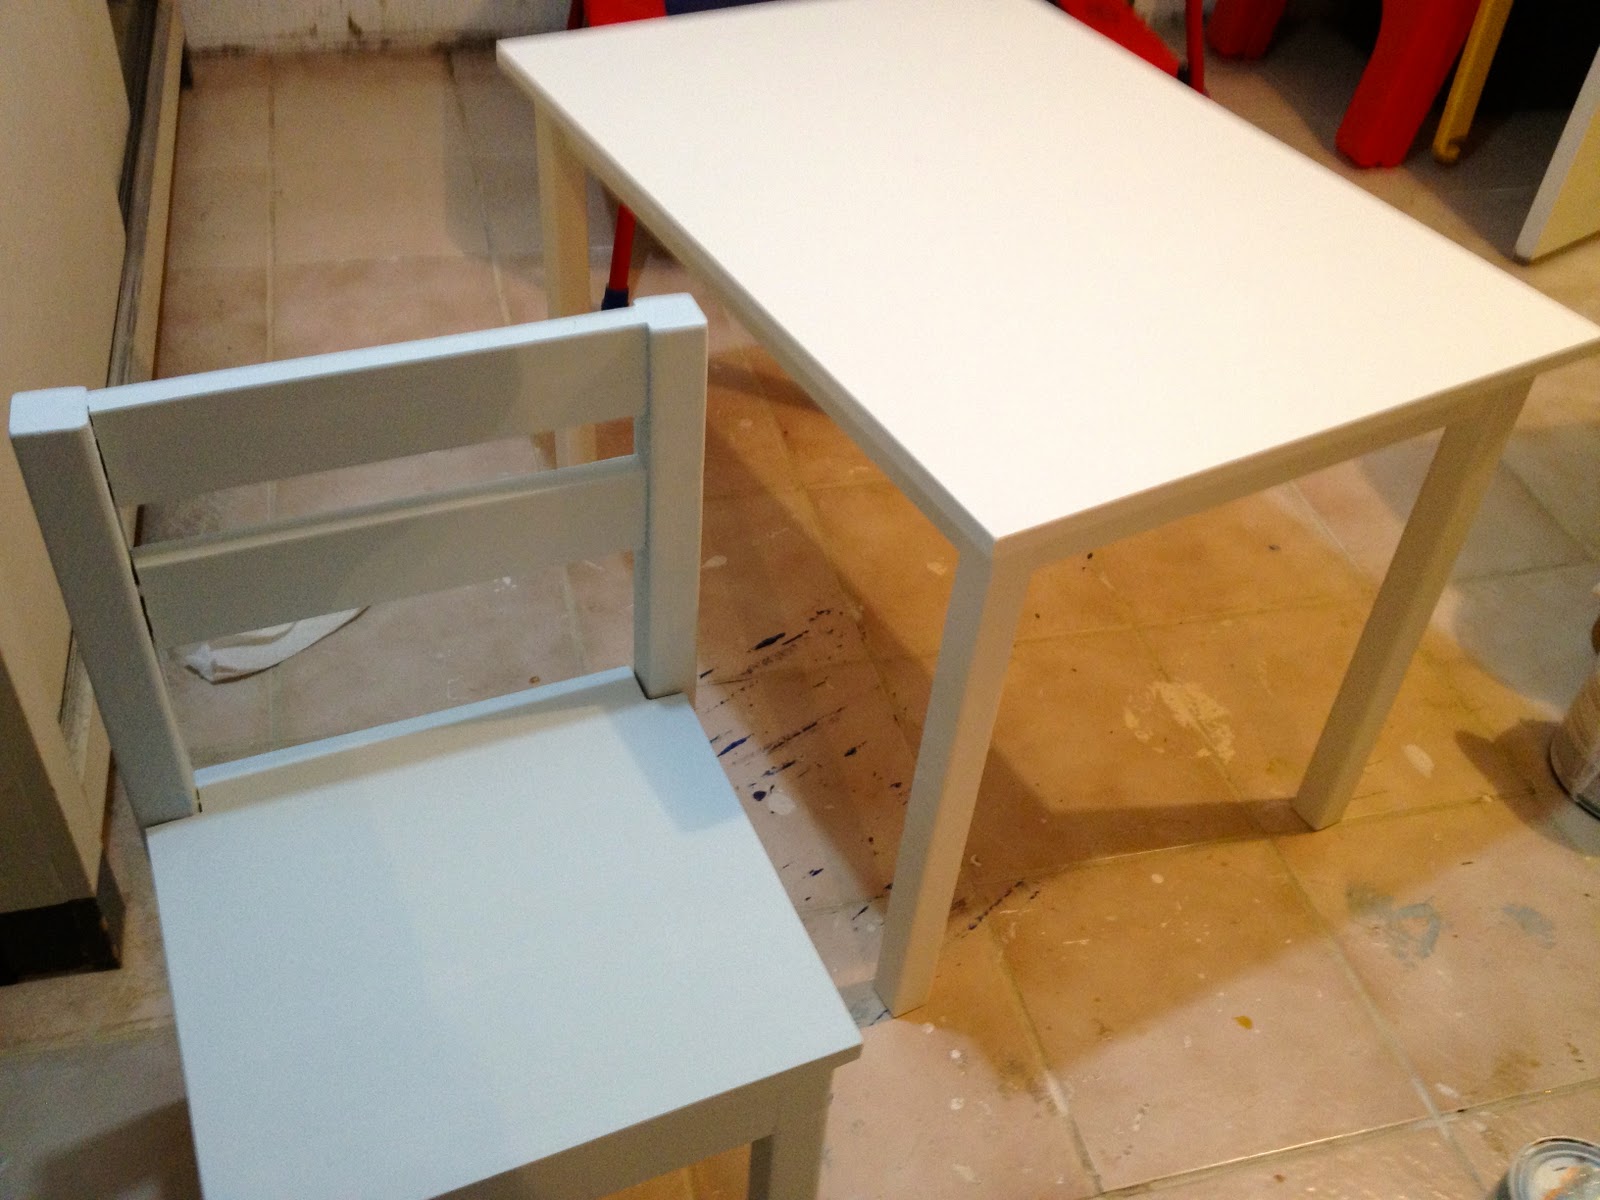
2. Construct, putty screws and sand.
** I used mostly #10 x 2 1/2″ wood screws, no kreg jig here.
3. For the chair seat cut one solid piece, then mark the back leg corner cuts:
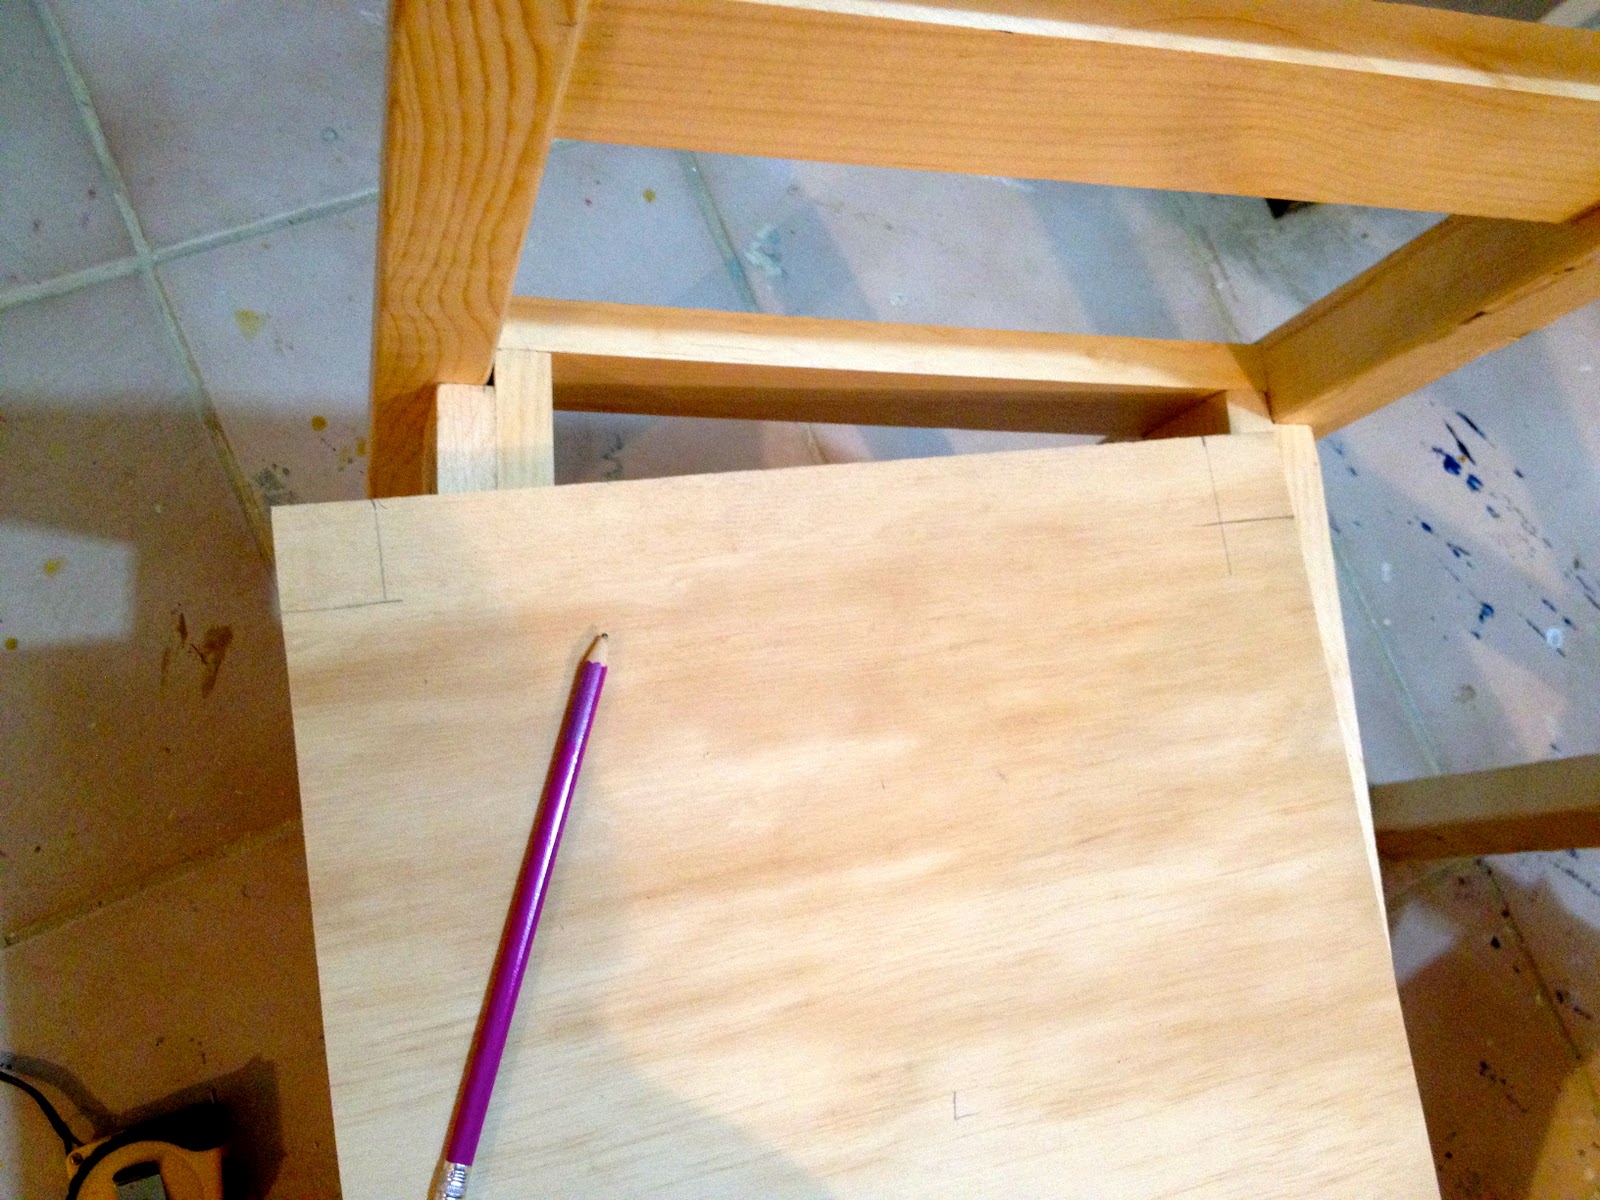
4. Cut corners with jig saw then attach:
5. Prime everything.
Paint chairs 2 coats Benjamin Moore summer shower.
Paint table 2 coats Behr swiss coffee.
** Sand between all coats.
6. Sand to distress then seal with Minwax clear satin poly.
Let the kids use and enjoy.
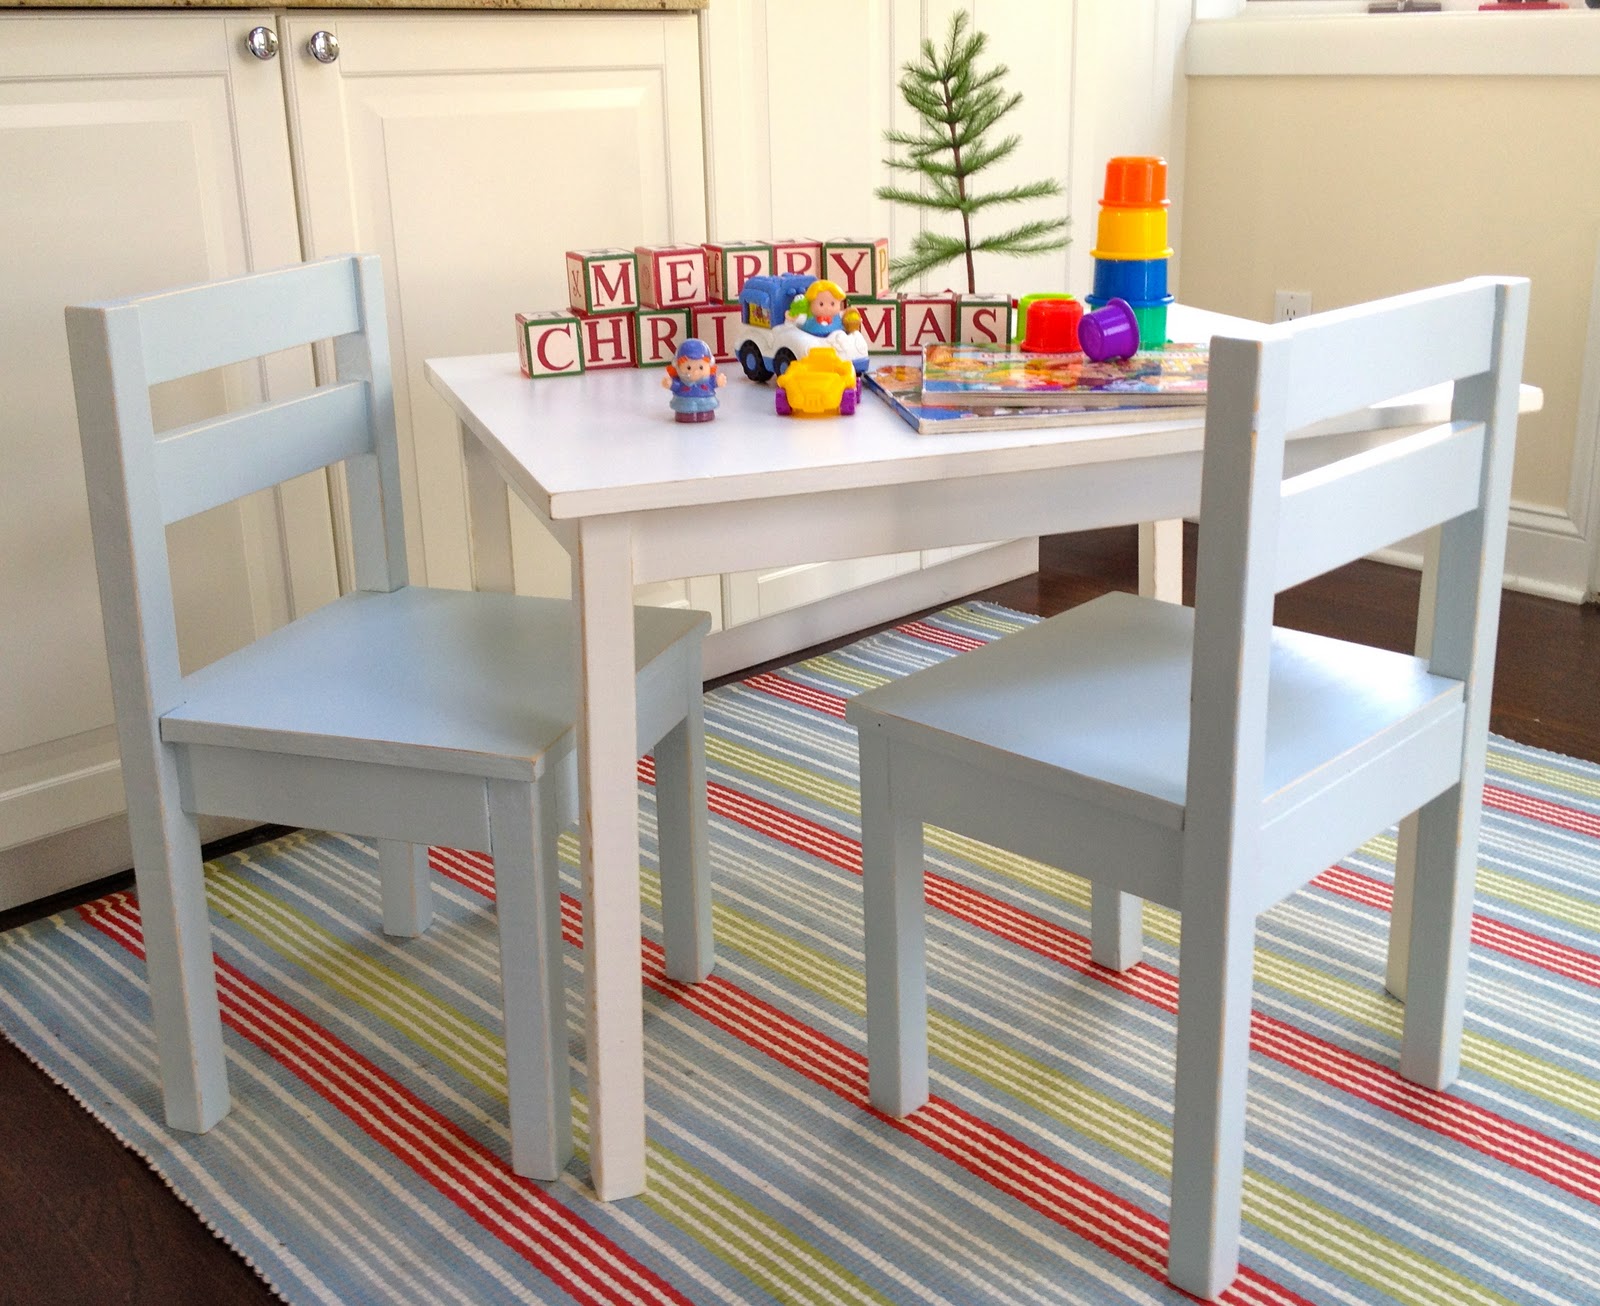
Merry Christmas Lily.

You may also like...

  • DIY Kids Play BarnDIY Kids Play Barn
  • DIY 18″ Doll Trundle BedDIY 18″ Doll Trundle Bed
  • DIY Treehouse Dollhouse & Furniture PlansDIY Treehouse Dollhouse & Furniture Plans
  • DIY Simple Play Market StandDIY Simple Play Market Stand
Share this post:

Filed Under: BENCHES, BUILD, DIY, FURNITURE, FURNITURE, PAINT, TABLES14 Comments

Reader Interactions

Comments

  1. Cassie @ Primitive & Proper says

    December 26, 2011 at 1:21 PM

    oh that is adorable! i love the colors! it looks perfect on that rug! 🙂

    Reply
  2. Vickie @ Ranger 911 says

    December 26, 2011 at 1:48 PM

    You never cease to amaze me! I can't believe you made that whole set!!! And ditto Cassie's comment. It looks so sweet on that stiped rug!

    Reply
  3. Inspire Me Heather says

    December 26, 2011 at 2:41 PM

    Your table and chairs look so good Jaime! Well done – as always. Happy holidays too!

    Reply
  4. Sarah says

    December 27, 2011 at 1:29 PM

    Beautiful job! How special to have something handmade instead of store bought- well done!

    Reply
  5. A Few Pennies says

    December 27, 2011 at 9:22 PM

    That is so adorable–I can't believe you made the table and the chairs (I know–saw the pictures!)–so sweet. Wish I had grandchildren! Thanks for the smiles–great talent!

    Reply
  6. Elizabeth (Blue Clear Sky) says

    December 27, 2011 at 10:37 PM

    Adorable! My sister and I both had similar sets for our kids when they were small and I miss them being at that age.

    Reply
  7. Suzanne@Meridian Road says

    December 27, 2011 at 11:40 PM

    Perfect! And they'll hold up so much better than any you could buy, too.

    Reply
  8. Ashley says

    December 31, 2011 at 3:54 AM

    Saw byour link on Funky Junk Int. link party. This is adorable. Great job and I love that carpet!! New follower here …you have so many great projects.

    Reply
  9. Hillcrest Acres says

    January 2, 2012 at 3:49 AM

    Adorable!!!!! Love the soft color of the chairs.

    Reply
  10. Attempting Aloha says

    January 9, 2012 at 6:04 PM

    Serously, girl…you're in my brain. I've already cut out the table top and legs for our table, and I'm doing the chairs solid as well (MDF scraps, though…I'm cheap and want to use what we have). Happy to see I'm not alone!!

    Aloha,
    Charlie

    Reply
  11. Unknown says

    May 12, 2012 at 2:23 PM

    Great job! I am a true beginner and will attempt to make these chairs for my kid's playroom. This may be a dumb question, but what kind of wood did you use for the chair seats? and the dimensions? See, told you I was a novice! I love that the seats are one solid piece and not slats. Thanks!

    Reply
  12. Liana Sanjana says

    March 24, 2013 at 5:19 AM

    Thank you soooooo much! I have so many furniture pieces to refinish but have waited because I hate to sand. Will try this next weekend. 🙂

    Reply
  13. trey says

    May 27, 2014 at 9:12 PM

    Great job! How much money did it cost to make it yourself? Not including the paint. Thanks

    Reply
  14. Ellen Sewitch says

    February 29, 2024 at 7:37 AM

    Just a quick question is the back apron and back slats on the chair 12 3/4 inches

    Reply

Leave a Reply Cancel reply

Your email address will not be published. Required fields are marked *

Primary Sidebar

Hi! I’m Jaime

Jaime Costiglio

Hello!

Thank you for stopping by.
Join me for lots of DIY.

Read more

Get new posts via email

Handbuilt Holiday: Gift Project Plans

handbuilt holiday gift project plans

Collection of DIY gift project plans to build.

The Home Depot Tool Prospective

THD Prospective

Tools to consider for the DIYer.

Archives

The Home Depot Logo
Copyright © 2026 Jaime Costiglio · Custom site by Moonsteam Design

Privacy Policy