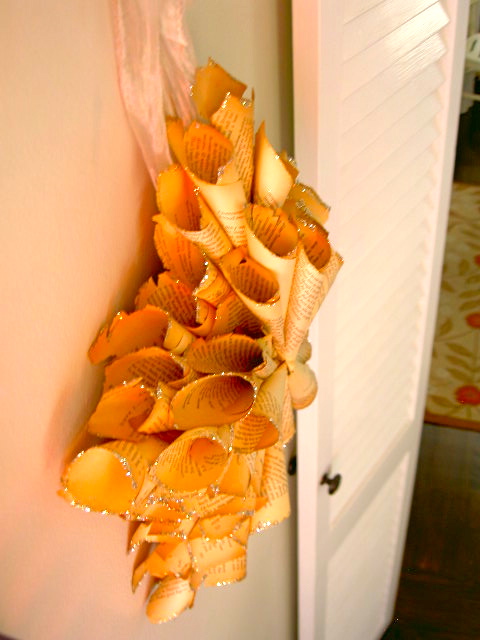
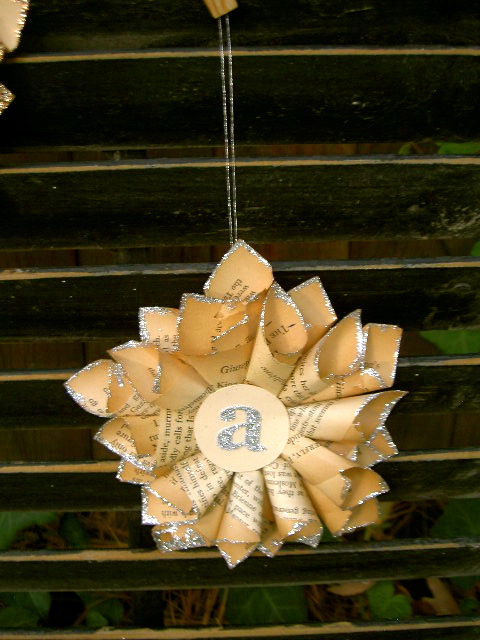
Glittered paper star wreath
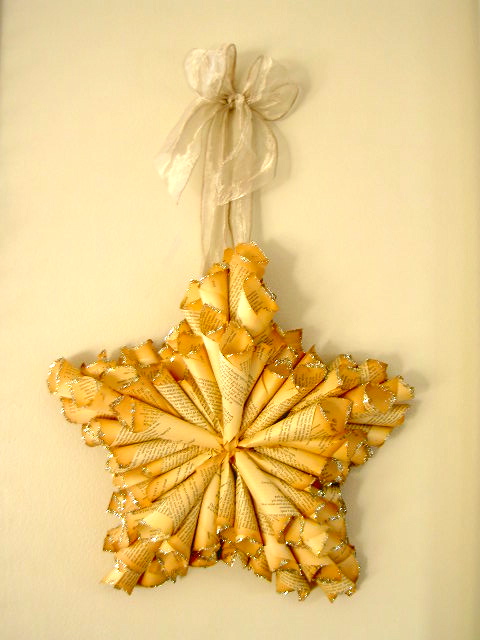
Made from old paperback book pages, add some glitter and presto:

Looks like a delicate pastry made for the walls.

Here’s how I made the paper star:
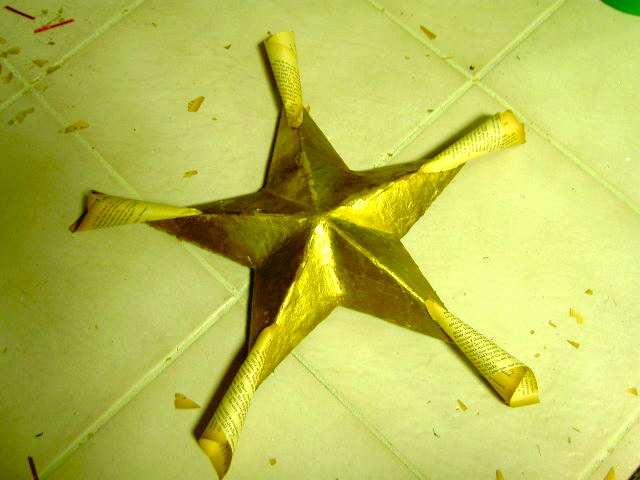
1. Using a 3D cardboard star shape (thank you Grandma) slice in half:
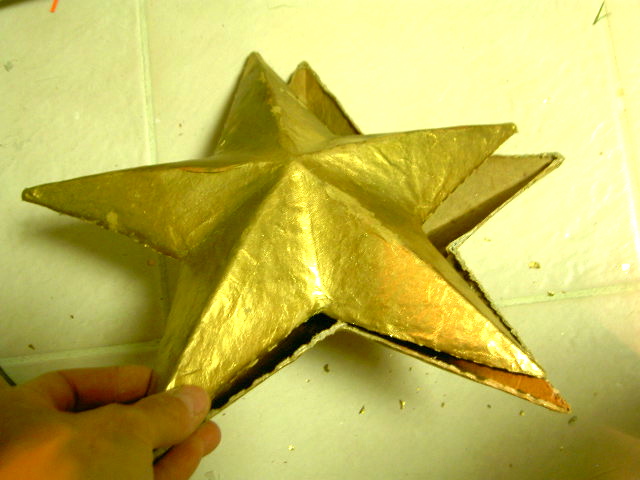
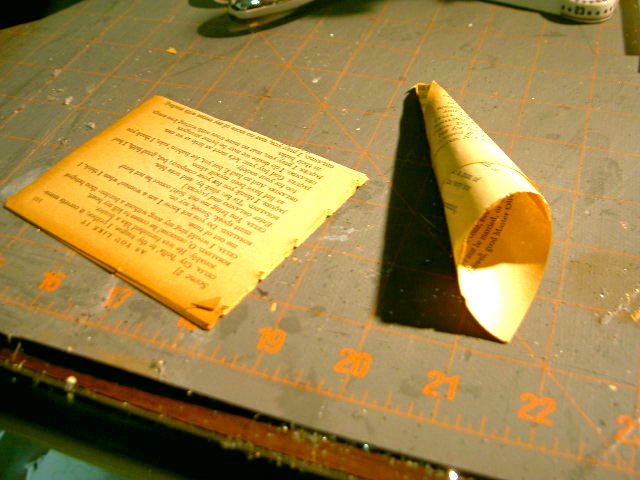
2. Prepare paper rolls.
Carefully remove old paperback pages.

Tear in half for a more squarish shape.
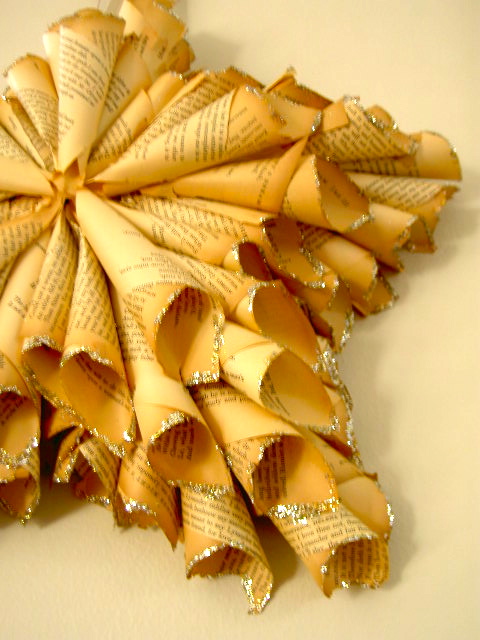
Roll into cone shape and hot glue.
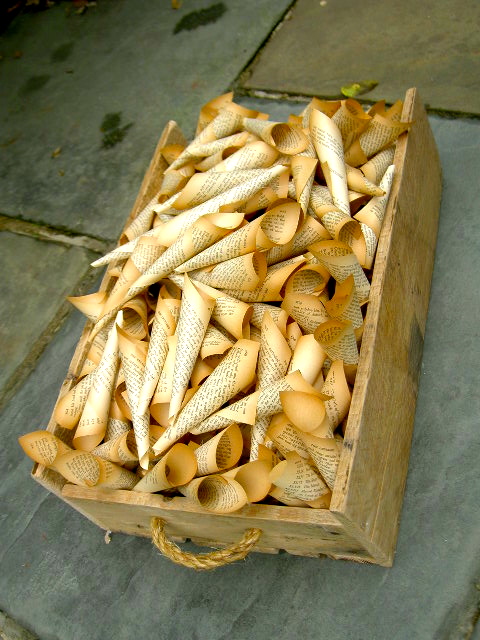
3. Make lots of paper rolls:
4. Start by gluing rolls onto star points:
Then in the crevices:

5. Fill in all the between sections:

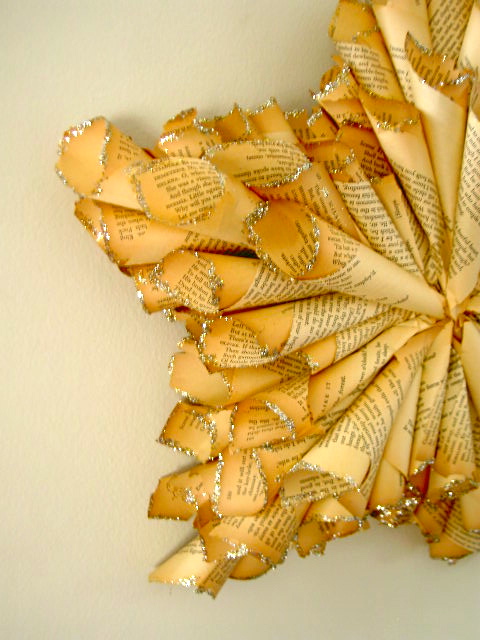
6. Add the next layer leaving top portion of previous layer exposed:
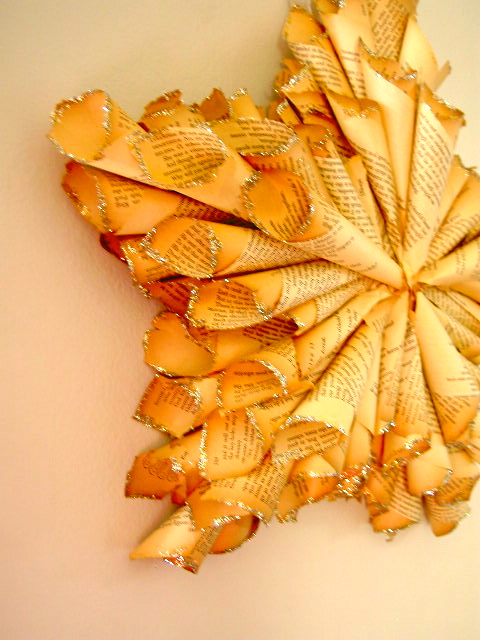
7. This star has 2 layers with an extra layer on top only to emphasize the points:
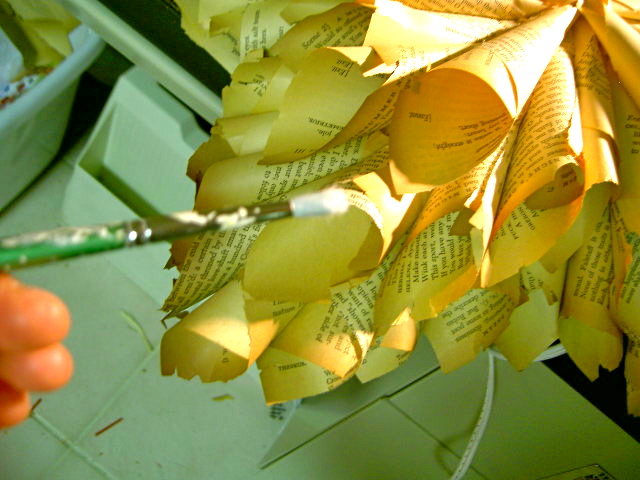
8. To add the glitter, brush on white glue just on the edges of the roll, doing only a few at a time:
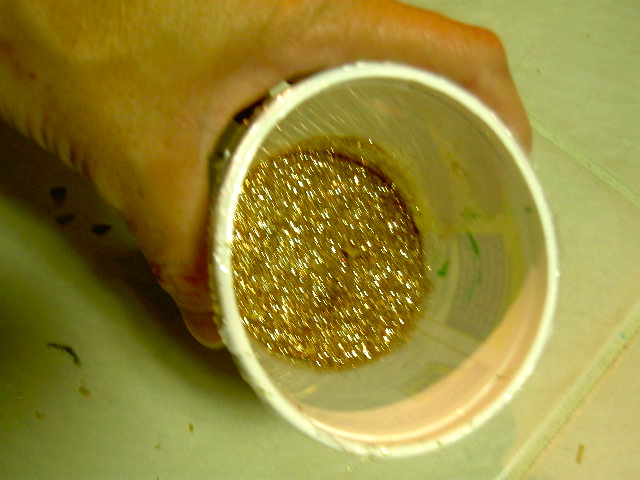
9. Shake glitter onto glue (be sure to do this over scrap paper to collect the excess glitter for re-use).

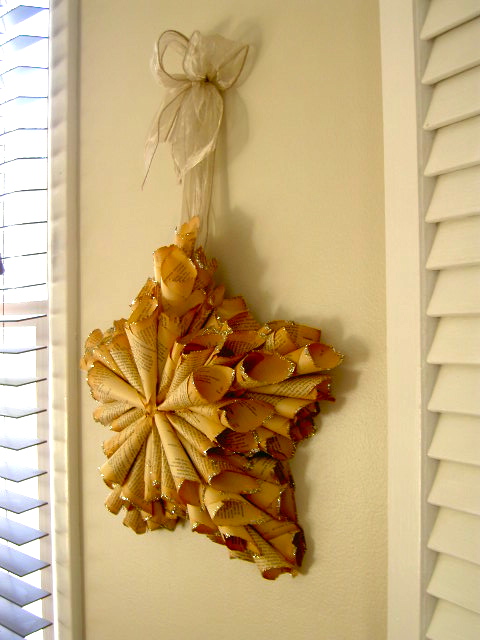
Hang and enjoy
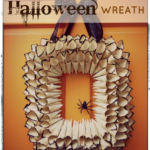
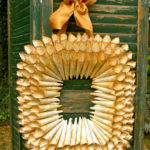
Previously I shared a rectangular version here:

But the star is definitely better suited for Christmas:

And I just made some mini star ornaments too:

Get the full tutorial on these little ones here.
I’m linking up to:
Whatcha Got Weekend @ Lolly Jane
SAS @ Funky Junk
Weekend Wrap Up @ Tatertots & Jello
Sundae Scoop @ I Heart Naptime
Sister Sunday @ Sisters of the Wild West
Sunday Showcase Party @ Under the Table & Dreaming
Just Something I Whipped Up @ The Girl Creative
DIY Fall Festival @ The DIY Showoff
Made by You Mondays @ Skip to My Lou
Making the World Cuter @ Making the World Cuter
Nifty Thrifty @ Coastal Charm
Tuesday Treasures @ My Uncommon Slice of Suburbia
Tutorials & Tips Tuesday @ Home Stories A to Z
Good Life @ A Beach Cottage
Delightfully Inspiring @ Delightful Order
Transformation Thursday @ The Shabby Creek Cottage
Strut Your Stuff @ Somewhat Simple
Share Awesomeness Thur @ The 36th Avenue
Flaunt it Friday @ Chic on a Shoestring
Tickled Pink @ 504 Main
Frugal Friday @ The Shabby Nest
SAS @ Just a Girl
Feathered Nest @ French Country Cottage
Remodelaholics Anonymous @ Remodelaholic


Your creation is delicious …..
Very good!
Love this! Pinning it now. I need to find me a 3D star shape now! I love your comment: "a delicate pastry for the walls" 😉
I love this!!! It's now on my to do list!
Meg
beautiful, jaime! i love the star shape!
I love this! Perfect for the Holidays!
xo
Love your different takes on the book page wreaths. Stars are definitely my favorite shape and your's looks so pretty with the glittered edges.
Ovo je prekrasno!!!!!
Od papira se mogu napraviti divne kreacije, zar ne?
How imaginative you are. That looks absolutely lovely. And I love the soft looking bow too.
Kathi
This star is beautiful! I must make this! I just love it! Thanks for sharing!
Stephanie @ Ladywiththeredrocker.wordpress.com
beautiful – I love stars, it's amazing with all that volume that the wreath is able to maintain the star shape. It caught my eye was scrolling through the links on Home Stories A2Z.
DeeLIGHTful!! Bookmarking this for a craft session with my eleven year old grandson! Love it…love it love it LOVE it!!
Deborah (happily visiting from http://cardsandthings.blogspot.com…hope you'll stop by too…)
That is gorgeous and great tutorial.
Beautiful! I plan on making something similar to this for my Christmas tree this year! You did a great job!
Wow amazing – you might be interested in seeing the recycled wall art at my blog earth sky sea – which is along the same lines but a giant flower.
I luv luv this!! I am so doing one of these for Xmas! thanks for the tut!
Veronica
Tassels Twigs and Tastebuds
Love this Jaime! For sure going on my "to do" list for the holidays!
It's beautiful, I love how the old book pages are yellowed at the ends!
Tania
love the glitter touch!
Your star is gorgeous, Jaime, and the tutorial is terrific. I know what my next project is! Love it!
Oh, Oh, Oh I have to have one of these. Stunning.
Very unique!! I like how you can just reuse an old book too:)
Hi Jaime, this is beautiful! So vintage looking. I'd love it if you shared this at my Christmas Craft Tutorial Party that I have going on at Project Queen through November.
http://www.projectqueen.org
I just love this! The glitter is a nice touch and so is the star shape. I'd love for you to share with my readers if you have the chance. Thanks! http://www.momontimeout.com/2011/11/taking-timeout-thursday-link-party-no-3.html
I LOVE this wreath (and all the creative things you make)!!
It's just beautiful Jaime – I do like the star just a tad better than the rectangle but both are so really lovely!
This is a great idea! I've made several of the wreaths from old books and sheet music but never in this shape. I'll have to give this a try! Love it!
Hey Jaime,
I am deep in the glitter and sheet music this week..making lot's of these for my shop holiday open house. LOVE your tute…beautiful!!!
janet xox
http://theemptynest-janet.blogspot.com/
Wow! This is stunning! I am making all of my ornaments out of old books this year. This would look so cool with my tree!
I featured you today! Come by and grab your button!
http://vintagemellie.blogspot.com/
Wow, that is gorgeous! So simple and so pretty…would you share it here at my holiday party? I'd love for you to join in!
http://oneartmama.blogspot.com/2011/11/our-home-for-holidays-party.html
Very crafty and creative…..looking forward to giving this a try 🙂
This is really cute…thanks for the tutorial…gonna spruce up some stars (bigger ones).Would love it if you would link this up to our Rockin' link party going on now at RoCa and Company. Here is the link: http://rocaandcompany.blogspot.com/2011/11/you-rock-8.html. Come and show off what you got. Hope to see you there…
Remember…YOU ROCK!!
Carmen @ RoCa and Company
http://www.rocaandcompany.blogspot.com
totally amazing book star…the glitter is a great touch! I hope you will link up with me here:
http://www.thegingerbreadblog.com/2011/11/sweet-saturday-v12.html
Love how you did shapes instead of just a circle great idea
This is so clever & ever so lovely. I simply must try this. Your blog looks really fun & filled with clever ideas, so you now have a new follower!
🙂 CAS
So cute and unique!
I LOVE how this turned out! I'm going to have to make one for sure thanks for sharing, also im a new follower i'd Love if you followed back!
Julianne
http://www.sewfantastic.blogspot.com
This is really amazing! I'm smitten by stars and you've taken it a new step further! Kudos to you!
Featured you on FB for SNS 106 and pinned. 🙂
https://www.facebook.com/photo.php?fbid=10150432360991141&set=a.192514281140.164586.175378011140&type=1&theater
Donna
Your star is really beautiful! I saw this on Donna, Funky Junk facebook page, and I just love it!
so pretty: I shall be pinning this one to add to my ever growing list of things I simply must make before Christmas!!
Oh my gosh, I totally love this!!!
I always make home made christmas decorations for my freinds and family. Wreaths ect. This year they are getting that wonderful star! Thank you for the inspiration!
This is absolutely beautiful. Thanks for sharing the tute, it's pinned and going on my to do list!
I love this! Beautiful star ornament 🙂
This is amazing! And it is so beautiful. I want to make one so badly. Maybe in a circle this time or something. 🙂
I cannot tell you how much I love this star! I would love to feature it on Reduce, Reuse, Upcycle. Feel free to stop by and grab a featured button. Thanks!
Love this! I shared a link to this on my Facebook page.
Love this! Frantically searching for those star shapes and hope to find one soon!
c'est magnifique
c'est magnifique
Hello Jaime! I've linked this to my stars post today – it's so pretty!
Beautiful! And your instructions are clear and easy to follow. So nice stopping by 🙂
Kindly, Lorraine
These are so cute! Love it 🙂