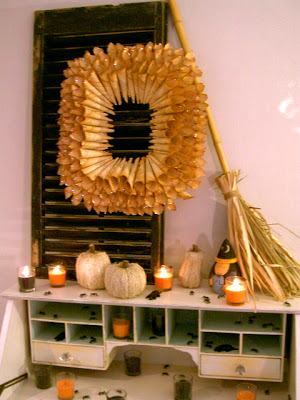
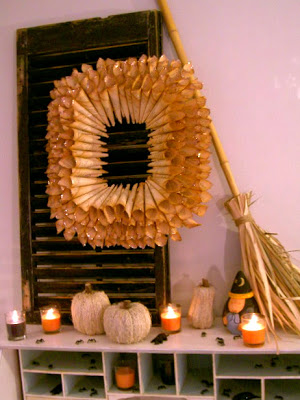
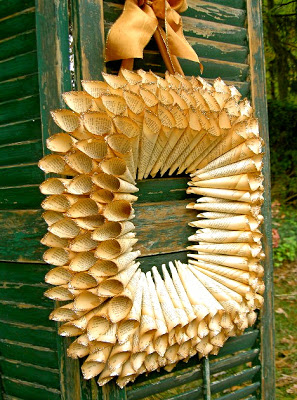
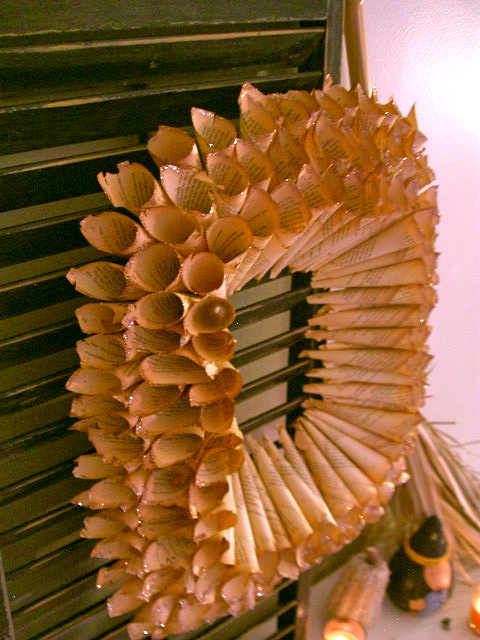
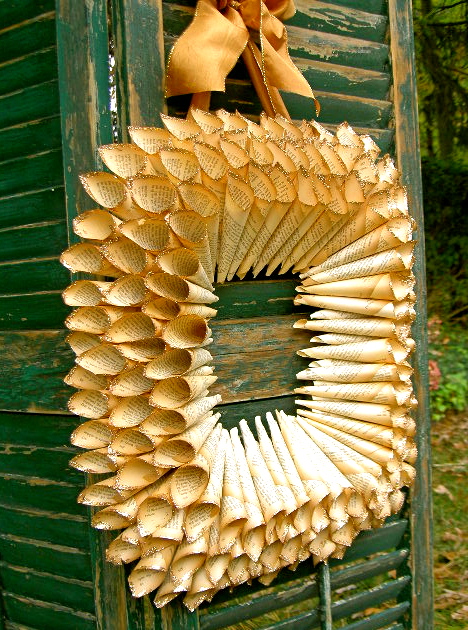
A rolled paper rectangular wreath.
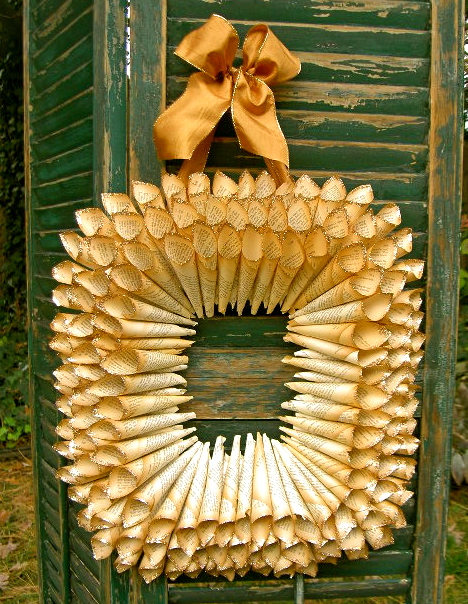
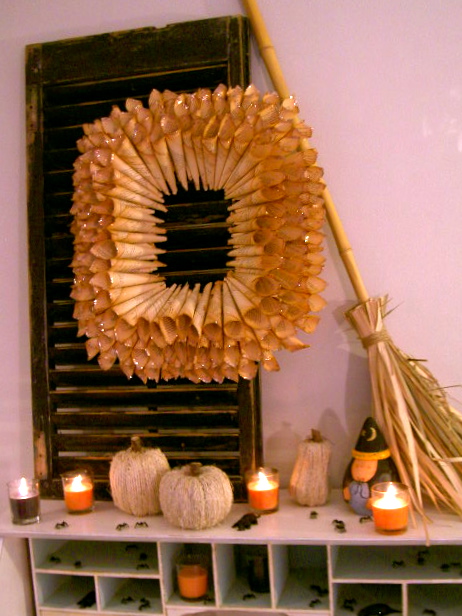
Old paperback books made into Fall decor.

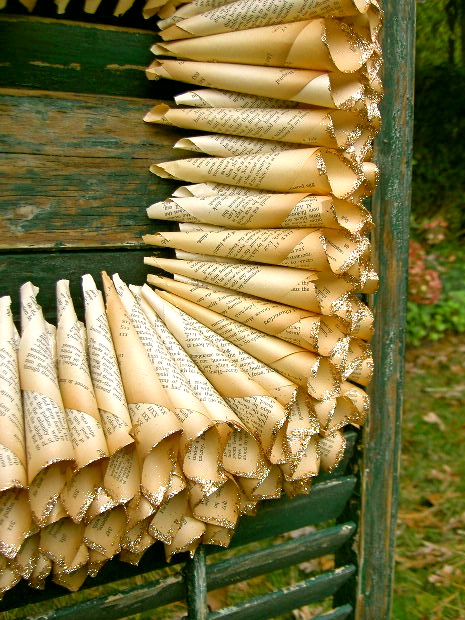
Complete with warm Fall colored glitter on the edges:


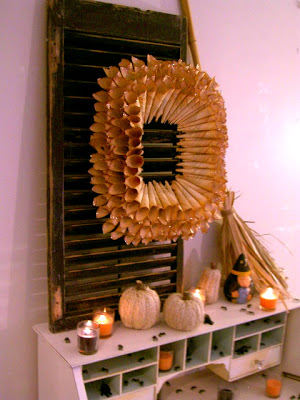


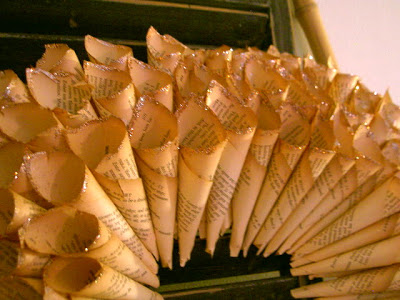


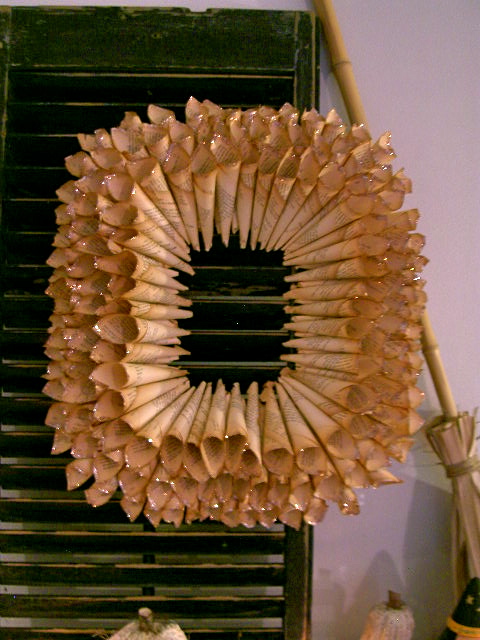
And outside the glitter looks like this:
A big thanks to Grandpa for saving all his paperback books over the years!

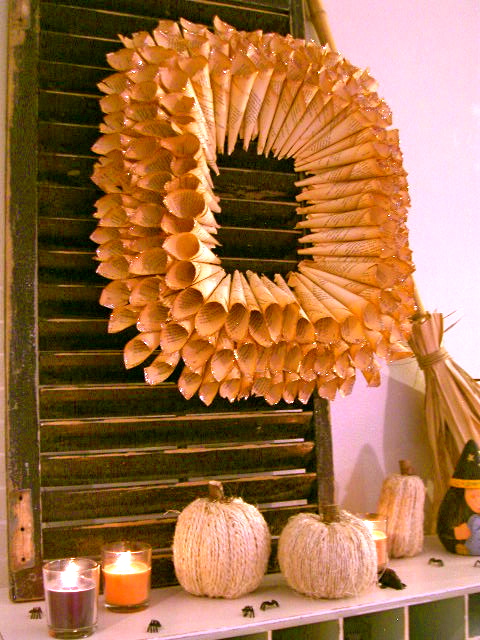
Those old books have really great worn edges that give the paper such character:
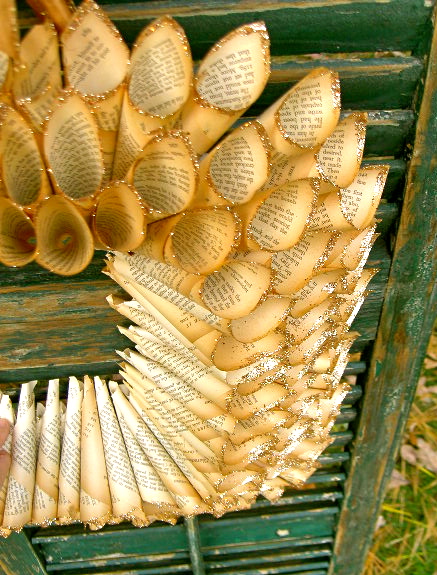
All the pages rolled together start to look organic:
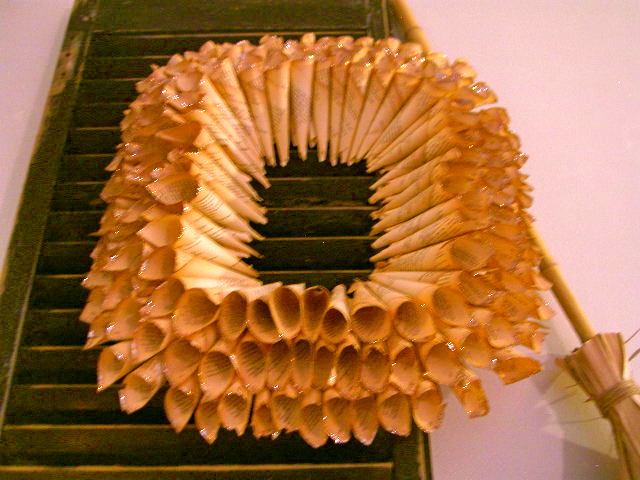
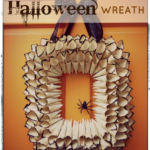
And perfectly spooky for Halloween.
Here’s how I made the wreath:
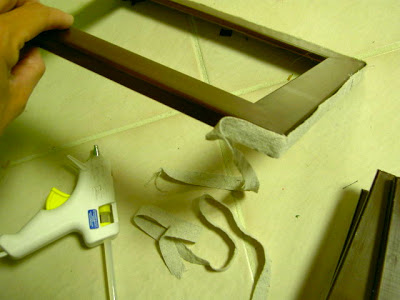
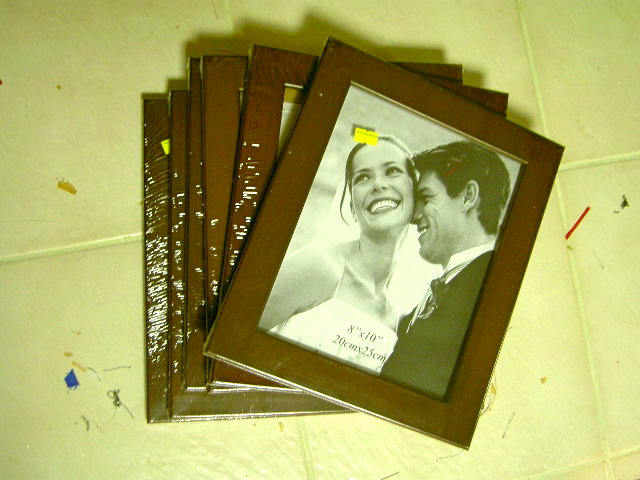
1. Buy plastic frames from the dollar store:
(plastic is very lightweight, or use mdf, 1/4″ plywood)
2. Cover the edge of the frame, I used drop cloth strips cut to the thickness of the frame edge and hot glue:
** Add wire for hanging prior to this step.**

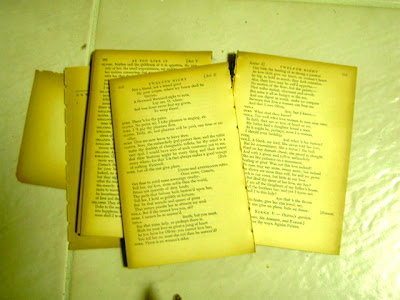
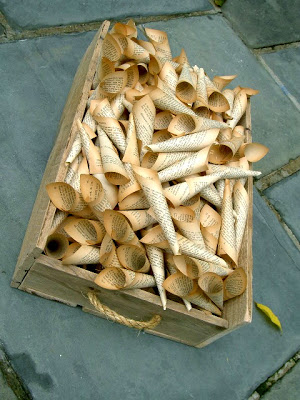
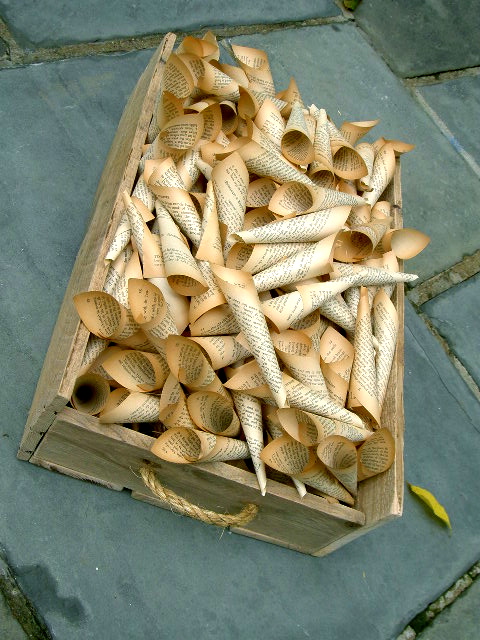
3. Prepare paper rolls.
Using old paperbacks, tear out pages:

4. Fold and tear pages in half for a more squarish shape.
Roll paper into cone shape and hot glue:

5. Make a lot of rolls, the 8 x 10 frame takes about 100 rolls:
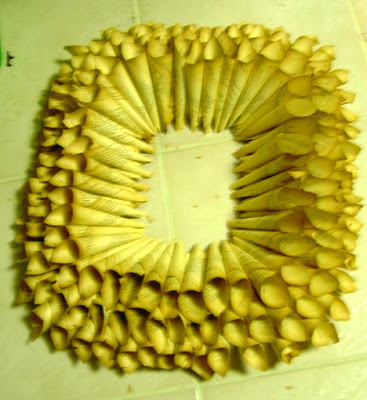
6. Start by gluing rolls in corners to preserve rectangular shape:

7. Fill in remaining spots then add second and third layers:

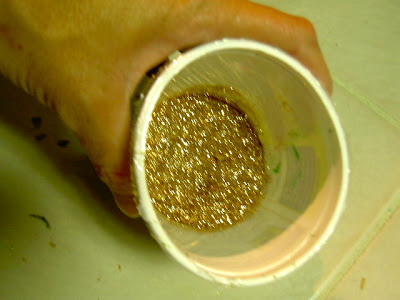
8. To add glitter – paint on white glue just on outer edges of rolls:
** Do this in batches of about 6 rolls at a time.**
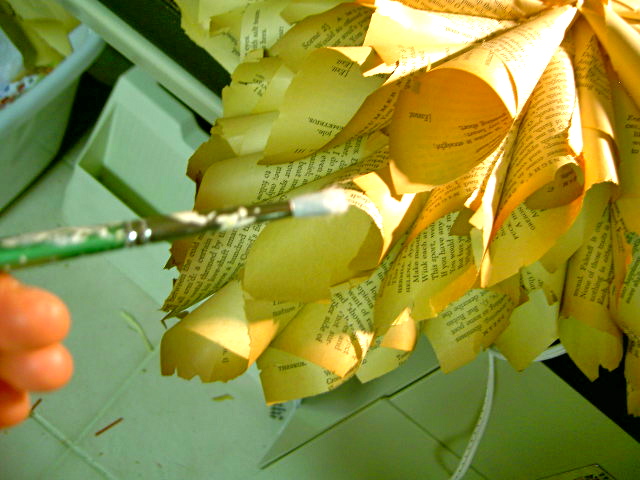
9. Using orange / copper glitter mixture shake glitter onto rolls over scrap paper to collect excess:

10. Let dry complete and give final shake.


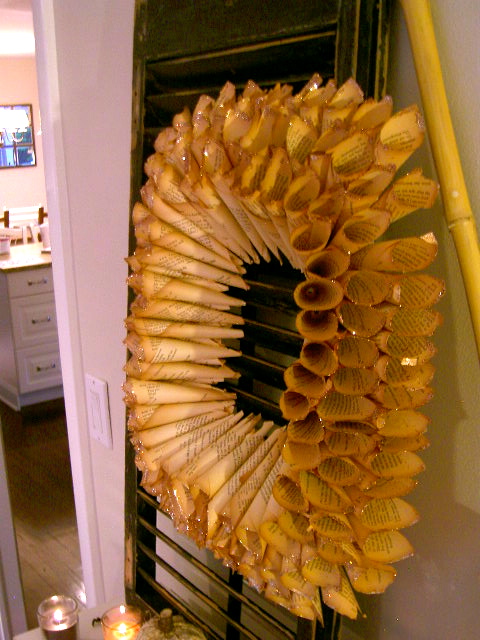
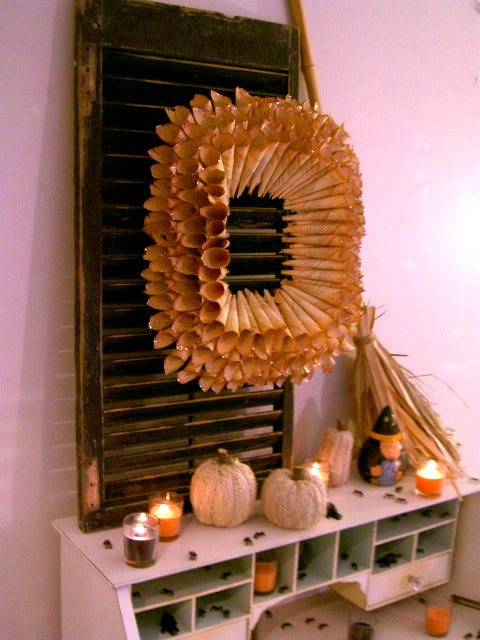
The indoor pictures truly don’t do it justice, the glitter is so brilliant but hard to capture with my camera.
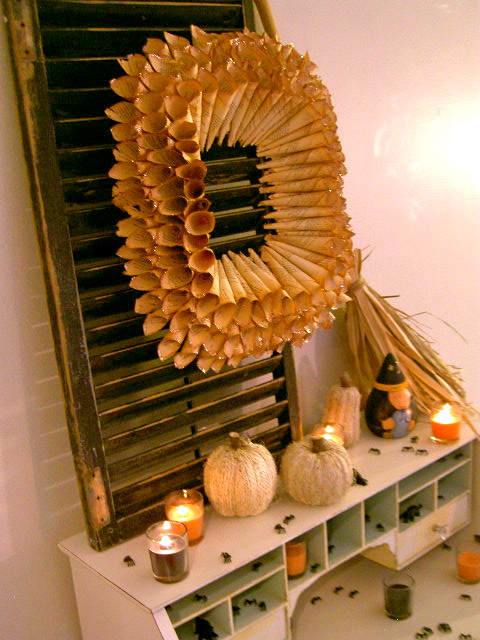
A fun, inexpensive and easy Fall craft.
Add a bow and now it’s ready for Thanksgiving.


Love the shape! this is really cute.
Okay….I am significantly creeped out by the little spiders all over your display!!! lol Makes me want to run and scream….I think that is the point of it all, so congrats! lol The wreath and tutorial are super duper. Thanks for sharing it. One of these days I am going to try one of these wreaths. Nice change up on the square, not circular, shape.
Wow, this is different! I really like how the pages were naturally aged. I'll have to try this one day.
~Tina
Love it! Most definitely going to snag this idea. 🙂
Fabulous. I love that you added glitter to the edges I havn't seen anyone else do that.
Thanks for the tutorial I think I may have to have a stab at these, after all I have a ton of books lying around 🙂
Caroline
This is soo pretty! WOW!!! What a gret tutorial thanks!
So pretty! My old books are looking a little scared now 🙂
it looks awesome! i love the square shape of it!
Awesome! Love the square book wreath idea! Great job 🙂
Amazing! I love the square shape. It goes so perfectly with the rest of your decor.
This is so fun! I love the rectangular shape and the glitter!
I love this! This is so creative and I love the glitter!
~Jessa
http://www.jessajill.blogspot.com
oh gosh!! stunning..
Beautiful. I love the glitter, the shape, everything.
xoxo,
Amy
This is so original. I've never seen anything like it. What a great idea!
So Cute!! I absolutely love it! I love how you put the glitter on!!
Jill
twoyellowbirdsdecor.blogspot.com
What a cool idea-love the glitter too!
What a great idea!
Thank you for a fabulous tutorial!
xo
Love it!!! I made tons of round wreaths last winter and even continued to fill in the circles and made huge paper Dalhias. I'll have to give the square ones a try 🙂
Thanks for sharing!!!!
Everything about this is lovely! I love the whole set up with the broom. I am now following you! 🙂
Jaime..Jaime!!!
I just scored a stack of old sheet music and now I know exactly what I am going to do with it!!
Thank you…thank you
Janet xox
http://theemptynest-janet.blogspot.com/
Your square wreath is adorable! I like the glittered edges!
I love the shape by far my favorite wreath 🙂 The glitter is such a great idea too! Stop by for a blog visit, I'm your newest follower.
Thanks for the GREAT tutorial on how to make this beautiful wreath! I saw your post over at "Carolyn's Homework" link party.
I love this! I've never seen any other wreath like it.
This is a great and unusual wreath, love it. I will have to add this to my to do list!
Visiting from Coastal Charm.
Thanks for posting. I love the new square look. I've always wanted to make one of these and now I think I can! Great job!
This is so pretty! I just love that is it square and so different from other wreaths! Thanks for linking to tickled pink! Sharing this on FB!
Wanted to let you know I featured your wreath on my blog today!
You are soo awesome. Love this!! Great JOB. The glitter REALLY makes this stand out for me!! Gonna be making some of these TONIGHT! We featured you today!
I love the touch of glitter! Visiting from Sister Sunday!
-caroline @ c.w.frosting
i love the look of this…great tutorial
It's gorgeous, Jaime! I love book page wreaths. Still haven't done one but I love yours for inspiration. I'm including a link back in tomorrow's DIY Fall Festival highlights. 😉
Roeshel
I love your version on this wreath. I'm going to try and make one today, thanx for the inspiration!
Shelly
So clever, Jaime! Thanks for linking up to The Talent Scouting Party at WhisperWood Cottage!