• Home
  • Blog
  • About
  • Contact
    • Privacy Policy
  • SHOP
  • Widget area for main menu

    • Email
    • Facebook
    • Google+
    • Instagram
    • Pinterest
    • Twitter
    • YouTube
  • Skip to primary navigation
  • Skip to main content
  • Skip to primary sidebar

Jaime Costiglio

build - paint - sew

  • BUILD
    • BEDS
    • BENCHES
    • DESKS
    • DRESSERS
    • GAMES & TOYS
    • SCRAP WOOD
    • SHELVES
    • STORAGE
    • TABLES
  • TOOLS
  • PAINT
    • CRAFTS
    • FURNITURE
    • HOME DECOR
  • SEW
    • GIFTS
    • HOME DECOR
    • POUCHES
  • HANDBUILT HOLIDAY
    • 2019
    • 2018
    • 2017
    • 2016
    • 2015
    • 2014
    • 2013
  • GIFTS
    • BABIES
    • KIDS
    • FOR HER
    • FOR HIM
    • TEACHERS
    • WEDDINGS
  • SEASONAL
    • 4TH OF JULY
    • FALL
    • HALLOWEEN
    • CHRISTMAS
    • SUMMER
    • SPRING
    • ST. PATRICK’S DAY
    • THANKSGIVING
    • VALENTINE’S DAY
    • WINTER
  • SALTBOX PROJECT
    • BATHROOMS
    • DINING ROOM
    • EXTERIOR
    • FAMILY ROOM
    • FOYER / MUDROOM
    • KIDS BEDROOMS
    • KITCHEN
    • LIVING ROOM
    • MASTER BEDROOM
    • PLAYROOM
  • SCROLL SAW

“S” is for Stack

October 13, 2011

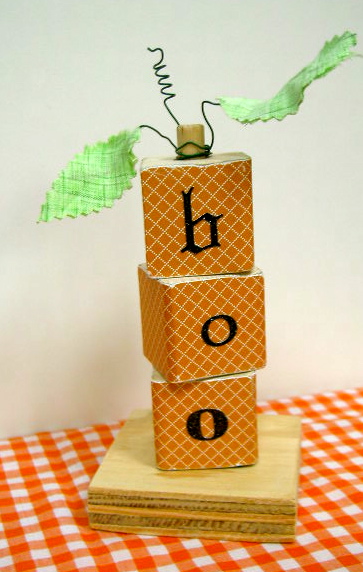
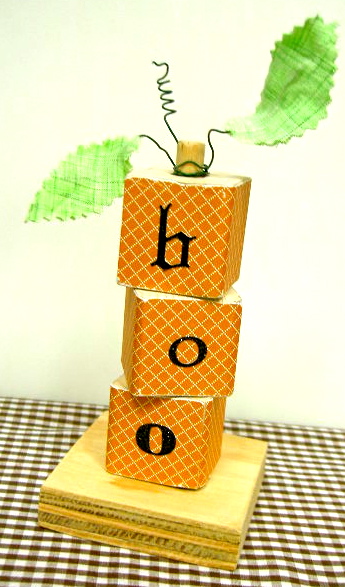
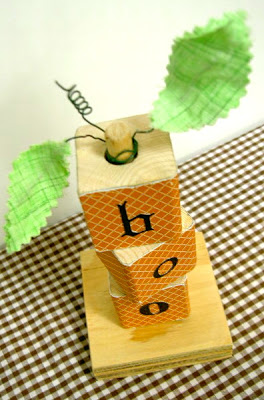
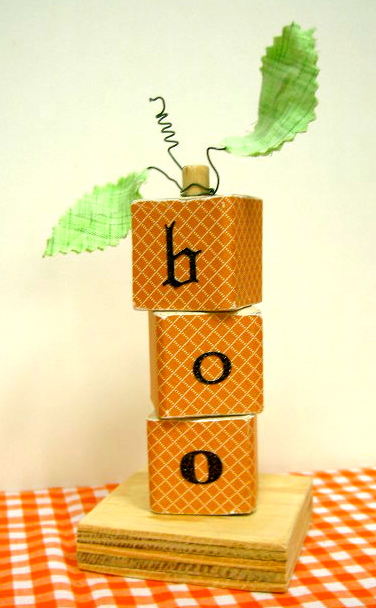
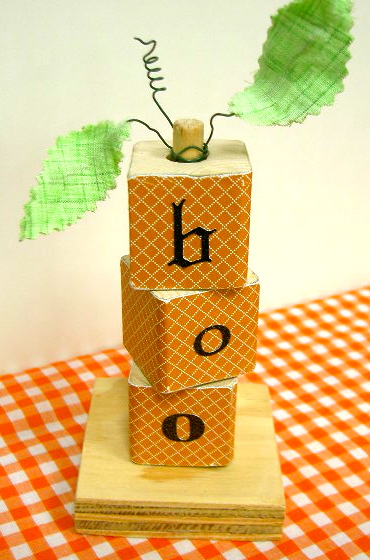
A wood stack pumpkin.

Made from scrap wood pieces stacked on a dowel.

 Add some ‘boo’ stickers just for fun.

Here’s how I made the pumpkin stack:
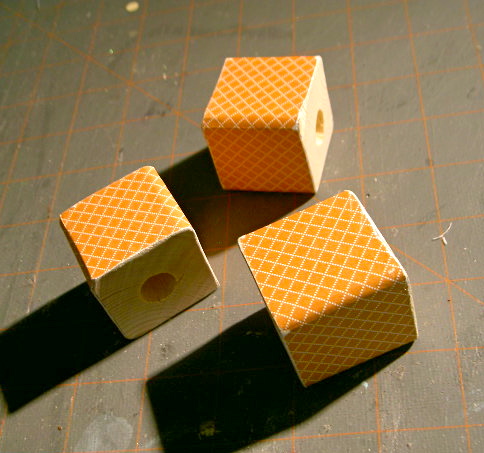
1. Cut wood pieces:
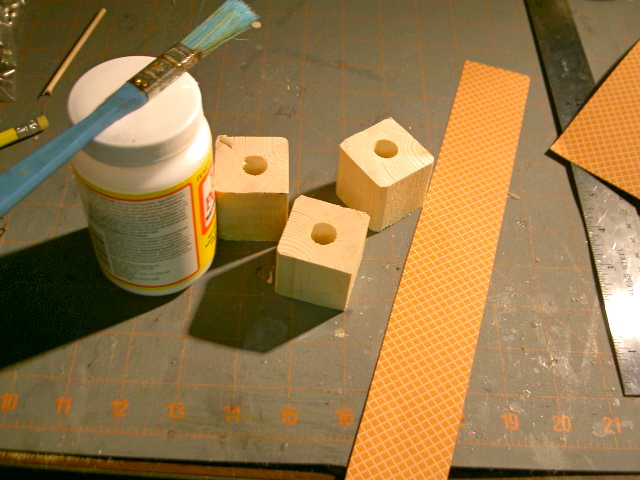
3 – 2×2 furring strips cut @ 1.5″
1 – 3/4″ plywood scrap (3″ x 3″)
1 – 3/8″ dowel cut @ 5″

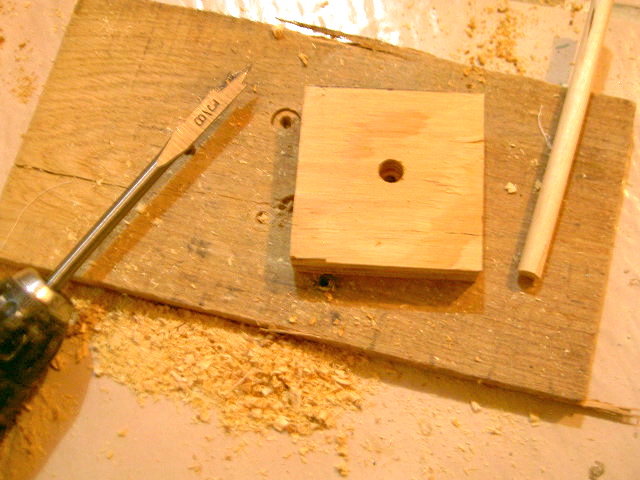
2. Drill a hole down the center of each square piece.
Use 1/2″ spade bit:
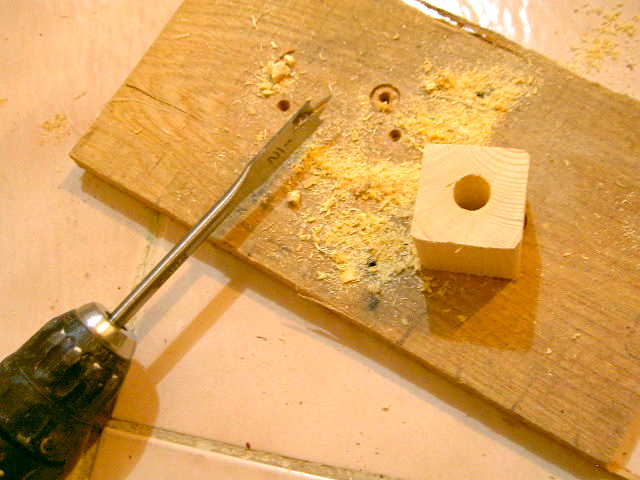
3. Drill hole into base piece, just until tip of bit pokes through.
Use 3/8″ spade bit:
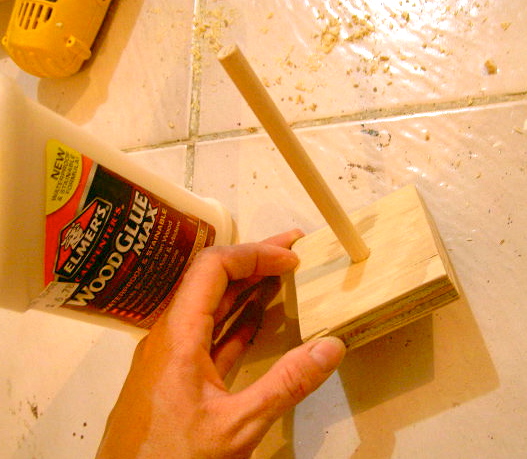
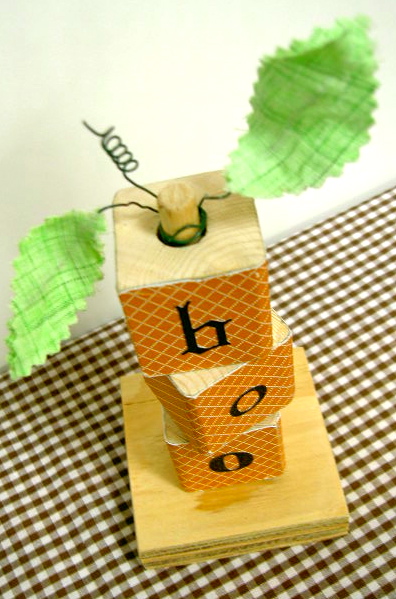
 4. Glue dowel into hole:
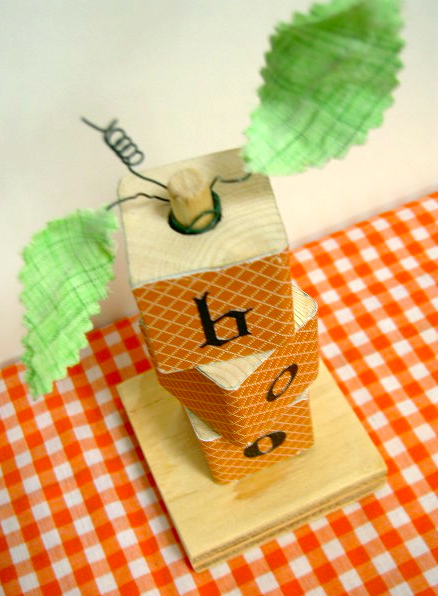
6. Apply decorative paper to blocks using mod podge:
7. Start paper at one edge and wrap around block:
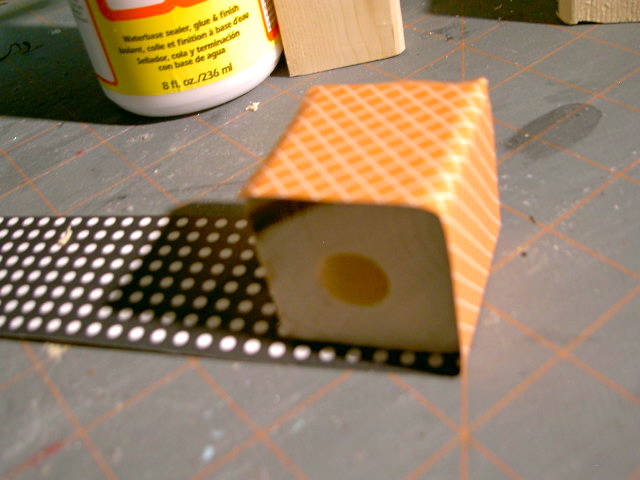
8. Trim excess tail piece and let dry:
9. Remove excess from edges using sandpaper:
10. To make leaves sandwich two fabric pieces around floral wire with hot glue:
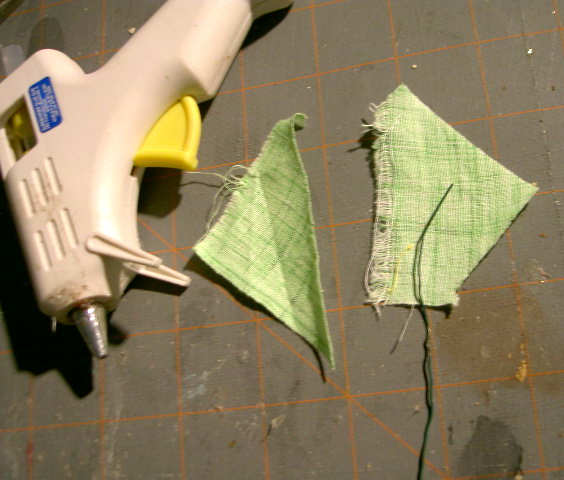
11. Cut into leaf shape with pinking shears:
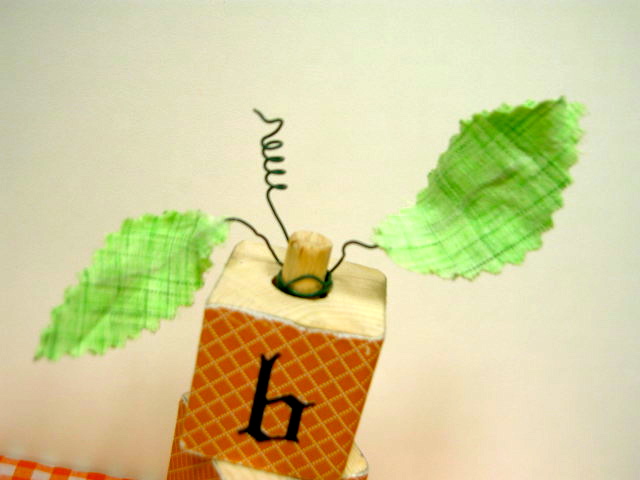
12. Stack blocks onto dowel, add stickers, twist wire leaf piece around top.
Add one long wire piece and twist end into coil.
This is the adult version of a kids craft coming soon.

Easy, fast and inexpensive.

I’m linking up to:

Whatcha Got Weekend @ Lolly Jane
SAS @ Funky Junk
Weekend Wrap Up @ Tatertots & Jello
Sundae Scoop @ I Heart Naptime
Sister Sunday @ Sisters of the Wild West
Sunday Showcase Party @ Under the Table & Dreaming
Just Something I Whipped Up @ The Girl Creative
DIY Fall Festival @ The DIY Showoff
Made by You Mondays @ Skip to My Lou
Making the World Cuter @ Making the World Cuter
Nifty Thrifty @ Coastal Charm
Tuesday Treasures @ My Uncommon Slice of Suburbia
Tutorials & Tips Tuesday @ Home Stories A to Z
Good Life @ A Beach Cottage
Delightfully Inspiring @ Delightful Order
Transformation Thursday @ The Shabby Creek Cottage
Strut Your Stuff @ Somewhat Simple
Share Awesomeness Thur @ The 36th Avenue
Flaunt it Friday @ Chic on a Shoestring
Tickled Pink @ 504 Main
Frugal Friday @ The Shabby Nest
SAS @ Just a Girl
Feathered Nest @ French Country Cottage
Remodelaholics Anonymous @ Remodelaholic
inspiration board @ Carolyns Homework
Wow us Wednesdays @ Savvy Southern Style
Weekly Challenge @ The CSI Project

You may also like...

  • “S” is for Spiders“S” is for Spiders
  • DIY Easter Goody BagsDIY Easter Goody Bags
  • “O” is for Orange“O” is for Orange
  • “A” is for Alphabet Blocks“A” is for Alphabet Blocks
Share this post:

Filed Under: CRAFTS, DIY, FALL, HALLOWEEN, SCRAP WOOD, SEASONAL16 Comments

Reader Interactions

Comments

  1. Geneva says

    October 13, 2011 at 2:50 PM

    So simple…so sweet! You always inspire!

    Reply
  2. Brooke says

    October 14, 2011 at 3:11 AM

    I love this. A cute, easy way to make some pretty awesome decor!

    Reply
  3. J's mom says

    October 14, 2011 at 5:37 PM

    I would love it if you would link this to my link party. It just started πŸ™‚
    http://diycraftstomake.blogspot.com/2011/10/whacha-got-weekly-linky-party.html

    Reply
  4. The Rosegarden in Malevik says

    October 15, 2011 at 9:59 AM

    Lovley job you have done πŸ™‚
    and do not miss…..

    S
    A
    T
    U
    R
    D
    A
    Y

    S
    H
    O
    W

    O
    F
    F

    WELCOME πŸ™‚
    HΓ₯kan ( The Roseman)

    Reply
  5. [email protected] says

    October 15, 2011 at 11:46 AM

    This is very cute and simple. It would be a great teacher's gift as it would fit neatly on the desk without taking up much room. Came over from Lolly Jane.

    Reply
  6. Kassandra @ Coffee and their Kisses says

    October 15, 2011 at 8:20 PM

    How cute! I love it! I hope you'll link up on my new linky party here, http://www.coffeeandtheirkisses.com/2011/10/stitch-n-niche-saturdays-3.html.

    Reply
  7. Sawdust and Paperscraps says

    October 17, 2011 at 3:53 AM

    Super cute J!

    Reply
  8. Jenny @ Simcoe Street says

    October 17, 2011 at 10:02 AM

    Super cute!!

    Jenny
    http://www.simcoestreet.blogspot.com

    Reply
  9. Leigh says

    October 18, 2011 at 12:09 PM

    This is the perfect thing to do with those wood blocks laying around! I love the leaves and curled wire at the top too. Great project. πŸ™‚

    -Leigh
    http://fun-to-funky.blogspot.com/

    Reply
  10. hilary @ oldhouse.truelove. says

    October 18, 2011 at 2:19 PM

    so darn cute!

    Reply
  11. Okio B Designs says

    October 19, 2011 at 12:58 PM

    Cute, cute, cute!

    Jeanine

    Reply
  12. Courtney ~ French Country Cottage says

    October 19, 2011 at 4:04 PM

    So darling- thanks for linking up at Feathered Nest Friday!

    Reply
  13. Lisa - A Room with A View says

    October 19, 2011 at 8:17 PM

    This is cute..I like the pattern and the final touch with the leaves.

    Reply
  14. Cori says

    October 20, 2011 at 11:16 AM

    Oh good Lord this is adorable! I'm your newest follower from http://www.createdbycori.blogspot.com

    Reply
  15. Angela @ The Not So Functional Housewife says

    October 21, 2011 at 1:41 PM

    Adorable! Thanks for posting a tutorial!

    I would love for you to stop by and link up your project for Functional Friday!

    ~Angela
    The Not So Functional Housewife

    Reply
  16. WhisperWood Cottage says

    July 16, 2012 at 3:31 PM

    Thanks for linking up to The Talent Scouting Party at WhisperWood Cottage, Jaime! Another creative project!

    P.S. When you get the button added, shoot me a quick email and I'll get it up on the party! πŸ™‚

    Reply

Leave a Reply Cancel reply

Your email address will not be published. Required fields are marked *

Primary Sidebar

Hi! I’m Jaime

Jaime Costiglio

Hello!

Thank you for stopping by.
Join me for lots of DIY.

Read more

Get new posts via email

The Home Depot Tool Prospective

THD Prospective

Tools to consider for the DIYer.

Handbuilt Holiday: Gift Project Plans

handbuilt holiday gift project plans

Collection of DIY gift project plans to build.

Archives

The Home Depot Logo
Copyright © 2019 Jaime Costiglio · Custom site by Moonsteam Design

Copyright © 2019 Β· 'Jaime Costiglio Custom Theme by Moonsteam Design on Genesis Framework Β· WordPress Β· Log in