• Home
  • Blog
  • About
  • Contact
    • Disclosure
    • Privacy Policy
  • SHOP
  • Widget area for main menu

    • Email
    • Facebook
    • Instagram
    • Pinterest
    • Twitter
    • YouTube
  • Skip to primary navigation
  • Skip to main content
  • Skip to primary sidebar

Jaime Costiglio

build - paint - sew

  • BUILD
    • BEDS
    • BENCHES
    • DESKS
    • DRESSERS
    • GAMES & TOYS
    • SCRAP WOOD
    • SHELVES
    • STORAGE
    • TABLES
  • TOOLS
  • PAINT
    • CRAFTS
    • FURNITURE
    • HOME DECOR
  • SEW
    • GIFTS
    • HOME DECOR
    • POUCHES
  • HANDBUILT HOLIDAY
    • 2021
    • 2019
    • 2018
    • 2017
    • 2016
    • 2015
    • 2014
    • 2013
  • GIFTS
    • BABIES
    • KIDS
    • FOR HER
    • FOR HIM
    • TEACHERS
    • WEDDINGS
  • SEASONAL
    • 4TH OF JULY
    • FALL
    • HALLOWEEN
    • CHRISTMAS
    • SUMMER
    • SPRING
    • ST. PATRICK’S DAY
    • THANKSGIVING
    • VALENTINE’S DAY
    • WINTER
  • SALTBOX PROJECT
    • BATHROOMS
    • DINING ROOM
    • EXTERIOR
    • FAMILY ROOM
    • FOYER / MUDROOM
    • KIDS BEDROOMS
    • KITCHEN
    • LIVING ROOM
    • MASTER BEDROOM
    • PLAYROOM
  • SCROLL SAW

How to Install a Shelf in the Eaves

February 26, 2014

diy shelf in the eaves
How to install a shelf in the eaves.  Lots of homes have eaves in the upstairs rooms, a necessary but difficult-to-work-with architectural detail.  Some homes even have eaves with windows, like mine.
Now you have a space with a slanted, low ceiling AND windows.
Good luck finding a piece of furniture to work there!
shelf in the eaves

I came up with an inexpensive solution to making those eaves work in my son’s bedroom.
A diy wall ledge installed just above the window moulding.
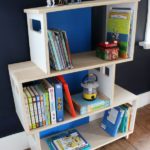
Now we have almost 14 feet of shelf space to hold tons and tons of lego builds, superheros, model boats, trucks and books:

ledge in the eaves
For this shelf I used two pieces of 1×10 pine board, the shelf extends 9 1/4″ from the wall.
shelf for toys in the eaves

diy shelf over windows
display shelf over windows
We moved in 9 months ago and this room had mini blinds on all the windows.
low window before
low window after with shutters and shelf
I ordered faux wood shutters for the eave windows, they were so easy to install and make a huge difference not only with the look of the room but functionally.
wood knobs versus plastic knobs
I choose not to use the tiny plastic knobs that came in the packaging and instead repurposed some wood knobs I found in my stash.

wood knobs on white shutters
side profile of shelf 
Because I installed the shelf brackets flush to the window moulding this prevents the shutters from opening entirely.
Even with the shutters open they don’t protrude beyond the shelf ledge so it all works. 
shutters open under shelf bracket
shelf brackets above shutters
To keep it real this is how my son’s room looked before I started the whole process:
boys bedroom before
And now he has a new pipe bed, no more wallpaper, and a great shelf in the eaves to hold all his cherished things.
boys bedroom after
How to build a shelf in the eaves:

1. Determine length of shelf and purchase 1×10 #2 pine board.
(My shelf is just under 14′ long so I purchased a 1x10x8′ and a 1x10x6′ placing the seam directly over a support.)
2. Purchase enough Ikea Ekby Stilig support brackets for your length of shelving.
(I used 6 brackets for almost 14′ of shelving, probably overkill but good for the layout.)
3. I choose to trim down the brackets both on the wall portion and the shelf portion.
ikea ekby stilig shelf support brackets
4. Mark the wall where the screws will go.
Predrill holes, add mollies (depending on your wall material – mine are plaster), insert screw into top hole:

how to install shelf support brackets
5.  Attach bracket to top screw by hooking then add bottom screw into through predrilled hole in bracket:

installing shelf support brackets
6. Using a level install the remaining brackets:

shelf support brackets installed
7. Prime and paint the pine boards.
Do a dry fit, cut boards if necessary to make the seam fall over a bracket:
installing a long shelf over brackets
8. Attach the boards to the brackets up through predrilled hole in bracket:
attach shelf to brackets

You may also like...

  • Small Master Bathroom RenovationSmall Master Bathroom Renovation
  • DIY Modern BookshelfDIY Modern Bookshelf
  • DIY BookrackDIY Bookrack
  • DIY Simple Personalized PillowsDIY Simple Personalized Pillows
Share this post:

Filed Under: BUILD, DIY, KIDS BEDROOMS, ORGANIZATION, SALTBOX PROJECT, SHELVES5 Comments

Reader Interactions

Comments

  1. Korrie@RedHenHome says

    February 26, 2014 at 2:56 PM

    Great solution! I love how the shelf is perfect kid-height.

    Reply
  2. Cassie @ Primitive & Proper says

    February 26, 2014 at 3:56 PM

    that is the perfect solution! why do kids have to come with so much stuff!

    Reply
  3. Inspire Me Heather says

    February 26, 2014 at 4:14 PM

    Great idea and they look good too!!

    Reply
  4. Vickie @ Ranger 911 says

    February 27, 2014 at 1:16 AM

    What a fun room you've created for your son! I love the little windows in the eaves and the shelf and shutters you installed.

    Reply
  5. Maureen Wyatt says

    February 27, 2014 at 7:34 AM

    This is a great idea. I just installed a shelf over the window in my bedroom. Because of sloped ceilings, I don't have a lot of usable wall space and it helps to go vertical for display space.

    Reply

Leave a Reply Cancel reply

Your email address will not be published. Required fields are marked *

Primary Sidebar

Hi! I’m Jaime

Jaime Costiglio

Hello!

Thank you for stopping by.
Join me for lots of DIY.

Read more

Get new posts via email

Handbuilt Holiday: Gift Project Plans

handbuilt holiday gift project plans

Collection of DIY gift project plans to build.

The Home Depot Tool Prospective

THD Prospective

Tools to consider for the DIYer.

Archives

The Home Depot Logo
Copyright © 2026 Jaime Costiglio · Custom site by Moonsteam Design

Privacy Policy