This post about painting tile floors is sponsored by Rust-Oleum®.
So you have tile floors and let’s just say you’re not in love with the color or pattern. Whatever the case may be I’m going to show you how to paint those tile floors. I painted the tile floors in my laundry room and the results are amazing. And as a special bonus I opted to not paint the grout and I will show your my tricks!

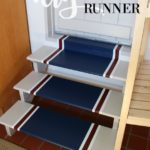
A DIY tutorial to paint your tile floors while not painting the grout. Update your tile with paint and my trick to avoid painting the grout.
At first glance you might think these navy tiles in my laundry room are originally navy with light grey grout. Truth be told that is actually Rust-Oleum® HOME Floor Coating in Navy with Matte Top Coat.

Tile Floors Before:
And here’s the before photo of my orange laundry room tiles as proof:

Painted Tile Floors After:
It’s truly magical and looks brand new. When you consider the alternatives (jack hammering up the tile or placing another floor on top) I’m just amazed at the outcome and extremely pleased with these painted tiles.


The success of this project boils down to the products (and a little good old elbow grease mixed with DIY spirit). I used Rust-Oleum® HOME Floor Coating which is made to be durable, scratch and stain resistant. And they now have over 30 beautiful colors to choose from spanning from white / light tints to black / dark tints. You can see all the color options here.

Floor Coating:
- transform your floor without replacing it
- works on tile, wood, laminate, concrete, vinyl, linoleum and more
- simple two step process
- walkable in 24 hours (full cure in 7 days)

Rust-Oleum® HOME Floor Coating has lots of options for all different spaces. The all-in-one kit comes in a box with everything you need to transform your floors. Above you will see the new dark tint color options including Navy, the color I used on my tile floor. They also have 19 light tint options as well. Once you decide your base coat color (or Colors if you’re doing a stencil) then you need to decide between matte or semi-gloss for the Top Coat. I used matte on my laundry room floors.
Floor Coating Kit Contents:
- 1 quart base coat tint base
- 1 quart top coat
- 4 oz. cleaner
And while the kits are quart size, which is perfect for a bathroom, entry or small space less than 100 square feet for one coat coverage, they also have gallons available.
For reference my laundry room measures 150 square feet and I applied two coats of base coat using about 1.5 quarts.

Let’s get another look at the original orange tile we started with in the laundry room. To be honest it was in fine condition, just a little bit dirty but otherwise the only issue was the color. It made me feel like I was in a commercial grade kitchen every time I stepped foot in there and I want my laundry room to be a little more charming and inviting.

Painting Supplies:
- Rust-Oleum® HOME Floor Coating base coat in color navy
- Rust-Oleum® HOME Floor Coating top coat in matte
- 6″ foam roller
- 6″ paint roller handle
- plastic paint tray
- 3/8″ painters tape
- Krud Kutter cleaner and degreaser
- old toothbrush
- Dremel versa or similar scrubbing action brush


Okay enough beauty shots let’s get to work!
Painting Tile Floors Instructions:
First and most important we must clean the floor entirely.


Step 1:
Spray down the floor using Krud Kutter cleaner and degreaser. Let it soak for a few minutes to penetrate the grime. Then scrub the grout using an old toothbrush.

After the grout is cleaned then use a Dremel versa or other scrubbing type cleaner to really clean the surface of the tiles. Lastly wipe away the dirty suds with a sponge. I highly suggest working in sections to keep it manageable and so you know exactly where you have cleaned and where you haven’t.
My laundry room floors were extremely dirty so it was very obvious which sections I had completed and which ones I had not tackled yet. You cannot skip this step, it prepares the tile for paint and also gets the grout looking brand new!


Step 2:
Because I chose to not paint the grout I needed to mask it using painters tape of the same thickness. Measure the width of your grout lines and use the same width painters tape. Again work in sections and press the tape down into the grout lines.

Step 3**:
In order to seal the tape edge and hopefully prevent bleeding I chose to use a swipe of the clear top coat on top of the painters tape. I suggest doing a quick press of the tape with your finger and then apply the top coat. **Please note this method is not recommended by Rust-Oleum.**
As per Rust-Oleum: base coat should always be first the first coat on the tile. It is important not to get the top coat directly on the tile because the base coat won’t adhere properly and could cause failure in those areas.

So far I have not had any issues with peeling or adhesion whatsoever. Once the top coat is dry you can see how it really helps to seal the tape edges. I cannot guarantee you won’t have any bleeding but this drastically helps to prevent any paint seeping under the tape.

Step 4:
Using a 6″ foam roller apply a thin even coat of the base coat. Again work in sections and try to keep the paint as even as possible.

After the first coat you will know right away whether or not you need a second coat. It will all depend on your existing floor color and the new paint color going on top.

Step 5:
Let the first coat dry for 6 hours and then apply the second coat. Use the same method of working in sections.

Now you can see with the second coat I have complete coverage and there is no orange poking through anywhere. Let this second coat dry, it really only needs about 1-2 hours.

Step 6:
To seal the paint we will apply the top coat. The process is the same using a foam roller and working in sections. You can see the matte top coat goes on wet and shiny but dries to a nice matte finish.
Let the top coat dry for 24 hours and then you can pull off the tape. Hopefully most of your painted tile floor looks like this:

But if you do get some bleeding I have a remedy for the situation. You can see below circled in yellow there is a bit of paint in the grout and I want to remove the paint:

Using a Dremel stylo fitted with a grinding stone bit you can easily grind off the excess paint. It will leave that area of grout a teeny bit lighter but once you apply the second coat of top coat over the entire floor that will even out the grout again.

Step 7:
Once the tape is off and any paint bleeds are removed I highly suggest another coat of clear top coat to seal the painted floor and grout.
And since this is our laundry room with high traffic I actually did 3 coats of top coat. After 2 weeks of heavy use as I continue renovate this space I can attest it has held up wonderfully.
Thanks for joining me for this painted tile floors project. Please leave any questions in the comments below and be sure to follow me on social media for sneak peeks, tools and project inspiration:
Instagram / Pinterest / Facebook / Youtube / Twitter
SHOP THIS PROJECT:


Beautiful Jaime! It really looks amazing.
Thanks Lisa, it’s 1000 times better than the orange :). On to the rest of the room now.
Looks great! Thanks for the product info. =)
So no need to sand and then prime the tile before you put the paint on ?
Hi Noemi, it depends on your existing tile. I did not need to sand my tile and this product doesn’t require a primer. But you should do a test tile before doing the whole floor. As per Rustoleum: “All flooring should be tested for adhesion before coating the entire floor. Clean a small 3”x3”, inconspicuous area, let dry. Apply base coat over area and allow to dry for 12 hours. Take a utility knife and make an X in the coating down to the flooring. Apply a 4” piece of duct tape over the X and press firmly. Remove the tape with one quick pull. If more than 10% of the coating comes off, the floor will need to be sanded with 60-80 grit sand paper before coating the entire floor.”
Could you do this w/ rounded pavers too?
Hi Terri, I would say yes. I don’t see why not. Be sure to follow the testing instructions regarding sanding or not. Good luck!
I haven’t thought something like this but what you did Jaime is just amazing. The transformation is gorgeous btw.
Thanks Mark, sure beats jackhammering up the old tile! It’s been a few months now and the paint is holding up great with no problems. I would definitely do this again.
The floor looks great
Hello, what if the tile is small and grout is small also if you paint everything would it look ok?
Hi Brenda, it’s completely a personal preference but yes you can paint both the tile and grout if you want.
Would this work in a shower?
Hi Maria, I can’t say for certain but I probably wouldn’t recommend using it in a ‘wet area’ that’s consistently exposed to water. They do make a product for tubs & tile: https://www.rustoleum.com/product-catalog/consumer-brands/specialty/tub-and-tile-refinishing-kit/ that is probably more appropriate given the environment.
I see you taped the edge, but how did you paint under the washer/dryer?
Hi Alyssa, I didn’t paint under the washer/dryer mostly because they will be moving forward about 5″ so I’m not concerned about anyone every seeing the tile under there. But if you need to paint under there I would do it first (pulling out the machines) and then slide them back into position and paint the remainder of the floor.
Based on your experience with the top coat, do you think the “step 2” top coat could be used over non Rust-Oleum paint (I know the company does not recommend this)? Rust-Oleum does not have the color’s I need to do my tile, so I will need to use a different kind of paint for my base coat(s) and was hoping to use the Rust-Oleum top coat as that seems to have the best overall reviews.
Hi Kerstin, Yes you could definitely use the top coat over other paints. I would do a test sample as it may make your paint color darker or lighter. It’s been really wonderful in our laundry room, no complaints here!
Hi Jaime,
I have a question about how you sealed the edges of the tape you placed over the grout lines to help prevent the paint bleeding into the grout.
In your post you stated you don’t want the top coat to come into contact with the tile before you apply the base coat because you will experience issues with getting the base coat to adhere to the surface.
It does, however, appear that you did, purposely, get some of the top coat on the perimeter tile surfaces so that you could seal the edges of the tape.
If that is the case, then how were you then able to get the base coat to stick to the perimeters of the tiles?
I just want to make sure I do this properly. Any additional advice you can provide is greatly appreciated.
Chris
Hi Chris, I added some video update (one year later) on my IG highlights here (towards the end of the highlight): https://www.instagram.com/stories/highlights/17874423325647599/
Basically the manufacturer suggests ‘not to have top coat come into contact with the tile’ but I choose to seal the tape that way. The base coat still stuck just fine and if you watch the video you will see one year later after regular laundry room traffic there are virtually no issues. Hope that helps.
You give such clear, concise and practical directions and advice. Thank you.