• Home
  • Blog
  • About
  • Contact
    • Disclosure
    • Privacy Policy
  • SHOP
  • Widget area for main menu

    • Email
    • Facebook
    • Instagram
    • Pinterest
    • Twitter
    • YouTube
  • Skip to primary navigation
  • Skip to main content
  • Skip to primary sidebar

Jaime Costiglio

build - paint - sew

  • BUILD
    • BEDS
    • BENCHES
    • DESKS
    • DRESSERS
    • GAMES & TOYS
    • SCRAP WOOD
    • SHELVES
    • STORAGE
    • TABLES
  • TOOLS
  • PAINT
    • CRAFTS
    • FURNITURE
    • HOME DECOR
  • SEW
    • GIFTS
    • HOME DECOR
    • POUCHES
  • HANDBUILT HOLIDAY
    • 2021
    • 2019
    • 2018
    • 2017
    • 2016
    • 2015
    • 2014
    • 2013
  • GIFTS
    • BABIES
    • KIDS
    • FOR HER
    • FOR HIM
    • TEACHERS
    • WEDDINGS
  • SEASONAL
    • 4TH OF JULY
    • FALL
    • HALLOWEEN
    • CHRISTMAS
    • SUMMER
    • SPRING
    • ST. PATRICK’S DAY
    • THANKSGIVING
    • VALENTINE’S DAY
    • WINTER
  • SALTBOX PROJECT
    • BATHROOMS
    • DINING ROOM
    • EXTERIOR
    • FAMILY ROOM
    • FOYER / MUDROOM
    • KIDS BEDROOMS
    • KITCHEN
    • LIVING ROOM
    • MASTER BEDROOM
    • PLAYROOM
  • SCROLL SAW

“P” is for Playing Card Holder

September 26, 2014

Build: DIY wood playing card holder
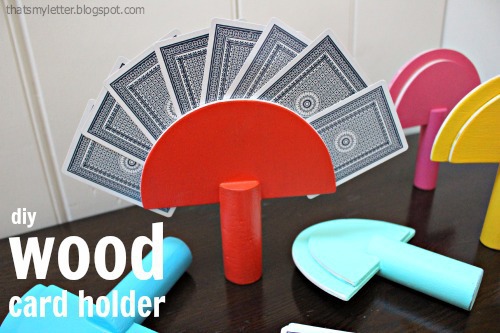
Make this fun playing card holder using wood scraps and your kids will thank you.
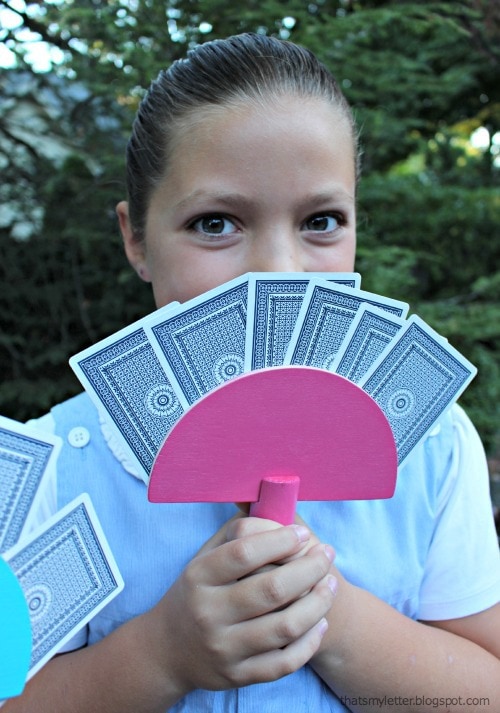
My kids love playing card games but have trouble holding a bunch of cards all at once.  And then they bunch up their cards and they can’t see what cards they have.  Ahh the frustration!

Here’s a cute and functional solution you can make yourself out of wood scraps:
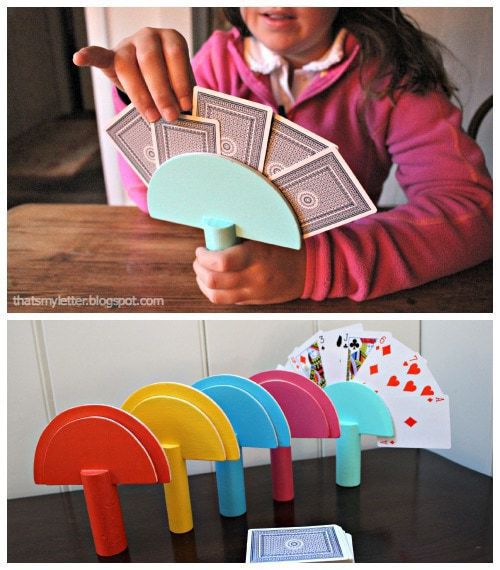
And paint it any color you like.  Perhaps even add a name or monogram on the back?
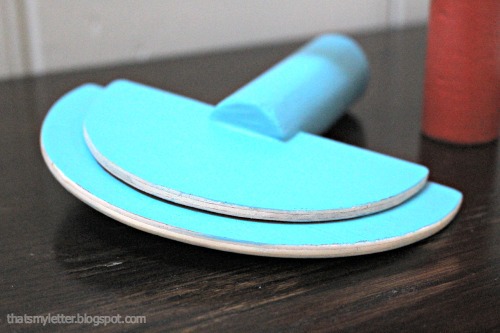
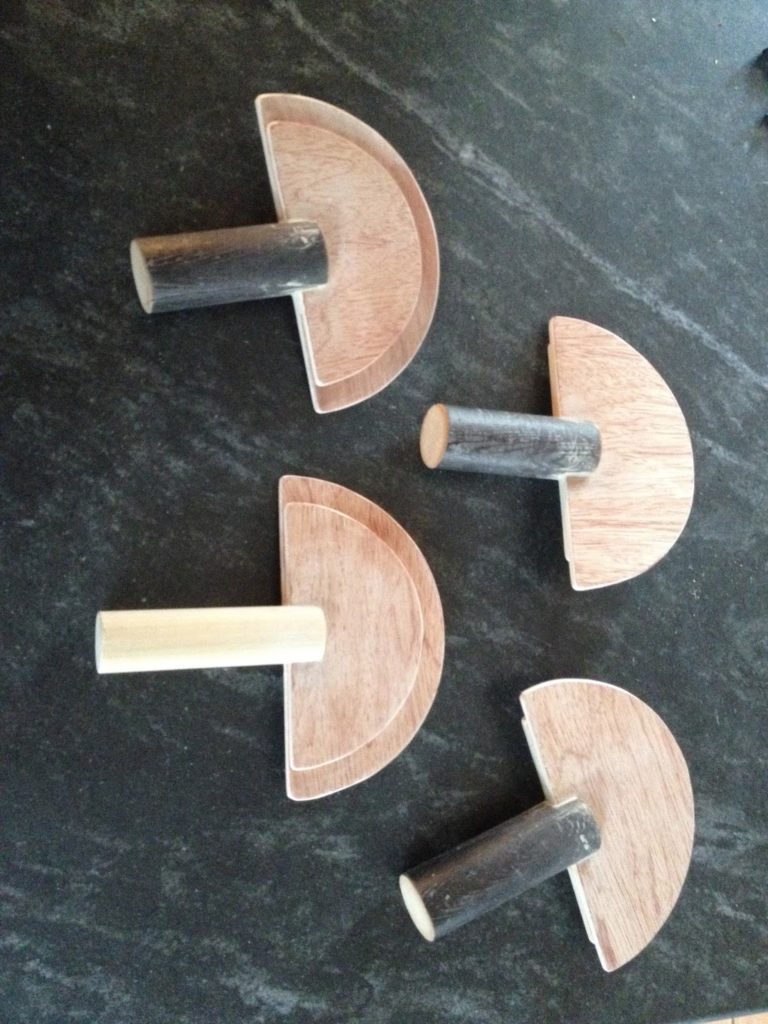
Two pieces of 1/4″ plywood together make a snug spot to hold to hold the cards.  I purposely did not paint the curved edges of the plywood in order for the kids to see the slot more clearly.

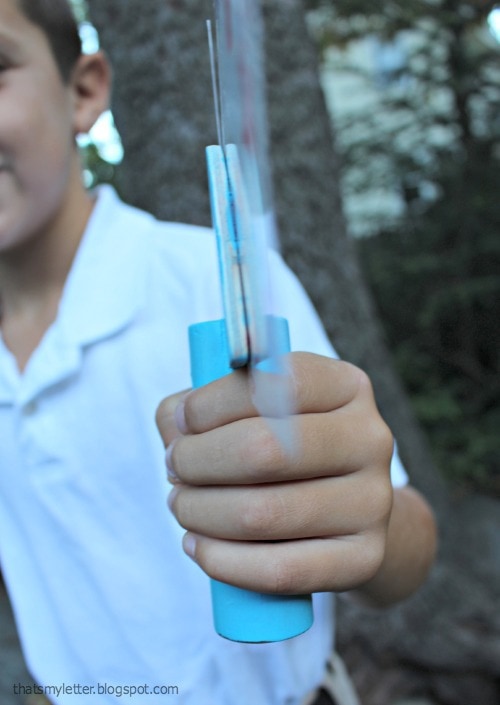
And the 1″ dowel makes the perfect handle for little hands.
How to make a wood playing card holder:

Supplies:
– 1/4″ plywood scraps
– 1″ dowel @ 4″l
– jigsaw
– sandpaper
– wood glue
– nailer
– wood putty
– paint

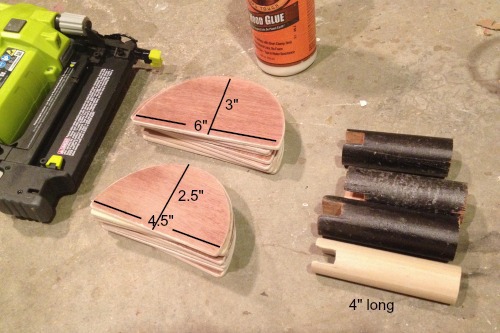
Step 1: Cut 1 large half moon shape at 6″w x 3″h and 1 medium half moon shape at 4.5″w x 2.5″h out of 1/4″ plywood for each holder.

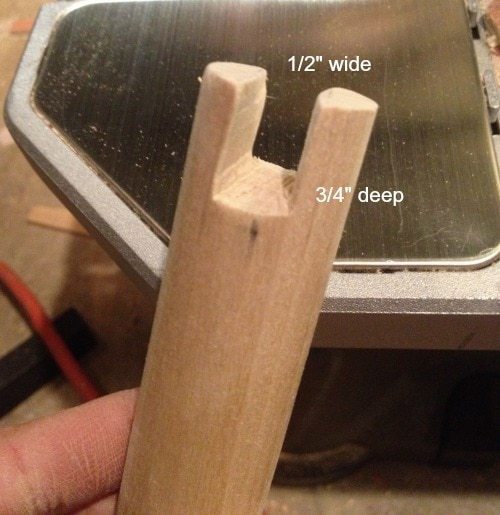
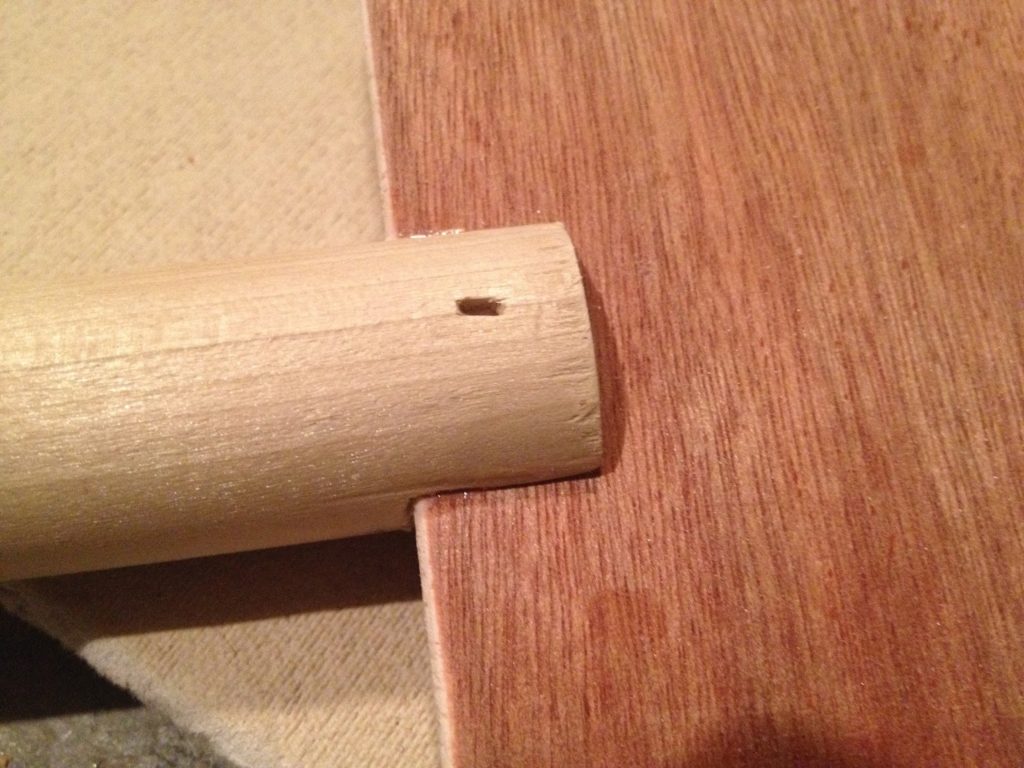
Step 2: Make a 1/2″ wide notch in one end of the dowel.
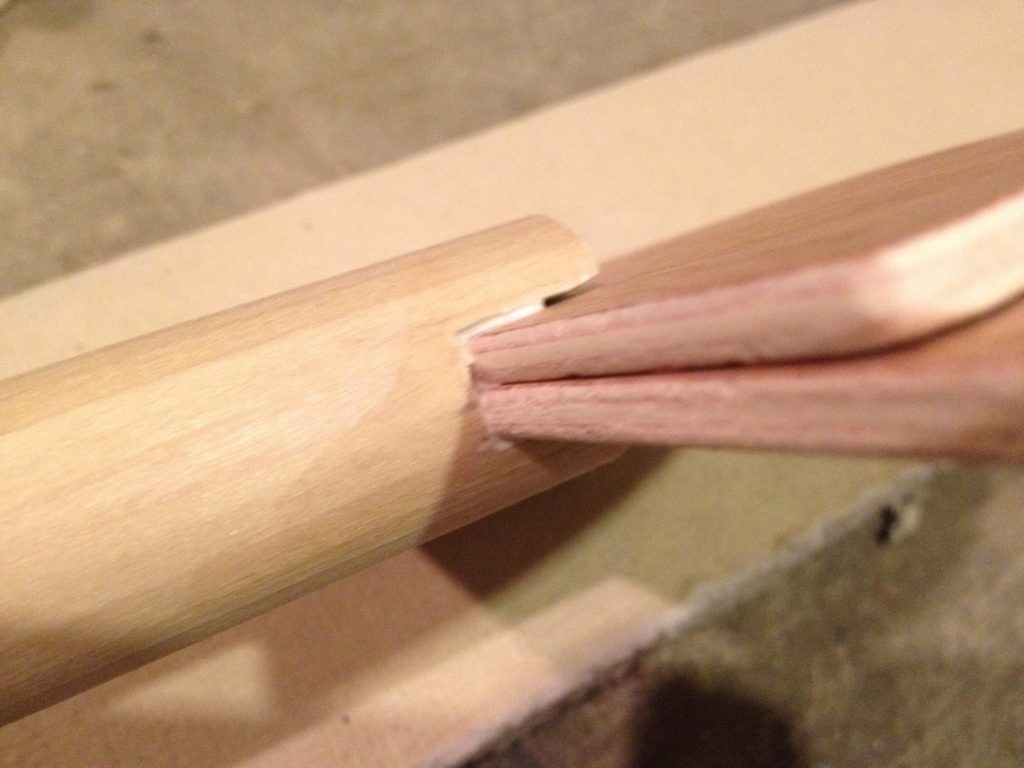
Step 3: Apply glue in the notched area and slip in plywood half moon shapes.
Step 4: Secure with a 3/4″ finish nail from both front and back.
Step 5: Apply wood putty as needed and sand.
Paint your favorite colors.
I’m linking up to:
Sand and Sisal
The 36th Avenue


Creative Collection @ Lolly Jane
Nifty Thrity Sunday @ Nifty Thrifty Things
Inspiration Exchange @ City Farmhouse
SAS @ Funky Junk
That DIY Party @ The DIY Showoff
Tutorials & Tips Tuesday @ Home Stories A to Z
Share Awesomeness Thur @ The 36th Avenue
Pretty Things Thursday @ Scissors & Spatulas
Flaunt it Friday @ Chic on a Shoestring
Frugal Friday @ The Shabby Nest
Furniture Feature Friday @ Miss Mustard Seed
SAS @ Just a Girl
Remodelaholics Anonymous @ Remodelaholic
inspiration board @ Carolyns Homework
Sunday Showcase Party @ Under the Table & Dreaming

You may also like...

  • Cross Stitch Monogram Ornament PlacecardCross Stitch Monogram Ornament Placecard
  • DIY Charcuterie BoardDIY Charcuterie Board
  • DIY Kids Play BarnDIY Kids Play Barn
  • DIY 18″ Doll Trundle BedDIY 18″ Doll Trundle Bed
Share this post:

Filed Under: BUILD, CRAFTS, DIY, GAMES & TOYS, ORGANIZATION, PAINT, SCRAP WOOD2 Comments

Reader Interactions

Comments

  1. Our Pinteresting Family says

    September 26, 2014 at 1:39 PM

    Such a cute idea. I love the colors of them too.

    Reply
  2. Debbie - Painted Therapy says

    September 27, 2014 at 11:44 AM

    You are BRILLIANT, as always!!

    Reply

Leave a Reply Cancel reply

Your email address will not be published. Required fields are marked *

Primary Sidebar

Hi! I’m Jaime

Jaime Costiglio

Hello!

Thank you for stopping by.
Join me for lots of DIY.

Read more

Get new posts via email

Handbuilt Holiday: Gift Project Plans

handbuilt holiday gift project plans

Collection of DIY gift project plans to build.

The Home Depot Tool Prospective

THD Prospective

Tools to consider for the DIYer.

Archives

The Home Depot Logo
Copyright © 2026 Jaime Costiglio · Custom site by Moonsteam Design

Privacy Policy