• Home
  • Blog
  • About
  • Contact
    • Disclosure
    • Privacy Policy
  • SHOP
  • Widget area for main menu

    • Email
    • Facebook
    • Instagram
    • Pinterest
    • Twitter
    • YouTube
  • Skip to primary navigation
  • Skip to main content
  • Skip to primary sidebar

Jaime Costiglio

build - paint - sew

  • BUILD
    • BEDS
    • BENCHES
    • DESKS
    • DRESSERS
    • GAMES & TOYS
    • SCRAP WOOD
    • SHELVES
    • STORAGE
    • TABLES
  • TOOLS
  • PAINT
    • CRAFTS
    • FURNITURE
    • HOME DECOR
  • SEW
    • GIFTS
    • HOME DECOR
    • POUCHES
  • HANDBUILT HOLIDAY
    • 2021
    • 2019
    • 2018
    • 2017
    • 2016
    • 2015
    • 2014
    • 2013
  • GIFTS
    • BABIES
    • KIDS
    • FOR HER
    • FOR HIM
    • TEACHERS
    • WEDDINGS
  • SEASONAL
    • 4TH OF JULY
    • FALL
    • HALLOWEEN
    • CHRISTMAS
    • SUMMER
    • SPRING
    • ST. PATRICK’S DAY
    • THANKSGIVING
    • VALENTINE’S DAY
    • WINTER
  • SALTBOX PROJECT
    • BATHROOMS
    • DINING ROOM
    • EXTERIOR
    • FAMILY ROOM
    • FOYER / MUDROOM
    • KIDS BEDROOMS
    • KITCHEN
    • LIVING ROOM
    • MASTER BEDROOM
    • PLAYROOM
  • SCROLL SAW

DIY Kids Play Stand

November 8, 2013

Build: kids play stand
Looking for the perfect diy gift for a young one this holiday season?  
This is it.
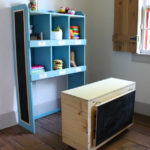
 A play stand you can build with plans from Ana White that is so multifunctional I can’t possibly list all the uses!
It’s week #4 of the handmade holiday series and Ana has come up with plans for the cutest play stand.
This diy play stand can be a market or grocery store:

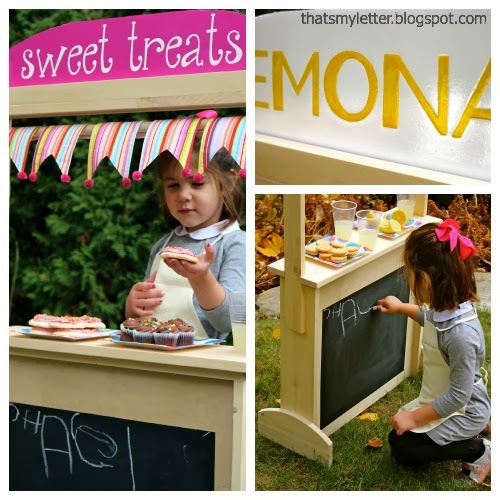
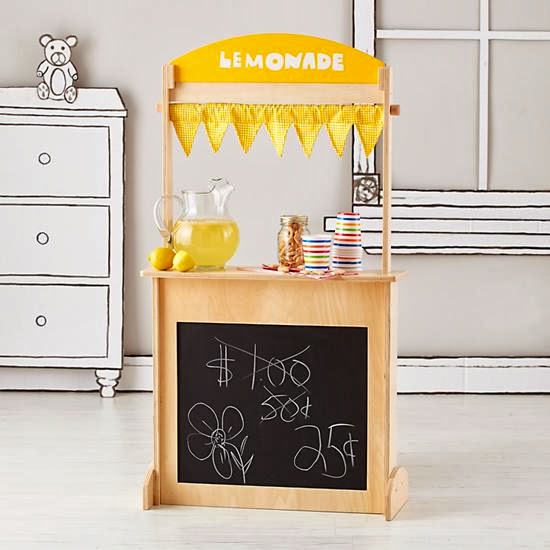
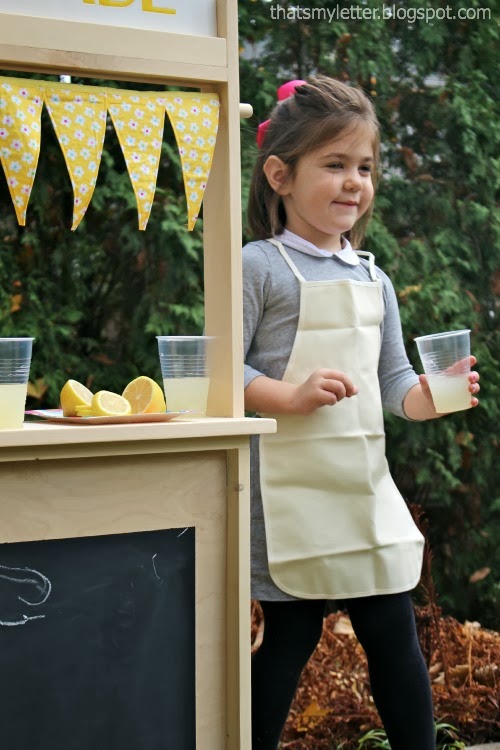
A sweet shop or lemonade stand:

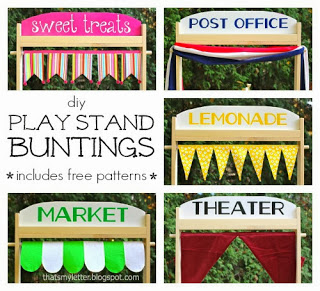
 The buntings are easy to change with velcro and can be made with my free patterns here:

Ana made the plans super easy, it’s a very quick build and sturdy too:

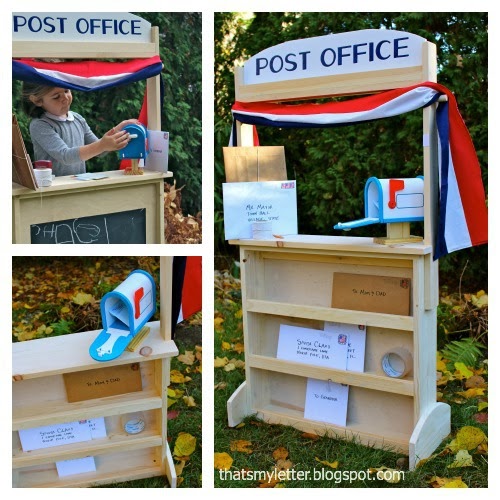
Don’t forget the post office:
And theater:
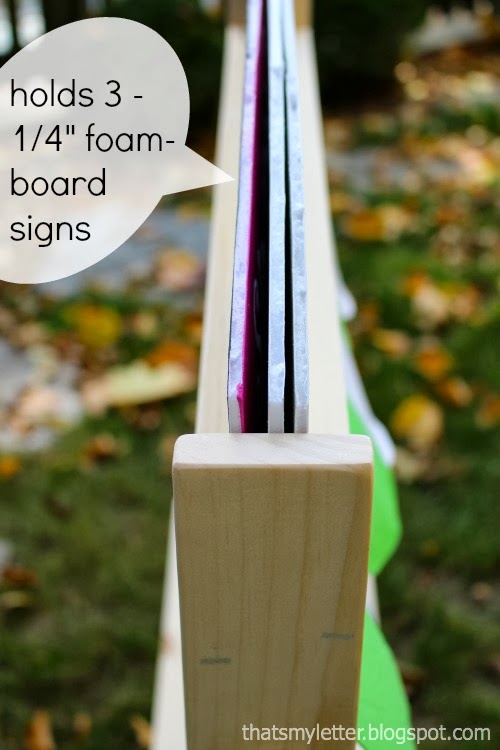
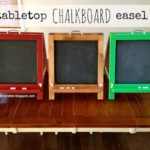
The 1/4″ foamboard signs fit perfectly in the top slot, there’s room for 3 but you could probably fit a 4th in there too:
With 3 signs you can make 6 play stand options:
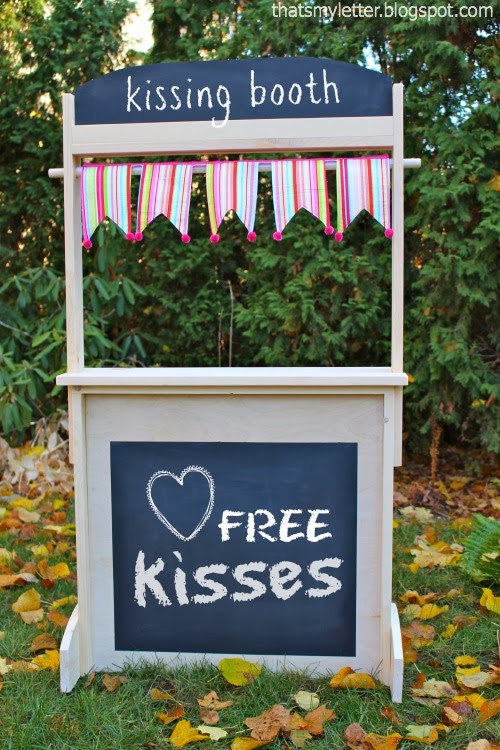
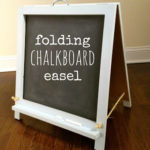
Or use the chalkboard sign and make up your own play stand, the possibilities are endless:
This play stand was inspired by Land of Nod’s What’s That Stand for Stand:
photo source

Our diy version of the play stand costs about $50 in lumber:
(And that’s something to smile about :))

How to build a kids play stand:

1. Use Ana’s plans and cut your lumber.
Assemble.
I added an additional 1×2 @ 24″ flush to top counter surface and inset 1 1/4″ from front:
(This will support the top edge of the 1/4″ plywood front.) 
Follow Ana’s plans for the remainder of the build.
Paint the front portion with 2 coats black chalkboard paint:
2. To make the foamboard signs cut your pieces, trace an arch shape and cut:
3. Print out lettering to fit, I used Oil Can font at 300 point for most of the signs.
Center print out over foamboard and trace letters with ballpoint pen.
The pressure of the pen will leave a slight indent in the foamboard.
Paint on and inside the indent.
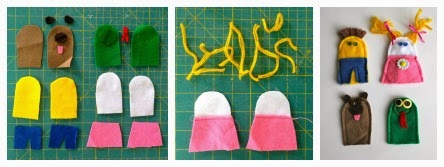
4. The felt puppets are handmade too:
(A good tutorial here.)
I guarantee that little boy or girl on your list will get tons of use out of this play stand.
Check back every Friday for a new handmade hoildays gift build plan.

You may also like...

  • DIY Pretend Play MarketDIY Pretend Play Market
  • DIY Play Table (24″ x 36″) with Storage Bins Free PlansDIY Play Table (24″ x 36″) with Storage Bins Free Plans
  • DIY Tabletop Chalkboard EaselDIY Tabletop Chalkboard Easel
  • DIY Folding Chalkboard EaselDIY Folding Chalkboard Easel
Share this post:

Filed Under: 2013, BUILD, DIY, FURNITURE, GAMES & TOYS, HANDBUILT HOLIDAY, TABLES5 Comments

Reader Interactions

Comments

  1. Cassie @ Primitive & Proper says

    November 8, 2013 at 5:14 PM

    that is awesome! i love how interchangeable it is!

    Reply
    • Mya says

      April 5, 2025 at 9:30 PM

      Slay

      Reply
  2. Korrie@RedHenHome says

    November 8, 2013 at 11:07 PM

    Such a great gift to encourage a child's imagination and get them AWAY from a screen!

    Reply
  3. Rosevine Cottege says

    November 15, 2013 at 10:04 PM

    So so so cute!!!! Please come share this at our linkup party! We would love our friends to see this!!!
    http://rosevinecottagegirls.blogspot.com/2013/11/link-up-5.html

    Reply
  4. Kim says

    June 7, 2014 at 1:08 PM

    I love this and plan to adapt it for use in my classroom! Has the finished stand in the pics been sealed or stained? Thanks!

    Reply

Leave a Reply Cancel reply

Your email address will not be published. Required fields are marked *

Primary Sidebar

Hi! I’m Jaime

Jaime Costiglio

Hello!

Thank you for stopping by.
Join me for lots of DIY.

Read more

Get new posts via email

Handbuilt Holiday: Gift Project Plans

handbuilt holiday gift project plans

Collection of DIY gift project plans to build.

The Home Depot Tool Prospective

THD Prospective

Tools to consider for the DIYer.

Archives

The Home Depot Logo
Copyright © 2026 Jaime Costiglio · Custom site by Moonsteam Design

Privacy Policy