• Home
  • Blog
  • About
  • Contact
    • Disclosure
    • Privacy Policy
  • SHOP
  • Widget area for main menu

    • Email
    • Facebook
    • Instagram
    • Pinterest
    • Twitter
    • YouTube
  • Skip to primary navigation
  • Skip to main content
  • Skip to primary sidebar

Jaime Costiglio

build - paint - sew

  • BUILD
    • BEDS
    • BENCHES
    • DESKS
    • DRESSERS
    • GAMES & TOYS
    • SCRAP WOOD
    • SHELVES
    • STORAGE
    • TABLES
  • TOOLS
  • PAINT
    • CRAFTS
    • FURNITURE
    • HOME DECOR
  • SEW
    • GIFTS
    • HOME DECOR
    • POUCHES
  • HANDBUILT HOLIDAY
    • 2021
    • 2019
    • 2018
    • 2017
    • 2016
    • 2015
    • 2014
    • 2013
  • GIFTS
    • BABIES
    • KIDS
    • FOR HER
    • FOR HIM
    • TEACHERS
    • WEDDINGS
  • SEASONAL
    • 4TH OF JULY
    • FALL
    • HALLOWEEN
    • CHRISTMAS
    • SUMMER
    • SPRING
    • ST. PATRICK’S DAY
    • THANKSGIVING
    • VALENTINE’S DAY
    • WINTER
  • SALTBOX PROJECT
    • BATHROOMS
    • DINING ROOM
    • EXTERIOR
    • FAMILY ROOM
    • FOYER / MUDROOM
    • KIDS BEDROOMS
    • KITCHEN
    • LIVING ROOM
    • MASTER BEDROOM
    • PLAYROOM
  • SCROLL SAW

DIY Play Table (24″ x 36″) with Storage Bins Free Plans

March 18, 2016

The play table has become a staple in most households with kids.  And today I’m sharing this diy play table in a slightly petite size at 24″ x 36″.  This version is a modification of Ana White’s play table here.  I scaled the size down a bit and simplfied the building process using pocket hole joinery.
diy play table

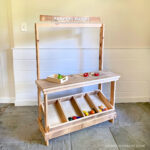
A DIY tutorial to build a kids play table with storage bins underneath. Make this generous size play table perfect for any kids play space.

kids play table with large storage bins under

Play Table with Storage

With two huge storage bins on wheels below this table is not only functional for play but great for clean up too!
You will find plans to build this play table down below, but first some more beauty pictures.
kids play table
kids play table with lip edge
Clearly I am lacking the toy trains department (my son is too old now) however this is for my nephew who has a large Thomas collection so he will easily fill the space.  Also you could paint the top play surface with a fun landscape scene, but I rather like it plain.
kids play table bins underneath

Bins on Wheels

I highly suggest using rigid casters (wheels that don’t swivel) on the bins.  The rigid casters allow the bins to simply pull in and out.  So there’s less mobility side to side and it’s much easier for kids to push the bin back under the table.
storage bins under play table
The cut out handle pull is easy and generous for kids and you could also add cute chalkboard labels to the front.

Play Table Plans

Below are step by step instructions to build this play table and storage bins.  Please read through all instructions and always follow all safety precautions when using power tools.


play table dimensions
Click here for a free printable PDF version of the plans.

Supplies:

  • 3 – 2x2x6 boards
  • 2 – ¾” plywood handy panels
  • 2 – 1x2x8 boards
  • 1 – 1x10x8 board
  • 1 – 1x10x6 board
  • 8 – 1 ½” ridgid casters
  • 1 ¼” & 2 ½” pocket hole screws
  • 2” wood screws
  • 1 ¼” finish nails
  • wood glue

Cut List:

TABLE:

  • 4 – 2×2 @ 13 1/2” (legs)
  • 3 – 2×2 @ 21” (short aprons & center support)
  • 2 – 2×2 @ 33” (long aprons)
  • 1 – ¾” plywood @ 24” x 36” (top)
  • 2 – 1×2 @ 24” (short trim)
  • 2 – 1×2 @ 37 1/2” (long trim)

STORAGE BINS:

  • 2 – ¾” plywood @ 14” x 21 ¾”(base)
  • 4 – 1×10 @ 21 ¾” (long sides)
  • 4 – 1×10 @ 15 1/2” (short sides)

play table step 1

Step 1: Attach the short aprons to the legs using wood glue and 2 ½” pocket hole screws. Make 2.

play table step 2

Step 2: Attach long aprons using wood glue and 2 ½” pocket hole screws.

play table step 3

Step 3: Attach center support to long aprons using wood glue and 2 ½” pocket hole screws.

play table base frame

play table step 4

Step 4: Attach top to the base using wood glue and 2” countersunk screws.

attaching base to top

play table step 5

Step 5: Attach trim to table top using wood glue and 1¼” finish nails.  Keep a ¾” lip.

play table storage bin


storage bin step 1

Step 1: Attach base to long side using wood glue and 1¼” pocket hole screws.

storage bin step 2

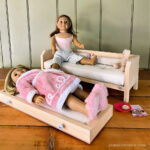
Step 2: Cut out handle from short sides using a jigsaw.

storage bin step 3

Step 3: Attach short sides to base using wood glue and 1¼” pocket hole screws.

storage in step 4

Step 4: Secure short sides to long sides using 2” countersunk screws.Add casters to underside.

Sand well and finish as desired.

dit play table with storage bins free plans

You may also like...

  • DIY Kids Play BarnDIY Kids Play Barn
  • DIY 18″ Doll Trundle BedDIY 18″ Doll Trundle Bed
  • DIY Treehouse Dollhouse & Furniture PlansDIY Treehouse Dollhouse & Furniture Plans
  • DIY Simple Play Market StandDIY Simple Play Market Stand
Share this post:

Filed Under: BUILD, DIY, FURNITURE, ORGANIZATION, STORAGE, TABLES14 Comments

Reader Interactions

Comments

  1. Cheryl Bowman says

    March 19, 2016 at 4:40 PM

    Love this my going to share it with my son so he can make it forhis sons 1st. birthday ! Thank You for sharing

    Reply
  2. Kim @ NewlyWoodwards says

    March 24, 2016 at 12:19 AM

    This is the coolest! I wish we would have made something like this for Henry – it's such a great transitional piece. It can work for trains, cars, legos …. has a lot of longevity. And I'm obsessed with those drawers. SO MUCH SPACE.

    Reply
  3. Mark Sindone says

    July 12, 2016 at 6:49 AM

    This would make an excellent LEGO table! All you need is the base plate up top and perhaps to segregate the storage bins more so you can compartmentalise all the different bricks!

    Reply
  4. samm m says

    January 1, 2017 at 11:51 PM

    Samm M
    Is there a typo in the cut list for the short apron pieces? The cut list says they are 23" long, which is what I cut and installed, but now the table is too big….in going back to figure it out I noted that the diagram shows the board as 21".

    Did I miss something?

    Thanks!

    Reply
    • jcprime1 says

      August 10, 2017 at 10:47 AM

      Yes you are correct. Thank you for finding the error. I have updated the post and plans to reflect 21".

      Reply
  5. Courtney Thomas says

    August 9, 2017 at 5:15 PM

    What was your estimated cost?

    Reply
    • jcprime1 says

      August 10, 2017 at 10:41 AM

      I would estimate just under $100 but prices for lumber vary. Also it depends a lot on what type of wood you choose. Hope that's helpful.

      Reply
  6. Chris says

    March 27, 2018 at 2:09 PM

    Hi,
    First off thanks for posting this info! I have a quick question, if I were to increase the table top size to 24×48”, would only my long apron measurement change? If so, to what length? Thanks for the help!

    Reply
  7. Yodelayheewho says

    September 5, 2018 at 12:39 PM

    I can’t seem to locate the plans for the DIY PLAY TABLE (24″ X 36″) WITH STORAGE BINS.

    Reply
    • Jaime says

      September 5, 2018 at 12:59 PM

      Hi Lori, the plans are up above within the post and also a link to the PDF printable version here: https://drive.google.com/file/d/0B85dRd-BoH0wWHFONjl5MTI0OXc/view Hope that helps.

      Reply
  8. Roxanne says

    June 18, 2022 at 2:34 PM

    What is a handy panel?

    Reply
    • Jaime says

      June 26, 2022 at 8:01 AM

      Hi Roxanne, A handy panel is a piece of plywood (or MDF or white board or peg board) that measures 24″ x 48″. It’s a handy size that is much more user friendly for smaller projects than a full sheet (4′ x 8′).

      Reply

Leave a Reply Cancel reply

Your email address will not be published. Required fields are marked *

Primary Sidebar

Hi! I’m Jaime

Jaime Costiglio

Hello!

Thank you for stopping by.
Join me for lots of DIY.

Read more

Get new posts via email

Handbuilt Holiday: Gift Project Plans

handbuilt holiday gift project plans

Collection of DIY gift project plans to build.

The Home Depot Tool Prospective

THD Prospective

Tools to consider for the DIYer.

Archives

The Home Depot Logo
Copyright © 2023 Jaime Costiglio · Custom site by Moonsteam Design

Privacy Policy