Who’s thinking about back to school? Yes please I can’t wait! As much fun as summer is don’t get me wrong I secretly long for those structured school days. Get organized with these DIY locker cubbies using remade wooden crates.

A DIY tutorial to build locker style cubbies using wooden crates. Combine ready made wood crates to create a locker cubby system.
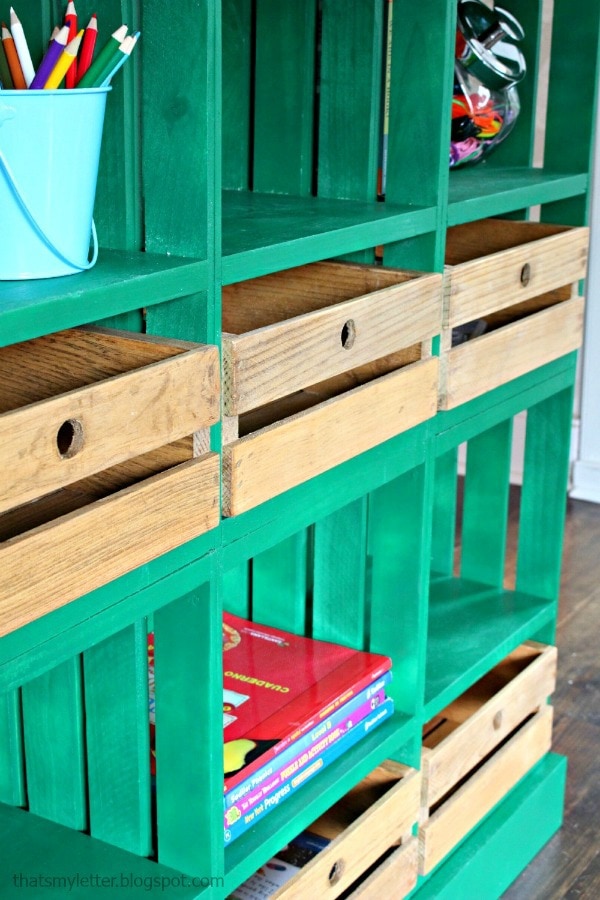
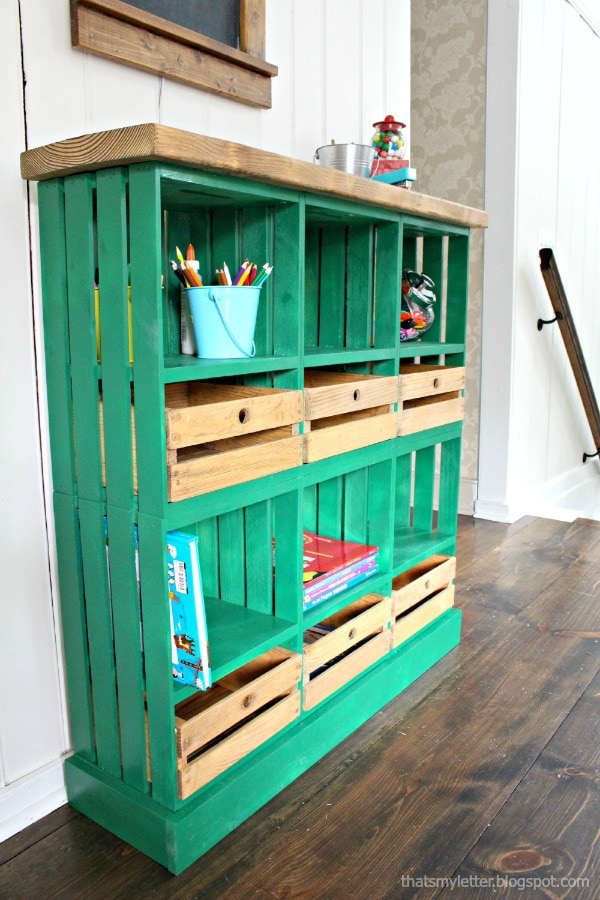
The folks at Crates and Pallet challenged a few bloggers to come up with a back to school themed organization project using the large and small crates. Today I’m sharing my locker cubbies made from 6 large crates and 6 small crates. Together they make a super functional and organized spot for school supplies and homework essentials.
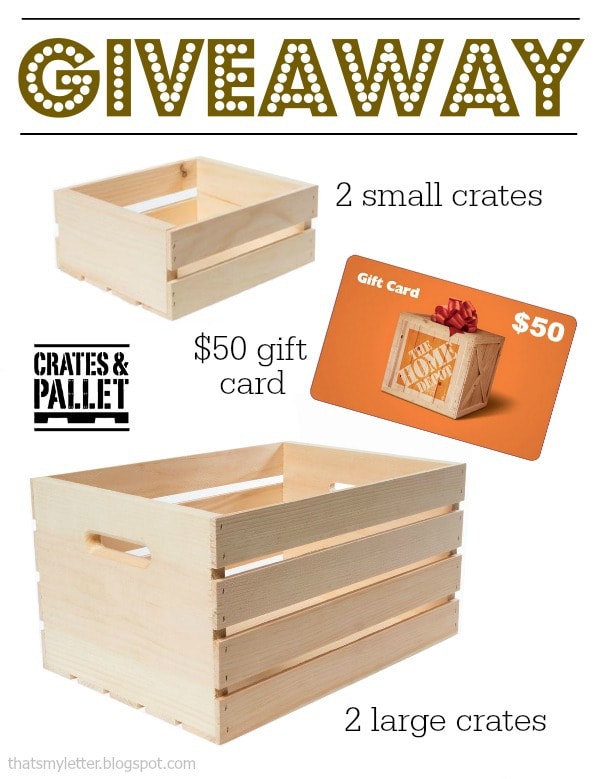
GIVEAWAY CLOSED: And the nice people at Crates and Pallet have offered to giveaway 2 large and 2 small crates plus a $50 gift card for The Home Depot to one lucky reader!
This makes a great way to get started on your own back to school organizational area.
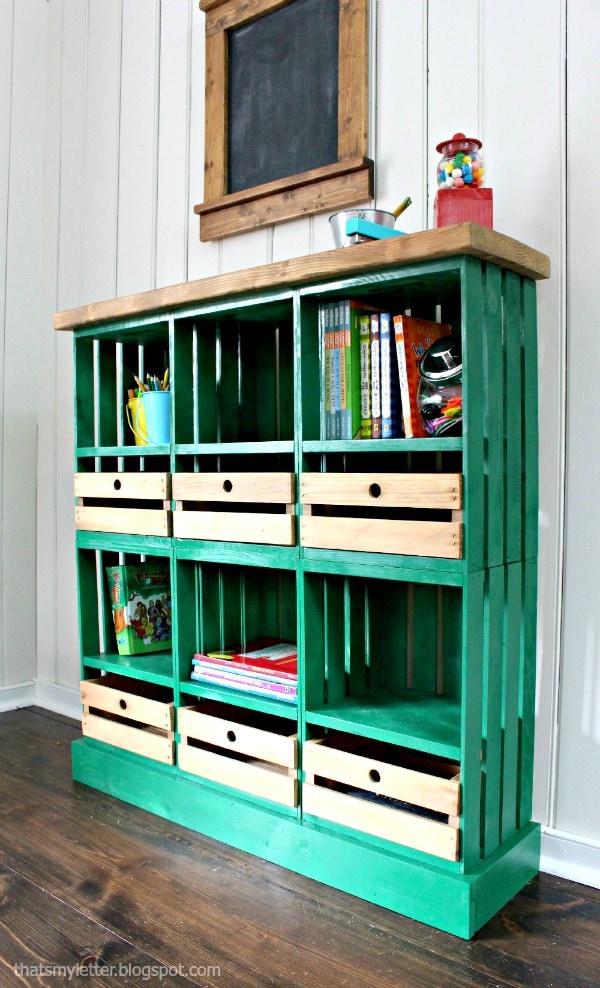
Locker Style
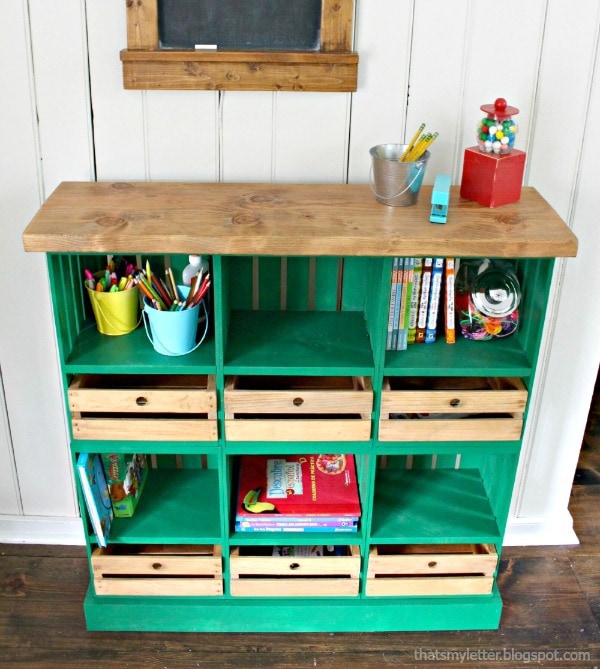
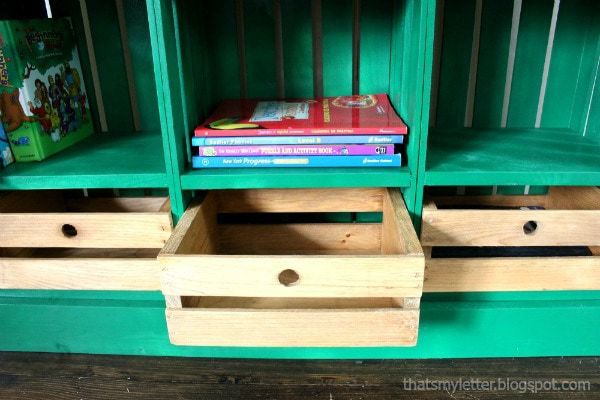
To make the crates more functional I added a shelf for books and supplies which also creates a space for the drawer below.

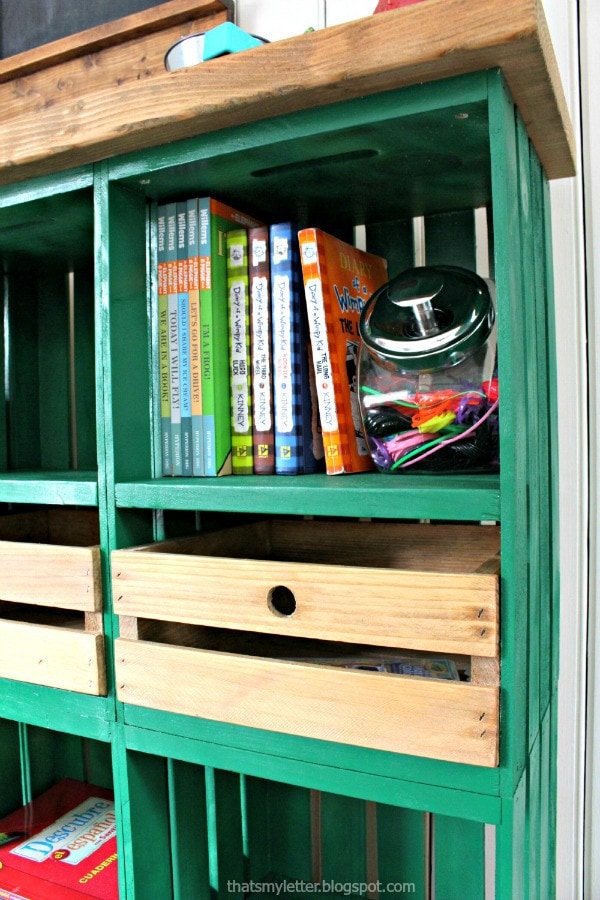
The small crate makes a great drawer. But you will have to sand down the sides a bit to allow for easy gliding, the effort is totally worth it!
Organized Cubbies
Come September my three kids will have this furniture piece filled with all things homework related. All the books, papers and supplies that stay at home or get used for homework will live here.
Honestly it’s not a difficult piece to build but rather more of a ‘put together’ project because the crates are already assembled.
Below are the step by step instructions, materials and cut lists.
Locker Cubbies Materials:
- 6 – large crates
- 6 – small crates
- 2x4x8 stud
- 1x4x6 pine board
- 1x10x8 pine board
- 1 – 2×12 @ 39 ½” board
- wood glue
- 3”, 2” & 1 ¼” screws
- 1 ¼” finish nails
- 7/8″ spade bit
Cut List:
- 1 – 2×4 @ 37 ½” (base front)
- 2 – 2×4 @ 8” (base sides)
- 1 – 2×4 @ 34 ½” (base back)
- 6 – 1×10 @ 12” (shelves)
- 2 – 1×4 @ 9 ½” (side trim)
- 1 – 1×4 @ 39” (front trim)
- 1 – 2×12 @ 39 ½” (top)
Always follow all safety precautions when using power tools.
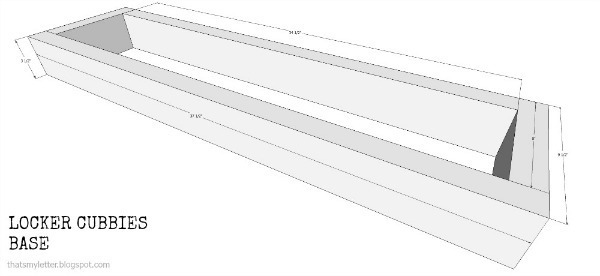
Step 1: Construct base. Use 3” screws to connect 2x4s to make base.

Step 2: Make shelves in large crates. Glue and attach using 1 ¼” finish nails through crate sides.

Step 3: Assemble crates onto base attaching using 2″ wood screws. Use clamps to keep crates in place while attaching to each other using 1 1/4″ wood screws.
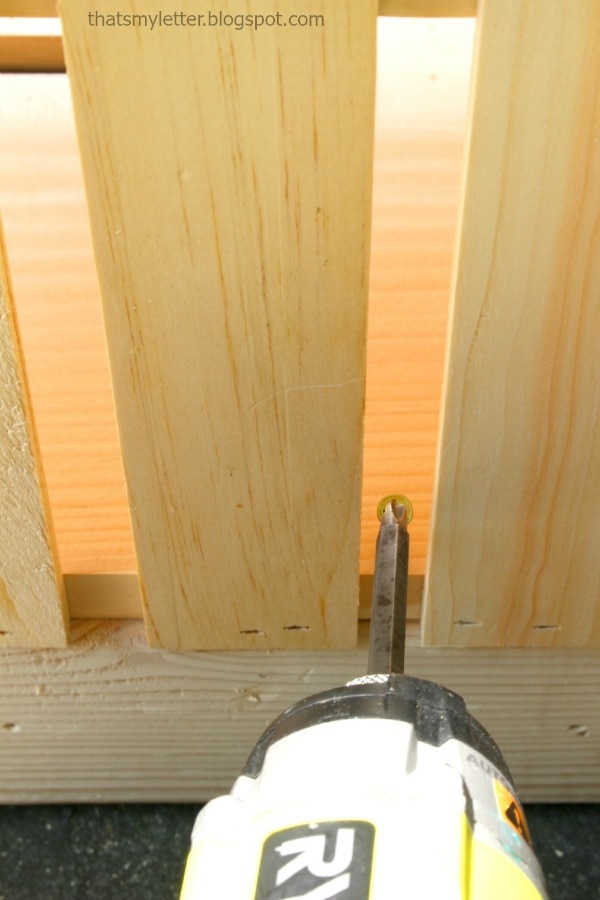
A long screw bit fits conveniently in between the slats to attach the crates at the back side.

Step 4: Attach trim to cover base using glue and 1 ¼” finish nails.
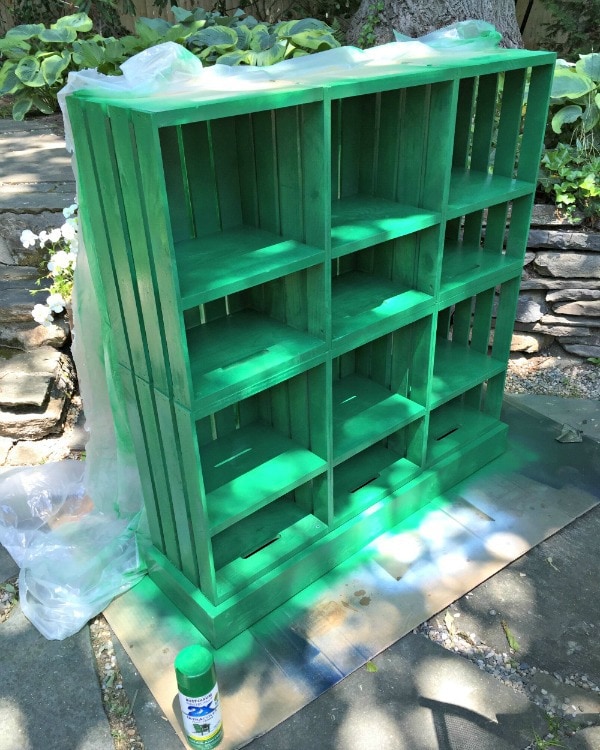
Step 5: Paint or finish as desired. I used Rustoleum green spray paint in gloss finish. Staple plastic to the back to prevent the spray from going everywhere.
Step 6: Stain the top (Minwax early american) then seal with clear wax. Attach top from underside using 2” screws.
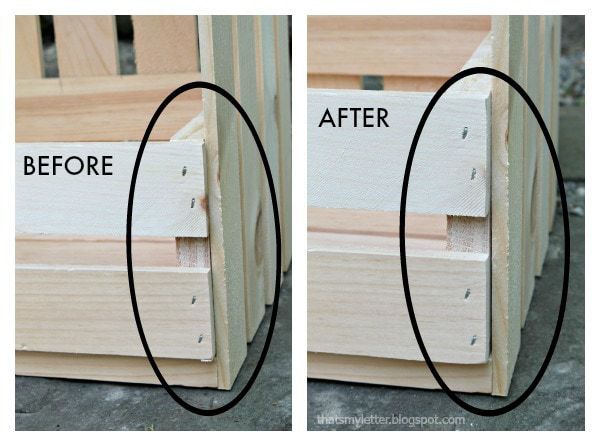
In order to get the small crates to glide as drawers in the large crates you will need to sand the sides of the small crates. Start with a low grit sandpaper (60) and aggressively remove some of the wood from the crate on both sides. Then sand smooth using 150, 220 grit and the drawer should be able to operate easily gliding in and out. Below you can see how the sanding is necessary to create a bit of gliding space:

Step 7: To make the pull hole in the small crate drawers use a 7/8″ spade bit, mark the center and clamp a piece of scrap wood behind the crate front in order to prevent splitting.
The small crates are also stained Minwax early american with clear wax. Be sure to wax the sides and bottom to help with easy gliding.
Disclaimer: I was provided product and/or compensation for this project post. All project ideas, thoughts and opinions are my own.


I absolutely love it!! Great color too.
I love the plan! The link takes you to two difference sizes of large and small sizes, could you give me the dementions of the ones you used please?
Love it! Thank you for the chance.
follow instagram as https://instagram.com/lisalubrown/
Awesome project!
I love this. Very versatile and fun.
Super cute! Would be great for homeschoolers.
I love this idea! It looks great and is so practical, too.
You are amazing and I adore this piece and the color! What a perfect idea for the kiddos Jaime. Keep inspiring ��
I love this!! Would be interested in making one for my rustic living room space. Do you know a rough estimate on how much something like this would cost to make? Thanks!
great project and nice color!!
What a fantastic piece and great project! I love it!
Good tutorial. Thank you.