Kitchen renovation complete
The kitchen renovation finished over 16 months ago, it was the reason I started this blog in the first place.
And since then things have snowballed into all the projects you see on the blog today.
I’m sharing the kitchen makeover as it looks today because I get lots of questions about all the details, here’s the full story.
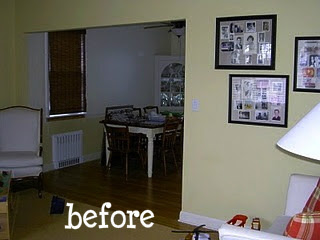
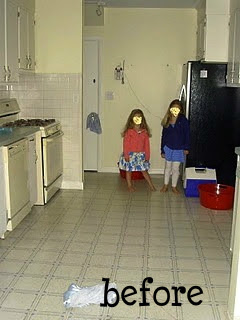
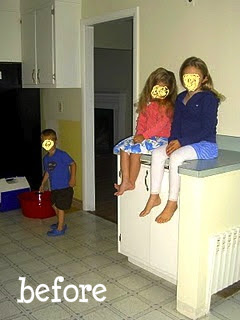
Behind this wall on the right is the old kitchen:
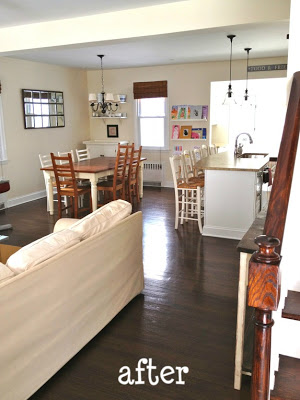
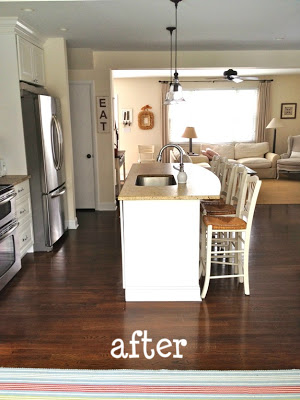
We took down the wall and now:
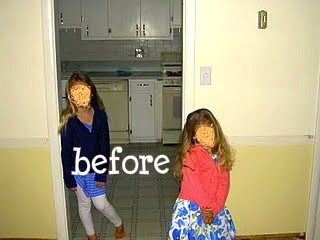
From inside the kitchen before (the girls are standing against the wall that came down):
Bye bye linoleum and bisque appliances:
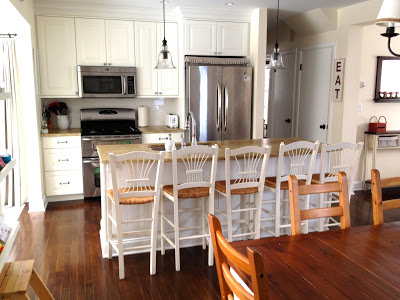
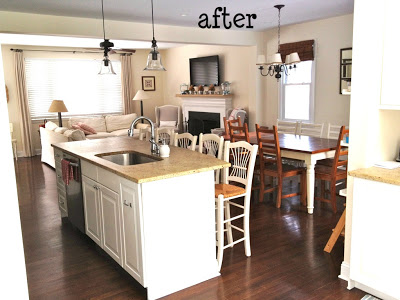
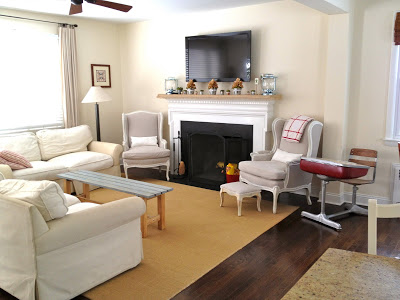
What used to be three rooms – living room, dining room and kitchen is now one great room.
Living room into dining room and island:
To see how I made the knock off mirror click here.
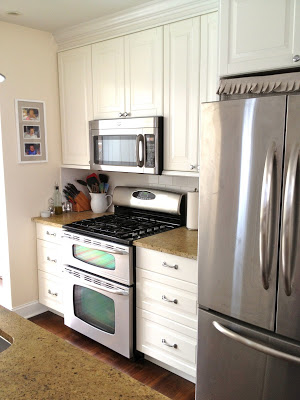
From the island into the kitchen:
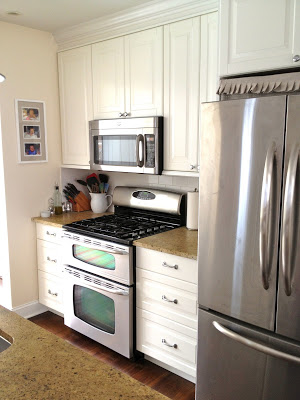
(I highly recommend the double oven, I use the small top one all the time – it heats up faster and uses less gas in general.)
The cabinets are Ikea Lidingo.
They did come flat packed and I put them all together in our garage, you can see some pics in a short post here.
The contractor installed the cabinets on 2×4 bases hidden behind this toe kick rather than the plastic feet that come with the bases:
and he added lots of crown molding for a more custom built look:
The hardware is Aubrey from Restoration Hardware.
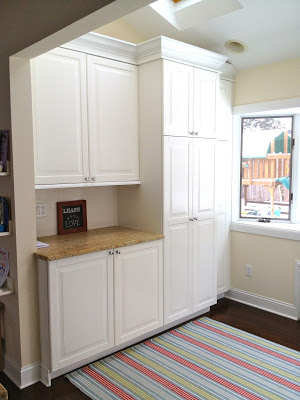
Back to cabinets for one minute, we don’t have a mudroom space therefore part of the kitchen was designed with three locker style cabinets:
For three kids to each have their own storage:
More details, the sink is double wide and I don’t think I will ever go back to a single:
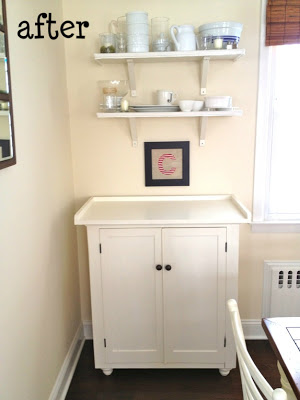
For more storage I added a sideboard by the dining table with open shelving:
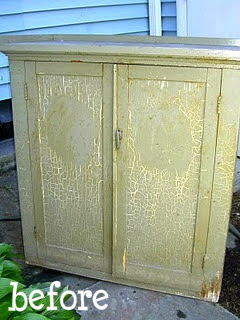
Found in the basement when we moved in, solid but needed some work (see that post here):
Now more useful here:
With some simple shelves trimmed with eyelet fabric:
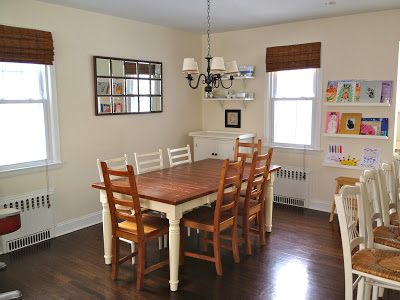
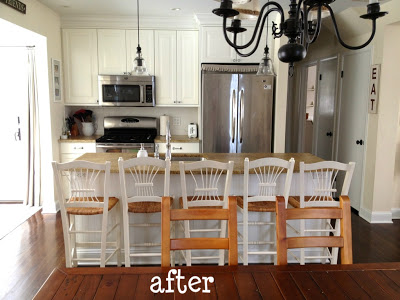
A view from the dining table:
(The hanging pendants are Pottery Barn rustic glass pendants.)
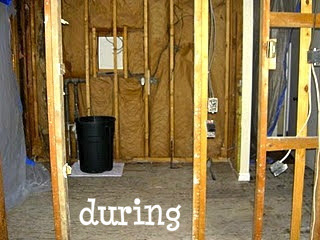
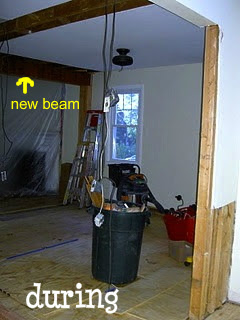
But it wasn’t always so pretty:
After day one of demolition:
And now:
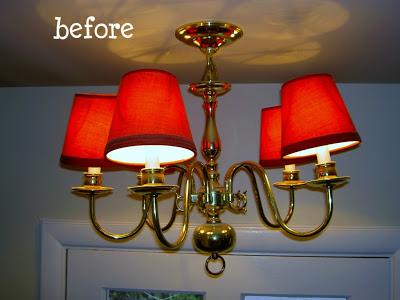
The chandelier came with the house too, mounted above the door practically flush to the ceiling:
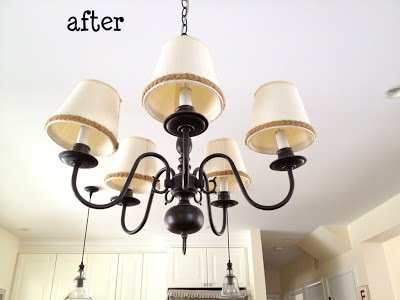
After some ORB spray paint and recovered shades with braided jute trim:
Here you can see the wall dividing the kitchen and dining room before:
That wall came down too, they moved the radiator and added a new support beam:
The wood floor was continued throughout and the entire first floor was sanded and refinished in Antique Brown.
We tried to make the space we have work the best for our family.
Now it’s where we spend all our time and it was worth the wait.














We have the same stove and fridge! Love mine!
I really like the pendants over your island/peninsula, where did you get those?
What a fantastic job!
A'
solongfarm.blogspot.com
wow! it looks amazing!!! it gives me hope that my kitchen will one day be pretty. 🙂
Your kitchen is beautiful!
Amazing Jamie!! Looks SUPER expensive! Gotta love it!
Your kitchen is so pretty! We are in the middle of a kitchen reno right now – and our Ikea cabinets are in our garage waiting to be installed! Is there a reason that you opted for installing your cabs on a 2×4 base and not the Ikea feet? We've planned on just using the feet that came with our cabinets but if you've heard negative things about that option, let me know! 🙂
What a difference taking down that wall made, Jaime!! Your kitchen/family room look so amazing. Thanks for sharing.
That is one gorgeous kitchen! I love that it's open to the living and dining areas too! Well done.
it looks great, I think I came to your blog the first time over that armchair you reupholstered…
love it
Wow – thanks so much for sharing!
Wow. It your home looks amazing now. I love how open and bright it looks. I wish we could tear down some of the walls in our house. I'd love a more open feel when we walk in the door. Doubt that's going to happen for us in this home though. So hopefully painting in lighter colors will help brighten up the place.
What an amazing transformation. It make such a difference with the wall down. It looks really nice. 🙂
Love how you opened up the space! Beautiful job!
Beautiful! Love the transformation, looks so fresh and open!
Thanks for sharing!
Kristin
great reno! we're doing ours now, and I just love everything you've done. Thanks for the inspiration!
What a beautiful kitchen! I love the cabinets and the lovely floors! Great Job 🙂
wow….i love what you've done! how are the ikea cabinets holding up?
Your kitchen looks fantastic. I'm visiting from the French Country Cottage link party.
This is AWESOME! I love it all – especially those deep drawers on either side of the stove!! Great job!
Oh how I love a good kitchen makeover! Yours gives me hope because ours looks much like your first BEFORE picture with the girls standing in the back. Unfortunately, we cant tear out any walls and our home was built in 1860 so its full of surprises. For instance, I have FIVE doorways in my kitchen alone! Plus no counterspace.
We had a fire in our kitchen about 3 weeks ago and I must say, now that cleanup has been done(and I primed everything this weekend) its looking brighter and Im excited for some super cheap updates.
BTW, I found you through the DIY showoff linkup:)
Have a wonderful weekend!Your home is lovely.
WOW! What a gorgeous transformation! Beautiful job on every detail!
Love your space! I found you via Little House Blog… I was inspired to post a kitchen post as well! 🙂
Jaime – just a head's up that I'm going to include a link back in this week's DIY Show Off highlights. 😉
Have a great weekend!
Roeshel
Jaime! Wow, you've done an AMAZING job in there – your kitchen is gorgeous girl!
My husband and I own a house that looks almost identical to your "before" pictures 🙂 It's still in it's "before" stage, as we're renting it out while we're overseas. We don't want to rebuild on our land, but would rather remodel like you have (seriously… the stairs, kitchen and LR situated the same way. it's kooky!) – what is your square footage? Our kitchen is definitely smaller as we only have a breakfast 'nook' which can only really fit a card table and two chairs. Thanks for showing me that this can be done with amazing results! I love it!
Wow! What a difference between the before and afters! You did a fabulous job, thanks so much for sharing! Marcia
I love how you've opened up the floor plan around the kitchen. Very nice!!
I'm a new follower, Mary Alice
Definitely worth the wait! I know how you feel – we renovated our whole house but it's like having a baby – you forget all about the pain once it's over!
Love how you added your mudroom storage into the kitchen and the moldings really make the cabinets look very custom!
Kelly
What a transformation! 16 months was worth the effort and wait. I love that you have made use of the old stuff in the new kitchen, like the cabinet and the chandelier. We don't have to buy brand new items all the time to make a gorgeous room. Sometimes, all you need is a bit of creativity and resourcefulness. Congratulations on the new kitchen!
Gabrielle Jeromy @Majestic Renovations
Amazing! I really love comparing before and after photos as they really show you how far your renovations have come ever since you started them. I think you have done a great choice, fusing three rooms into one big room as it looks so spacious and airy.
Arthur Bryant
I LOVE your spruce-up of the little cabinet–so clean and crisp. Too many people would have redone it to look like the decaying original–shabby is not always chic!