• Home
  • Blog
  • About
  • Contact
    • Disclosure
    • Privacy Policy
  • SHOP
  • Widget area for main menu

    • Email
    • Facebook
    • Instagram
    • Pinterest
    • Twitter
    • YouTube
  • Skip to primary navigation
  • Skip to main content
  • Skip to primary sidebar

Jaime Costiglio

build - paint - sew

  • BUILD
    • BEDS
    • BENCHES
    • DESKS
    • DRESSERS
    • GAMES & TOYS
    • SCRAP WOOD
    • SHELVES
    • STORAGE
    • TABLES
  • TOOLS
  • PAINT
    • CRAFTS
    • FURNITURE
    • HOME DECOR
  • SEW
    • GIFTS
    • HOME DECOR
    • POUCHES
  • HANDBUILT HOLIDAY
    • 2021
    • 2019
    • 2018
    • 2017
    • 2016
    • 2015
    • 2014
    • 2013
  • GIFTS
    • BABIES
    • KIDS
    • FOR HER
    • FOR HIM
    • TEACHERS
    • WEDDINGS
  • SEASONAL
    • 4TH OF JULY
    • FALL
    • HALLOWEEN
    • CHRISTMAS
    • SUMMER
    • SPRING
    • ST. PATRICK’S DAY
    • THANKSGIVING
    • VALENTINE’S DAY
    • WINTER
  • SALTBOX PROJECT
    • BATHROOMS
    • DINING ROOM
    • EXTERIOR
    • FAMILY ROOM
    • FOYER / MUDROOM
    • KIDS BEDROOMS
    • KITCHEN
    • LIVING ROOM
    • MASTER BEDROOM
    • PLAYROOM
  • SCROLL SAW

DIY Jewelry Stand

November 12, 2013

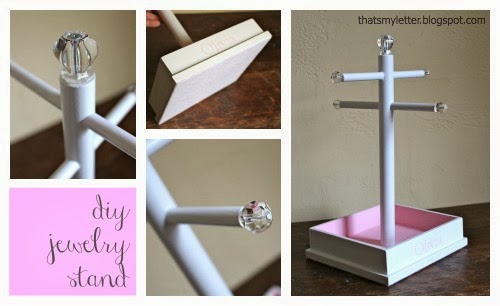
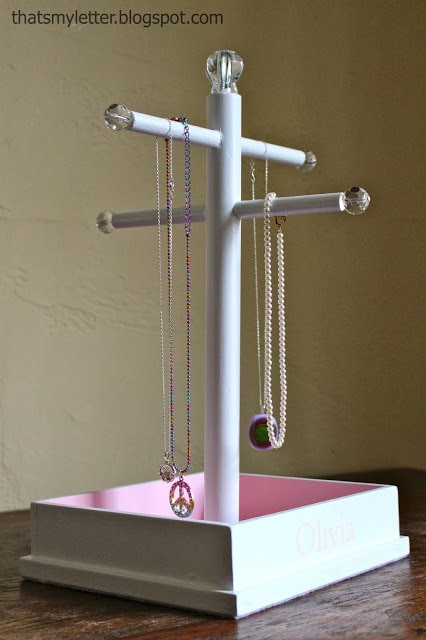
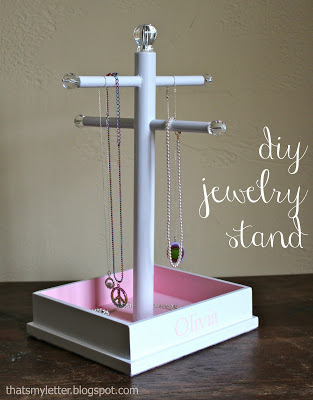
diy jewelry stand
Build this simple and pretty jewelry stand using scrap wood, dowels and clear beads.
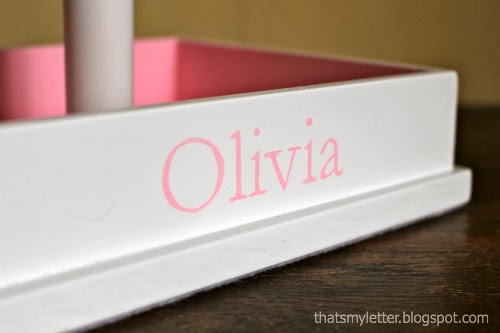
And personalize your jewelry stand too:
diy personalized jewelry stand

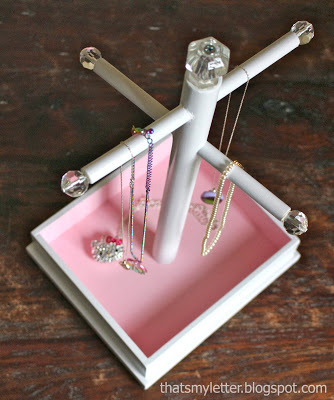
Functional and classy complete with a felt covered base:
diy personalized jewelry stand details
diy personalized jewelry stand from above
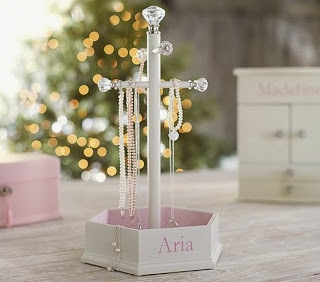
I used the Abigail Jewelry Stand from Pottery Barn Kids as my inspiration:
pottery barn kdis abigail jewelry stand
photo source

You can make your own for much less and then spend what you saved on more jewelry!

diy jewelry stand with glass knob details
How to build a jewelry stand:
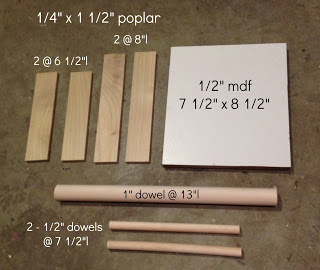
1. Cut wood pieces:
how to build a jewelry stand
2. Make base edge frame using glue and finish nails:
edge frame for base
3. Secure frame to mdf base using finish nails up through the base:

base portion with frame
4. Drill 1/2″ holes through main dowel for 2 posts:
center dowel with holes
5. Assemble using glue and one 2″ screw into the main dowel up through the base.
Prime and spray paint high gloss white:
horizontal dowels inserted

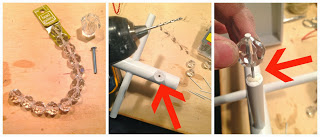
 6. To add decorative jewels use 1/2″ clear beads and one hardware knob.
Predrill hole at center end of dowel.
Use finish nails and glue to secure beads:

attach clear beads on dowels
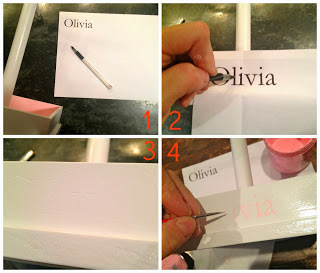
7. For personalization print out name, I used Garamond font at 90 point.
Step 2: Line up print out at center of long side and trace using ballpoint pen.
Step 3: The pen leaves a visible indent in the wood.
Step 4: Paint on and inside the indent.
how to personalize a jewelry stand
8. Paint the interior of the tray light pink:
paint interior of jewelry stand base
9. To add felt bottom use spray adhesive:
apply spray adhesive on felt
10. Press firmly onto base and trim away excess for a clean edge:
trim felt base on jewelry stand
For more handmade holiday build ideas see my page here where Ana White and I have shared diy builds complete with free plans.

You may also like...

  • Cross Stitch Monogram Ornament PlacecardCross Stitch Monogram Ornament Placecard
  • DIY Desktop TrayDIY Desktop Tray
  • DIY Wedding Cake Ornament FavorsDIY Wedding Cake Ornament Favors
  • DIY Wood Cut Out Name PlaqueDIY Wood Cut Out Name Plaque
Share this post:

Filed Under: 2013, BUILD, DIY, FOR HER, GIFTS, HANDBUILT HOLIDAY, HOME DECOR, KIDS, ORGANIZATION, PAINT, SCRAP WOOD, STORAGELeave a Comment

Reader Interactions

Leave a Reply Cancel reply

Your email address will not be published. Required fields are marked *

Primary Sidebar

Hi! I’m Jaime

Jaime Costiglio

Hello!

Thank you for stopping by.
Join me for lots of DIY.

Read more

Get new posts via email

Handbuilt Holiday: Gift Project Plans

handbuilt holiday gift project plans

Collection of DIY gift project plans to build.

The Home Depot Tool Prospective

THD Prospective

Tools to consider for the DIYer.

Archives

The Home Depot Logo
Copyright © 2023 Jaime Costiglio · Custom site by Moonsteam Design

Privacy Policy