• Home
  • Blog
  • About
  • Contact
    • Disclosure
    • Privacy Policy
  • SHOP
  • Widget area for main menu

    • Email
    • Facebook
    • Instagram
    • Pinterest
    • Twitter
    • YouTube
  • Skip to primary navigation
  • Skip to main content
  • Skip to primary sidebar

Jaime Costiglio

build - paint - sew

  • BUILD
    • BEDS
    • BENCHES
    • DESKS
    • DRESSERS
    • GAMES & TOYS
    • SCRAP WOOD
    • SHELVES
    • STORAGE
    • TABLES
  • TOOLS
  • PAINT
    • CRAFTS
    • FURNITURE
    • HOME DECOR
  • SEW
    • GIFTS
    • HOME DECOR
    • POUCHES
  • HANDBUILT HOLIDAY
    • 2021
    • 2019
    • 2018
    • 2017
    • 2016
    • 2015
    • 2014
    • 2013
  • GIFTS
    • BABIES
    • KIDS
    • FOR HER
    • FOR HIM
    • TEACHERS
    • WEDDINGS
  • SEASONAL
    • 4TH OF JULY
    • FALL
    • HALLOWEEN
    • CHRISTMAS
    • SUMMER
    • SPRING
    • ST. PATRICK’S DAY
    • THANKSGIVING
    • VALENTINE’S DAY
    • WINTER
  • SALTBOX PROJECT
    • BATHROOMS
    • DINING ROOM
    • EXTERIOR
    • FAMILY ROOM
    • FOYER / MUDROOM
    • KIDS BEDROOMS
    • KITCHEN
    • LIVING ROOM
    • MASTER BEDROOM
    • PLAYROOM
  • SCROLL SAW

DIY Butterfly Growth Chart

August 15, 2012

Build and paint: butterfly growth chart

A friend requested this growth chart for her daughter Molly.
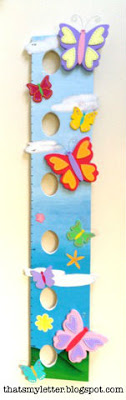
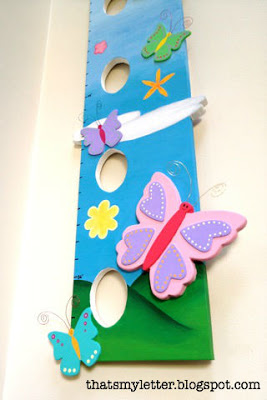
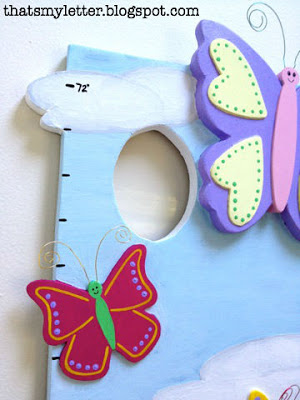
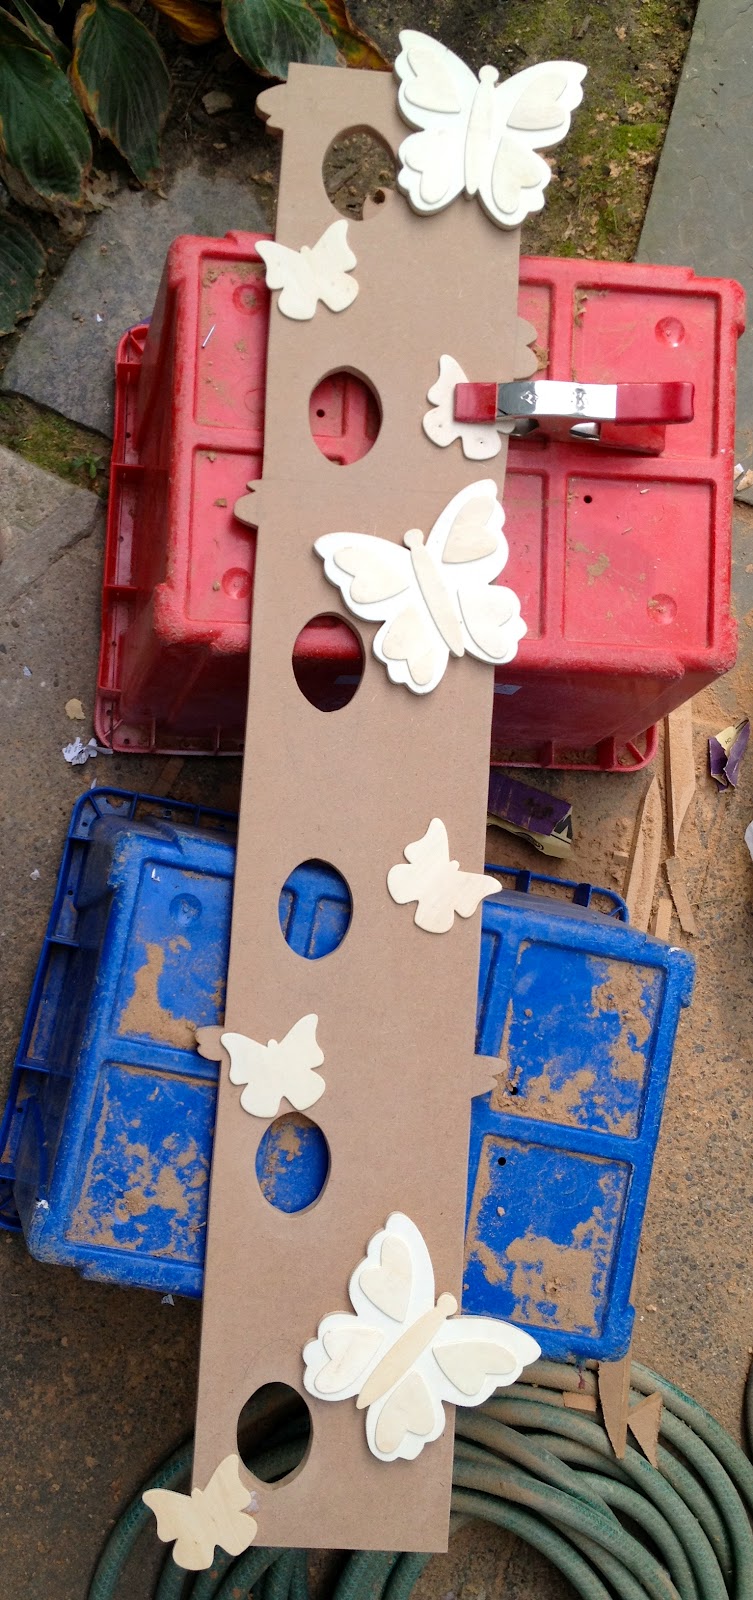
This growth chart has spots to mark her height as she grows and picture holes:

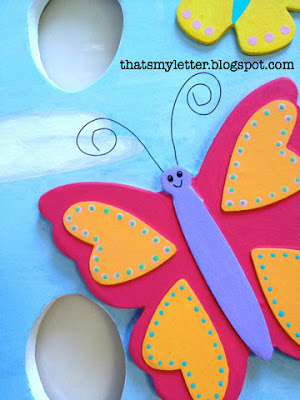
The butterflies are wood cutouts adhered to MDF board:

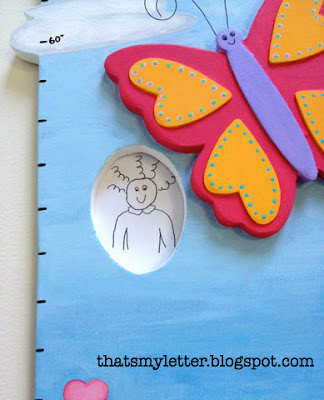
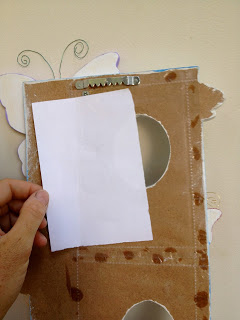
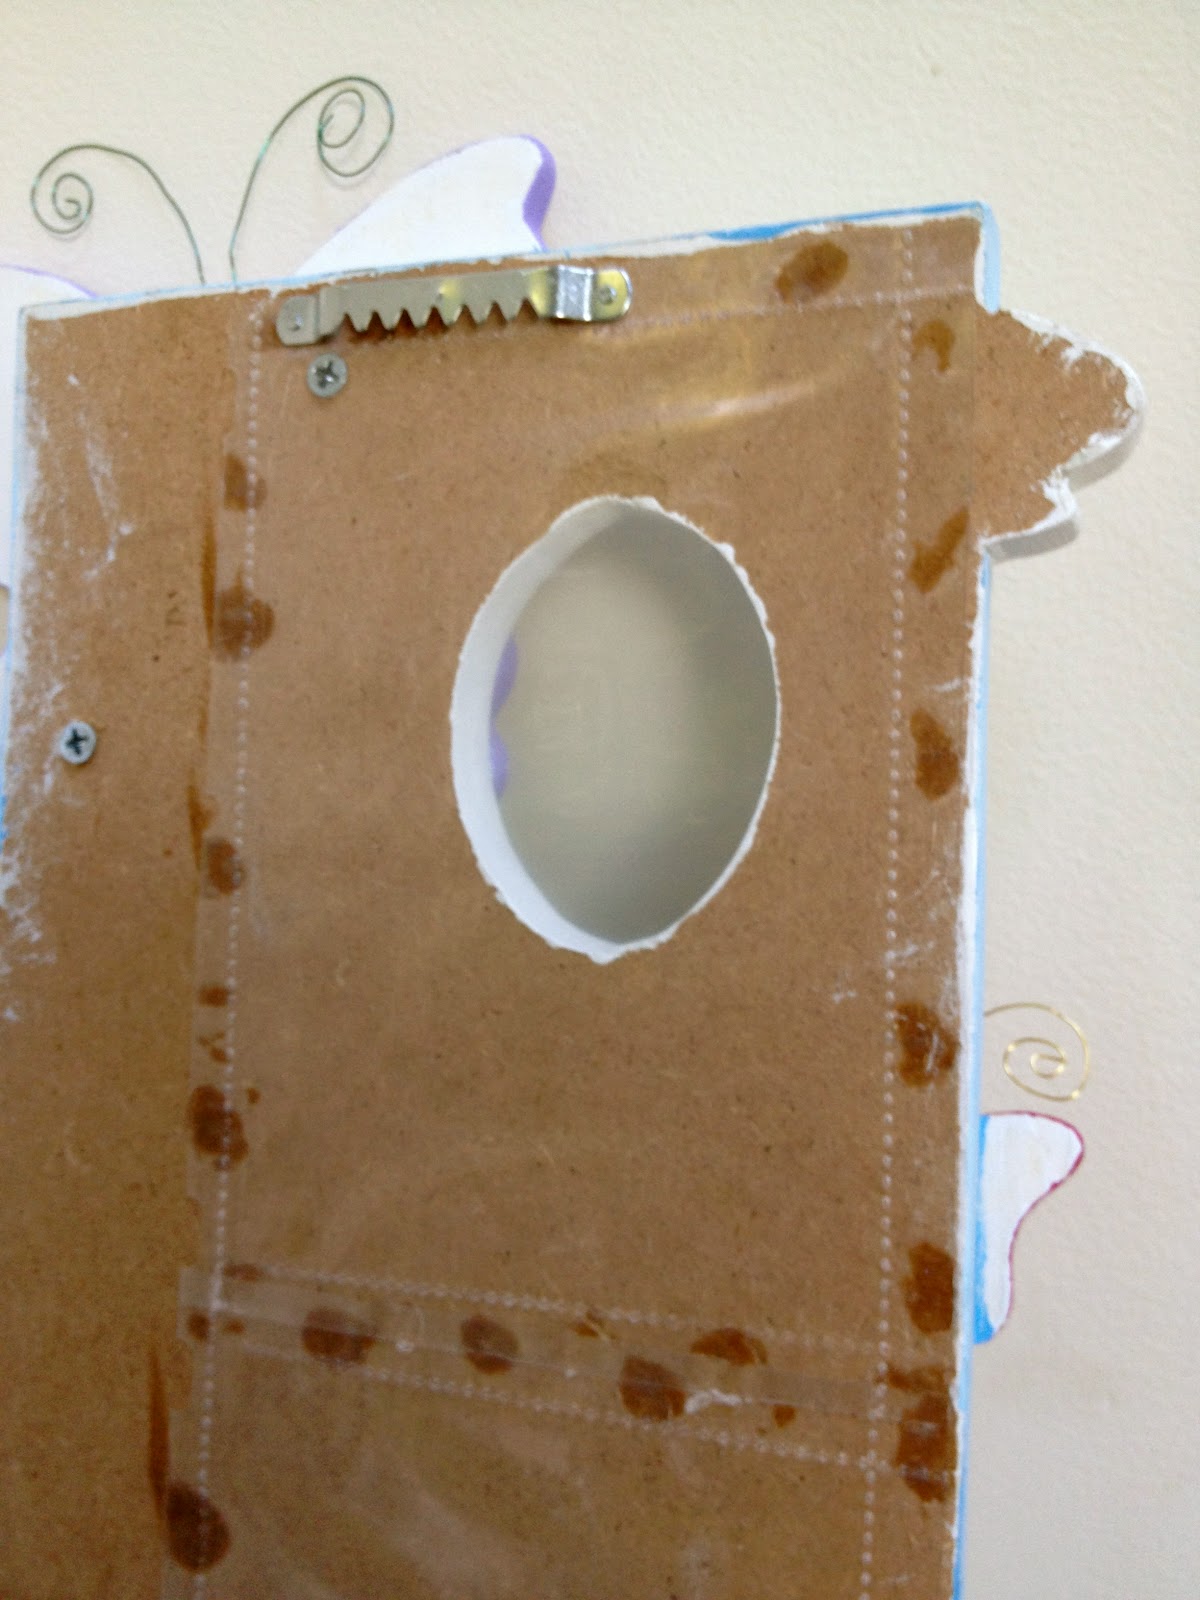
Oval picture holes provide a visual reminder of Molly at that height:
Each hole has a plastic sleeve on the back to hold the picture:

Here’s how I made the growth chart:

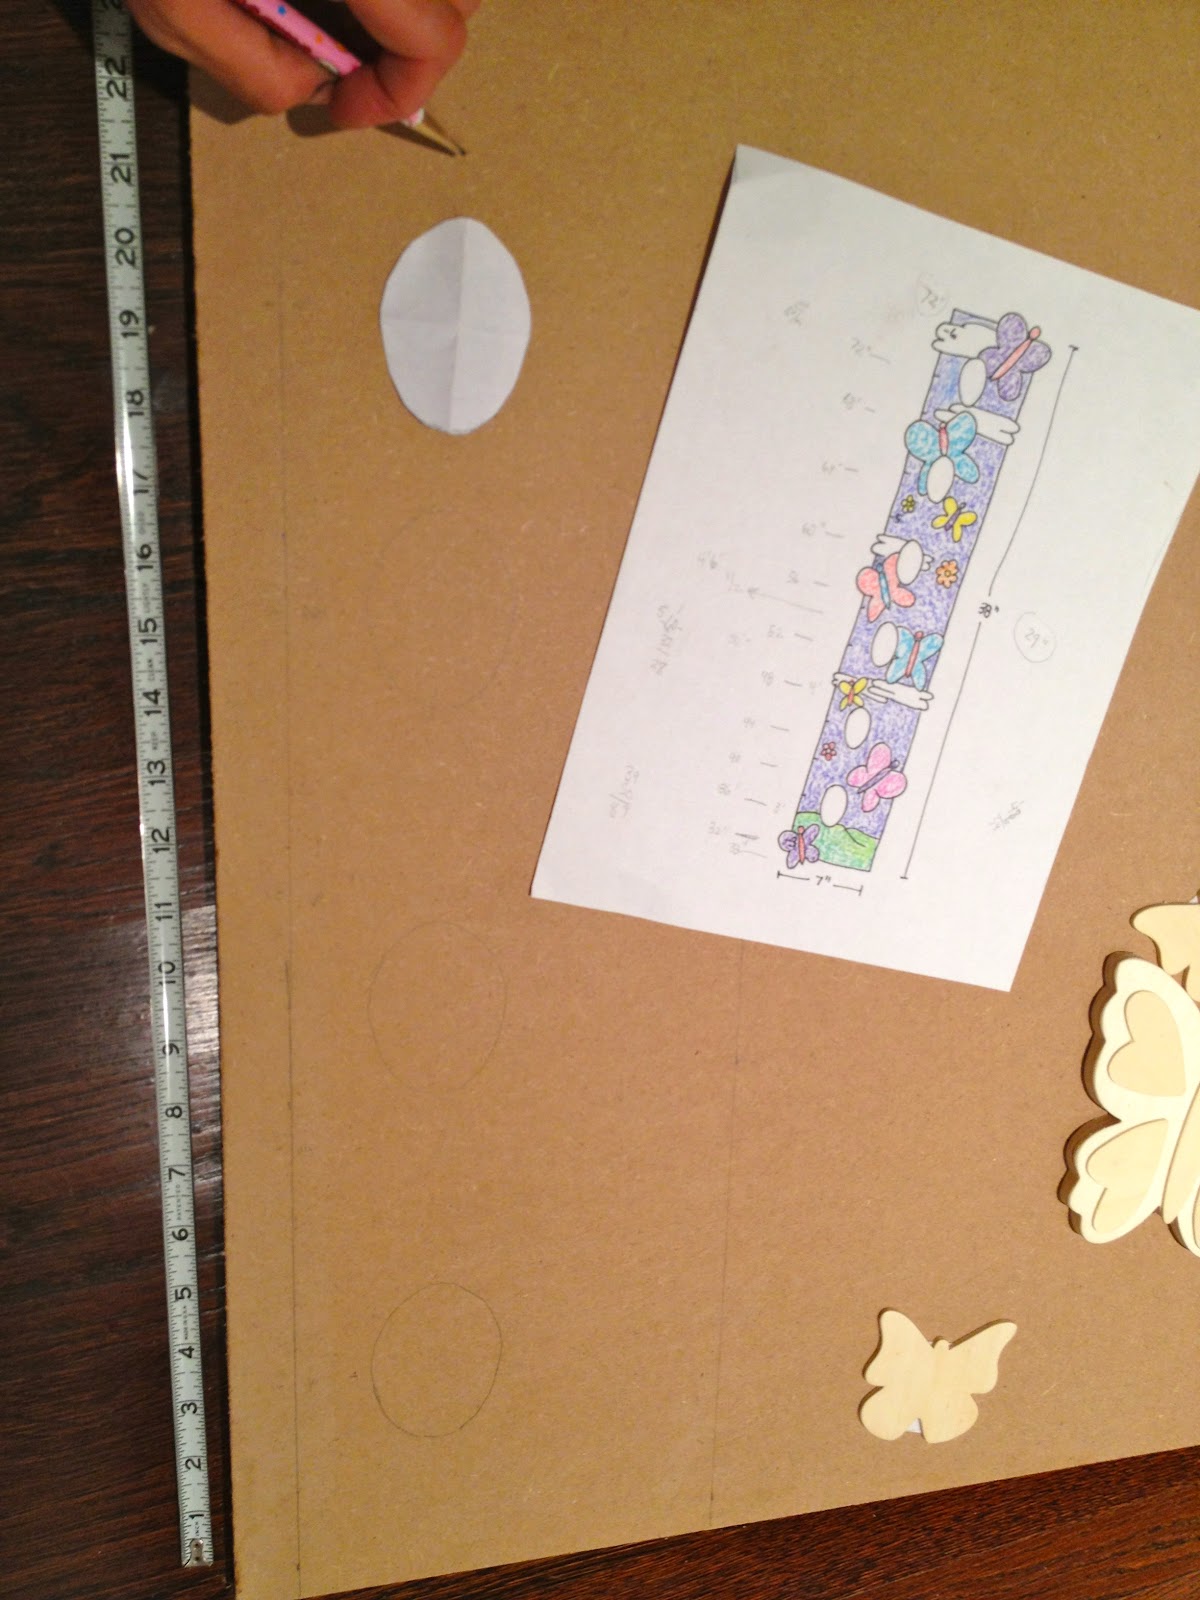
1. I started with a sketch:
The actual dimensions are 41″h x 7″w.
2. Using 1/2″ MDF mark out 41″h x 7″w including clouds that stick off the sides.
Then use an oval template for each picture hole:

3. Layout wood butterfly cutouts to be sure everything fits good and no picture holes are covered by butterflies:

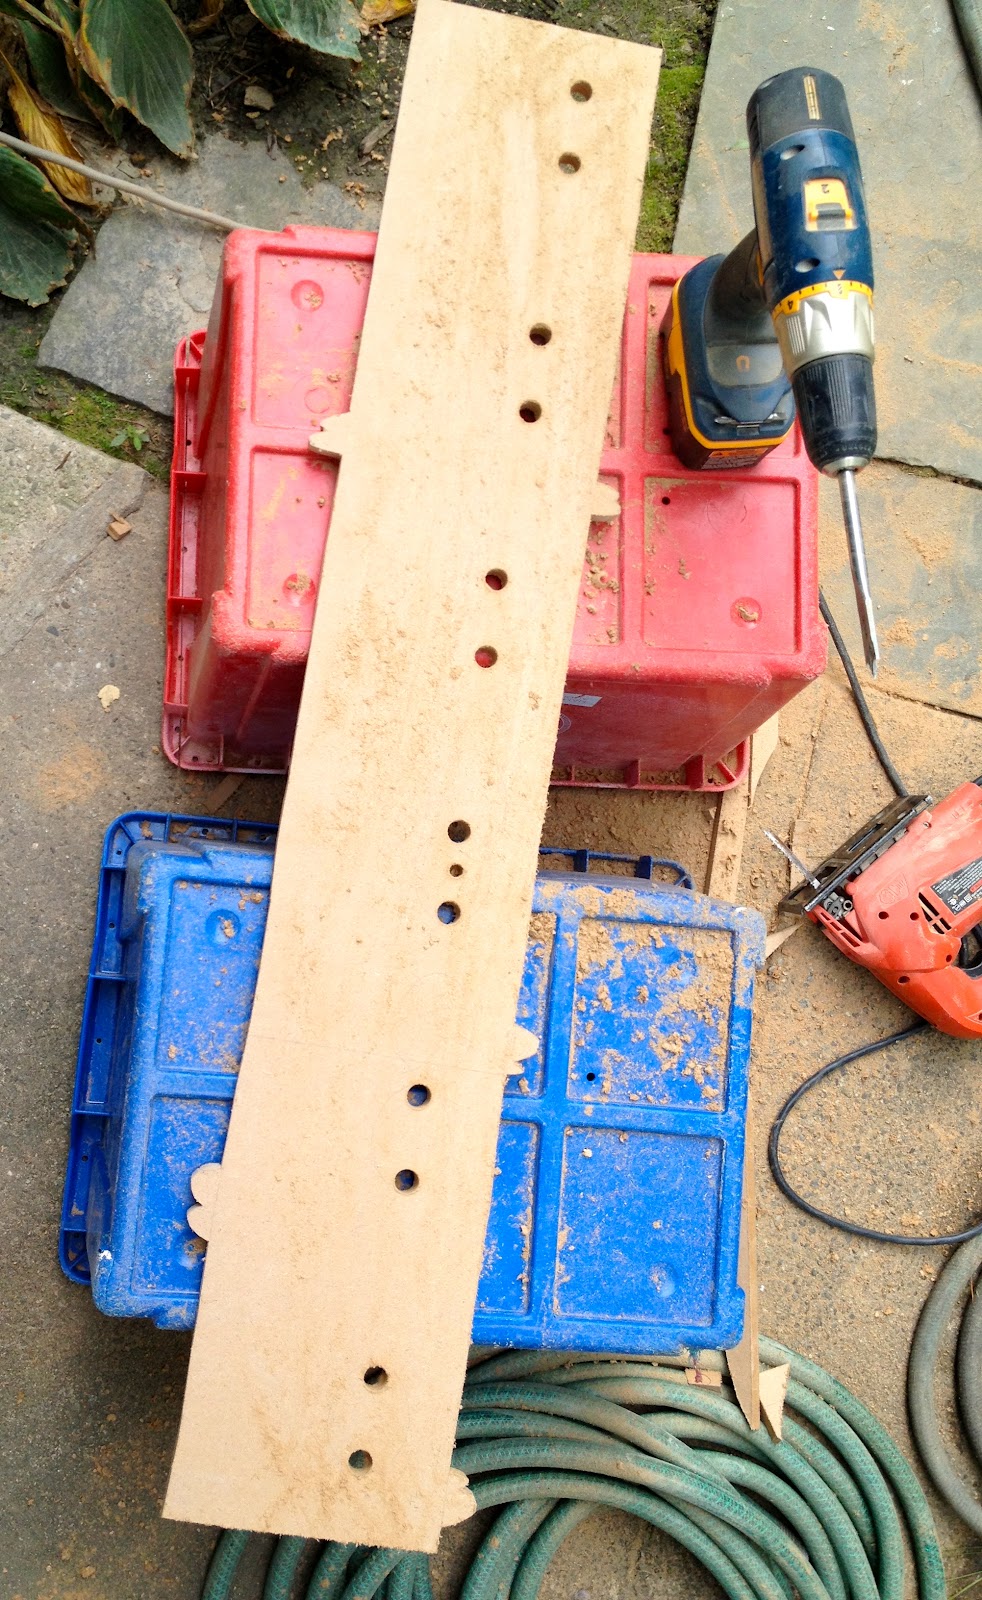
4. Cut out using jigsaw.
Then begin cutting out oval picture holes with a spade bit making a circle hole at each top and bottom:

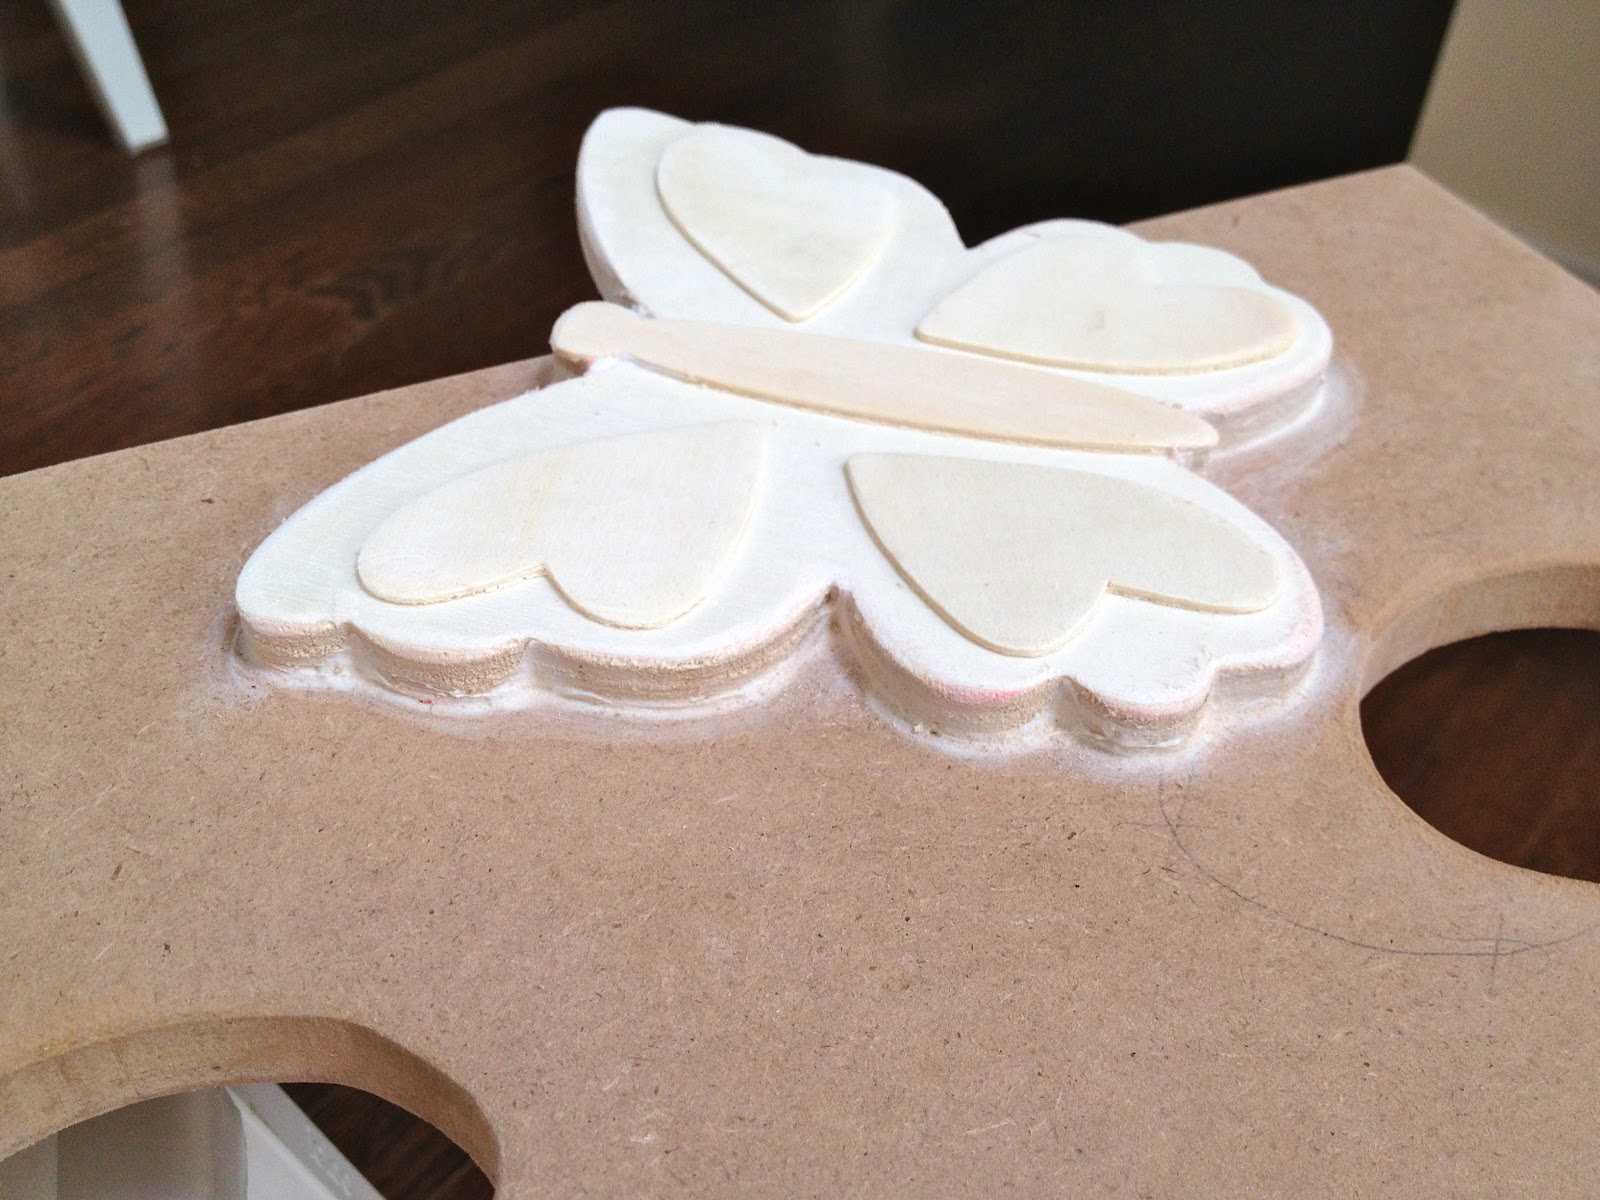
5. Secure each large butterfly from the back with glue and 3/4″ wood screws countersunk:

6. Then glue on the small thin wood butterflies:

7. Chaulk around the large butterflies for seamless look:

8. Prime:

9. Paint.
I used all acrylic craft paints.

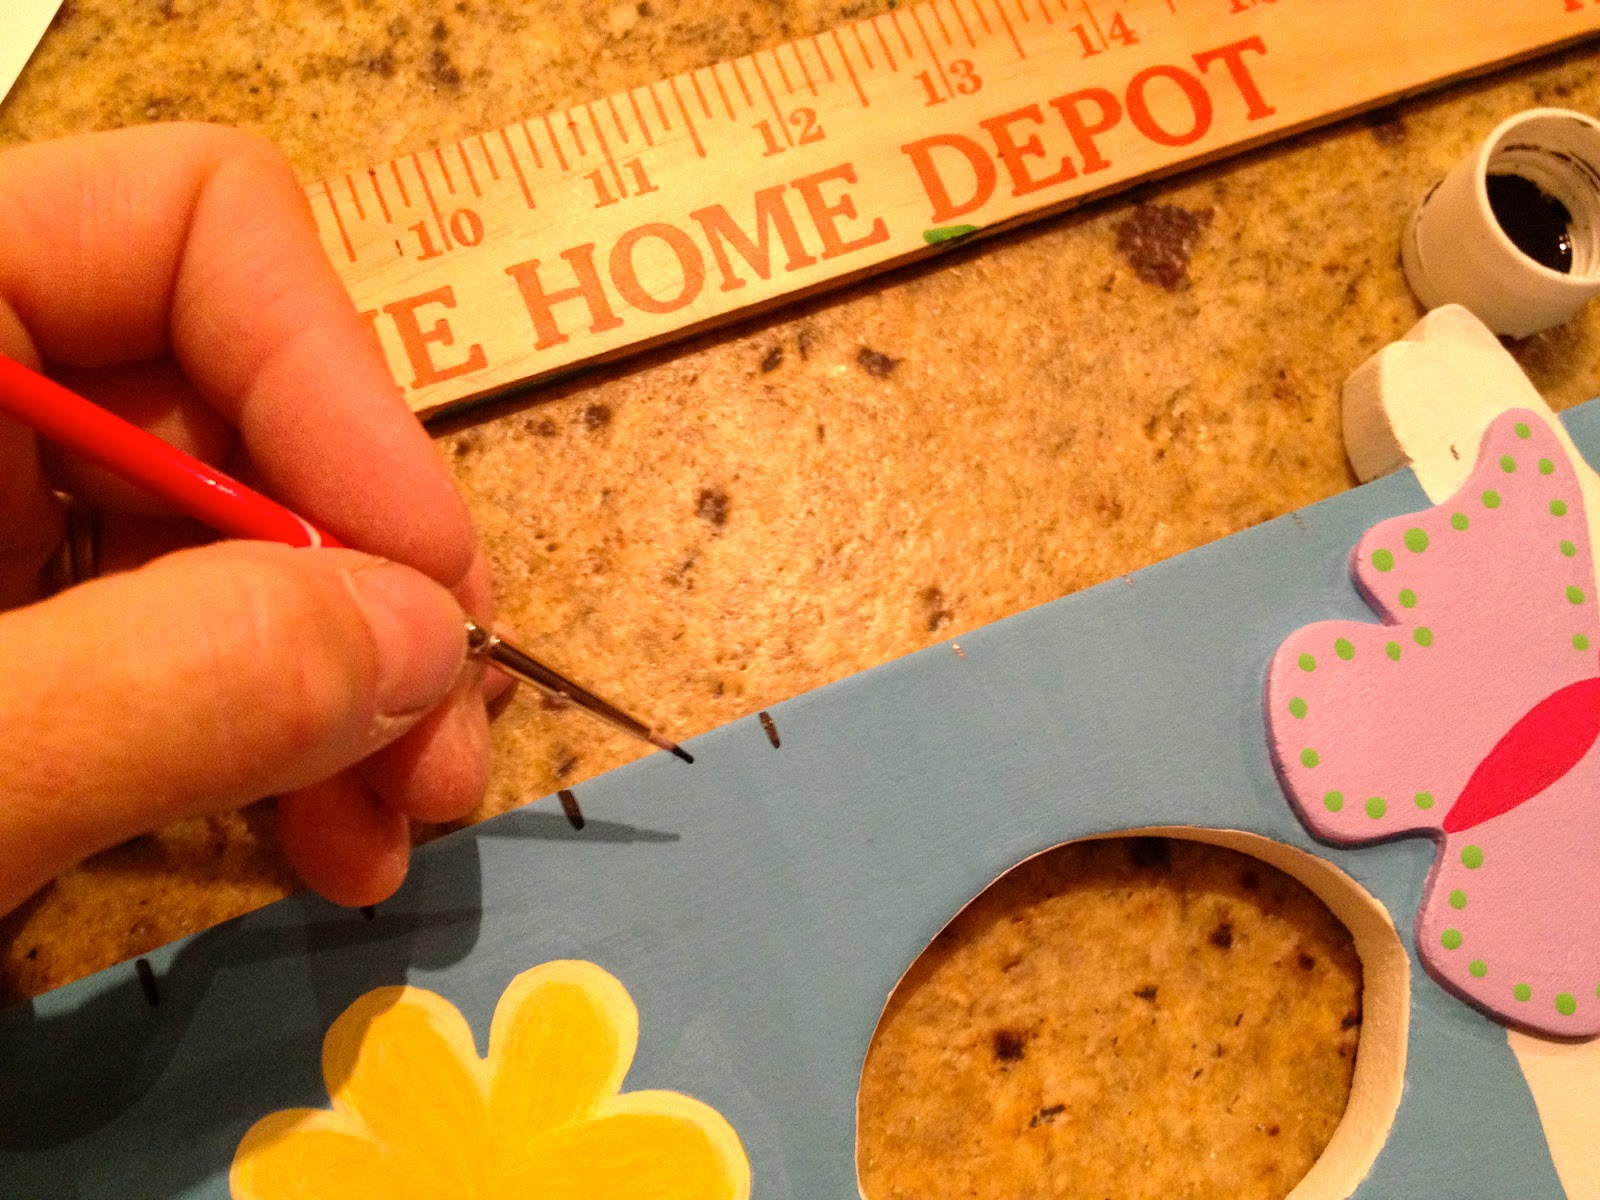
10. Mark off measurements and add lines and numbers with black paint:
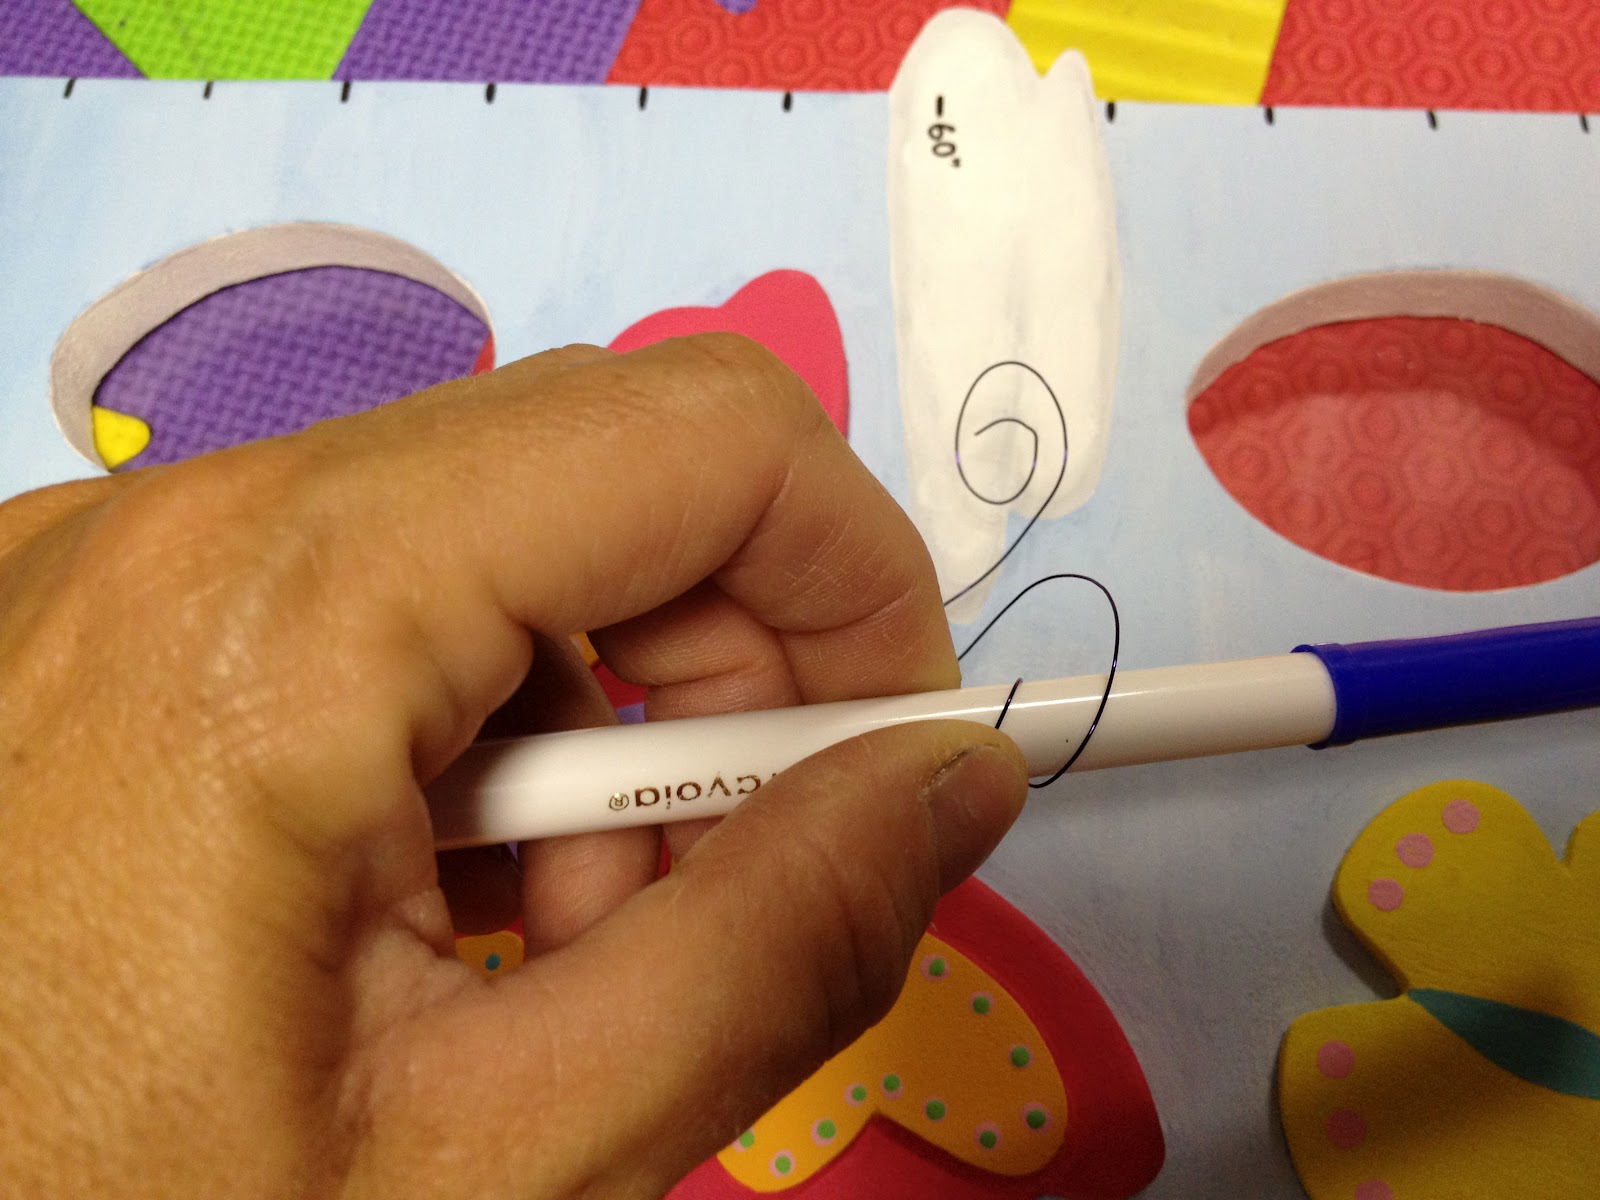
11. The antenna are made from colored beading wire, 24 gauge:

12. Make a hole for the wire with a thick straight pin:

13. Apply E-6000 adhesive to end of wire and insert into hole:

14. Curl ends of antenna by wrapping around a pen:

15. The photo holders are plastic 4″ x 6″ sleeves:

16. Trim off the sleeve excess and apply E-6000 glue around edge then adhere to back of board:
Then add sawtooth hanger:

Be sure to hang at the correct height off the floor for accurate measurements!

You may also like...

  • DIY Kid Size StoolDIY Kid Size Stool
  • Simple Storage MirrorSimple Storage Mirror
  • DIY Giant Decorator LettersDIY Giant Decorator Letters
  • DIY Animal Wall HooksDIY Animal Wall Hooks
Share this post:

Filed Under: BABIES, DIY, GIFTS, HOME DECOR, HOME DECOR, KIDS, PAINT4 Comments

Reader Interactions

Comments

  1. Suzanne@Meridian Road says

    August 16, 2012 at 2:04 AM

    I think this is one of the cutest growth charts I've ever seen! You did a great job on it. I love that you added those cutouts for photos.

    Reply
  2. freckled laundry says

    August 17, 2012 at 12:35 AM

    So cute, Jaime!

    Reply
  3. Julie says

    August 27, 2012 at 3:27 AM

    So super cute and very well thought out! New GFC follower from The Sunday Showcase.

    Hope you'll come check out my blog sometime! 🙂

    http://blog.organizedtomorrow.com

    Have a great week! 🙂

    Julie @ The Path to an Organized Tomorrow

    Reply
  4. ellienix05 says

    June 2, 2014 at 6:53 PM

    I would like to buy one! Don't have the time to make one! Can they be purchased? 🙂

    Reply

Leave a Reply Cancel reply

Your email address will not be published. Required fields are marked *

Primary Sidebar

Hi! I’m Jaime

Jaime Costiglio

Hello!

Thank you for stopping by.
Join me for lots of DIY.

Read more

Get new posts via email

Handbuilt Holiday: Gift Project Plans

handbuilt holiday gift project plans

Collection of DIY gift project plans to build.

The Home Depot Tool Prospective

THD Prospective

Tools to consider for the DIYer.

Archives

The Home Depot Logo
Copyright © 2026 Jaime Costiglio · Custom site by Moonsteam Design

Privacy Policy