Handmade gifts are the best and I’m a huge fan of making something rather than buying (hence my entire page devoted to handmade gift ideas). So today I’m sharing this DIY wine carrier project plan. It’s nothing new or really that creative but it’s a simple project that nearly anyone can complete in under an hour.
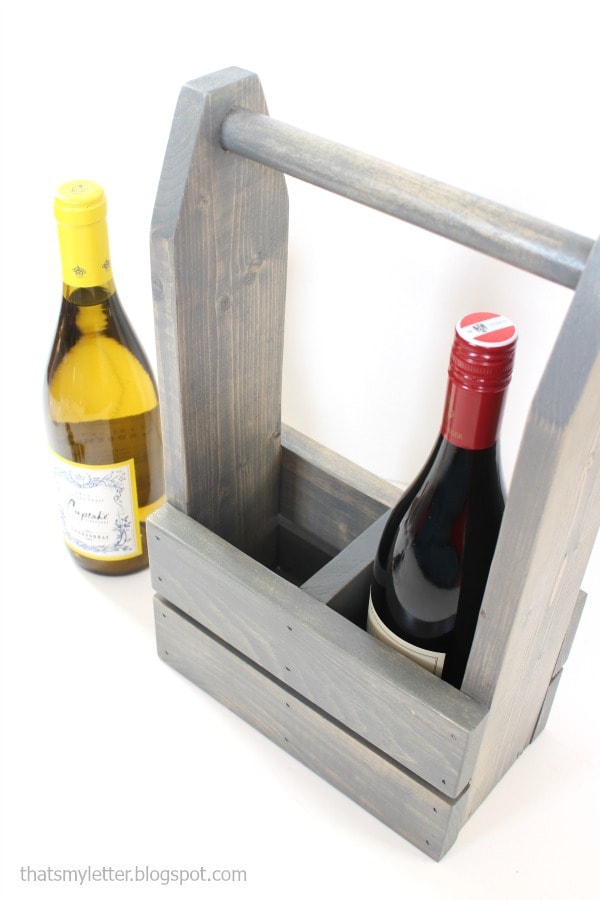
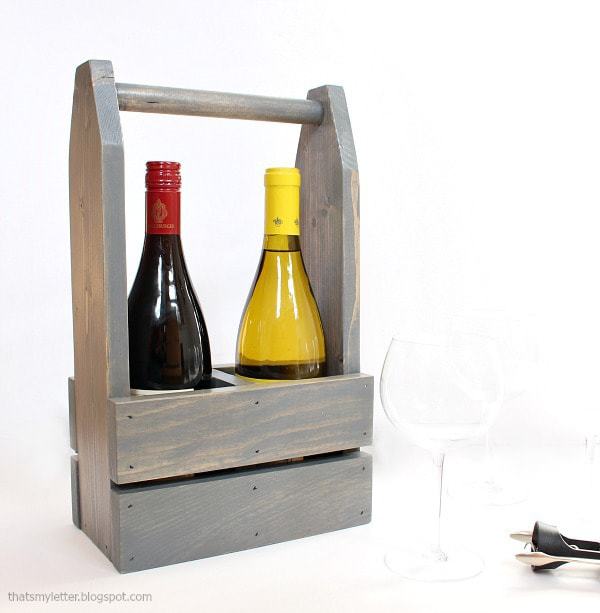
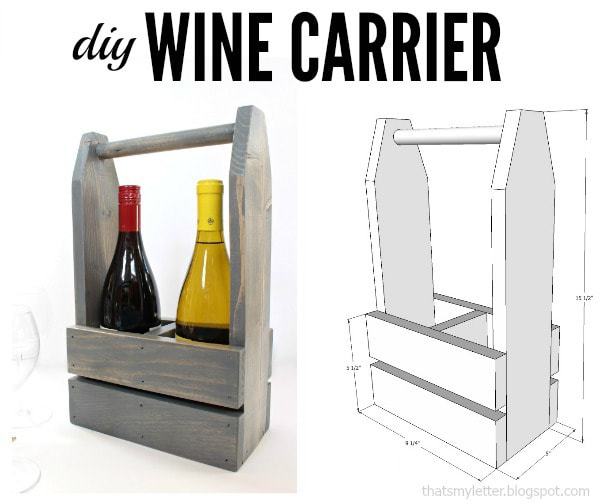
A DIY tutorial to build a wine carrier. Make this functional wine carrier to bring to your next party as a hostess gift or for easy transport.
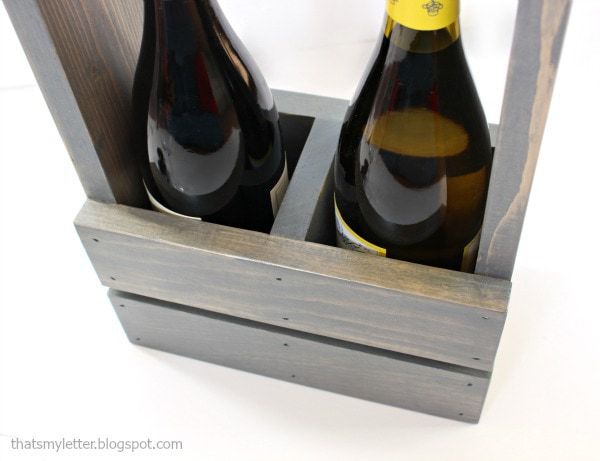
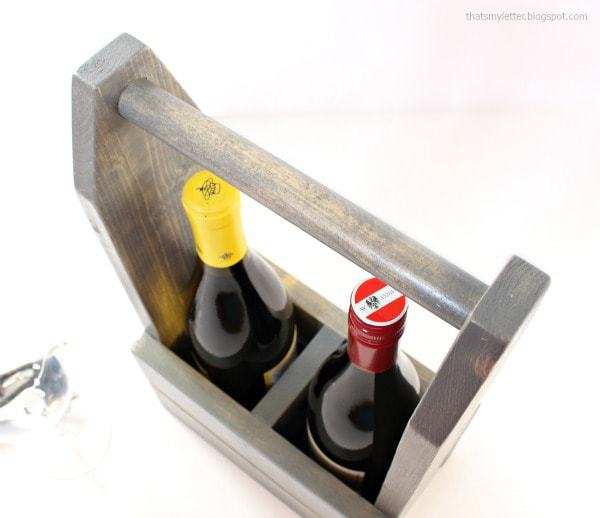
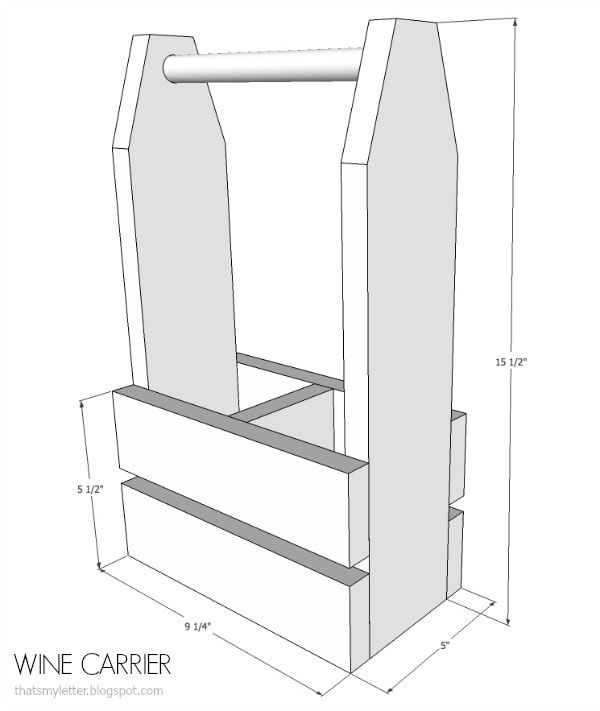
This wine carrier holds two bottles just perfectly. A 1×4 board just happens to be the exact width you need to fit a bottle of wine!
I finished this wine carrier with Rustoleum’s weathered grey stain then clear semi-gloss polyurethane.
Wine Carrier Plans
Below are step by step instructions including supplies and cut lists. Be sure to follow all safety precautions when operating power tools.
Supplies:
- 1 – 1x4x6 pine board
- 1 – 1x3x6 pine board
- ¾” dowel @ 8 ¾”l
- 1 ¼” finish nails
- wood glue
Cut List:
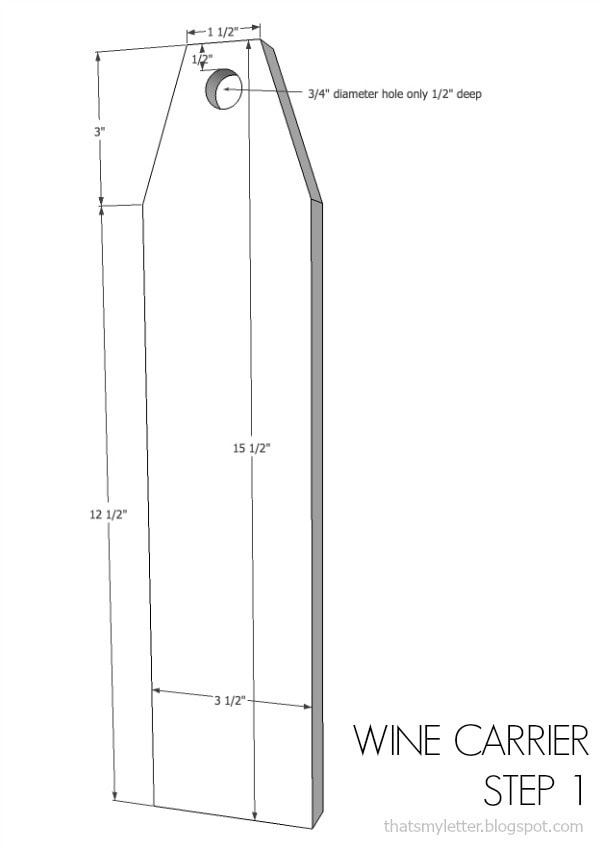
- 2 – 1×4 @ 15 ½” pine board (ends)
- 1 – 1×4 @ 7 ¾” pine board (base)
- ¾” dowel @ 8 ¾” (handle)
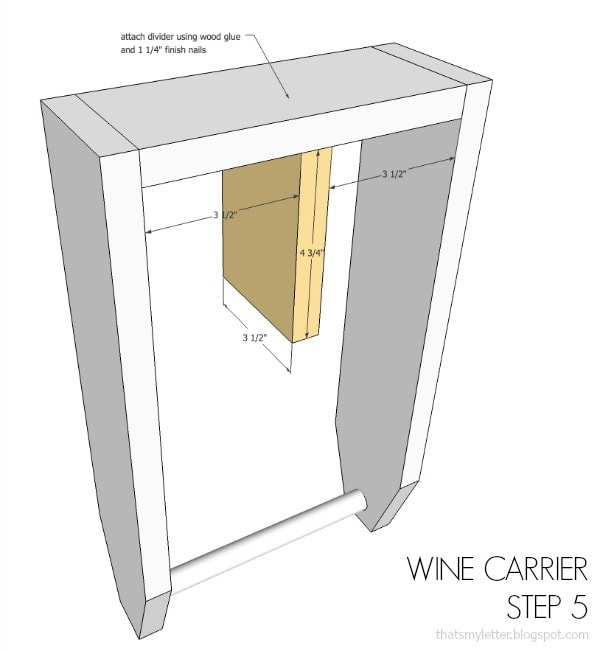
- 1 – 1×4 @ 4 ¾” pine board (divider)
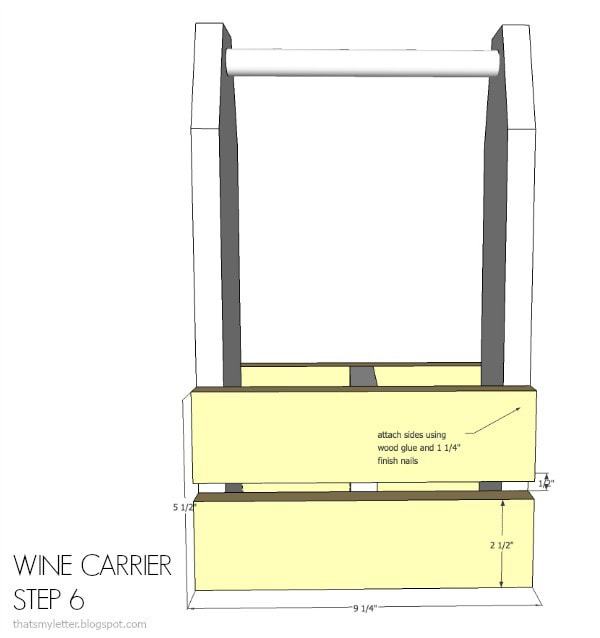
- 4 – 1×3 @ 9 ¼” pine board (side slats)
Step 1: Make tapered cuts in end pieces as per sketch above. Predrill hole for handle using ¾” spade bit going only ½” deep. Make 2.
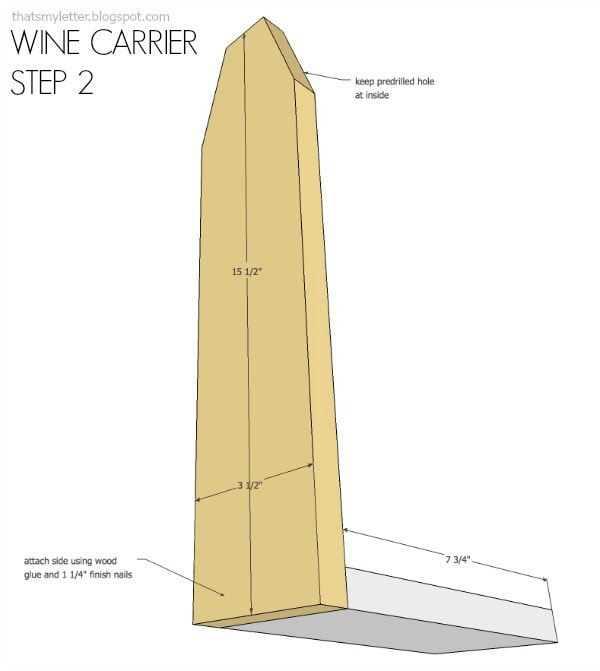
Step 2: Attach one side to the base using wood glue and 1 ¼” finish nails.
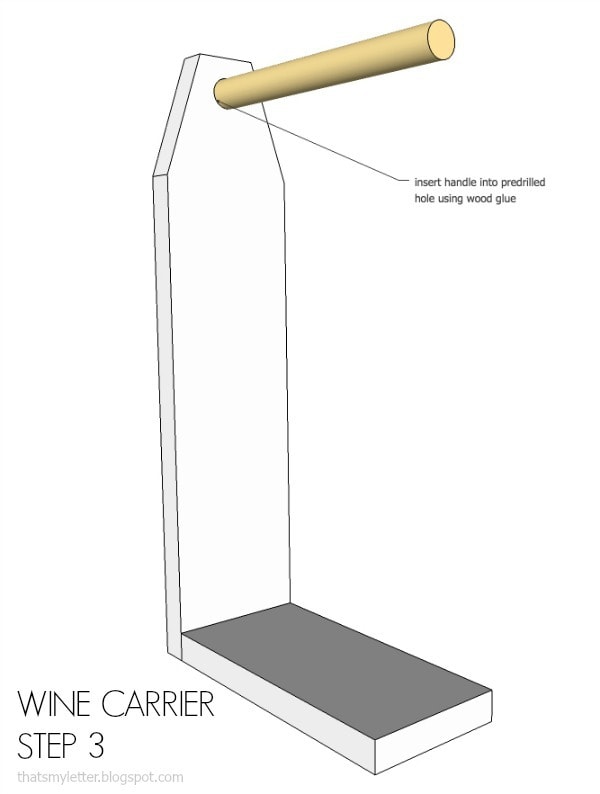
Step 3: Insert handle into predrilled hole in end piece and secure using wood glue and 1 1/4″ finish nails.
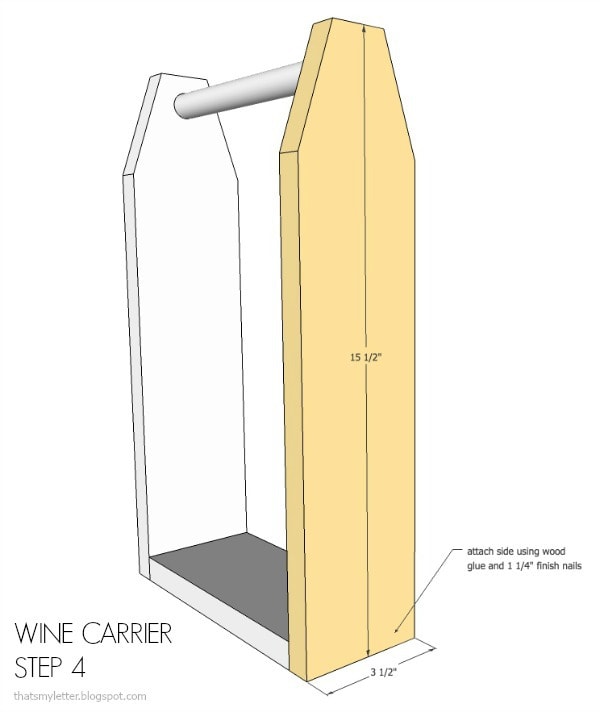
Step 4: Attach other end piece using wood glue and 1 ¼” finish nails.
Step 5: Attach center divider using wood glue and 1 1/4″ finish nails.
Step 6: Attach side slats using wood glue and 1 1/4″ finish nails.



This DIY wine carrier is truly creative! Love the idea and the purpose. Really a good job!