*This post is sponsored by Crates & Pallet.
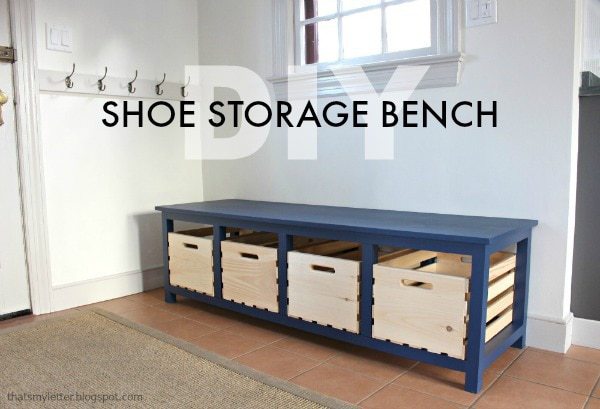
Who’s thinking about clearing out all that clutter now that the holidays are over? I’m right there with you. It’s overwhelming and chaotic and you just want to clear the decks and start fresh. So let’s start in the mudroom with a shoe storage bench that holds a ton!
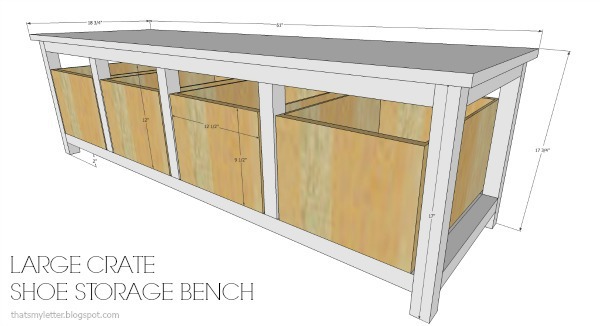
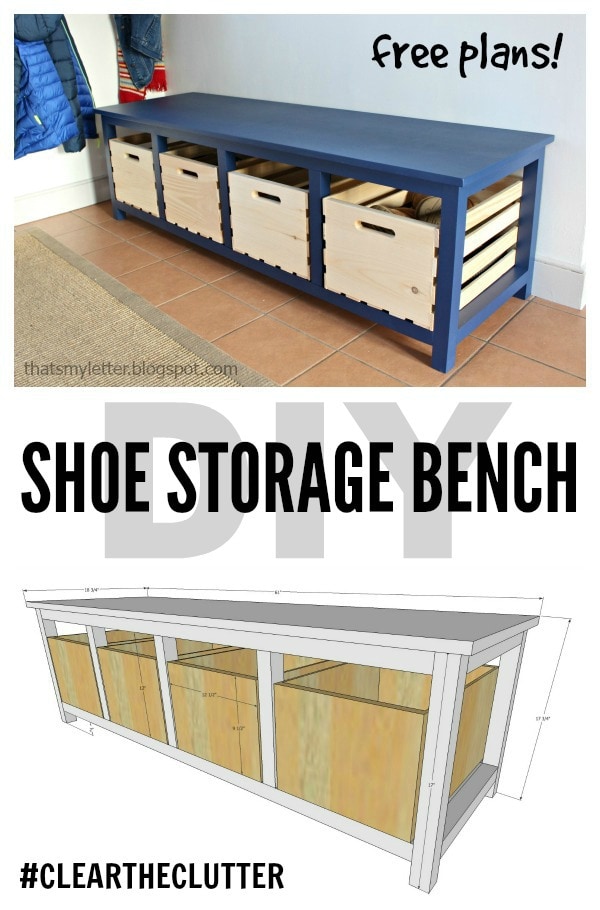
A DIY tutorial to build a large mudroom bench with open space below to fit premade crates for shoe storage. A generous storage bench idea.
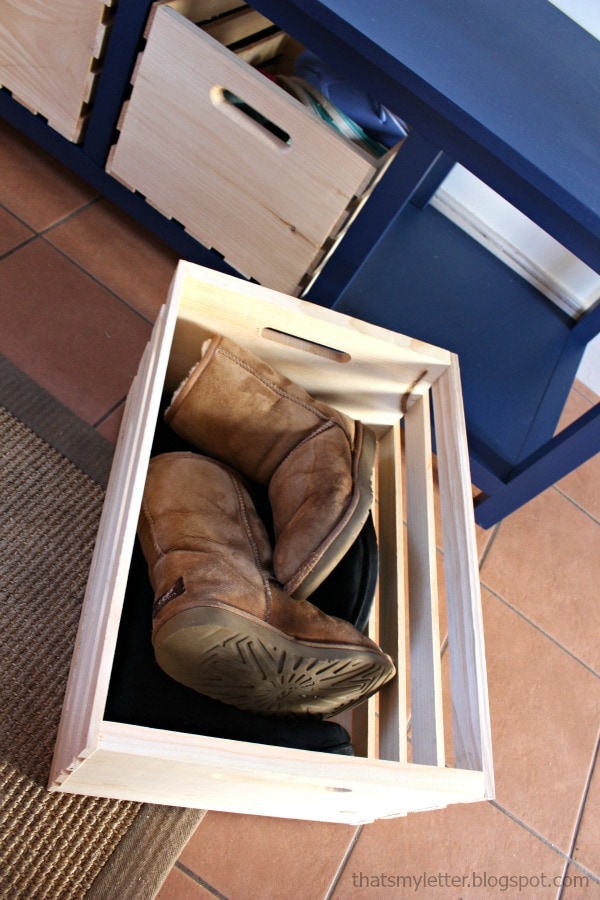
These crates corral and contain all the shoes, hats, gloves and mudroom accessories plus the bench provides a generous spot to sit while putting on those shoes.
Large Premade Crates
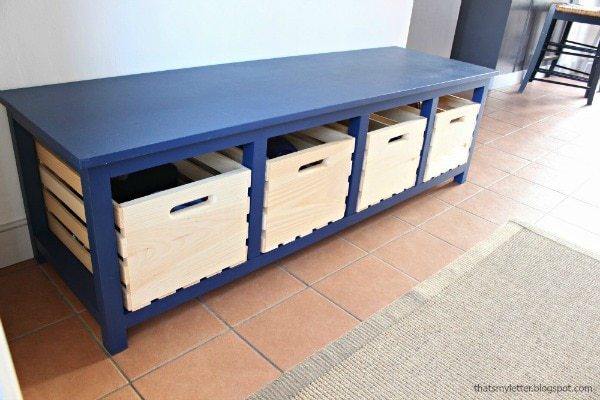
I’ve teamed up with Crates & Pallet to bring you this shoe storage bench plan. We will use four of the large crates for this build. But Crates & Pallet makes all types of crates, various sizes and shapes, you’ll want to check out all the options.
So to get you started on clearing the clutter Crates & Pallet is offering a giveaway to one lucky reader for a Home Depot $50 gift card! (Giveaway CLOSED.) If the holiday mess isn’t motivation enough to clear the clutter then perhaps this giveaway will get you going.
Shoe Storage Bench
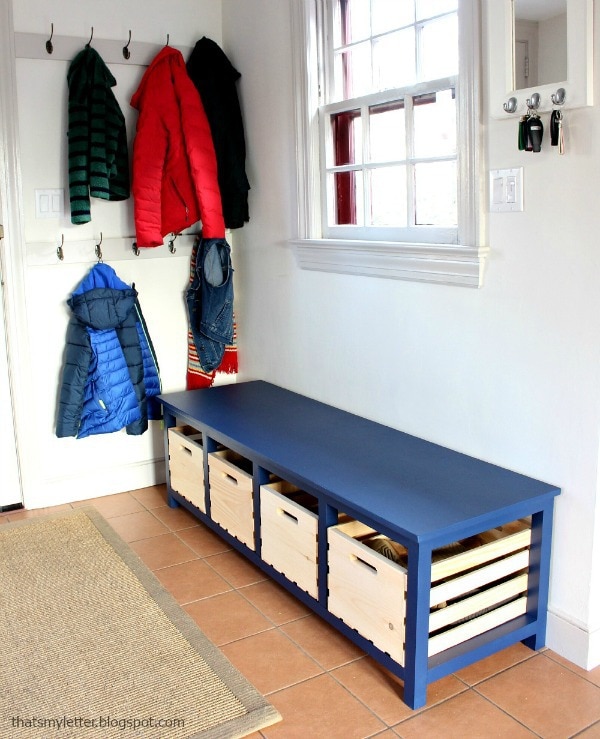
The shoe storage bench fits just inside our back door mudroom area. And you could adjust these plans for a shorter bench. Maybe your space will accommodate just two or three crates and that would be perfect too!
These large crates are 18″ long x 12 1/2″ wide and 9 1/2″ deep so plenty of storage space for multiple pairs of shoes and boots.
I painted this shoe storage bench using Benjamin Moore old navy satin enamel finish. I love the contrast of the natural wood crates against the painted finish.
Below are step by step instructions including supplies and cut list. Please follow all safety precautions when using power tools.
Supplies:
- 4 – large Crates & Pallet wood crates
- 1 sheet – ¾” birch plywood
- 5 – 2x2x8 boards
- 2 ½” & 1 ¼”pocket hole screws
- 2” wood screws
- wood glue
Cut List:
- 1 – 3/4″ plywood @ 18 ¾” x 61” (top)
- 1 – ¾” plywood @ 15” x 56 ½” (base shelf)
- 4 – 2×2 @ 56 ½” (front & back supports)
- 4 – 2×2 @ 15” (side supports)
- 6 – 2×2 @ 12” (center supports)
- 4 – 2×2 @ 17” (legs)
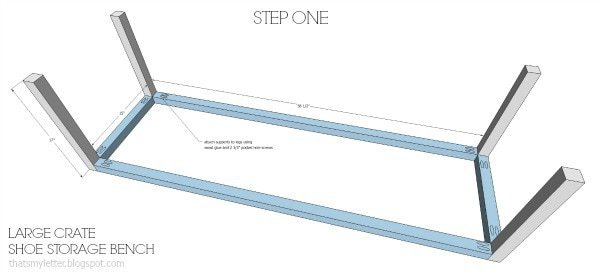
Step 1: Attach supports to legs using wood glue and 2 ½” pocket hole screws.
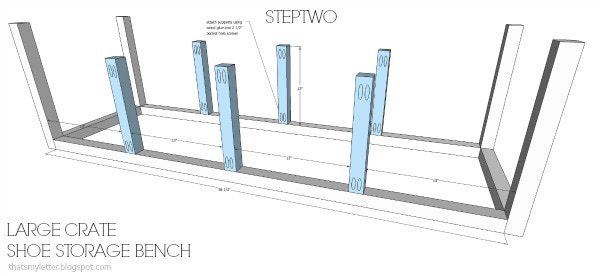
Step 2: Attach center supports to long supports using wood glue and 2 ½” pocket hole screws. Keep pocket holes all facing same direction
(towards back).
(towards back).
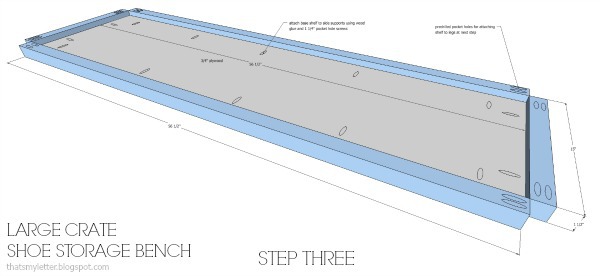
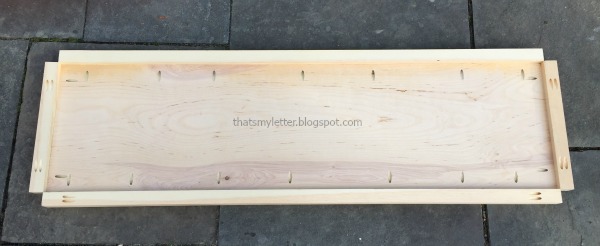
Step 3: Make base shelf by attaching supports to shelf keeping plywood flush on underside. Be sure to predrill the supports with pocket
holes for attaching to legs in next step BEFORE attaching supports to base shelf. Use wood glue and 1 ¼” pocket hole screws.
holes for attaching to legs in next step BEFORE attaching supports to base shelf. Use wood glue and 1 ¼” pocket hole screws.
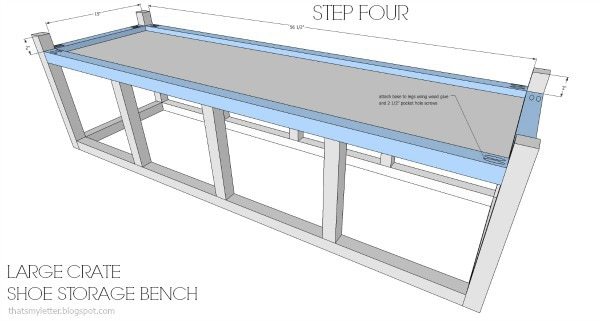
Step 4: Attach base shelf portion to legs using predrilled pocket holes. Use wood glue and 2 ½” pocket hole screws. Also attach center supports to base shelf using wood glue and 2 ½” pocket hole screws.
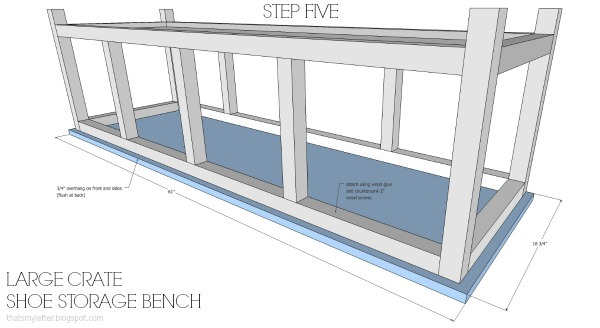
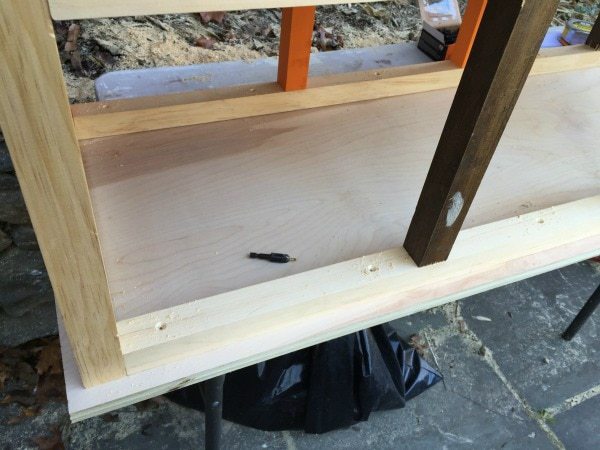
Step 5: Attach top to frame. Use wood glue and predrilled countersink holes to attach top with 2″ wood screws from underside. Keep top flush to back and ¾” overhang on front and both sides.
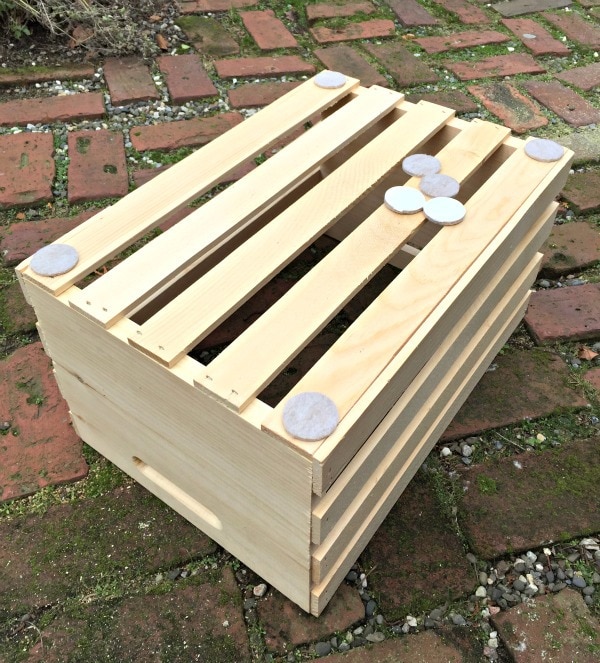
Lastly sand and finish your bench as desired. Also I recommend a few felt pads on the underside of each crate to help the crates slide easily and protect the finish on your bench.
Be sure to stop by Ryobi Nation to see more diy storage project ideas and plans.
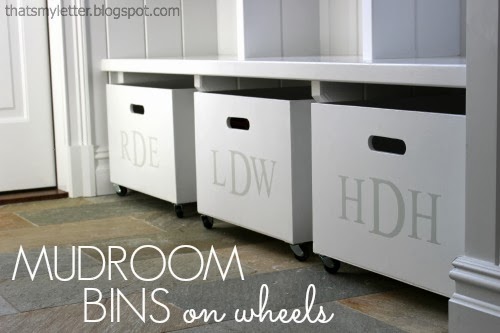
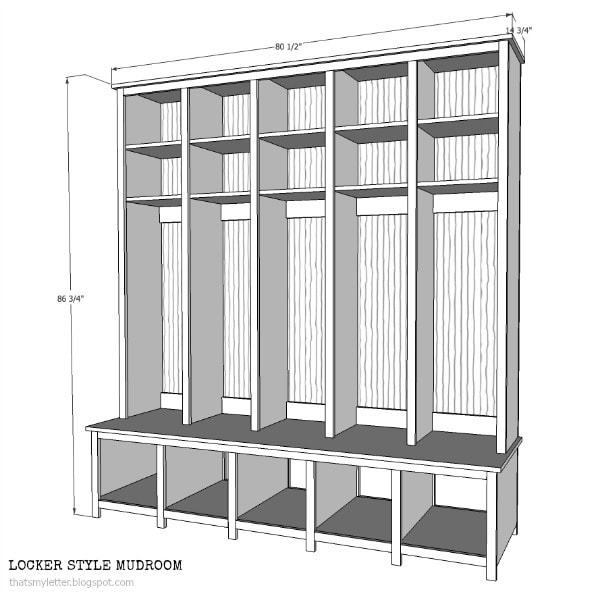
For more mudroom storage ideas click on the photo:


That's a great idea. I love the use of the crates in it. I think I'm going to go home and start measuring boots to see how many I can fit in something like this.
Jane I would like to add a back on my bench. Getting ready to start project but I need to put a back on it to basically hide some of the area. I have kind of a weird set up. Just converted my laundry room into mud room. Do you having any ideas or illustrations?
Hi Terry, I’m assuming since you want the back to ‘hide some of the area’ it needs to be a solid back? I’d consider extending the base frame legs at the back corners and center two supports all the way vertical (as high as your back). You will have to adjust the plywood seat a bit and then you can add a solid plywood back? I’d search for church pew style benches and meld those plans with this shoe bench if you need the storage. Hope that helps.
Jamie,
Bought all supplies yesterday however I purchased plywood with one side sanded, instead of the birch plywood. When I went to purchase what you have on supply list as (2” wood screws) their are differences in thickness at the store…Which 2” screw type would it be I.e. 8-2, 10-2. Also not sure what type of back I’ll be putting on it yet I.e. design…Would there be any problem if I build the bench per your instructions and then attach back?
Love this idea for almost any room – would be great for toys. (How heavy do the crates get with stuff in them? Curious if it would be too heavy for Henry.)
How did you get the wood to look so smooth? I feel like my wood looks really rough still even after sanding and the first coat of paint.
In respond to @Chris Drahos comments above I suggest using SELECT 2×2 pine boards and 2 1/2" Kreg pocket hole screws. The 2×2 should not split when driving the screws. I suggest using a pocket hole clamp to keep joins tight and square, I did not have any hardware collisions during this build process.
I agree the 2x2s worked perfectly with a kreg jig. These plans were actually spot on. I still have to finish my project but everything came together ez peezy.
Thank you Justin, so great to hear other builder’s experiences. Hope you love your bench as much as we love ours.
What was your supply cost?
How much weight can these benches support?
I've had 2 adults on it at once with no sagging. If you're concerned about weight I'd change out that middle vertical support to be a leg on both front and back.
How would you do this middle vertical support to a leg?
Hi Drew, there are 5 vertical supports on each side (the 2 on each end are legs). If you want to add additional support to prevent any sag I would lengthen the center vertical supports (see step 2) to become center legs. This gives support in the center but it will change the cross support cuts as you need to make space for the leg coming down. Totally doable and once you’re building it it will make sense. Hope that helps.
Where did you get the crates for this project? I have seen some at Michaels, but I wanted to make sure I get the correct ones.
HI Matt, The large crates are from Home Depot: https://www.homedepot.com/p/Crates-Pallet-Crates-and-Pallet-18-in-x-12-5-in-x-9-5-in-Large-Wood-Crate-94565/203153338?irgwc=1&cm_mmc=afl-ir-1241962-456723-&clickid=3RYWF02EMzC%3AXl0ztrVJYR3SUkgyUMUxIzBSQc0
Hi! I am wanting to do this project with three crates instead of four, how difficult do you think it would be for me to modify the measurements? How would I go about doing that?
I have always stuck to refinishing furniture, and haven’t gotten into the building side yet!
Hi Lindsey, So fun to get on the building train, it’s amazing what you can create with just a few boards. Yes you can definitely modify this bench for 3 crates. I use SketchUp to create my plans. Working with paper and pencil you could take the plans and start with your finished size & required openings for 3 crates. Then work backwards following the steps backwards and making the modifications to fit your openings. That will give you a new cut list you can work from.
Very well done! I am impressed with your DIY skills.
I wish all the best.
Just want to make sure the 2×2 are what you get at a hardware store and actually measure 1.5×1.5
Hi Jeff, yes 2×2 is the nominal size – 1 1/2″ x 1 1/2″ is the actual size.
What is the ratio for the base shelf? As in, If I were to make it shorter in length, what should I switch the base shelf dimensions to? Thanks so much!!!! Appreciate these plans and your work!