• Home
  • Blog
  • About
  • Contact
    • Disclosure
    • Privacy Policy
  • SHOP
  • Widget area for main menu

    • Email
    • Facebook
    • Instagram
    • Pinterest
    • Twitter
    • YouTube
  • Skip to primary navigation
  • Skip to main content
  • Skip to primary sidebar

Jaime Costiglio

build - paint - sew

  • BUILD
    • BEDS
    • BENCHES
    • DESKS
    • DRESSERS
    • GAMES & TOYS
    • SCRAP WOOD
    • SHELVES
    • STORAGE
    • TABLES
  • TOOLS
  • PAINT
    • CRAFTS
    • FURNITURE
    • HOME DECOR
  • SEW
    • GIFTS
    • HOME DECOR
    • POUCHES
  • HANDBUILT HOLIDAY
    • 2021
    • 2019
    • 2018
    • 2017
    • 2016
    • 2015
    • 2014
    • 2013
  • GIFTS
    • BABIES
    • KIDS
    • FOR HER
    • FOR HIM
    • TEACHERS
    • WEDDINGS
  • SEASONAL
    • 4TH OF JULY
    • FALL
    • HALLOWEEN
    • CHRISTMAS
    • SUMMER
    • SPRING
    • ST. PATRICK’S DAY
    • THANKSGIVING
    • VALENTINE’S DAY
    • WINTER
  • SALTBOX PROJECT
    • BATHROOMS
    • DINING ROOM
    • EXTERIOR
    • FAMILY ROOM
    • FOYER / MUDROOM
    • KIDS BEDROOMS
    • KITCHEN
    • LIVING ROOM
    • MASTER BEDROOM
    • PLAYROOM
  • SCROLL SAW

DIY Craft Island

January 6, 2014

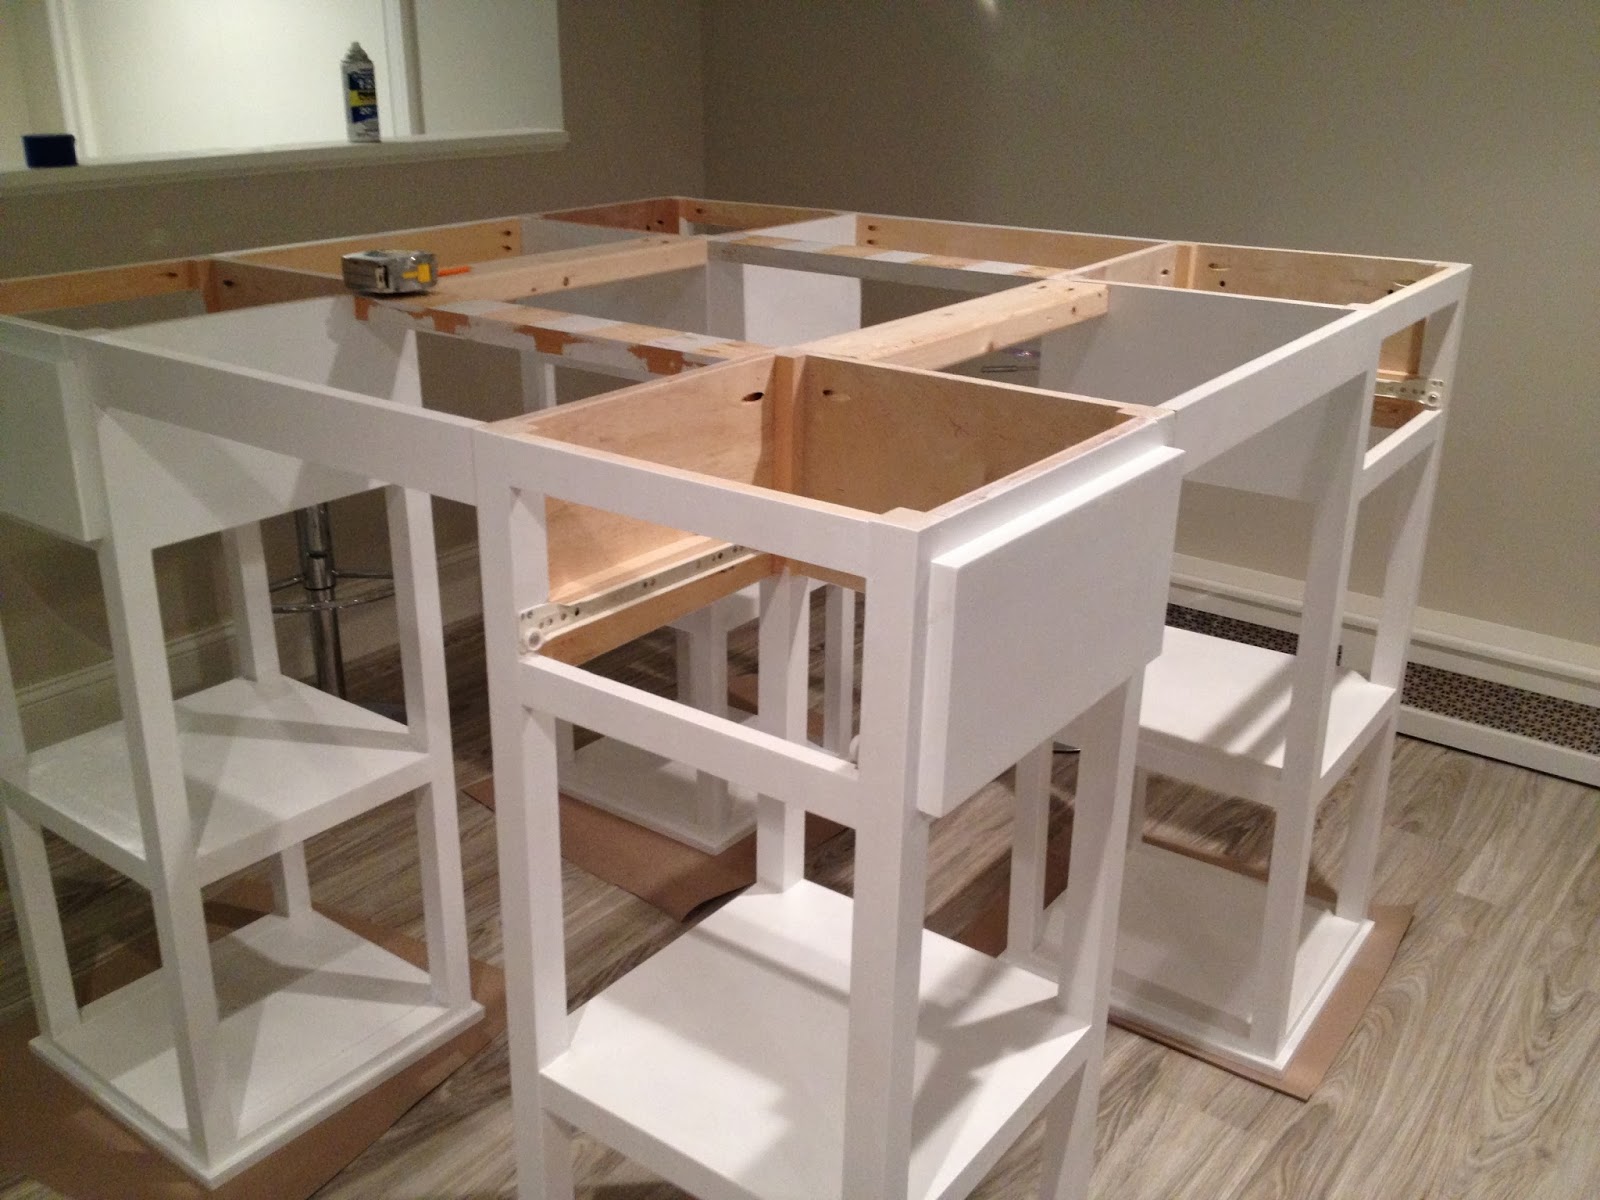
Build: diy craft island
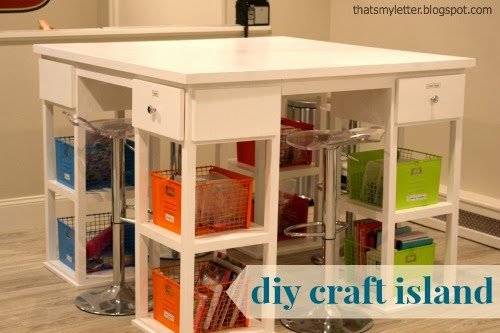
I built this craft island for a friend.  
This craft island resides in her new home in the basement (which explains the overhead lighting as there are very few small windows).

Inspired by this Houzz find:
Transitional Kids by Dallas Home Builders Ellen Grasso & Sons, LLC

This diy version is the perfect designated craft space for her four kids.
The top measures 56″ x 56″:
One drawer in each tower with 2 open shelves:

How to build a craft island:

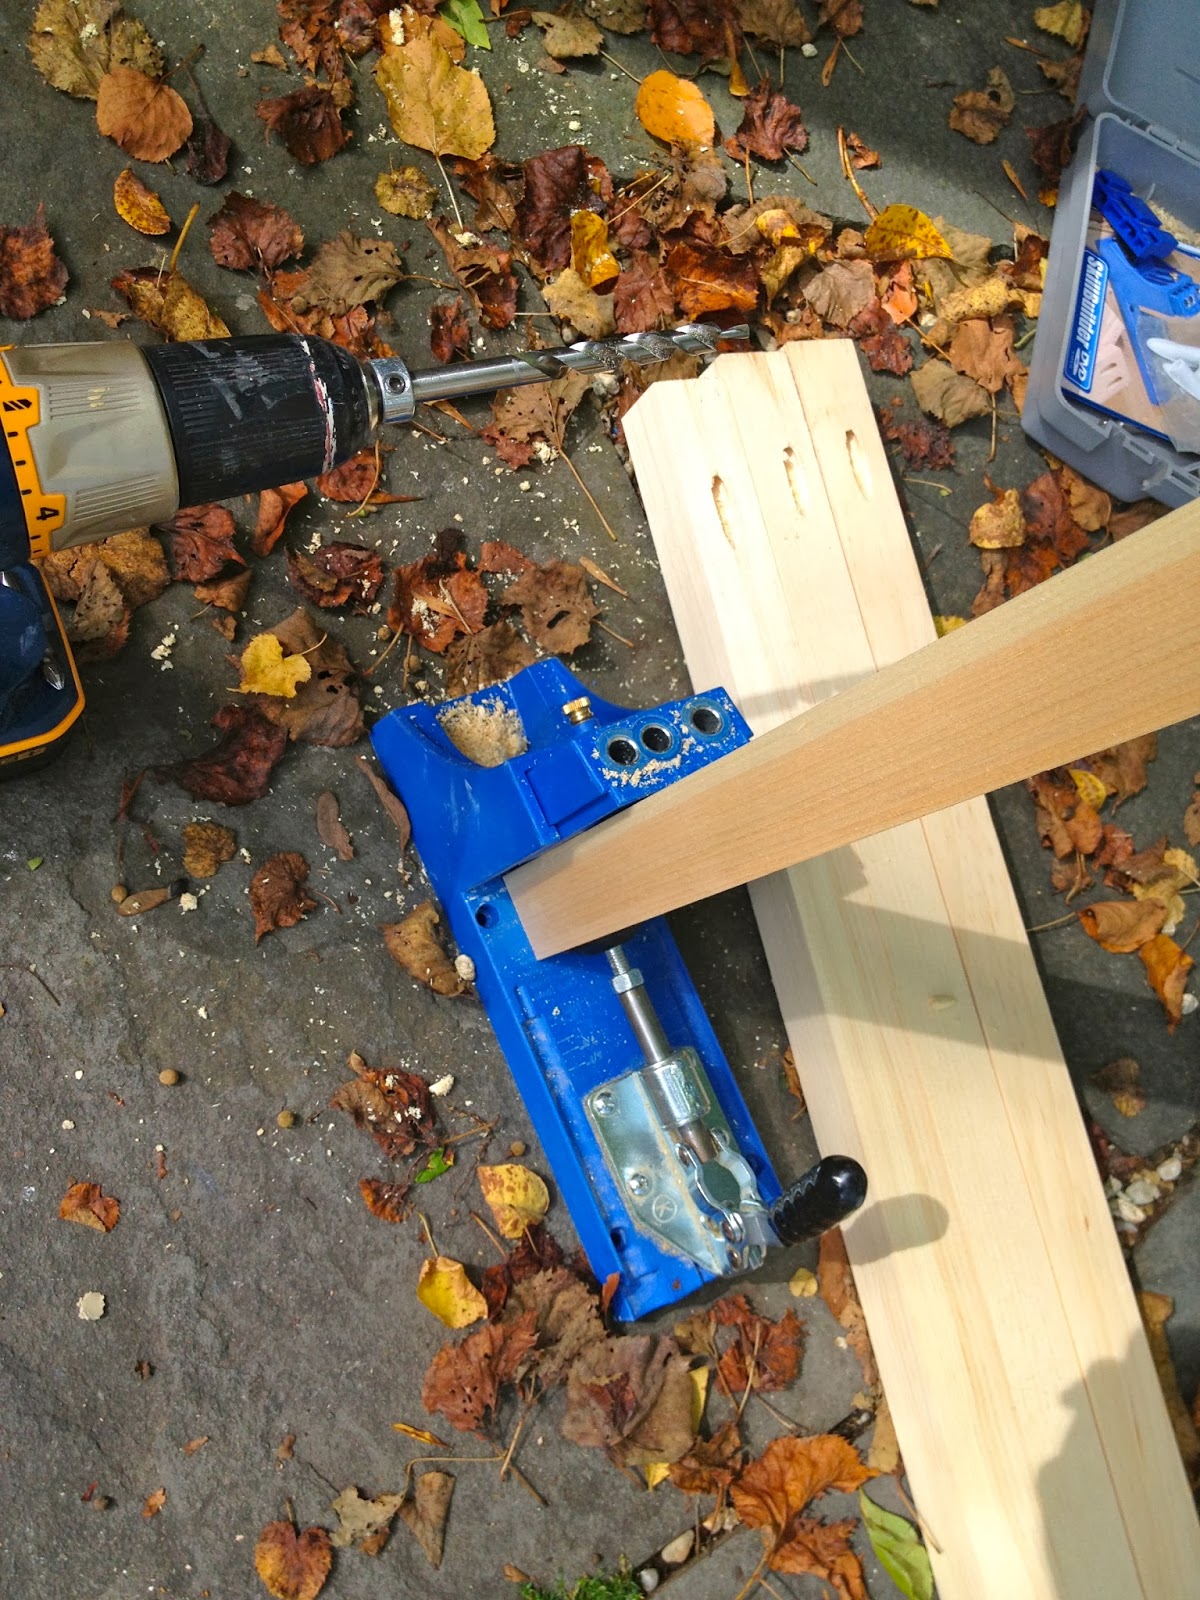
1. Determine leg height and drill pocket holes in one side of one end:
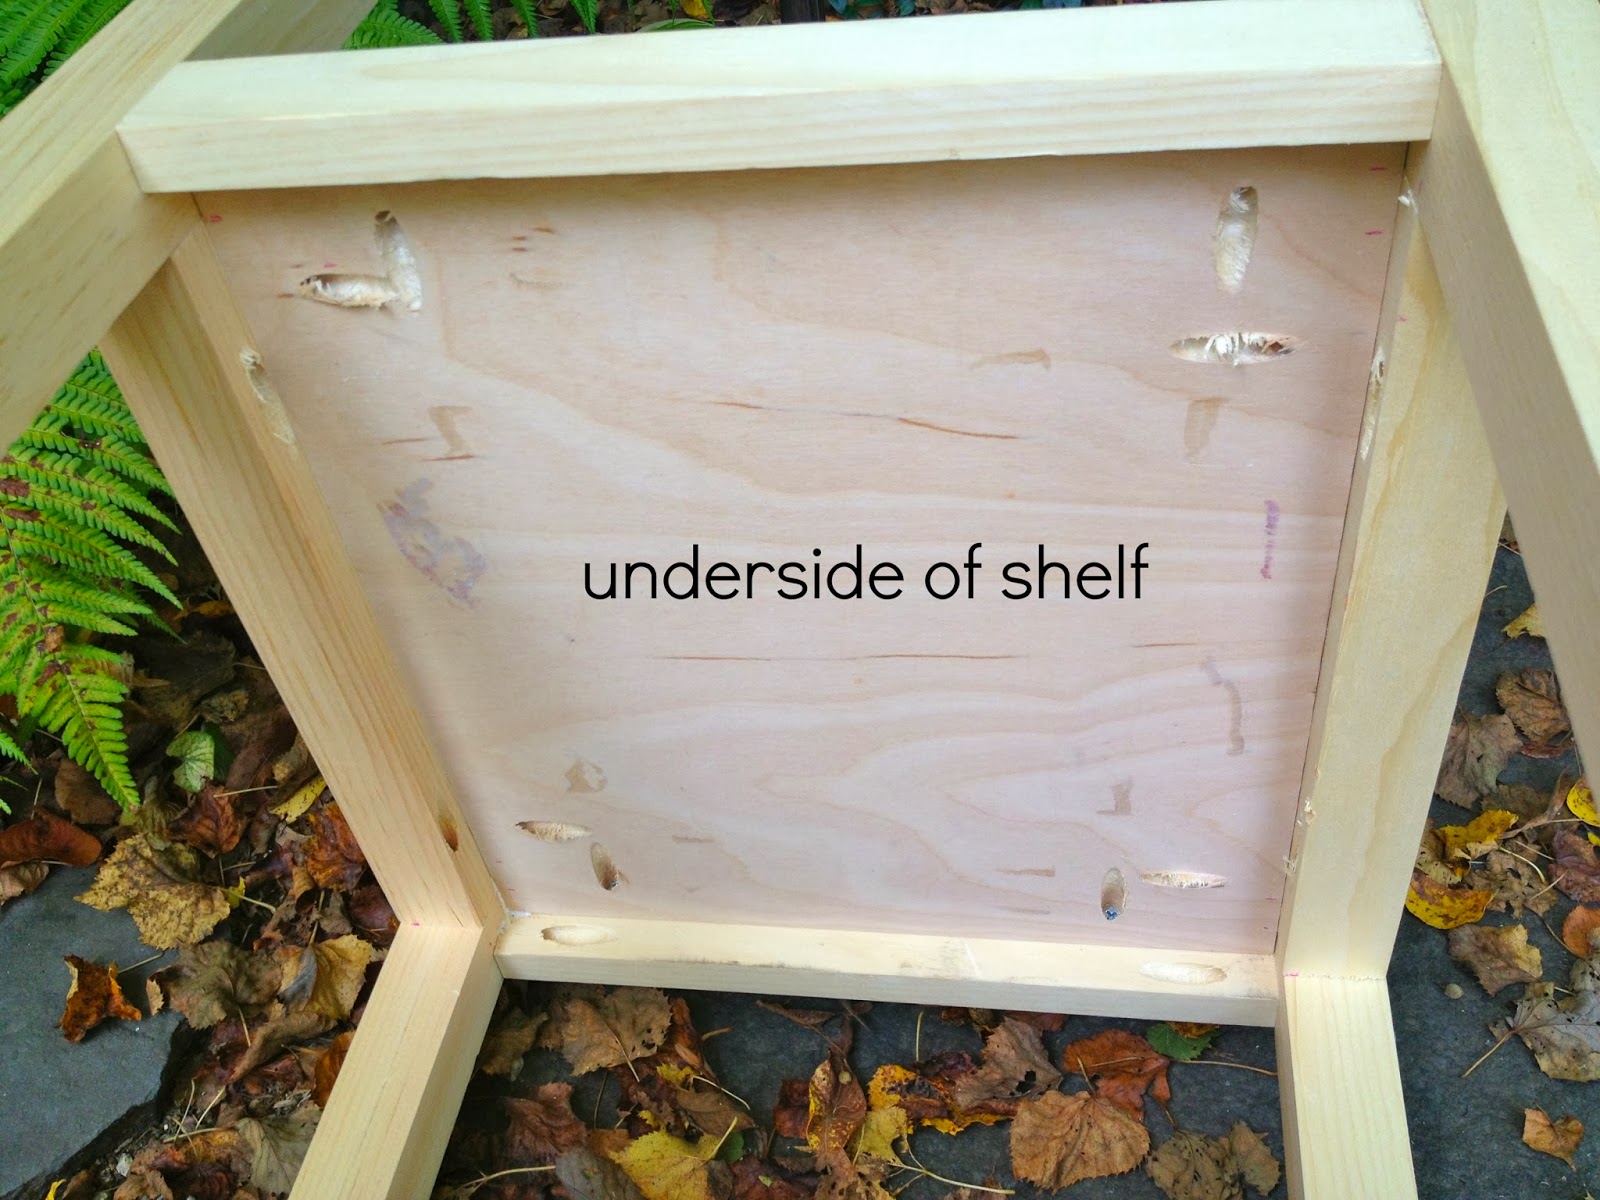
2. Prepare shelf.  
3/4″ plywood middle, 2×2 on two sides, 1×2 on opposite sides.
This is the underside view with all the pocket holes drilled:

Trim pieces attached:

3. Attach legs to 3/4″ ply base with 1×2 trim in between legs.
Attach shelf:

Top view of shelf:

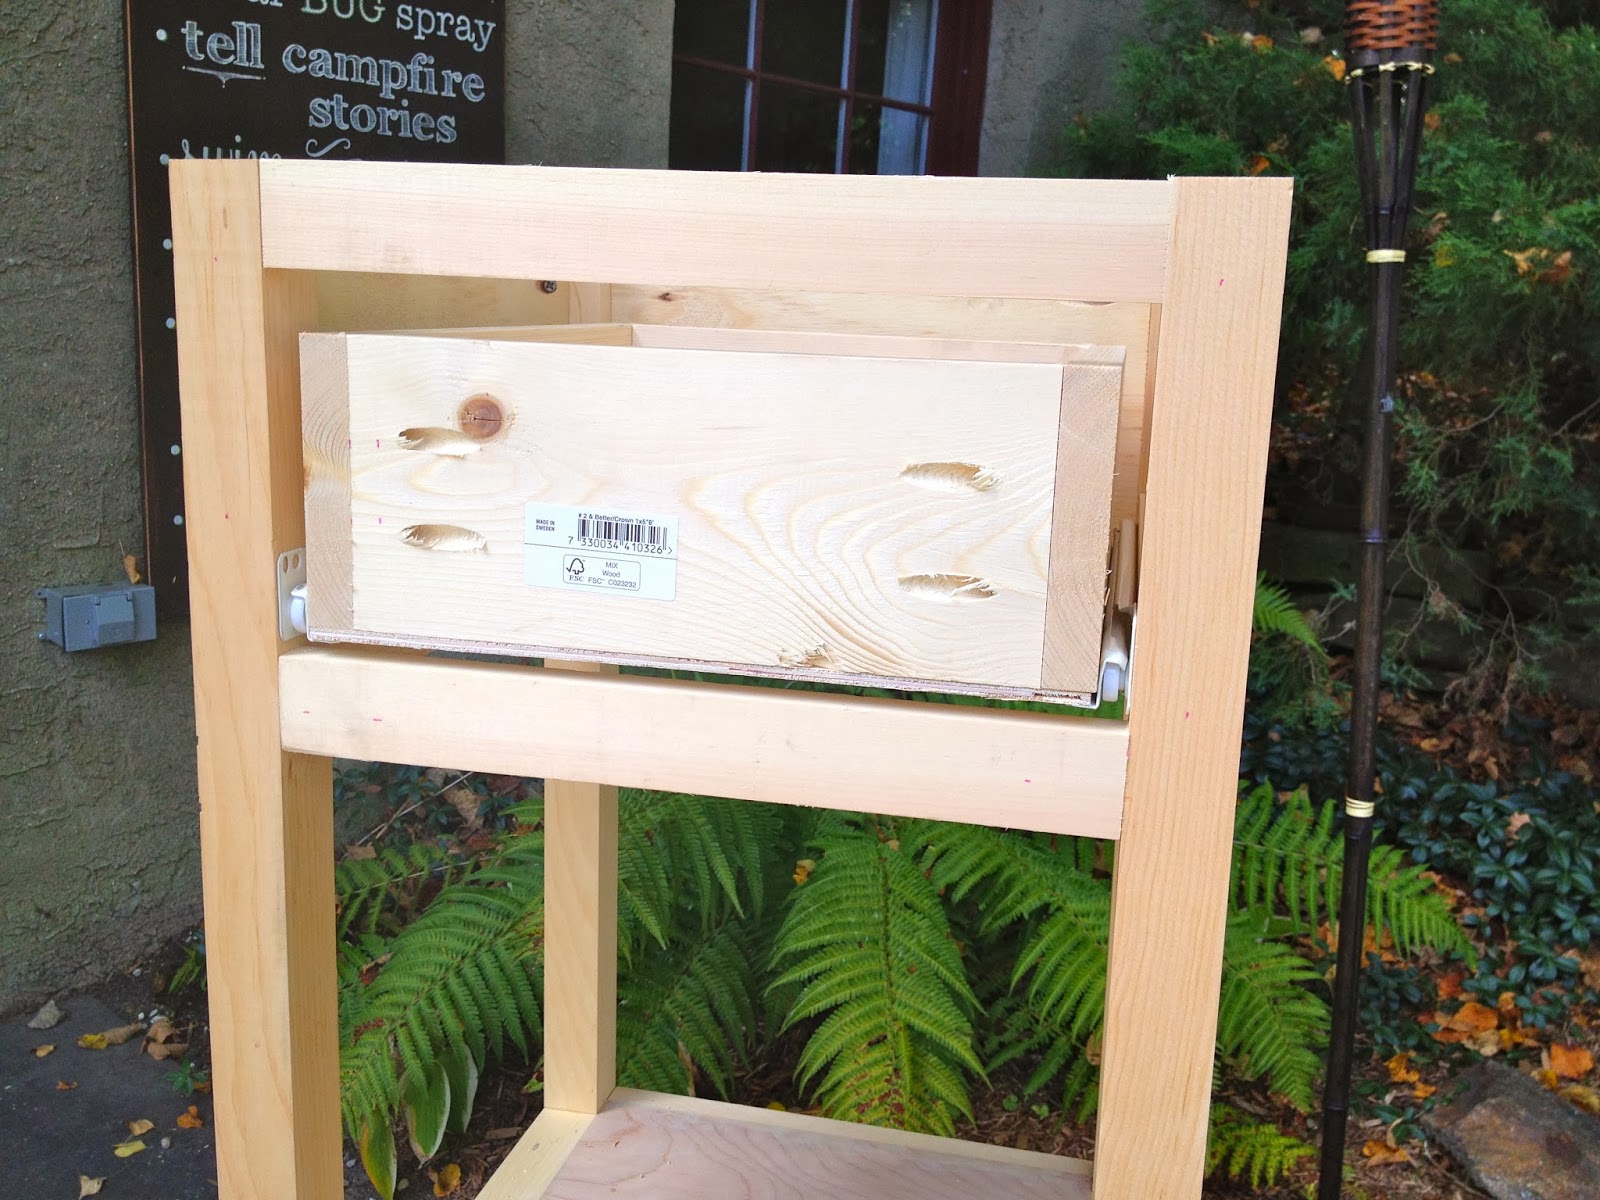
4. Prepare drawer space with 3/4″ ply on 3 sides and 1×2 trim for drawer opening:
5. Attach drawer glide cleats on both sides of interior:

6. Attach drawer glides:
7. Construct drawers from 1×5 boards:
8. Attach 1/4″ ply base and glides:
9. Attach 1×8 drawer front and faux drawer front to right side:

10. Sand.
Prime with Zinsser oil based primer.
Sand.
Paint two coats white high gloss enamel.
11. Assemble.
Start with 2×4 braces between the towers:
12. Add 1×3 trim flush to front of towers:

13. The top surface is 2 pieces of 3/4″ plywood on top of 1/2″ plywood pieces then trimmed out with 1×2:

Add drawer hardware.

You may also like...

  • DIY Kids Play BarnDIY Kids Play Barn
  • DIY 18″ Doll Trundle BedDIY 18″ Doll Trundle Bed
  • DIY Treehouse Dollhouse & Furniture PlansDIY Treehouse Dollhouse & Furniture Plans
  • DIY Simple Play Market StandDIY Simple Play Market Stand
Share this post:

Filed Under: BUILD, DIY, FURNITURE, FURNITURE, PAINT, SHELVES, STORAGE, TABLES9 Comments

Reader Interactions

Comments

  1. Hopping Along says

    January 6, 2014 at 3:25 PM

    DId you use poplar 2×2's for the legs? They are so smooth and square… unlike the furring strips I usually find.

    Reply
  2. Katy says

    January 6, 2014 at 11:35 PM

    I LOVE THIS!!!
    I think this is one of my favorite things you've built. maybe because I really want one of my own! 🙂

    Reply
  3. jcprime1 says

    January 8, 2014 at 10:37 AM

    Legs – yes Hopping Along the legs are made from 2×2's. I used select white pine, not furring strips. The pine runs about $9 for a 8' board but worth the extra cost and they only recently started stocking them at my Home Depot in June.

    Reply
  4. Meg Sluyter says

    January 10, 2014 at 10:04 PM

    Hi Jamie, I saw this at Funk Junky. I LOVE it! I want something just like this in my craft room, once I get to organizing it that is. Thanks for sharing how you did it 🙂

    Reply
  5. Whitney Surane says

    January 10, 2014 at 11:21 PM

    Yay! I so want one!!

    Reply
  6. Sarah Vanderkooy says

    January 12, 2014 at 11:46 PM

    Beautiful island, love how clean and organized it is. Thanks for the detailed tutorial.

    Reply
  7. Jileen says

    February 22, 2014 at 7:32 PM

    Wow Jamie, I just found your blog and it so flipping cool! We are going to embark on our playroom a few months from now and this craft island is such a great inspiration. Thanks!

    Reply
  8. Troy Raines says

    September 22, 2014 at 2:49 PM

    Hi Jamie, I am making this table for a workroom. Do you have any measurements or cut lists. Mainly the width and depth of the corner towers. And drawers also. Any help would be great,love the design. It's going to be a fun build thanks.

    Reply
  9. Denny Krynicki says

    March 30, 2015 at 1:55 PM

    Could you please give some details on making the top ?
    How do you join the 3/4 plywood to make the 56" top ?
    Thank you

    Reply

Leave a Reply Cancel reply

Your email address will not be published. Required fields are marked *

Primary Sidebar

Hi! I’m Jaime

Jaime Costiglio

Hello!

Thank you for stopping by.
Join me for lots of DIY.

Read more

Get new posts via email

Handbuilt Holiday: Gift Project Plans

handbuilt holiday gift project plans

Collection of DIY gift project plans to build.

The Home Depot Tool Prospective

THD Prospective

Tools to consider for the DIYer.

Archives

The Home Depot Logo
Copyright © 2023 Jaime Costiglio · Custom site by Moonsteam Design

Privacy Policy