Craft: covering books

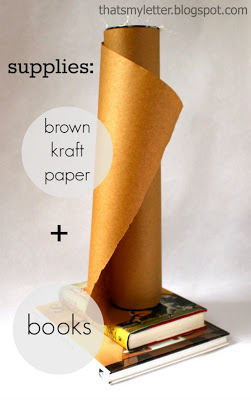

How to cover your books old school with brown kraft paper.
– NO SCISSORS
– NO TAPE
– NO CONTACT PAPER
Just books and brown kraft paper (or a disassembled paper bag).

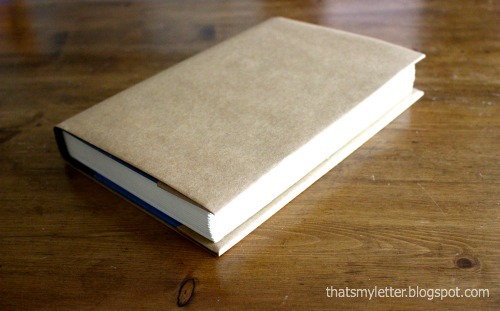
And you can do this:
Now you have the perfect spot for doodles and designs!
Thanks Mom and Dad for teaching me this technique so many years ago.
How to cover your books with paper:
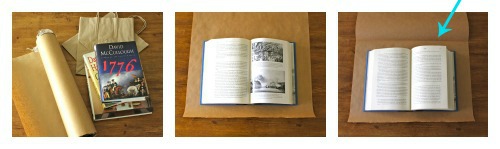
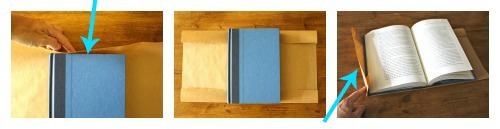
Open the book and tear off a piece of paper to size. Fold to make a crease first and be sure you have at least 3″ at top and bottom and 5″ on each side. (My paper could be a little bit wider.)
Begin by folding up the bottom edge just to the edge of the book then make a crease.
Repeat with top edge folding down just above the height of the book.
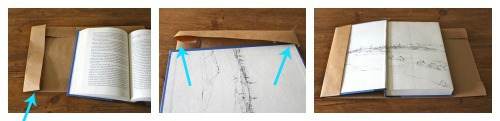
For the sides open the book again, center on paper, fold over left side to mark edge.
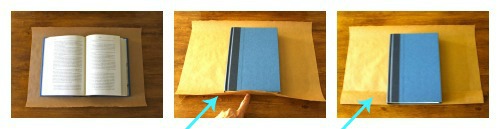
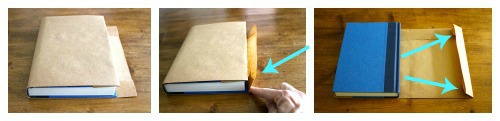
Complete fold to create a slot for the hardcover. Slide left cover into folded corners.
Close the book and repeat for right side, mark the fold using edge of book then finish fold.
Slide right side of cover into folded corner slots.

I’m linking up to:
SAS @ Funky Junk
Nifty Thrifty Sunday @ Nifty Thrifty Things
That DIY Party @ The DIY Showoff
Tutorials & Tips Tuesday @ Home Stories A to Z
The Scoop @ Lolly Jane
Strut Your Stuff @ Somewhat Simple
Transformation Thursday @ The Shabby Creek Cottage
Share Awesomeness Thur @ The 36th Avenue
Pretty Things Thursday @ Scissors & Spatulas
Flaunt it Friday @ Chic on a Shoestring
Frugal Friday @ The Shabby Nest
Furniture Feature Friday @ Miss Mustard Seed
SAS @ Just a Girl
Remodelaholics Anonymous @ Remodelaholic
inspiration board @ Carolyns Homework
Sunday Showcase Party @ Under the Table & Dreaming

How fun is that! We needed to cover all our schoolbooks when I was in school and this was the least expensive way to do it. Of course we often scribbled all over the covers and would always make new ones each quarter. I have just done this to a few books with a a plan to post in the future. What a coincidence! When I do post, can I link to your very good instructions with the diagram?
Cheers! Rita
We used to do this to all our books. Now the stores all seem to sell those stretchy covers. I like the look of this better though! And it looks great when you're styling bookcases too! Thanks for the reminder! And hi! I found you via Shabby Nest. ~Ali from Pies & Puggles
Brings back high school memories. Of course mine usually ended up doodled on to no end.