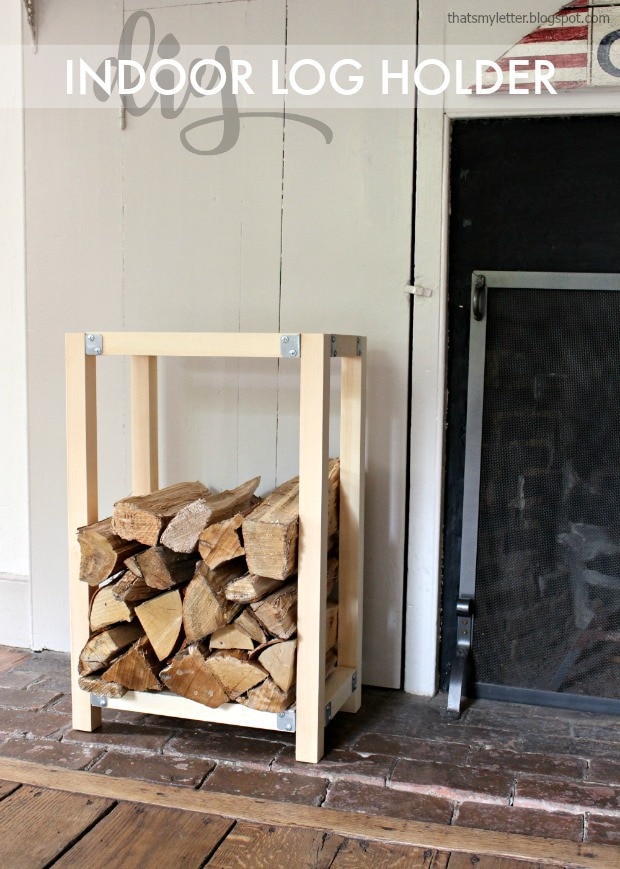
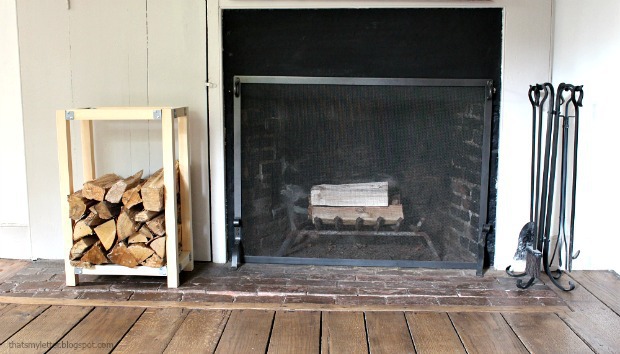
I’m getting prepared for the winter season today and sharing this indoor log holder constructed using Simpson Strong-Tie® connectors. This DIY log holder is only one of many projects featured over at DIY Done Right, a site all about using Simpson Strong-Tie® products to make projects for your home.
A DIY tutorial to build an indoor log holder. Make the perfect spot to contain logs indoors to have at the ready for your next fire.
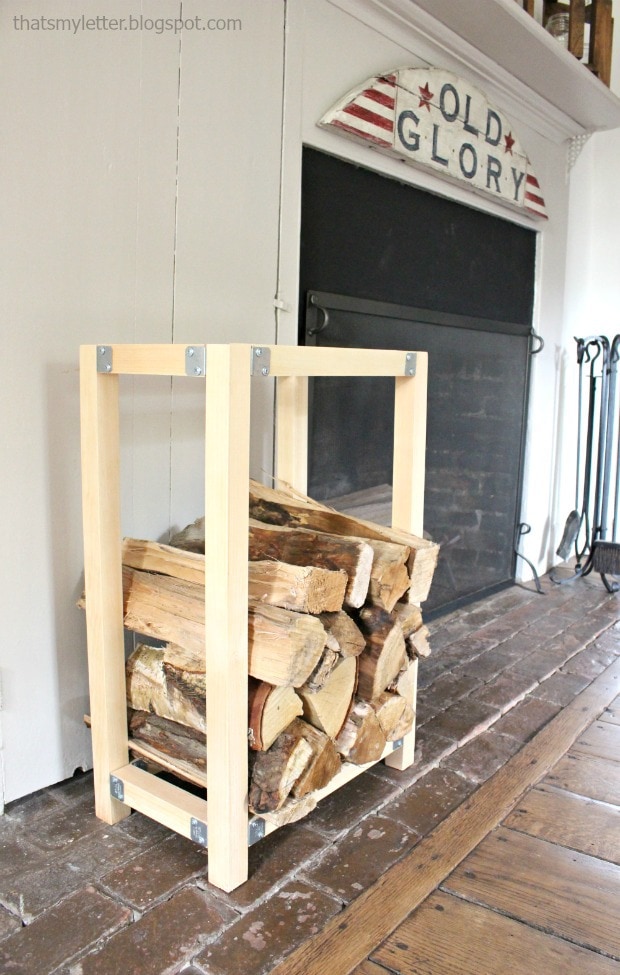
I’m a sucker for functionality and ease so I designed this indoor log holder with those two priorities in mind.
- The simple construction allows for easy access to the logs
- In addition you can modify the size to fit your needs.
Once the boards are cut the building process is very straight forward.
Log Holder Construction
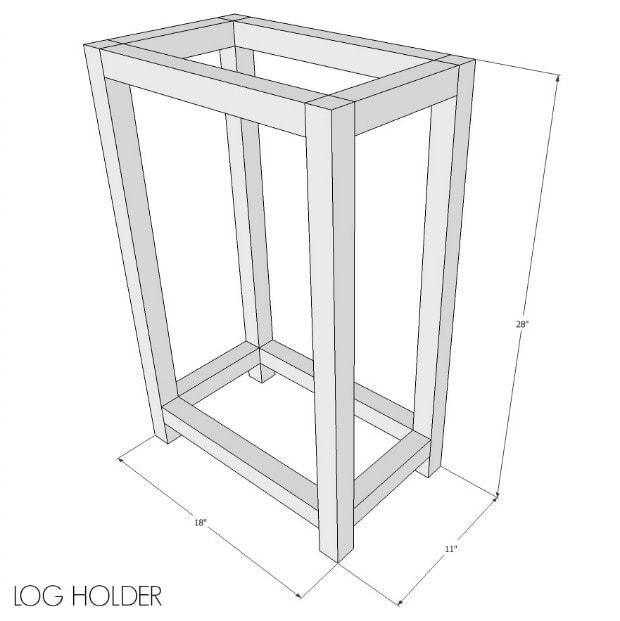
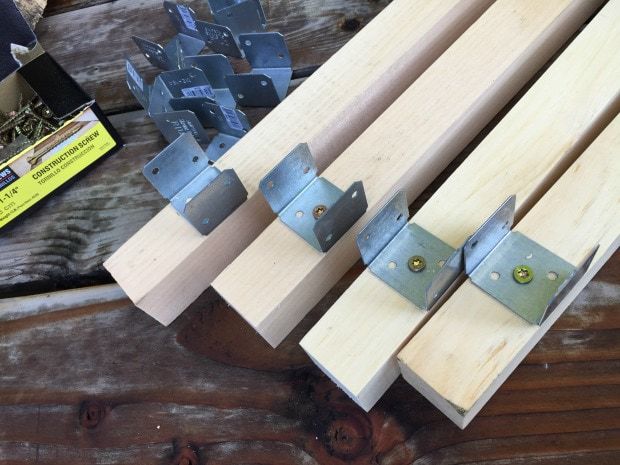
We are essentially building a box frame here. I used all Simpson Strong-Tie® RTU2 connectors for this indoor log holder.
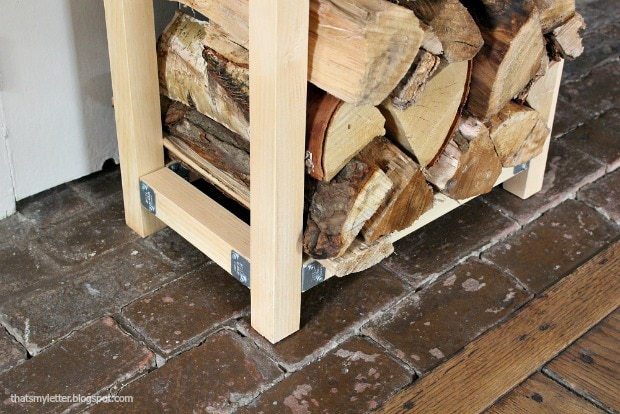
Hardware Details
I quite like the contrast between the raw wood boards, the metal hardware and the logs. But you could paint or finish your log holder to fit your décor.
Below are steps to build an indoor log holder. Be sure to measure your space and your average log size to determine the best fit.
Materials:
- 1 – 2x2x8
- 1 – 2x2x6
- 16 – SimpsonStrong-Tie® RTU2 connectors
- ¾” wood screws
- ¾” lath screws
- wood glue
Cut List:
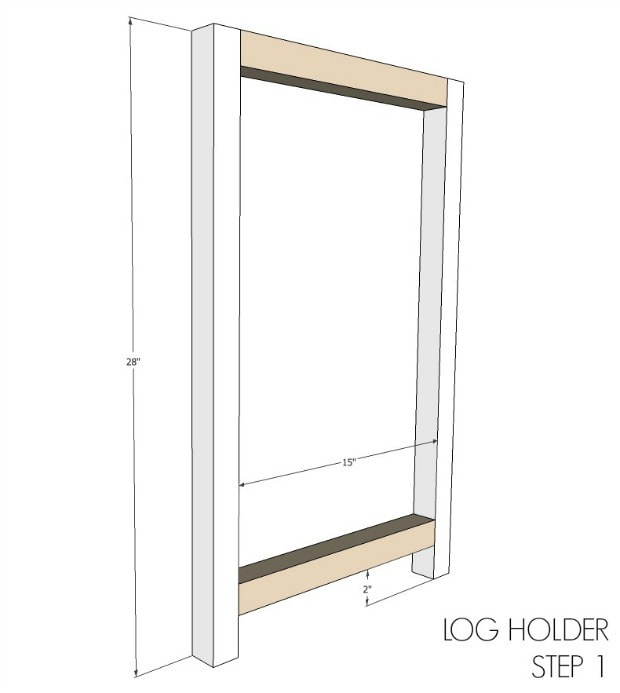
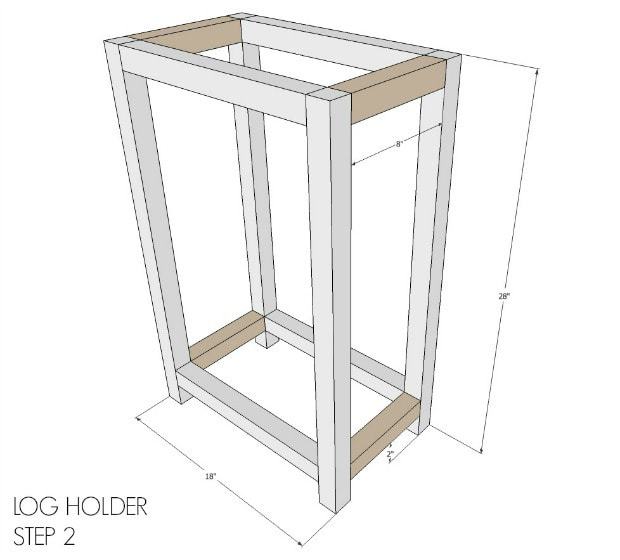
- 4 – 2×2 @ 28” (legs)
- 4 – 2×2 @ 8” (short supports)
- 4 – 2×2 @ 15” (long supports)
Step 1:
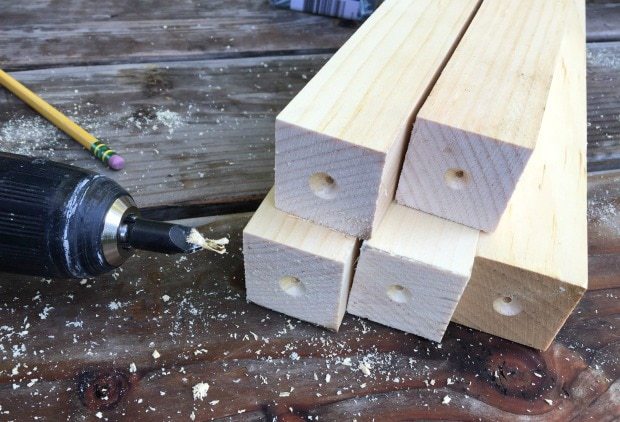
Build the long sides using 2 legs and 2 long supports. Attach the Simpson Strong-Tie® RTU2 connector to the leg using ¾” wood screws. Use a spade bit or countersink bit to create a well in the end of the long support for the screw head to hide. (See below) Then attach the long support to the connector using ¾” lath screws.
Make 2
Assembly Tips
I suggest attaching all of the Simpson Strong-Tie® connectors before assembly.
Below you can see I used a countersink bit to create a well for the screw head. This allows the board to sit flush against the connector for a tighter fit.
Step 2: Attach the short supports to the long sides using the same method as Step 1.
Sand well and finish as desired.
An indoor log holder ready for the winter season, now I just need to stock it with more firewood!
Be sure to follow DIY Done Right on Facebook, Twitter and Instagram for more project inspiration.
Disclaimer: This post is brought to you in partnership with Simpson Strong-Tie®. I was provided compensation and /or product for this post however all thoughts, opinions and creative ideas are my own.




Leave a Reply