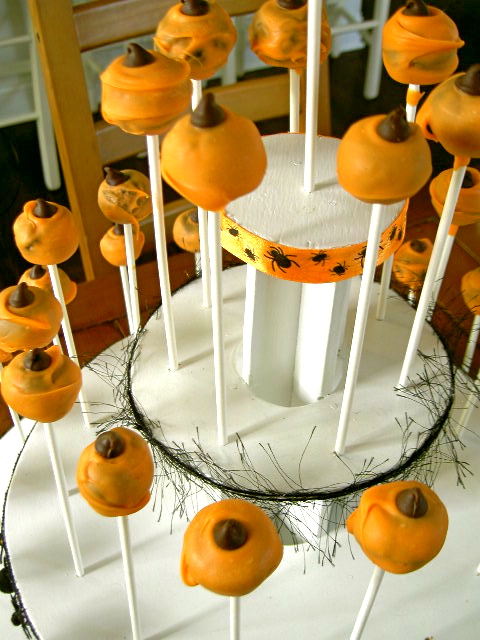
Pumpkin brownie pops.
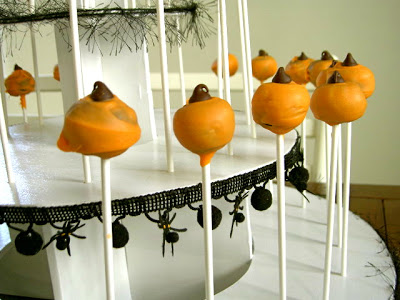

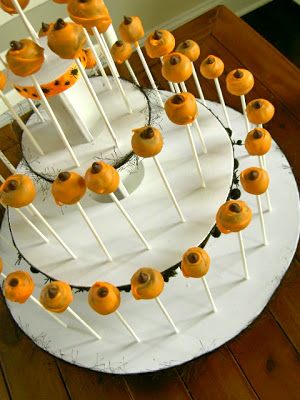
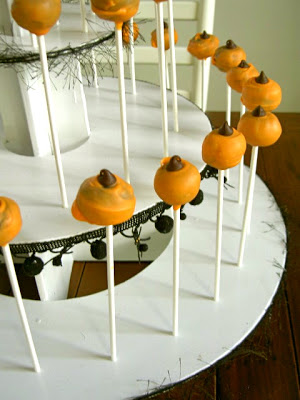
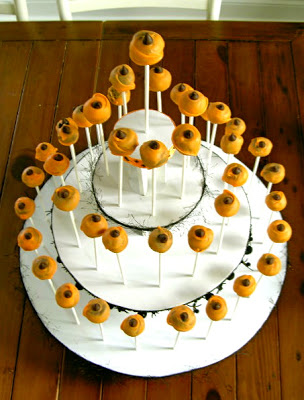
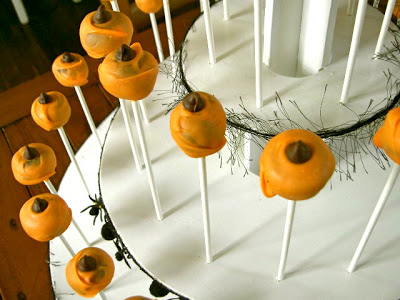
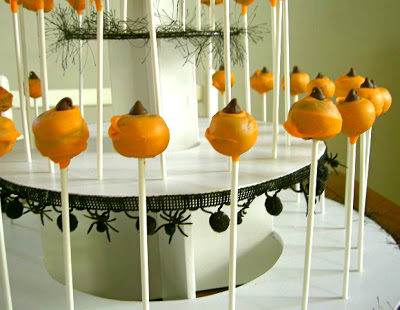

Brownies on a stick covered with orange candy melts and a chocolate chip stem.
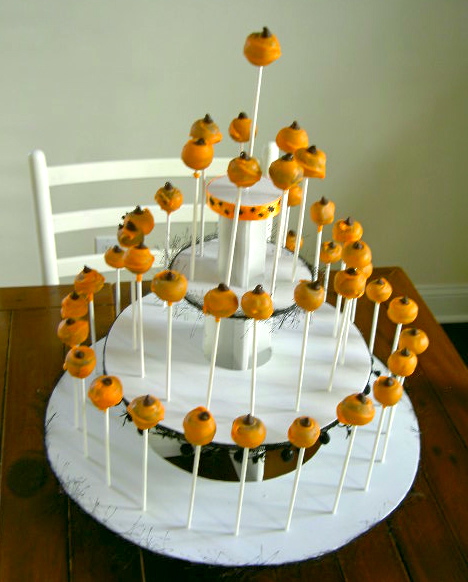
A two bite dessert treat fun for kids and adults.
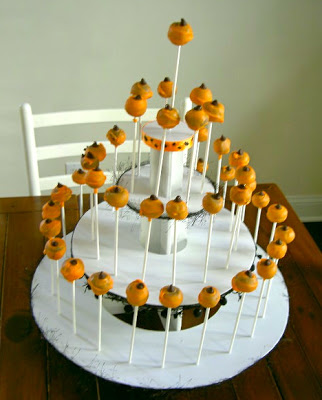
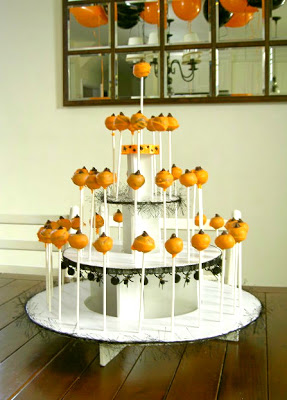
For the how-to on the cake pop stand I made awhile back click here.

Perfect for our Halloween themed double birthday party for girl #1 and buddy boy.

Here’s how I made the brownie pops:
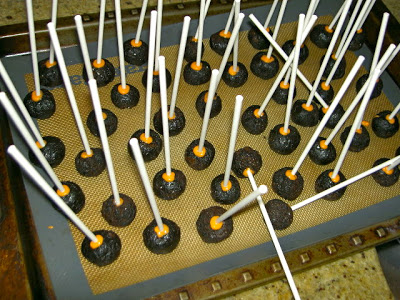
1. Bake brownies as directed, be sure to use the ‘fudgy style’ brownies.
Let cool.
2. Scoop small spoonful of brownie, avoiding crusty edges, and roll into a ball.
3. Melt about 10 candy melts.
Dip tip of stick into melted candy and stick into brownie ball.

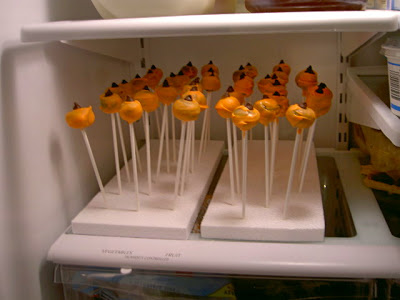
4. Refrigerate about 1 hour, until slightly cool and shape is firm.
5. Melt about 20 candy melts, a narrow container is best.
(Small batches of candy melts works better.)
Dip brownie into melted candy, spinning to coat all sides.
Immediately place stick into styrofoam holder and add chocolate chip stem on top.

6. Refrigerate again until candy coating is hard.
7. Place sticks into cake pop tower for display.

Too cute who can eat just one?


And makes for a great centerpiece before they all get eaten!

I’m linking up to:
Whatcha Got Weekend @ Lolly Jane
SAS @ Funky Junk
Weekend Wrap Up @ Tatertots & Jello
Sundae Scoop @ I Heart Naptime
Sister Sunday @ Sisters of the Wild West
Sunday Showcase Party @ Under the Table & Dreaming
Just Something I Whipped Up @ The Girl Creative
DIY Fall Festival @ The DIY Showoff
Made by You Mondays @ Skip to My Lou
Making the World Cuter @ Making the World Cuter
Nifty Thrifty @ Coastal Charm
Tuesday Treasures @ My Uncommon Slice of Suburbia
Tutorials & Tips Tuesday @ Home Stories A to Z
Good Life @ A Beach Cottage
Delightfully Inspiring @ Delightful Order
Transformation Thursday @ The Shabby Creek Cottage
Strut Your Stuff @ Somewhat Simple
Share Awesomeness Thur @ The 36th Avenue
Flaunt it Friday @ Chic on a Shoestring
Tickled Pink @ 504 Main
Frugal Friday @ The Shabby Nest
SAS @ Just a Girl
Feathered Nest @ French Country Cottage
Remodelaholics Anonymous @ Remodelaholic
inspiration board @ Carolyns Homework
Wow us Wednesdays @ Savvy Southern Style
Handmade Holiday Gift Guide @ Grosgrain Fabulous
Wow us Wednesdays @ Savvy Southern Style
Handmade Holiday Gift Guide @ Grosgrain Fabulous

VERY CUTE! I made cake pops only ONE time…very time consuming but a similar method to yours…might try again one day…thanks for your tips! I am going over now to see how you made your stand…it is adorable too.
Mmmm…cake pops…they are so cute and delish! Love the Halloween spin you put on them, Jami!
Erin
P.S.–I just noticed the pom-pom/spider fringe detail…great touch! 🙂
Aren't they adorable!
Danielle
Brownie pops! Those are adorable!
♥Linsey
Very sculptural, and they look yummy.
These look really good…mmmm…brownie pops.Would love it if you would link this up to our Rockin' link party going on now at RoCa and Company. Here is the link: http://rocaandcompany.blogspot.com/2011/10/you-rock-7.html. Come and show off what you got. Hope to see you there…
Remember…YOU ROCK!!
Carmen @ RoCa and Company
http://www.rocaandcompany.blogspot.com
Your pumpkin pops are precious! They look too cute to eat, well almost!
Oh yumm! Those sound delicious and look adorable! I'd be so excited if you'd share them here:
http://oneartmama.blogspot.com/2011/10/falling-for-crafts-challenge-7-holiday.html