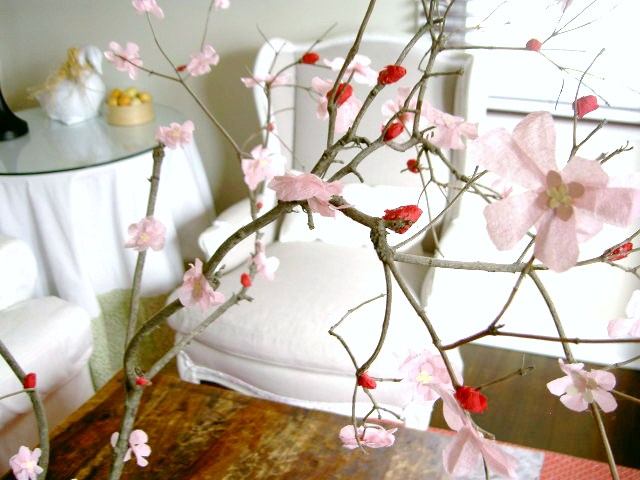
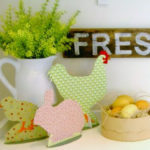
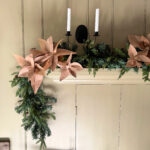
Cherry blossoms for Spring.


In true knock off fashion, again, I copied Pottery Barn’s cherry blossom branch:

image from Pottery Barn
Good luck finding it at Pottery Barn, it’s “no longer available” online.
But in the time it takes you to search for one you can easily make it.
And I bet you already have all the supplies (surprisingly I did so not one fresh penny was spent on this knock off).
Here’s how I made the blossoms:
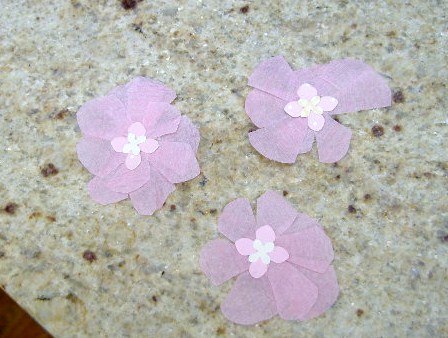
1. Using crepe paper scraps (from pom poms I made for girl #2’s birthday) and some paper flower punch outs (I made awhile back for my sister-in-law’s baby shower) make your flowers:

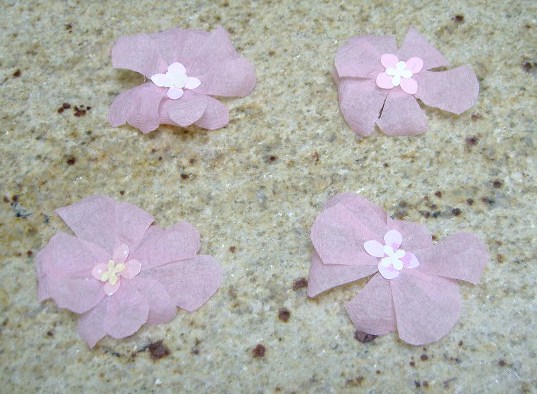
2. Don’t go for perfection, the more imperfect = more natural looking flower.
3. Once the crepe paper petals are glued on start shaping the petals. Pull out and stretch the crepe to get three dimensional petal.
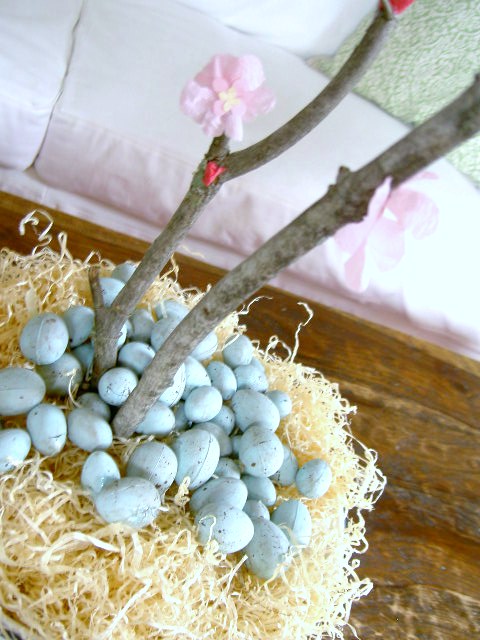
4. My branch is secured into a pail with concrete and then pea gravel.

5. Glue the flowers onto the branches. Roll up the dark pink crepe to make buds and glue on.
(Here’s my branch at night with one lonely flower.)

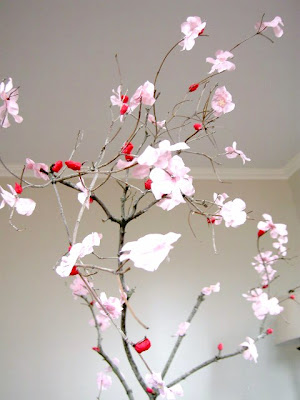


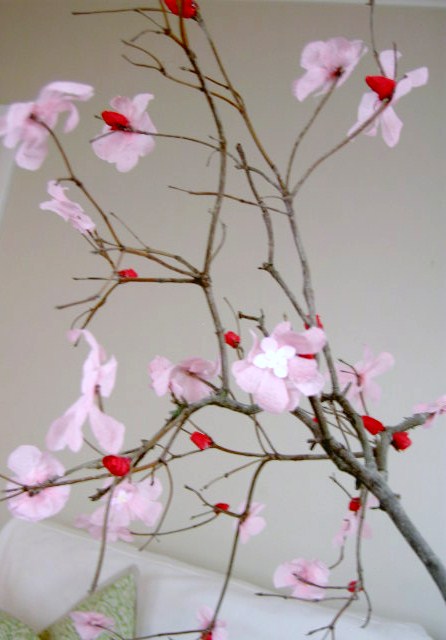
All finished:
Can you tell which branch is mine and which is Pottery Barn’s?
Okay I know mine aren’t totally realistic but a darn good knock off!

image from Pottery Barn

image from Pottery Barn
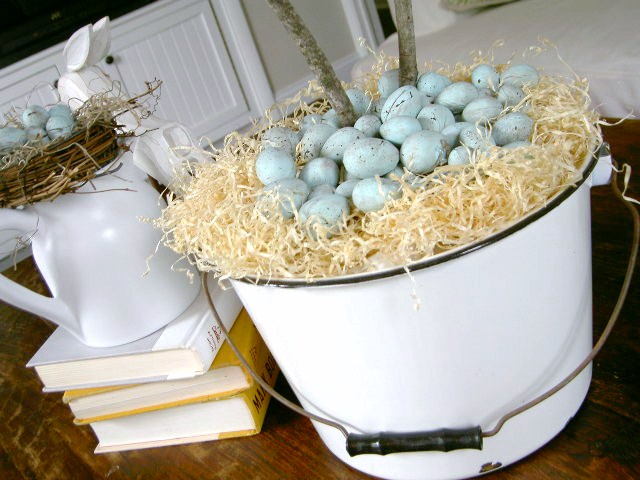
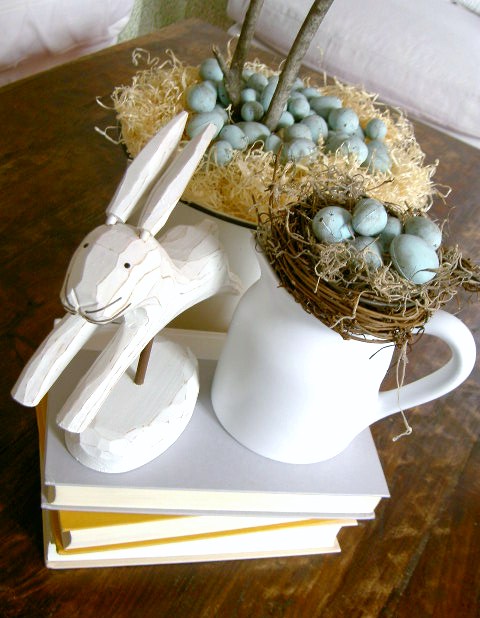
A close up of the blossoms.

this is so pretty! I tried to do something similar last Easter with my 3 kids, and it came out so awful! I am in awe of your talent 🙂
I was just in PB over the weekend and yours is better! Love it!
Hi Jamie, I am new to your blog (found through Cottage and Vine) and I am loving it. Funny, like one of your readers, I was at PB over the weekend and yours looks so much better. I love it, Spring definitely has arrived! Look forward to reading more.
Angie
Linen + Verbena
Lovely. Tell you what, tonight some one's gonna make a copy of that copy! I heart this idea.
I think we need a button here of your blog to grab.
Your branches are beautiful! Thanks for linking up!
Really lovely job! My favorite sign that Spring is nearby.
that is just gORGEOUS!!!!!!!!!!!!!!!
lovely photos!
take care,
Rosa
Wow! That's amazing. They look so beautiful. Thanks for the tutorial! I'll be bookmarking it!
Love it! I'm loving all the simple flower stems at PB. I found some similar at HL, but I LOVE the ones you made. PERFECTION. WHERE are you finding all the cute blue eggs?
Yours was definitely cuter – I love the addition of the eggs at the bottom. Pretty pink and beautiful blue: what's not to love? 🙂
– Jess
So pretty! I just might have to knock off your knock off! Love it!
Love it!! I saw those branches in the catalog and I totally wanted to do the same thing- I knew it would involve some bare branches and tissue paper, but I hadn't gotten around to the details. Yours are gorgeous! Nice work! I just finished some tissue paper peonies over on my blog and they turned out super cute. Nice when we can make spring for ourselves and not have to wait on that slooowpoke Mother Nature. 😉
wow great job! I just love those colors together:)Beautiful… Stopping by from the Shabby Chic Cottage's party:)
Super cute and classy!
Ashley
http://www.TheThriftyWife.com
sooo cute, Jamie! I love those branches so I may have to give this a try! Thanks for your sweet comment on the bedroom. And yes, many switcheroo's have been discussed. 😀
shaunna
Nice knock-off! And very creative. I love the blue eggs. Such a springy color! Stopping by from Chic on a Shoestring.
Jen
Beautiful!
Awesome tutorial! I thought about buying the Pottery Barn version last year but just couldn't get myself to actually take the branches to the register. Way too pricey! I love this solution though~
Hey Jamie!
Nice to meet you!!! I just became a follower!
I love you!! Thank you for the great idea!!!
I was in Pottery Barn last weekend $19.95!!!
HELLO!!!!
I know what I'm doing this weekend!!!
Thanks!
Jane
these turned out so pretty, love them
Great idea! So pretty!
Jo-Anna
Stopping by from Tatertots and Jello. I LOVE this! I have been trying to come up with a way to make something like this! We had to cut our huge cherry blossom tree down last year as it was too close to the house 🙁 Bookmarking this and I can't wait to get started.
these are beautiful! I love that the blossoms are out! I actually took pictures of them on the trees earlier today 🙂
—————
handmade tuesdays @ ladybug-blessings… http://www.ladybug-blessings.com
how pretty
so so so so cute!! Here from Shabby Nest. Great job!
LOVE this, so pretty! I'd love for you to link it up at I ♥ Nap Time.
I have to say, I like your blossoms much better than the original ones! good job!
Sibylle (http:fun.kyti.me)
I love a good knock off and you did really good!
Love it! its really pretty!
I am having a giveaway on my blog. $35 sc + free shipping to get a custom trendy backpack for your kid from Paige Holliday Designs. All you have to do is leave a comment.
http://houseonashwelllane.blogspot.com/2011/03/35-store-credit-free-shipping-to-get.html
This really does look like a real cherry tree branch full of blossoms. Good for you for making it for free!
this is gorgeous.
beautifully done. so so pretty.
thanks for linking up!
kellie
Thanks for adding your beautiful blossoms to my party 🙂
I love these and plan to give them a try. They look beautiful.
Ruth
Wow this turned out gorgeous! At first I couldn't tell that the flowers were made out of paper…good job!
Stopping by from centsational girl.
Oh, so cute! I love cherry blossoms! Thank you for sharing this great idea.
How cute! Well done!
Very pretty! It's fun to create and rewarding to see such beautiful results.
Very well done and why on earth pay those PB prices?
This is adorable & love the branches you did…those blue eggs are so cute in the moss! Thanks for linking up to Cottage Flora Thursday's today ~ i'm your newest follower! xoox, tracie