• Home
  • Blog
  • About
  • Contact
    • Disclosure
    • Privacy Policy
  • SHOP
  • Widget area for main menu

    • Email
    • Facebook
    • Instagram
    • Pinterest
    • Twitter
    • YouTube
  • Skip to primary navigation
  • Skip to main content
  • Skip to primary sidebar

Jaime Costiglio

build - paint - sew

  • BUILD
    • BEDS
    • BENCHES
    • DESKS
    • DRESSERS
    • GAMES & TOYS
    • SCRAP WOOD
    • SHELVES
    • STORAGE
    • TABLES
  • TOOLS
  • PAINT
    • CRAFTS
    • FURNITURE
    • HOME DECOR
  • SEW
    • GIFTS
    • HOME DECOR
    • POUCHES
  • HANDBUILT HOLIDAY
    • 2021
    • 2019
    • 2018
    • 2017
    • 2016
    • 2015
    • 2014
    • 2013
  • GIFTS
    • BABIES
    • KIDS
    • FOR HER
    • FOR HIM
    • TEACHERS
    • WEDDINGS
  • SEASONAL
    • 4TH OF JULY
    • FALL
    • HALLOWEEN
    • CHRISTMAS
    • SUMMER
    • SPRING
    • ST. PATRICK’S DAY
    • THANKSGIVING
    • VALENTINE’S DAY
    • WINTER
  • SALTBOX PROJECT
    • BATHROOMS
    • DINING ROOM
    • EXTERIOR
    • FAMILY ROOM
    • FOYER / MUDROOM
    • KIDS BEDROOMS
    • KITCHEN
    • LIVING ROOM
    • MASTER BEDROOM
    • PLAYROOM
  • SCROLL SAW

“R” is for Ruffle Towels

February 26, 2013

diy personalized bath towel with ruffles
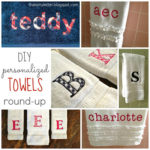
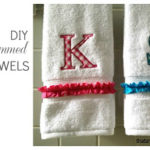
Make these diy personalized ruffle towels using bias cut ruffles and appliqued letters.  Take a simple bath towel and make it cute as can be!
diy personalized bath towel with ruffles

Inspired by Pottery Barn Teen’s ruffle towels:
pottery barn teen ruffle towels
I made my own version for much less than their $37 bath towel, follow the tutorial down below.
diy personalized bath towel with ruffles

personalized bath towel with name
diy bias ruffles on bath towel
Here’s how to make the personalized ruffle towel:

1. Prepare fabric letters for applique.
Print out letters (I used American Typewriter font at 250 point.)
Apply double sided fusible interfacing (heat-n-bond) to wrong side of fabric:
how to personalize a bath towel
2. Place print out right side down on light box then place fabric right side down on top of print out.
Trace outline of letter onto paper backing of fusible:
how to personalize a bath towel
3. Cut out fabric letters keeping paper backing on for the moment:

diy cotton fabric letters for monogramming
4. Prepare ruffles.
Cut Kona white cotton bias strips at 1 1/4″ wide x double the width of your towel x 3:
bias cut strips to make ruffle
5. To make ruffles run a long zig zag stitch off center of strips, pull one string GENTLY until strip begins to ruffle:

bias cut strips to make ruffle
6. Pin ruffles in place, 3 equal rows and straight stitch down the middle.
Then remove zig zag stitches.

bias cut strips to make ruffle
7. Now remove paper backing from letters, center on towel and iron in place:
bias cut strips to make ruffle
8. Zig zag stitch around edge of letters, tight and narrow, go slow turning towel as you go.
diy ruffle towel with personalization

You may also like...

  • “T” is for Terry Towels Roundup“T” is for Terry Towels Roundup
  • “H” is for Hand Towels“H” is for Hand Towels
  • Cross Stitch Monogram Ornament PlacecardCross Stitch Monogram Ornament Placecard
  • DIY Simple Personalized PillowsDIY Simple Personalized Pillows
Share this post:

Filed Under: DIY, GIFTS, HOME DECOR, SEW, SEWING7 Comments

Reader Interactions

Comments

  1. Feral Turtle says

    February 26, 2013 at 2:48 PM

    What a cute idea!

    Reply
  2. Leslie Stewart says

    February 26, 2013 at 3:25 PM

    I love it! Thanks so much for sharing this great tutorial. I really would love to make these for my daughter's bathroom. I'd like to invite you to share it at my Twirl & Take a Bow party. Hope you can stop by.
    Leslie
    House on the Way

    Reply
  3. Jennifer Hughes says

    February 28, 2013 at 8:10 PM

    Terrific tutorial! Please share your entry on Creative Crafts Thursday, http://www.creativecraftsthursday.blogspot.com, and any of your favorite projects each and every week!

    Reply
  4. housewifehowtos says

    March 1, 2013 at 2:55 AM

    What an adorable project! You really should consider selling these on Etsy for those of us who never find time (or courage) to do projects like this. I love them! If you haven't already, I'd love if you'd come join my How To Tuesday link party, too.

    http://housewifehowtos.com/link-party-2/how-to-tuesday-link-party-10/

    Reply
  5. Tammy @ A Walk in the Countryside says

    March 3, 2013 at 1:38 PM

    I love them, even better than PB's! Thanks for sharing the great tutorial! I'm now a new follower! Have a blessed week, Tammy!

    Reply
  6. freckled laundry says

    March 3, 2013 at 5:38 PM

    The towel looks awesome, Jaime. Great tutorial, too. SO much better than Pottery Barn. I'll take handmade by mommy over Made in China any day. xo Jami

    Reply
  7. decoratewithalittlebit.com says

    March 5, 2013 at 1:58 PM

    these are really cute! Little Bit

    Reply

Leave a Reply Cancel reply

Your email address will not be published. Required fields are marked *

Primary Sidebar

Hi! I’m Jaime

Jaime Costiglio

Hello!

Thank you for stopping by.
Join me for lots of DIY.

Read more

Get new posts via email

Handbuilt Holiday: Gift Project Plans

handbuilt holiday gift project plans

Collection of DIY gift project plans to build.

The Home Depot Tool Prospective

THD Prospective

Tools to consider for the DIYer.

Archives

The Home Depot Logo
Copyright © 2026 Jaime Costiglio · Custom site by Moonsteam Design

Privacy Policy