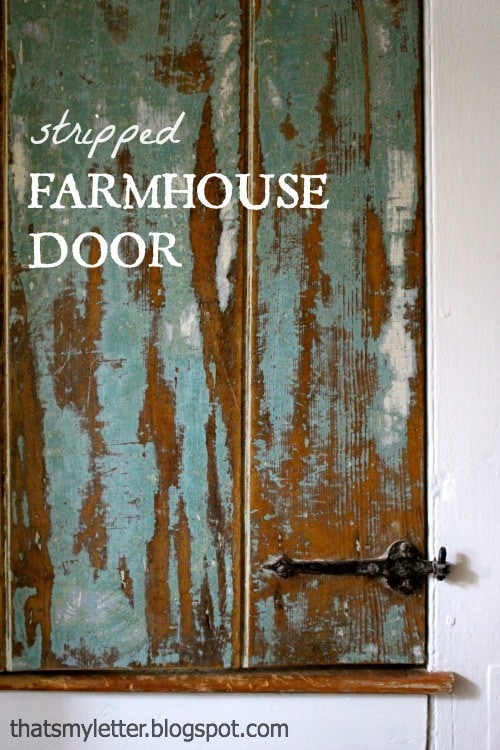
 How I stripped an original farmhouse door in our 1740 saltbox home.
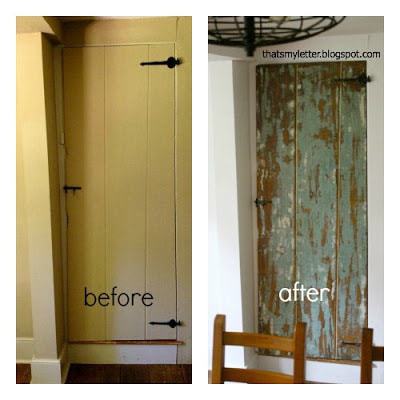
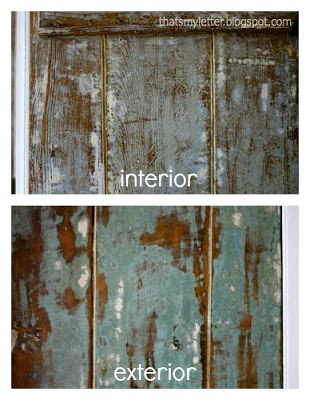
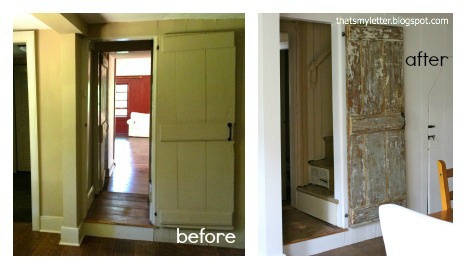
Who knew this boring beige door had the most beautiful turquoise color hiding underneath about 15 layers of paint?
Also hiding under all that paint was 200+ years of history etched and marred into the wood.
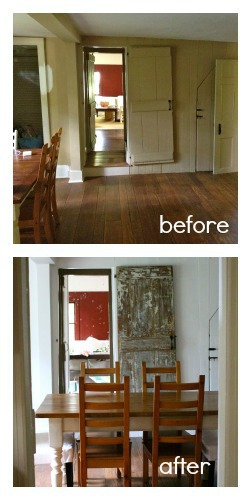
The doorway is original to this house built about 1740, (hence the reason it’s not square) and I’m not sure if this tongue and groove panel door is the original door but it’s darn old:
The bright turquoise color is on the exterior, the interior of the door is not quite as bold:
Immediately upon moving in to our new home 2 months ago I knew right away the dining room had to be painted (Benjamin Moore simply white). It’s the centermost room in our house with 6 doors on 3 sides and windows on the fourth side.
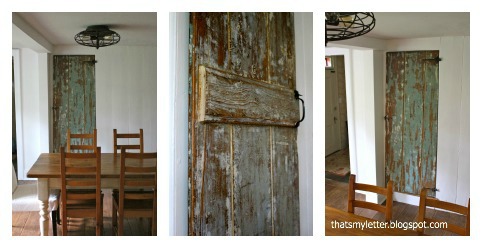
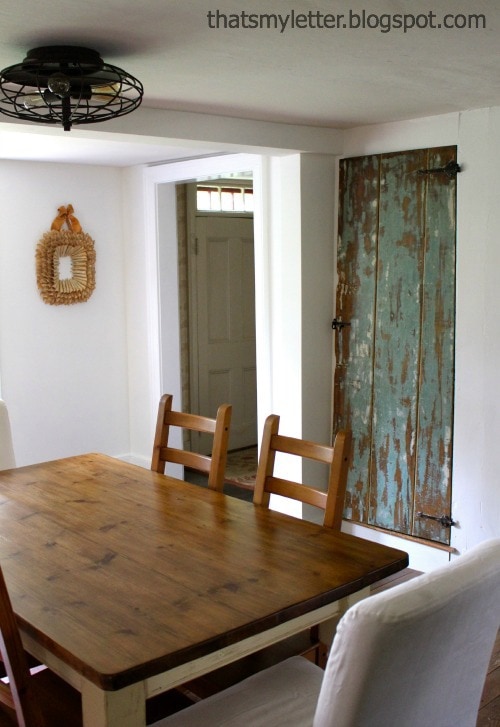
The white paint not only brightens the space but also lets the stripped door act as decor, artfully functional! (Don’t worry that red paneling in the far room will be painted too!)
We usually keep the door open since my kids like to pass through the stair landing into the family room:
But I think it looks even better with the door closed (you can still pass through using the back foyer):
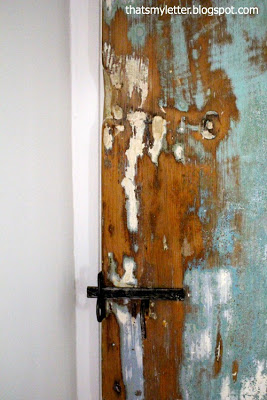
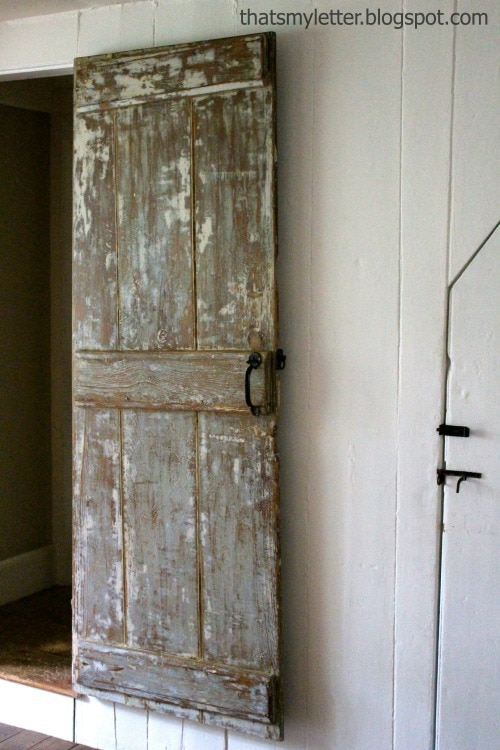
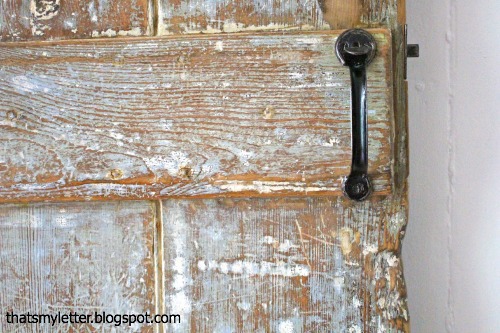
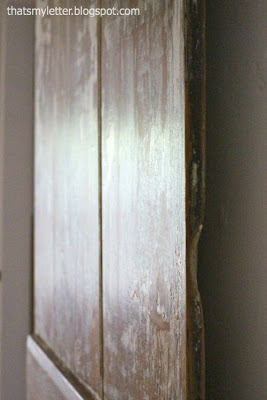
This door has history all over it:
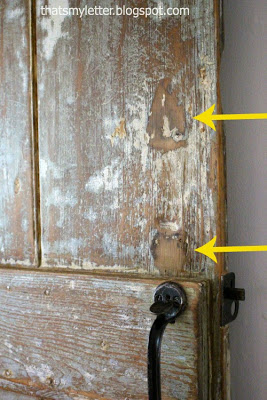
Look at the marks from previous hardware:
And although it may look chippy and rough it’s actually very, very smooth.
I sealed the door on all sides (including hardware) with two coats of Minwax polycrylic clear satin:
The power of paint (or lack of it!) at work again.
One door done, about 15 more to go!
To achieve this look I took the door off the hinges:
And used about 3 applications of Klean Strip chemical stripper.
* Work outside, wear a respirator and gloves.
Scrap off all the paint with a paint scraper being careful not to gouge the wood.
Sand using orbital sander.
Vacuum.
Wipe with damp cloth.
Seal with 3 coats of polyurethane.




love the rustic stripped look!!!!!
what a gorgeous door!!!
I feel like putting 20 coats of paint on mine – and then taking them off now – think that would work LOL ???
XOXO
I love the way this came. You're awesome.
So beautiful, I just love it!
Love the "new" look! That turquoise color is beautiful.
So awesome! It looks amazing.
Love the "new" look. I am in love with the history you have uncovered. What an asset to the house!!! Great job 🙂
Such a great idea to seal it. I'm sort of crazy paranoid about lead paint so this is a great solution. And I love the look of that awesome turquoise paint.
Love the texture on the door. Stop by my Friday's Five Features and link up this post (and others)! http://diy-vintage-chic.blogspot.com/2013/08/fridays-five-features-no-3.html
Stunning! You never know what you're going to discover under layers of paint.
Love this door and I love the pop of color it gives to the room! I love both sides but I can see what you mean about leaving it closed, that side is just awesome. 🙂
Love your blog. I just followed you and hoping you'll follow back 🙂
http://thecraftiestallie.blogspot.com/
Um…gorgeous! I absolutely love your door!!
It's absolutely gorgeous now! Love it 🙂
What a hidden gem!! It is amazing what the white wall paint and stripping this door did for your room. Looks great!
Love this…. It looks amazing!
Wow, it turned out amazing…love the new color and the chippy effect of the old paint.
I absolutely love your door! I'm stripping 15 antique doors (2 French) for my pocket doors.
I am ranting all over the place about Citristrip, which I STRONGLY suggest you check out. No stench, no flesh-eating, no space suit, and you can do it inside, in place.
The trick is to put it on thick and leave IT ALONE. Go to bed. Go to work. Anything. Don't fuss with it. It bubbles the layers of paint up in ribbons and sheets.
Sometimes I cover it with cut up plastic grocery bags to keep the ribbons in contact with the piece, and leave it, it'll even remove the varnish or shellac under the paint. If it dries? No biggie. It doesn't settle back down. Just scrape off the powder!
With kids, get rid of the horribly painful and dangerous chemicals. With you? Doing so much great work? Double your productivity and actually enjoy stripping. As it were, that is. 🙂 I LOVE your door.
I'm going to try a scraper like you did on another door. I like the left over paint look!
Hi! Came back to look at your lovely door. I'm done with my 15, and can't be happier. I tried your method using the left-over chemical stripper I had, and was also successful. Boy I hate that stuff! 🙂
Thought you might be interested in a finish I've worked out. I've discovered I enjoy the raw wood look (which a 2nd coat of Citristrip will give you!) Exterior, latex FLAT, dark (4 or 5) paint base. It goes on awfully white, but dries so clear and matte I defy you to find where you left off! I also found it glues down chippy finishes without gumming them up.
With the lovely work you do, I thought you might enjoy this finish, since it offers that real, aged look, yet seals and protects without yellowing!
Really. Love. Your. Work!