• Home
  • Blog
  • About
  • Contact
    • Disclosure
    • Privacy Policy
  • SHOP
  • Widget area for main menu

    • Email
    • Facebook
    • Instagram
    • Pinterest
    • Twitter
    • YouTube
  • Skip to primary navigation
  • Skip to main content
  • Skip to primary sidebar

Jaime Costiglio

build - paint - sew

  • BUILD
    • BEDS
    • BENCHES
    • DESKS
    • DRESSERS
    • GAMES & TOYS
    • SCRAP WOOD
    • SHELVES
    • STORAGE
    • TABLES
  • TOOLS
  • PAINT
    • CRAFTS
    • FURNITURE
    • HOME DECOR
  • SEW
    • GIFTS
    • HOME DECOR
    • POUCHES
  • HANDBUILT HOLIDAY
    • 2021
    • 2019
    • 2018
    • 2017
    • 2016
    • 2015
    • 2014
    • 2013
  • GIFTS
    • BABIES
    • KIDS
    • FOR HER
    • FOR HIM
    • TEACHERS
    • WEDDINGS
  • SEASONAL
    • 4TH OF JULY
    • FALL
    • HALLOWEEN
    • CHRISTMAS
    • SUMMER
    • SPRING
    • ST. PATRICK’S DAY
    • THANKSGIVING
    • VALENTINE’S DAY
    • WINTER
  • SALTBOX PROJECT
    • BATHROOMS
    • DINING ROOM
    • EXTERIOR
    • FAMILY ROOM
    • FOYER / MUDROOM
    • KIDS BEDROOMS
    • KITCHEN
    • LIVING ROOM
    • MASTER BEDROOM
    • PLAYROOM
  • SCROLL SAW

DIY Serving Tray

November 21, 2012

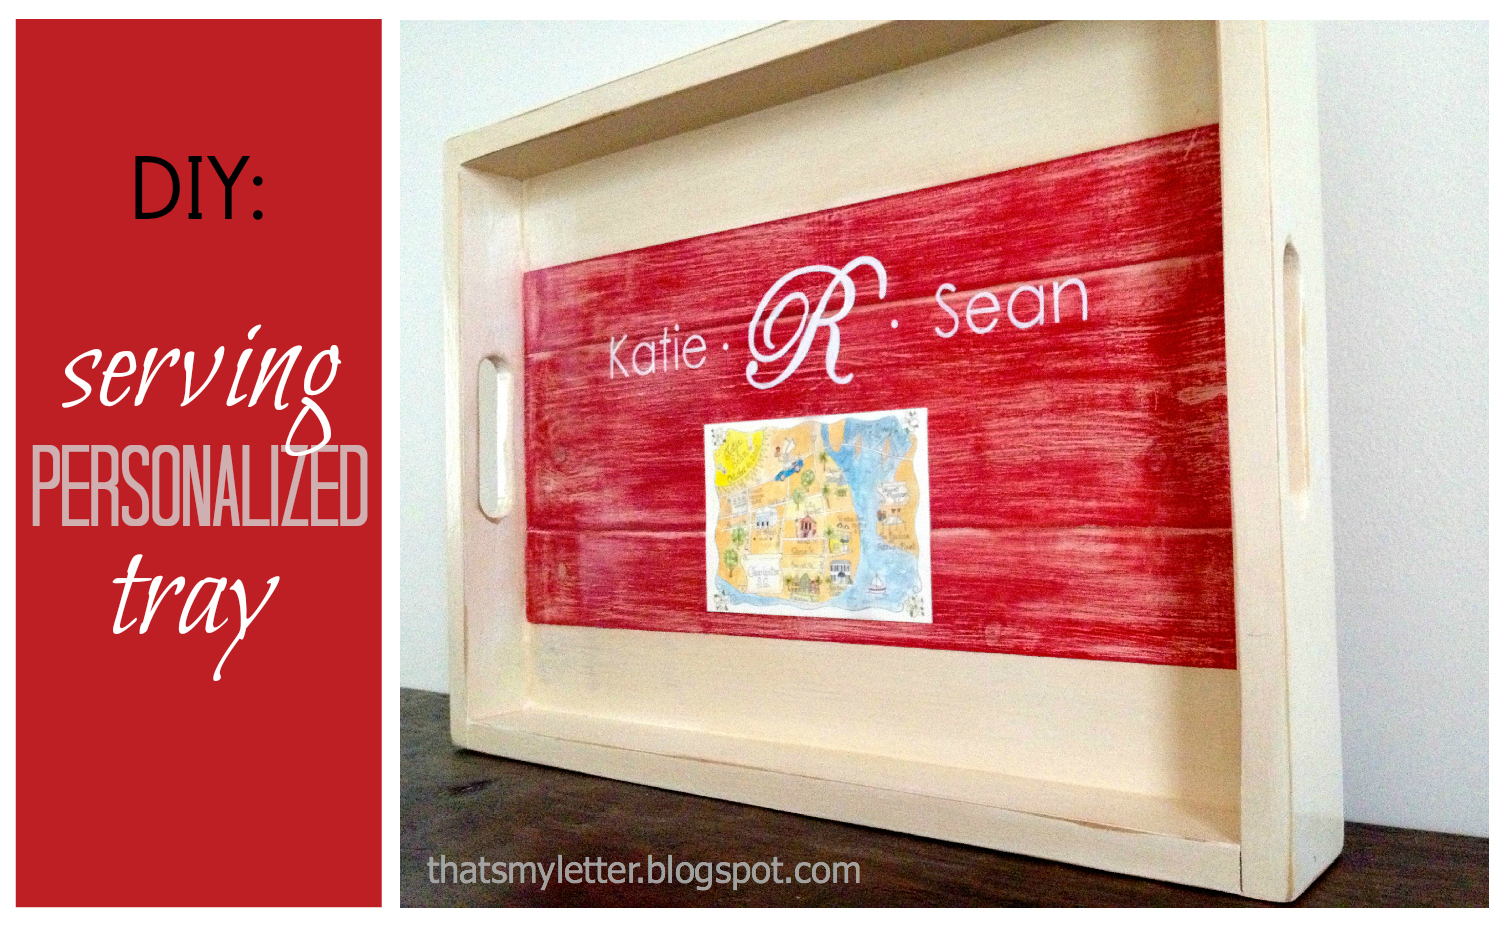
Build: personalized serving tray
A wedding gift for a newly married couple.

A friend asked if I would come up with gift incorporating the map that was part of their invitations:

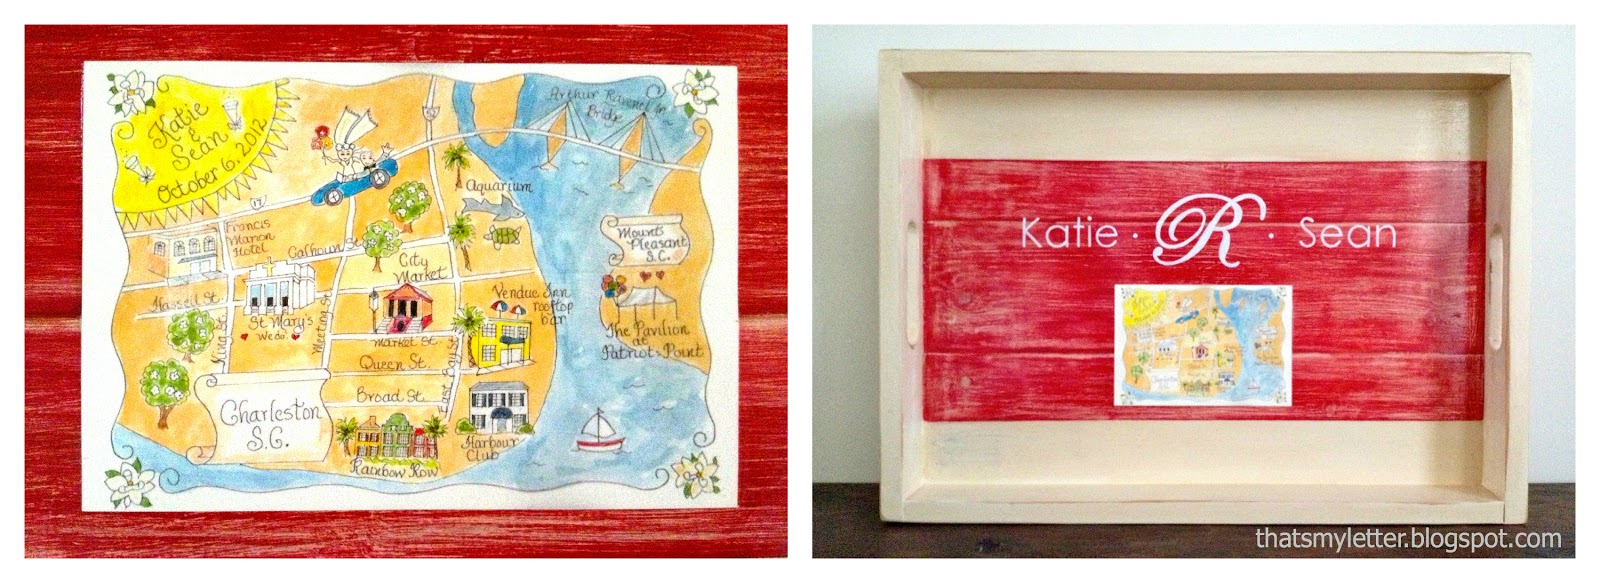
I made a wood serving tray with handles:

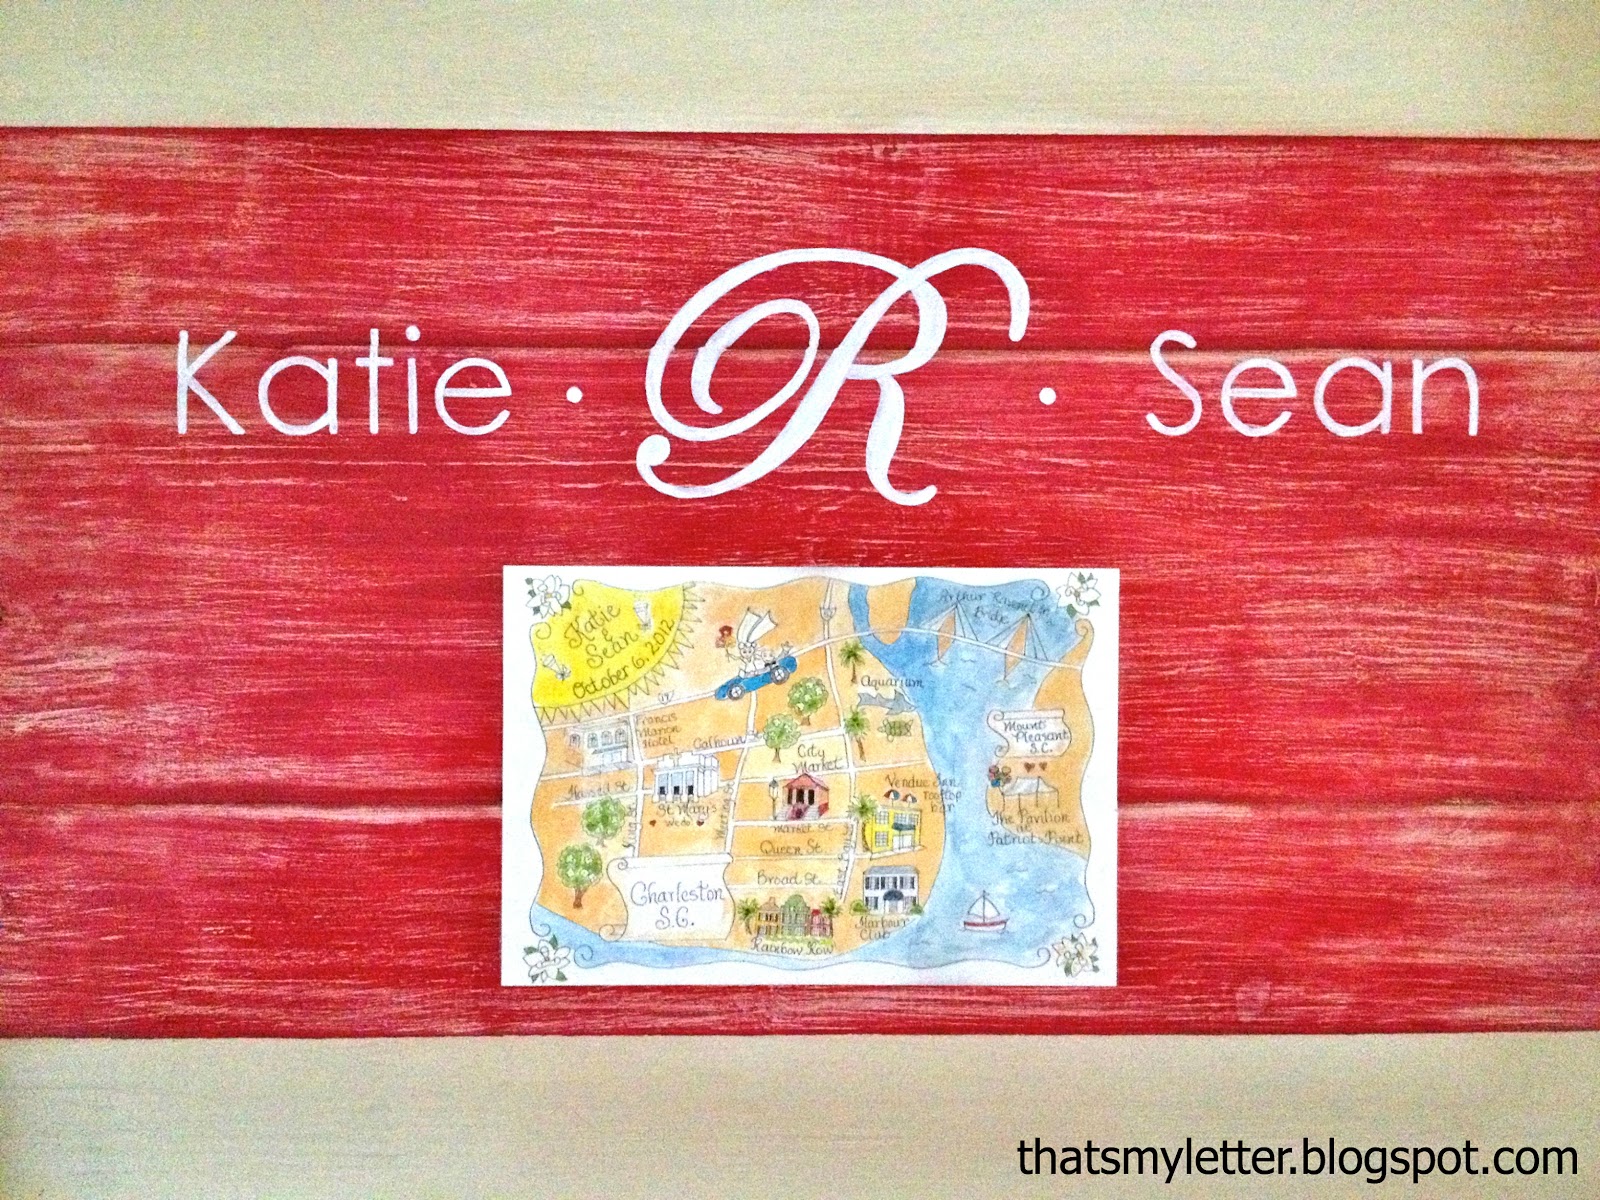
and personalized it with the couples names and the map:
Everything is sealed under clear lacquer to protect from liquid and spills, you can the shiny protective layer in this picture below:

Here’s how I made the wood serving tray:

1. Cut the #2 pine boards:
3 – 1×5 @ 19″
2 – 1×3 @ 19″
2 – 1×3 @ 15″
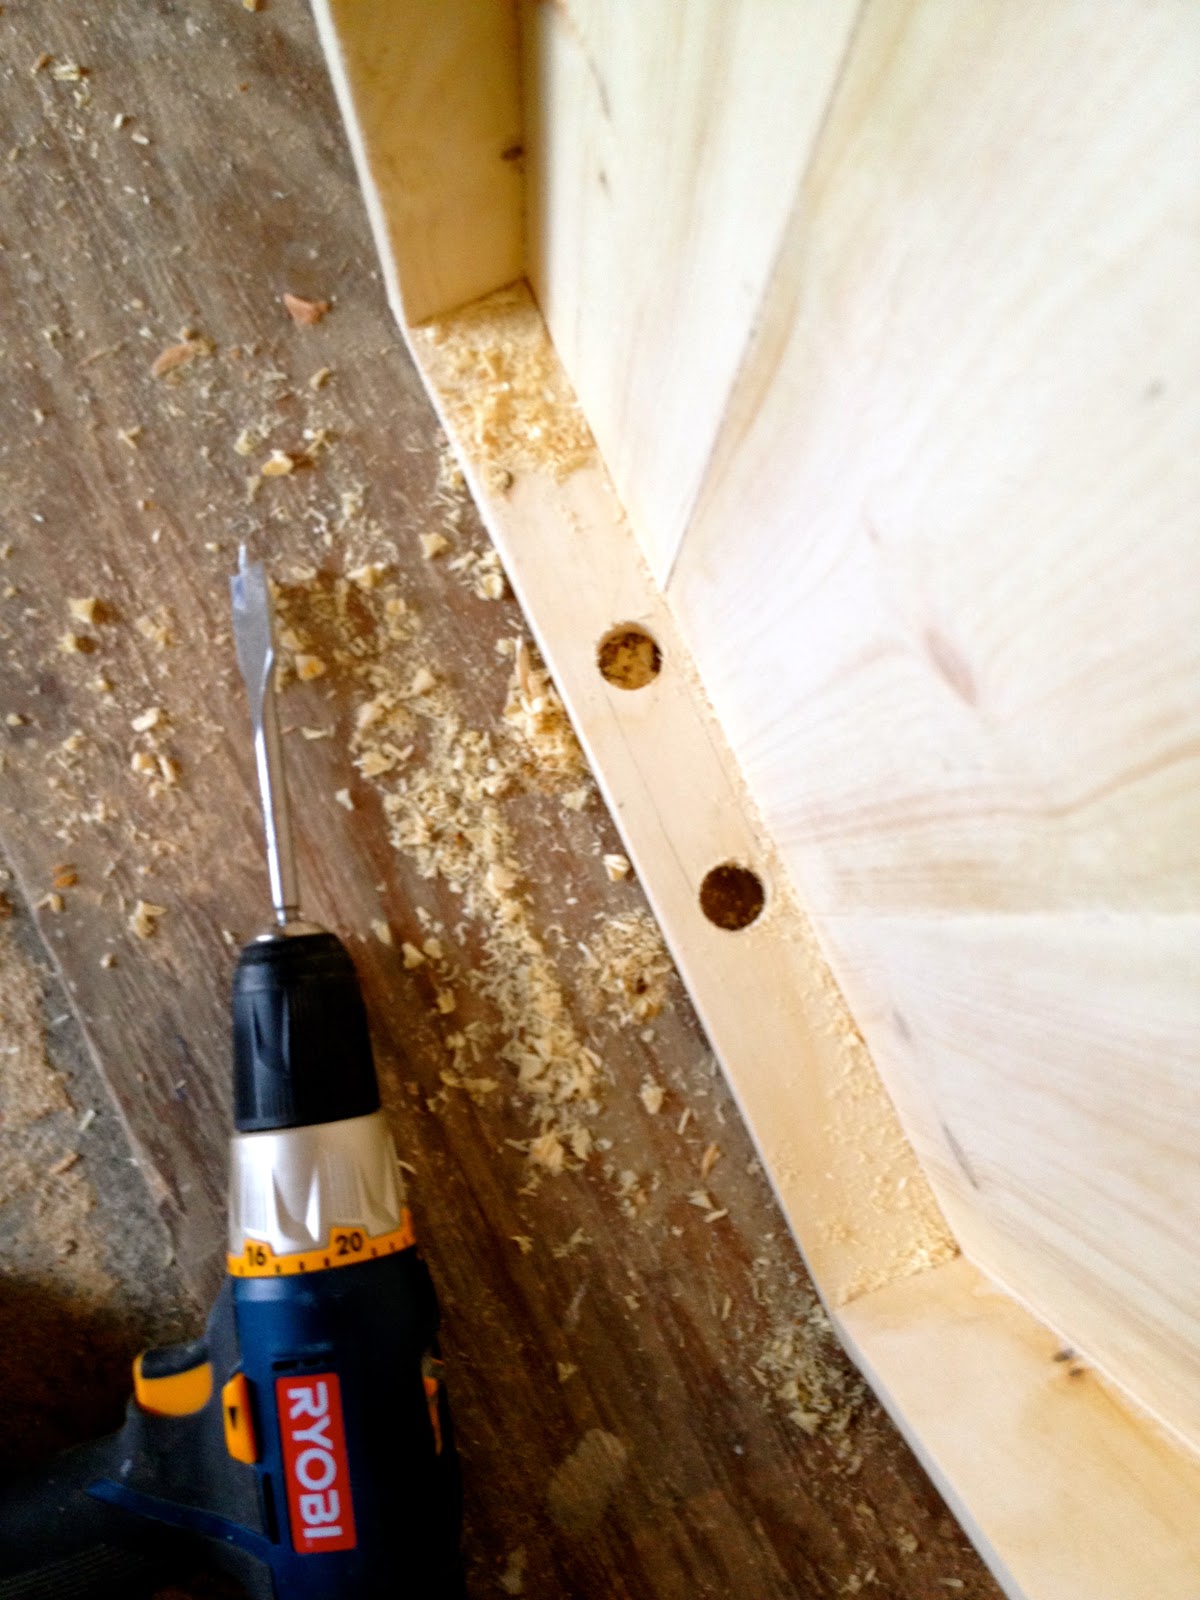
2. I used pocket holes to connect the pieces, both the tray portion and the side pieces.
Then cut a 1/4″ plywood piece to fit the bottom.
Glue and secure with 3/4″ finish nails.

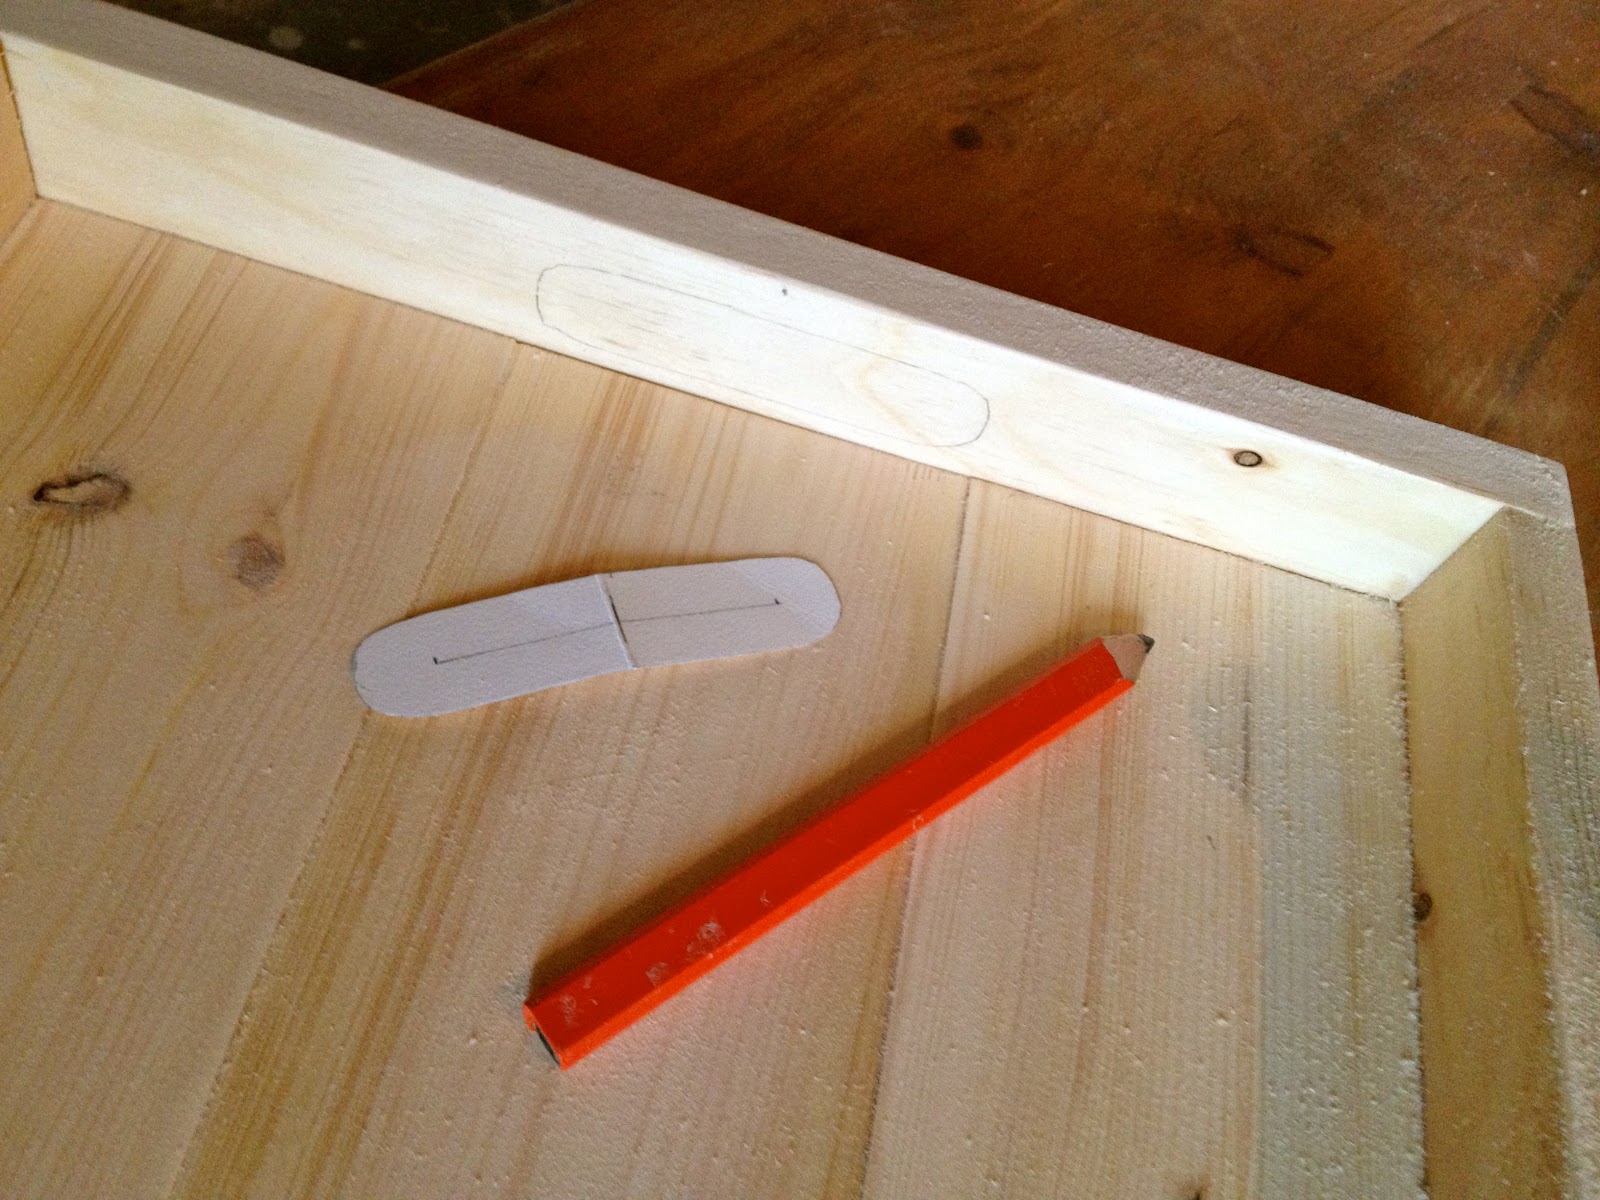
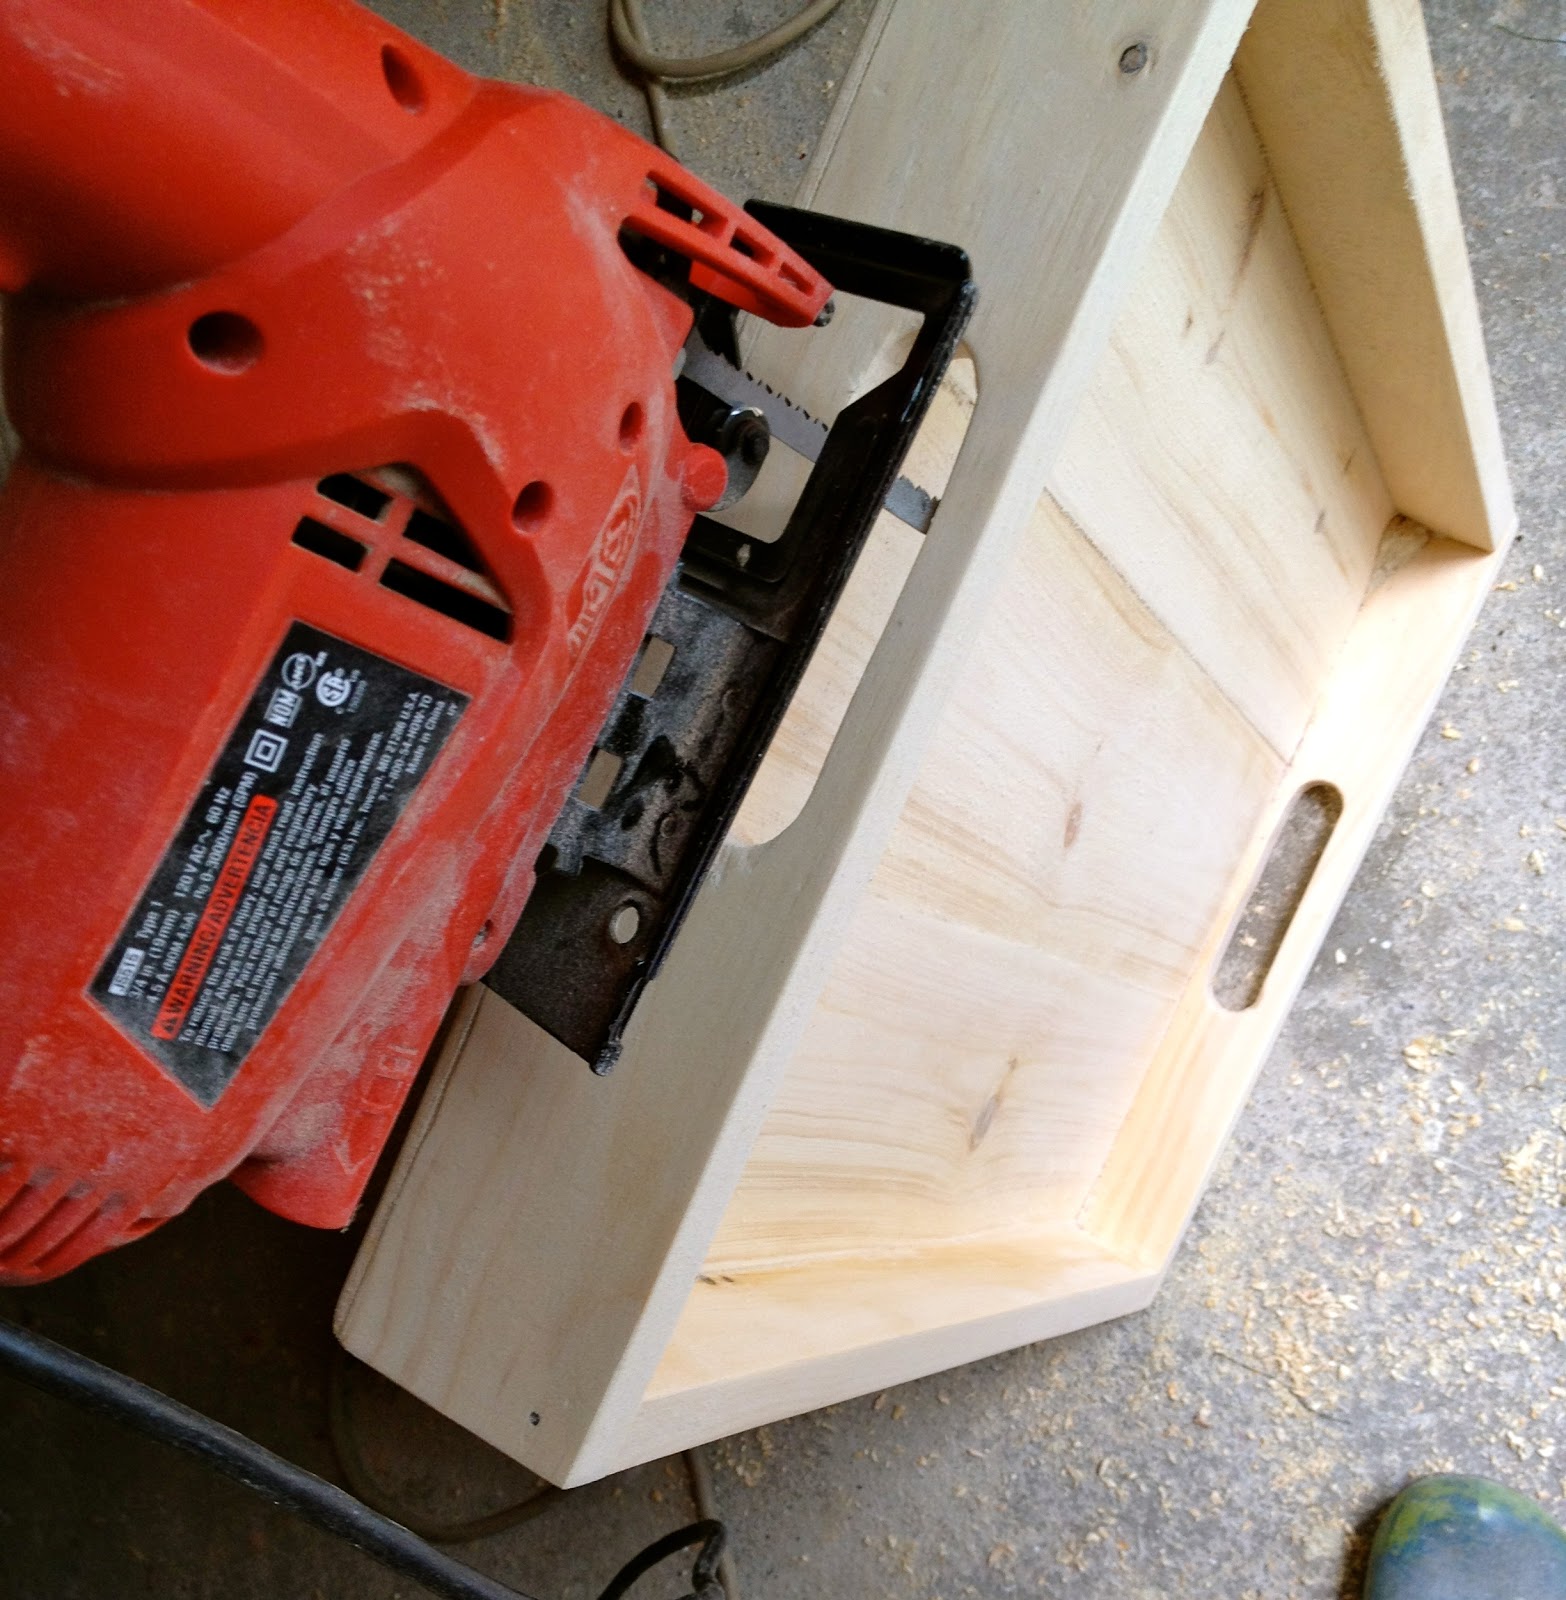
3. Make a template for the handle cut outs and trace at center on both short ends:

4. Begin by drilling circular holes with spade bit:

5. Then jigsaw remaining middle portion:

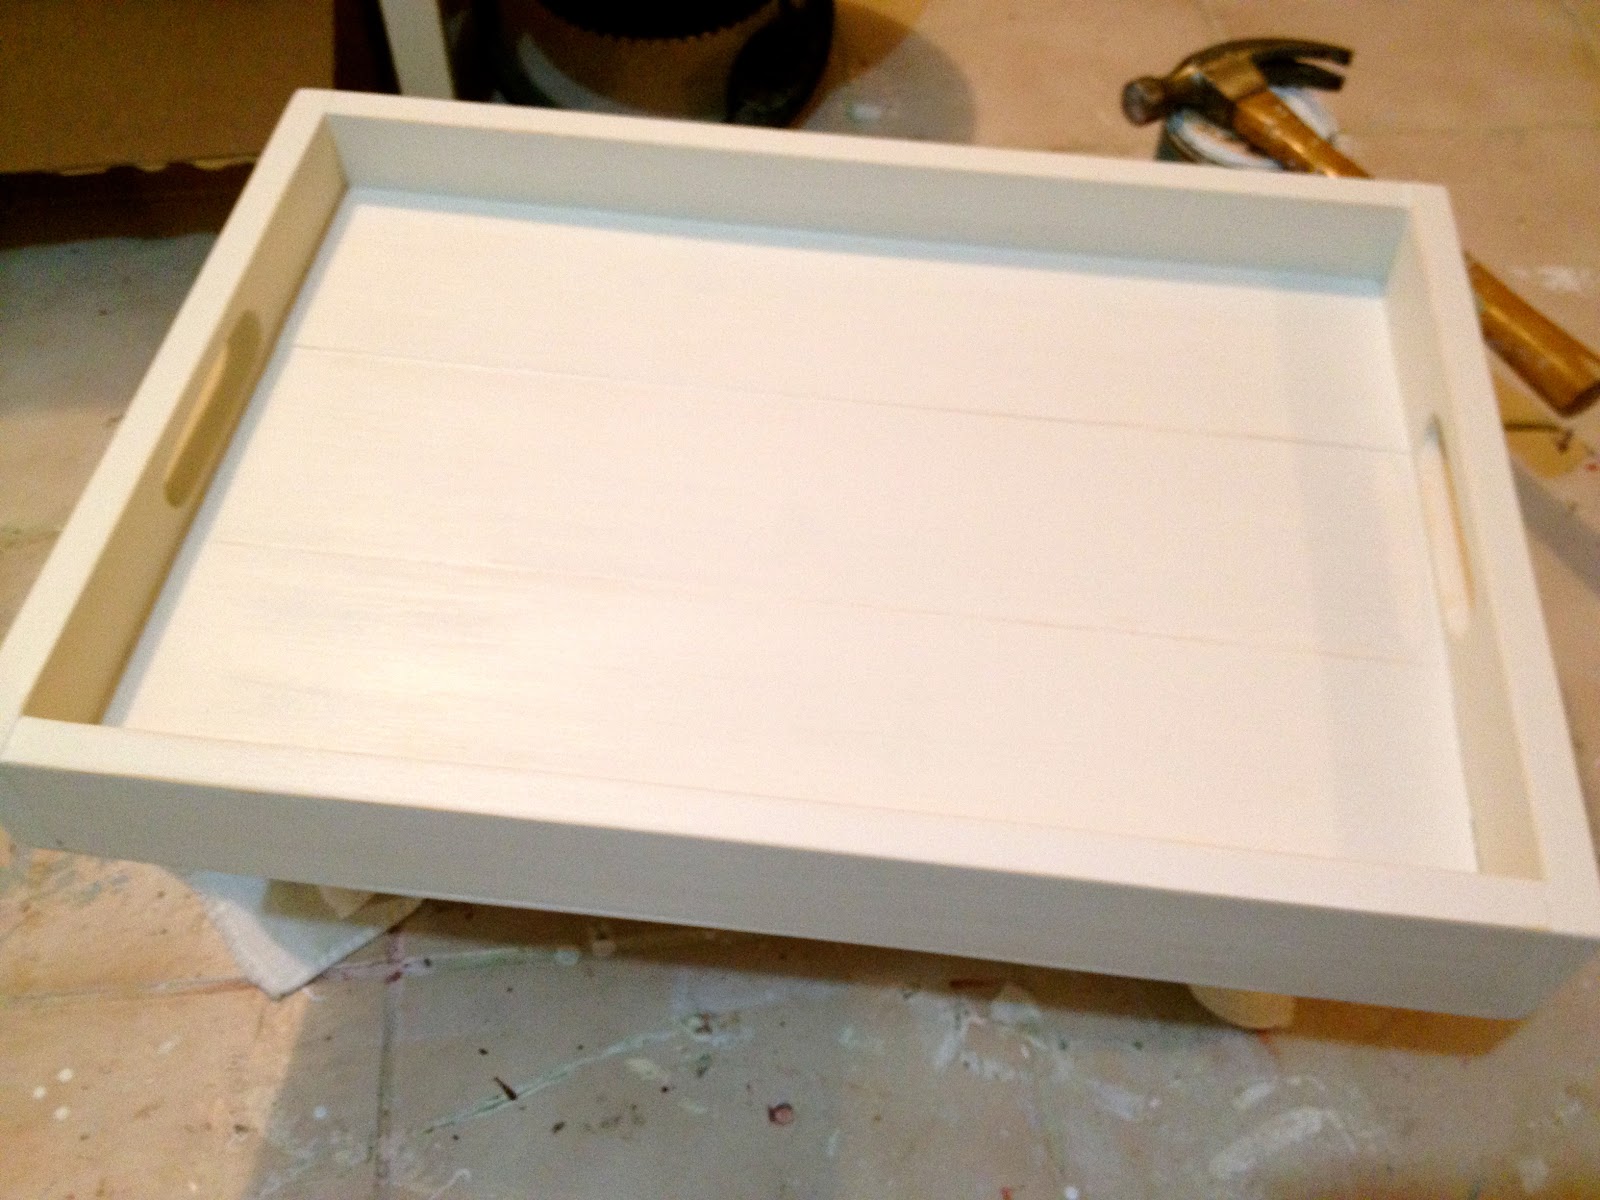
6. Prime and paint two coats Behr swiss coffee:

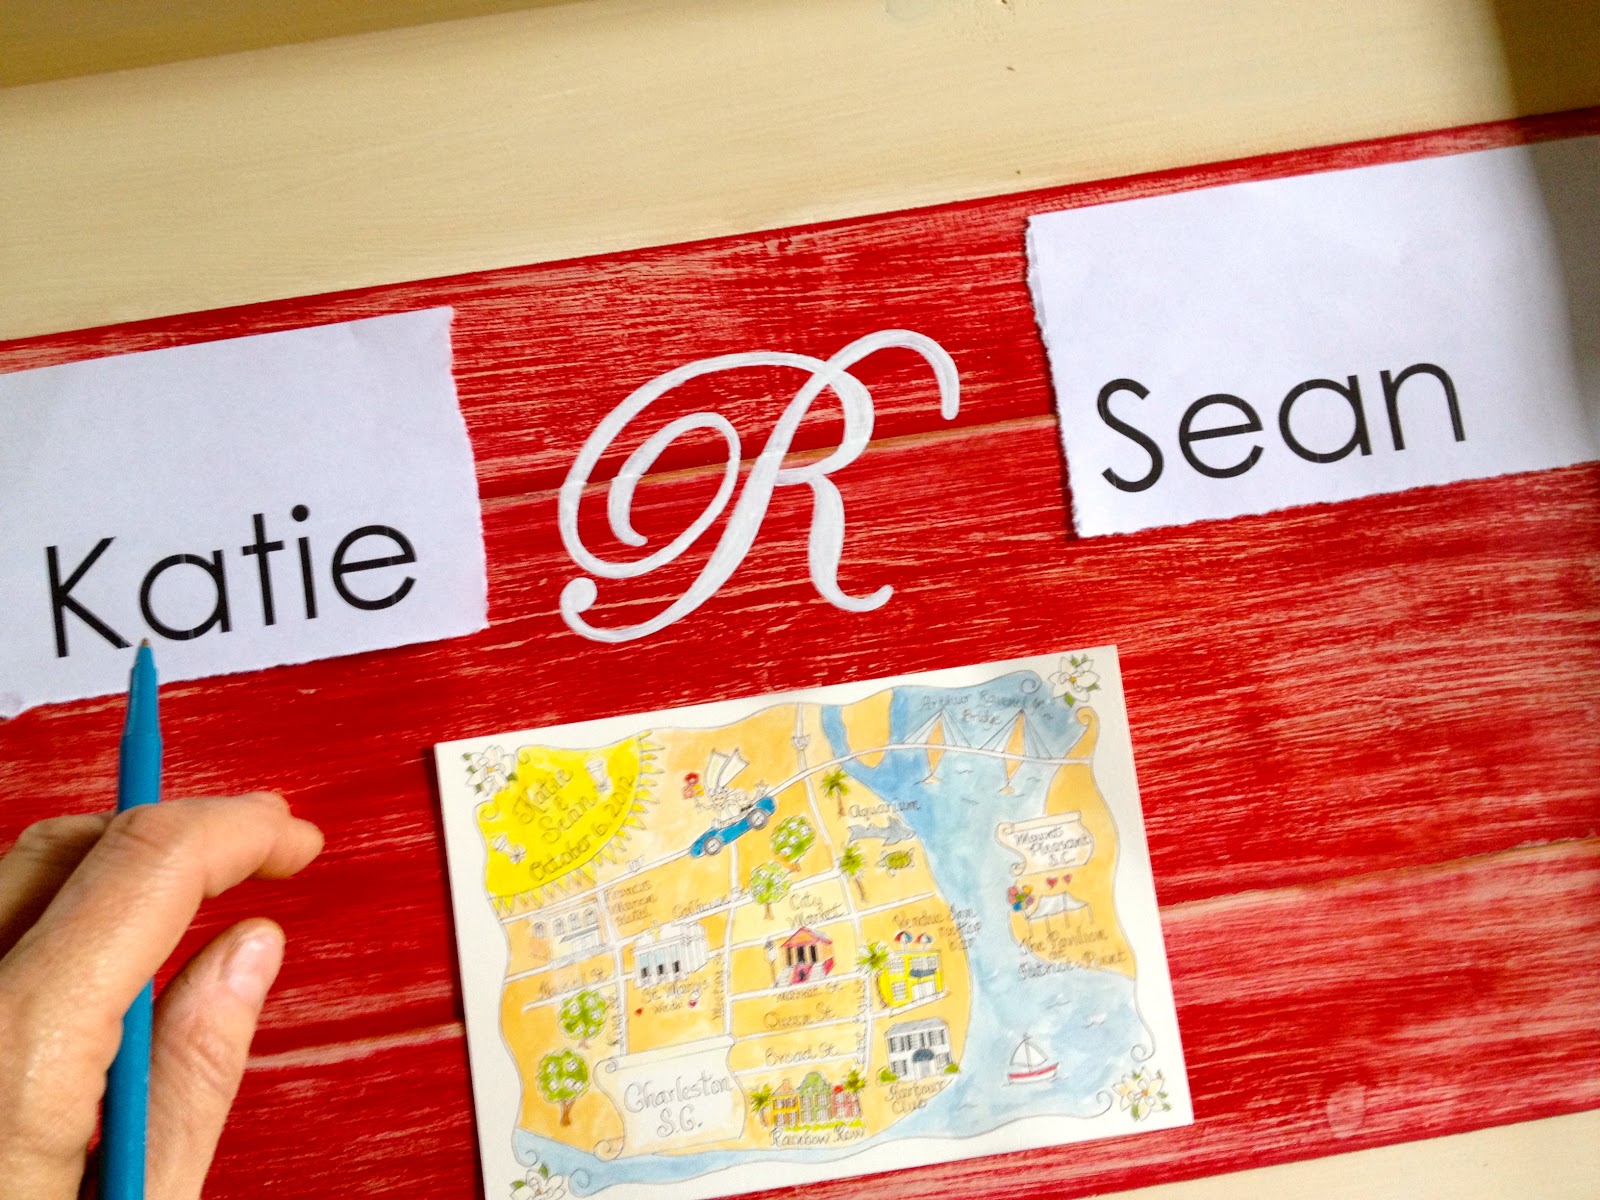
7. Paint on red strip detail then distress:
8. Stain entire tray to age:

9. Secure map (shown below is a wedding invitation from a similar tray) with matte mod podge on front and back:
10. Print out lettering to fit space: 
11. Line up and trace outline of letter with ballpoint pen:

12. Paint on and inside the indent left behind by the pen:

13. Repeat process for names:

14. To seal map and personalization, paint on multiple layers of Americana DuraClear gloss varnish on flat serving surface:
15. Finally seal the entire tray, sides inside and outside with Minwax clear gloss spray poly.

You may also like...

  • “K” is for Kids Step Stool“K” is for Kids Step Stool
  • “S” is for Step Stool #2“S” is for Step Stool #2
  • DIY Desktop TrayDIY Desktop Tray
  • DIY Caddy GiftDIY Caddy Gift
Share this post:

Filed Under: BUILD, DIY, GIFTS, HOME DECOR, HOME DECOR, PAINT, SCRAP WOOD, WEDDINGS4 Comments

Reader Interactions

Comments

  1. reFresh reStyle says

    November 22, 2012 at 3:17 AM

    You are so talented! Love it 🙂
    Happy Thanksgiving
    Debbie

    Reply
  2. Cait Geddes says

    November 22, 2012 at 2:59 PM

    I LOVE IT! Such a great job! Thanks for the step by step. I may give this a shot.
    🙂 Cait @ MyHouseMyCanvas.com

    Reply
  3. daiseyjayne.com says

    November 22, 2012 at 3:59 PM

    Look at you go with that drill! This is a most attractive and practical gift…..I could use a couple of these myself 🙂

    Reply
  4. melissa podann says

    August 5, 2016 at 6:20 PM

    Hi 🙂 what kind of brush did you use for this and what size is the brush? Is it script or round? Thanks 🙂

    Reply

Leave a Reply Cancel reply

Your email address will not be published. Required fields are marked *

Primary Sidebar

Hi! I’m Jaime

Jaime Costiglio

Hello!

Thank you for stopping by.
Join me for lots of DIY.

Read more

Get new posts via email

Handbuilt Holiday: Gift Project Plans

handbuilt holiday gift project plans

Collection of DIY gift project plans to build.

The Home Depot Tool Prospective

THD Prospective

Tools to consider for the DIYer.

Archives

The Home Depot Logo
Copyright © 2023 Jaime Costiglio · Custom site by Moonsteam Design

Privacy Policy