Going into the depths of my stone basement workshop space to share my scroll saw set up including the free plans to build a scroll saw stand. Before I ever started working with wood I did a lot of sewing and I think the reason I’m in love with scrolling is because it’s extremely similar to sewing – except with wood. At any rate when your interests collide and overlap it’s like a giant burst of awesome and anything seems possible.

Sharing a DIY tutorial to build a scroll saw stand including free plans. How I set up my scroll saw station on a DIY stand including a little dust collection.
Sure you can buy the scroll saw stand that is made to fit your saw but you can also make one. And building your own is probably cheaper and most likely sturdier and you can add all the customization you want. There are a few scroll saw stand plans out there and I used inspiration from Kenneth Van Winkle’s plans here.

Built from 2×4 studs, a 4×4 post and a 2×12 board my scroll saw stand is solid as a rock. It fits my Dewalt scroll saw perfectly and I added a bungee cord on the front to hold a shop vac hose in place for dust collection. This lower dust collection does help but it doesn’t completely eliminate the dust.

The bungee cord keeps the hose in position and allows me to easily remove for quick clean up on the work surface table and around the base.

I have the hose positioned just to the right of the bevel knob so it doesn’t interfere with the blade. Works like a charm and I can still use my shop vac for other things.

The three leg design of the scroll saw stand virtually eliminates any vibration. I didn’t even attach the saw to the stand although I recommend doing so. I was contemplating lifting the back of the saw ever so slightly so as to tilt the work table which helps ease any neck strain but so far I’m happy with it being level. This scroll saw weighs 65 pounds and hasn’t moved an inch since I placed in on the stand even when cutting through 1 1/2″ material.

The stool I sit at is counter height which lifts me a little above the work table. You definitely want to consider your saw’s work table height and your stool height before building the stand.
Click here for free printable PDF version of the plans.

In step 1 assemble the front legs to the aprons. I used a countersink bit to predrill holes for the 2 1/2″ wood screws. Many of the cuts for this stand are done with a 5 degree miter so pay attention to your angles.
I hope you enjoy this scroll saw stand as much as I enjoy using it. Please be sure to share your builds and tag me on social media.
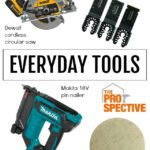
SHOP THIS PROJECT:


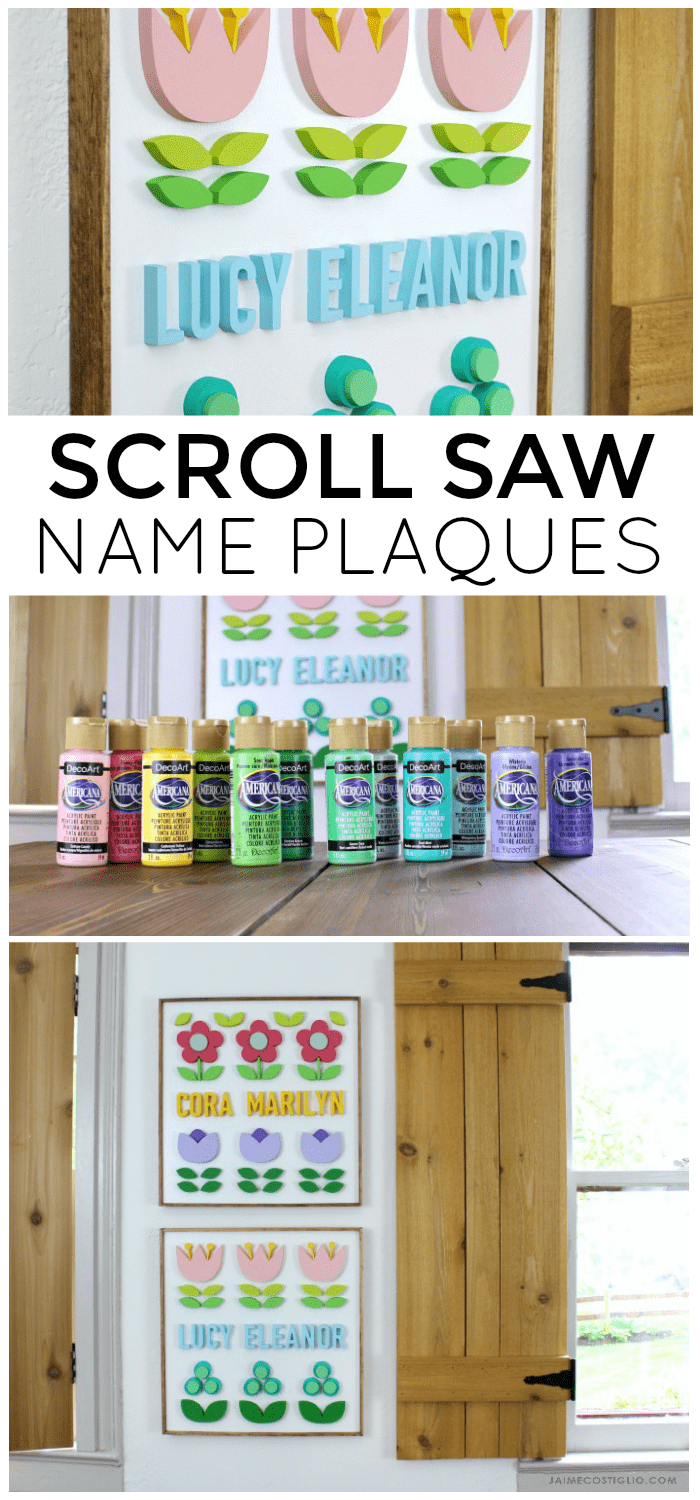
And if you’re looking for some scroll saw project ideas I’ve got a few. Click on the photo:
![]()


This is super sweet setup….great job on your table,,,tfs
Thanks Gloria, it’s been working out good for me so I thought I’d share 🙂
Hey Jaime…..I just love the scroll saw plan but I’m unable to print or download which I click on the link. Help please!
Hi Jlynn, I’m not sure why it’s not working for you but I just checked and the link is good. Can you try from a different browser? I will leave the link here as well: https://drive.google.com/file/d/1R8xJNMWex_ZN7yzKkgPapZegVONMvu0d/view?usp=sharing
hi jamie.im new to scrolling,but recently i bought a new sheppach scroll saw,and as space is very tight,i needed a permanent stand for it ,your stand is going to be copied soon,thanks again kind regards from southern ireland. leo
Hi Leo, Great to hear about your new scroll saw. Truly scrolling is the most relaxing and fun way to work with wood IMO. So happy you found my plans for the stand, it’s fairly simple but so useful. Good luck and do share!
Hi Jaime. I found your design on line and built it in a few hours. Your instructions were very thorough and easy to follow. It now has my new dewalt 788 scroll saw on it. Many thanks….
Thanks Bob, so great to hear my plans were of use. Cheers to many, many hours of scrolling ahead!
thank you for the plans! it’s great to have a homemade stand for our new dewalt scroll saw. also many thanks for such clear and thorough instructions.
Hi Erin, You’re very welcome. So glad you found it useful. Cheers to all the scrolling!
Very nice! Going to start this today .One question though, can’t I just use 2 2×4 @ 5 1/2″ instead of the 2×3’s?
Hi Brian, yes definitely use the 2×4 – I think I just had the 2×3 scraps on hand so I went with it. Either will work.
Hi Jaime. Thanks for the tutorial on this. I’m picking up a Dewalt Scroll Saw next week and will be glad to have this ready to go. When I try to click on the free plans picture above, nothing happens. Are the plans supposed to open or download? Would love to get a copy, especially if it includes a cut list. 🙂 Thank you!
Hi Jennifer, The plans are linked above but I will leave them here: https://drive.google.com/file/d/1R8xJNMWex_ZN7yzKkgPapZegVONMvu0d/view
Thank you!
Salut Jaime ! Sunt din Romania și voi construi standul pentru ferăstrăul de traforaj. Mulțumesc pentru planuri !
Hi Jaime! I am from Romania and I will build the stand for the scrollsaw. Thanks for the plans!
Hi Jamie
What a great table design for my scroll saw. The plans are very easy to follow and the recommendations for table height was perfect prior to making the final table leg cuts. Not sure of the mystery of 3 legs making the table more stable and less vibration but my saw now runs allot smoother……..one of life little mysteries. Thanks again for making the wood working shop even more fun.
The boat shop
Nanaimo , BC, Canada
Thanks Ian, so glad the plans worked out for you. Now only we could find more time to scroll!
Thanks for this plan. I made it and added locking wheels to it so I can easily move it when I have time to scroll. Easy. To do as this was my first wood build.. YAY.
Hi Angela, great idea for the locking wheels. Thanks for sharing your mods.
Got mine done, being a beginner woodworker I had trouble with miters on top of 4X4 and bottom. Finally got it and it looks great
Glad to hear, thanks for sharing your experience from a beginner perspective. Happy Scrolling!
How much space around the scroll saw stand do you recommend having in the workshop? I’m rearranging and designing a new workshop with a new scroll saw and trying to figure out how much space it should be!
Hi Jenny, the space you need depends on how big your projects are. In general I would keep it as open as possible on all sides, at least 24″ especially at the back but if you only scroll small projects then you won’t need all that real estate. Good luck with your shop set up!
Very nice! Going to start this today, thank you,
Capt., Stratos
The plan worked for me once I got the miter cuts going the right way. I added retractable casters that lift the stand up 3/4″ to allow moving it easily from storage to the work area. Once in place, raise the casters to lower the legs to the floor. Works great and wasn’t expensive. Got a chair to sit on while using the scroll saw. This stand makes using the scroll saw so much more enjoyable. Thanks for the plan.
Love hearing that, thank you Joe for sharing. Great idea to add the retractable casters (I might have to borrow that ;)). Happy Scrolling!
I am new to this I retired 10 years ago and I want to try scroll saw working to expand my hobbies , I have a RYOBI 16″ saw
and after looking at many plans I like yours the best.
Thanks Arnold. I still love the scroll saw stand as well, in fact I recently added 4″ casters to make it more mobile in my shed shop and it’s the perfect standing height for me plus I can push it out of the way when I need space.
Jaime, you certainly saved me the time and effort to design a table for my new Dewalt scroll saw. I will be adding a small sheld below to hold a few tools and additional blades, etc. Thank you so much.
I’m building this table now, very excited to get my scroll saw off the sawhorses. One question: why the 5 degree miter on the 2x4s going into the 4×4? Having trouble visualizing it, and want to understand the benefit before I start cutting. Don’t you end up with an uneven top surface onto which you attach the 2×12?
Hi Matt, I can’t quite remember why I did that 5 degree miter but I think it was to kick out the back 4×4 leg just a hair. It’s definitely not necessary. Thanks for inquiring and good luck with your stand!
Thanks for the scroll saw stand plans. I have my DeWalt saw on a shaky nightstand-type table that I added legs to. I’m going to make a proper stand, starting with your plans. My current setup has a 10 degree slope front to back and I find that quite congenial, so I’ll be modifying your stand a little. And, like one of your fans wrote, I’ll be adding a shelf. Your plans are a great start — thank you.