It’s been a long time coming friends but today I’m finally sharing the master bedroom ceiling makeover. We moved in to this 1740 saltbox farmhouse almost three years ago and I’ve always known I wanted to expose the ceiling beams in our bedroom. So it’s a huge project milestone to finally have this complete.

A DIY tutorial to remove plaster and lath ceiling to reveal original wood beams. A ceiling makeover worth every ounce of dust.
If you follow me on Instagram (you should – it’s fun) then you’ve already seen a few sneak peeks of the exposed ceiling beams. Down below are more before and after pictures plus I’m sharing the complete ceiling makeover process on how to expose the wood beams.

Ceiling Before
Typical to many antique homes we had low ceilings composed of plaster and lath which cover the wood beams (also known as floor joists for the flooring above). The plaster tends to crack over time and you can see from the picture above it’s uneven, almost textured. This plaster also had a linen paper over it to keep the cracks under control.
I’m only sharing the next picture because I want you to see just how much things have changed.

This MLS listing picture above is from October 2012 when the previous owners put the house on the market. This is exactly how the master bedroom looked when I decided I wanted and needed to buy this house.
Exposed Wood Beams
And now this same exact space looks like this:

Dreams do come true folks!

Every day I look up at those beams and think holy smokes the carpenters who built this house in 1740 were amazing. I think about them all the time (and all the owners who have cared for this home since then) and wonder just how on earth they were able to create such beauty using only hand tools!

Cozy Ceiling Makeover
Exposing the wood beams really changed the look and feel of this room. It’s super cozy now, almost like sleeping in a log cabin.


I’m not completely convinced that mirror should stay above the fireplace but for now it’s good. It’s a diy project I made long ago, the tutorial is here.

Honor Your Home
I always say we should make our homes a reflection of ourselves. Do everything possible to make your home the best version of itself for your family. I believe that by exposing the wood beams I’ve not only made a vast improvement on this room but given honor to this historical home.

* This post contains affiliate links below.
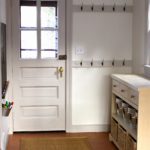
Part of this master bedroom ceiling renovation involved a complete bathroom renovation as well. The return vent you see below originally was in the wall just above the moulding. However, because of the bathroom remodel we had to move the return to the floor:

And I opted to use a vintage cast iron return grill versus the standard metal return vent cover. It just adds a tiny bit of character and charm.
Ceiling Process
Below is the step by step process to exposing wood beams in the ceiling. Every ceiling will be a tiny bit different as I have experienced with previously ripping down our dining room ceiling and more recently with this ceiling. Go slow and think things through before tearing down something truly priceless.

Step 1: Move every piece of furniture possible out of the room. I opted to leave the poster bed frame (because I built it in the room – plans here) and wrapped it with stretch wrap to protect the finish.
- cover floor with protective roisin paper (Update: recommend ram board instead.)
- cover and seal all vents and returns
- painter’s tape
over outlets and switches
- stretch wrap
- seal doors shut with painter’s tape
WARNING: THE DUST WILL GO EVERYWHERE EVEN WITH THESE PROTECTIVE MEASURES! Just be prepared for a lot of dust no matter how much you seal the space.

Step 2: Protect yourself. A good respirator mask , protective eyewear
 and cover your body head to toe in clothing. When the plaster comes down it’s a mix of dust and horsehair plus all the mouse poop flying in the air, you don’t want that stuck in your hair ;).

Step 3: To get started peel back a piece of the linen paper (if you have it) then start hammering away at the plaster. It will crumble and you can pull it down. Then use a pry bar to pull the lath off the beam. This is just to start.
The goal is to take the plaster down in BIG CHUNKS which creates less dust and easier to bag up and remove. Same with the lath, it’s easier to pry off a full piece of lath rather than breaking it.

You’ll want a plastic tarp below your work space along with a garbage bin ready to collect the plaster chunks.


Step 4: Once you get started use a hammer to loosen the plaster from above. Hammer down on the keys and then you can pull it off the lath in chunks.
Work in sections. The lath usually runs across 3 or 4 beams so let the lath size lead your section.

Removing Lath from Ceiling
You can see the exposed beams and flooring in the photo above. I could’ve left that exposed as this ceiling has no electrical wires to worry about. I also could have painted the underside white but I choose to install sheetrock in between the beams. The sheetrock creates a finished look and dampens some sound. If you do have electrical wires you will probably want the sheetrock to conceal any wiring. (We have electrical in the dining room ceiling – see my post here for details.)

Step 5: After all the plaster and lath is down it’s time to install sheetrock. I called my contractor for this part. His guys are amazing and I asked them to sheetrock in between the beams.
In a more recent ceiling makeover I tackled the sheetrock process myself. To see the entire process including how to install the cleats see my post here.
Step 6: I painted the ceiling using Benjamin Moore waterborne ceiling paint .
.

Ceiling Makeover Complete
Looks like it was always meant to be this way. Now that makes two rooms with exposed original wood beams. I still have one more room to do but this momma needs a break and time for all that dust to settle!

Thanks for joining me for this exposed wood beams project. Please leave any questions in the comments below and be sure to follow me on social media for sneak peeks, tools and project inspiration:
SHOP THIS PROJECT:


WOW! it's beautiful!!!
It's downright gorgeous!!!
I don't normally comment on stuff. But this is amazing, honoring the work of the people who built the house. And it is so beautiful So many would think the job is just too hard, well done.
I know it was a ton of work but it was worth it! Gorgeous job!
Amazing! I love it! So beautiful!
Debbie
Oh my beautiful!!! Wow Jaime!! I love it! I wish my house had beams like that!
Wow, lots of work but totally worth it. It's beautiful!
I'm amazed you had the courage to tackle that project, but so worth it! Can't believe those gorgeous beams were hidden. Well done!
Fabfreakingtastic!
Gosh – the beams just MADE the space. It was lovely before, and now it's really incredible. Love it.
Wow!! That is so beautiful! great work!! Love your house btw, what a gem!
Jaime this is really stunning — great job!!
Wow, wow and wow!!!! I love beams and those are beauties. Lucky you!
Absolutely beautiful.
Get out!! That is the most incredible transformation I've seen. And now I want beams in every room of my house. And that wide-planked floor. it looks amazing, Jaime! Job WELL done!
I love, love your new bedroom! It's all so clean, and has so much personality!
This is AMAZING!!!! WE just bought an 1896 Queen Anne Victorian and I was researching how to pull down the plaster and lathe on our living room ceiling to expose the 2×4 joists. How amazing would it be if I found beams?!?!?!
Thank you Leigh Anne. Congratulations on the new – old house, I can only imagine the character and charm in all the nooks and crannies 🙂 If I was a betting person I would say you definitely have beams under the plaster and lath, condition may be uncertain but it’s worth a peek. Take down a 2′ x 2′ area and if you don’t find treasure you can always patch it back up. Good luck!
Jaime, love the rooms. I am currently doing something similar on my 1800’s shotgun house. I am wondering if you caulked where the beams meet the drywall?
Thanks Jacob, where the sheetrock meets the wood I used joint compound – a very thin bit shoved in using a joint knife. You can see the process here in my most recent ceiling makeover: https://www.instagram.com/stories/highlights/18033494155285328/ (its near the end). I’ve done this in 3 ceilings now and it’s been 5 years and no cracking. I wouldn’t recommend chaulk although if you could put joint compound in a chaulk gun that may be the best solution! Good luck!
I am asking about the stain and color on your floors. I’m in the process of refinishing my pine floors and having a heck of a time trying to find a stain that I like and I love your floors and color.
Hi Shannon, the pine floors are original 1740 and no stain, just wax. Years and years of wear and tear and exposed have turned them brown. If I had to pick a stain that was close I would say Varathane special walnut or provincial. Hope that helps.
Hi – this is beatiful. Did you put insulation behind the sheetrock?
Hi Hilary, No insulation under the sheetrock. Yes we can hear muffled conversations and anyone walking around – the joys of a primitive home 🙂