* This post is sponsored by Leather Hide Store.
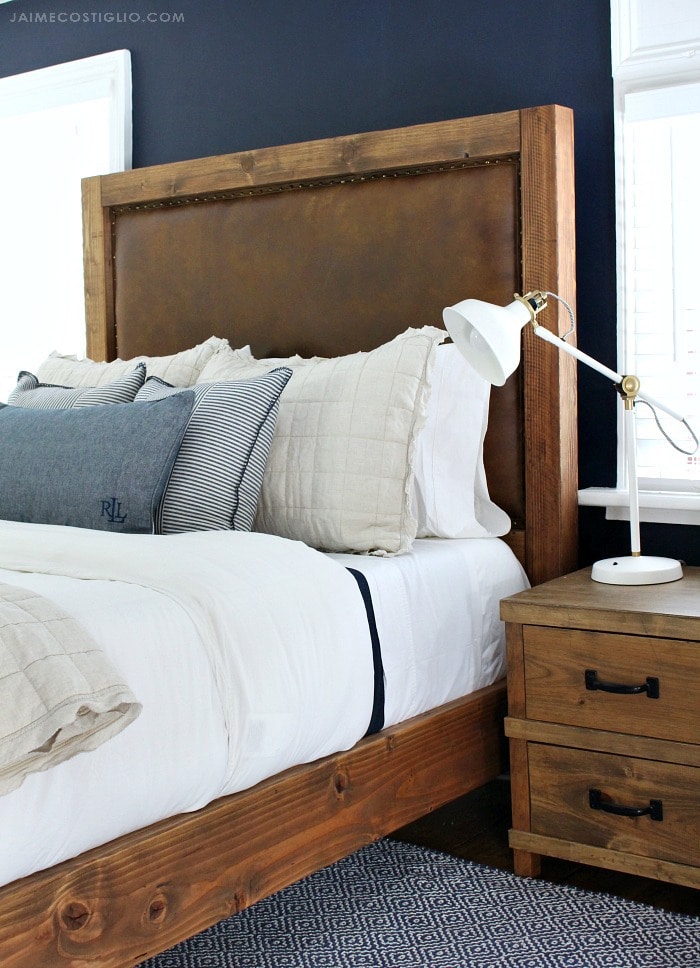
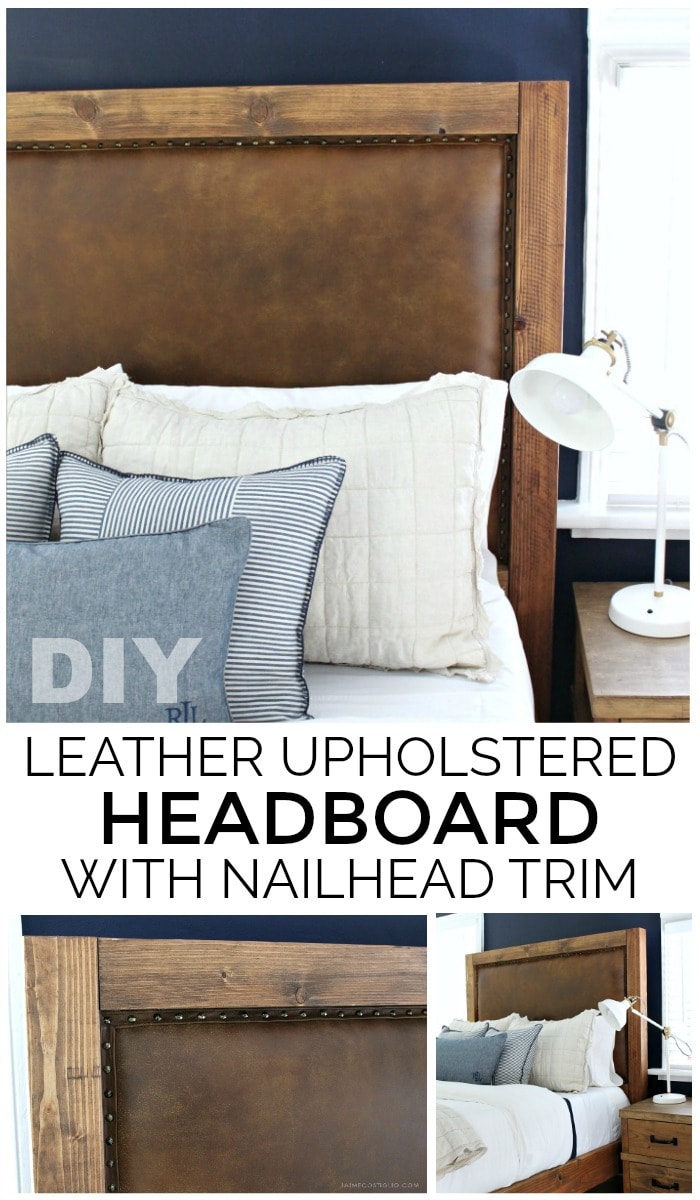
Never in my wildest dreams did I imagine I would be making my son a leather upholstered headboard until now. Sometimes you think of a project, hoping and dreaming some day it may come true but thinking it will probably never come to life. This is one of those imaginary projects that just came to fruition in my home, for my family and now my son is sleeping in this very bed. Truly there is something to be said for DIY and that feeling you get from real accomplishment.
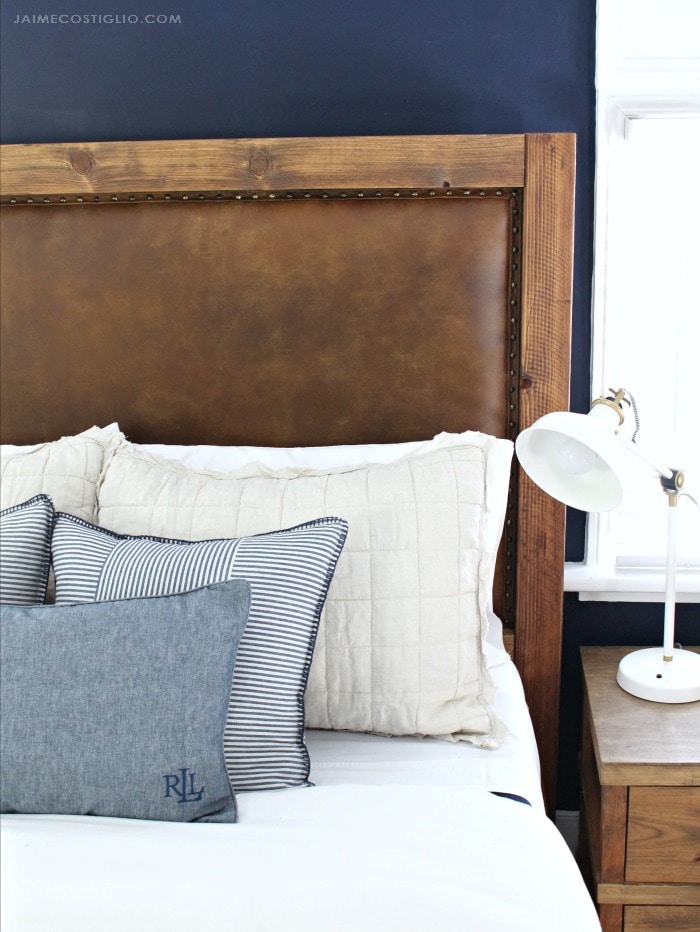
A special thank you to the kind folks at Leather Hide Store for supplying this beautiful Montana buckskin leather. I tried my very hardest to capture the texture and I hope these photos do it some justice but honestly you have to see it in person and touch it because it’s incredibly soft and yummy.
For this leather upholstered headboard I used Montana Buckskin. It is a cowhide, hand finished leather with warm buckskin tones then distressed to add weathered golden brown highlights creating a truly authentic rustic look. I prefer the natural markings (like brands, healed scratches and scars) in this leather because it makes it one of a kind. Bonus this leather is proudly produced in the USA!
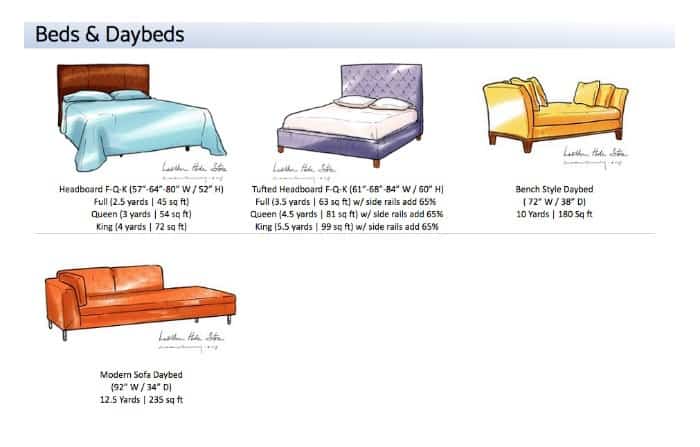
The Leather Hide Store has all different types of leather finishes and colors to choose from. You can use leather on almost any upholstery project and they have created a beautiful guide for figuring out exactly how much leather you need for all kinds of furniture pieces. Click here for the complete guide.
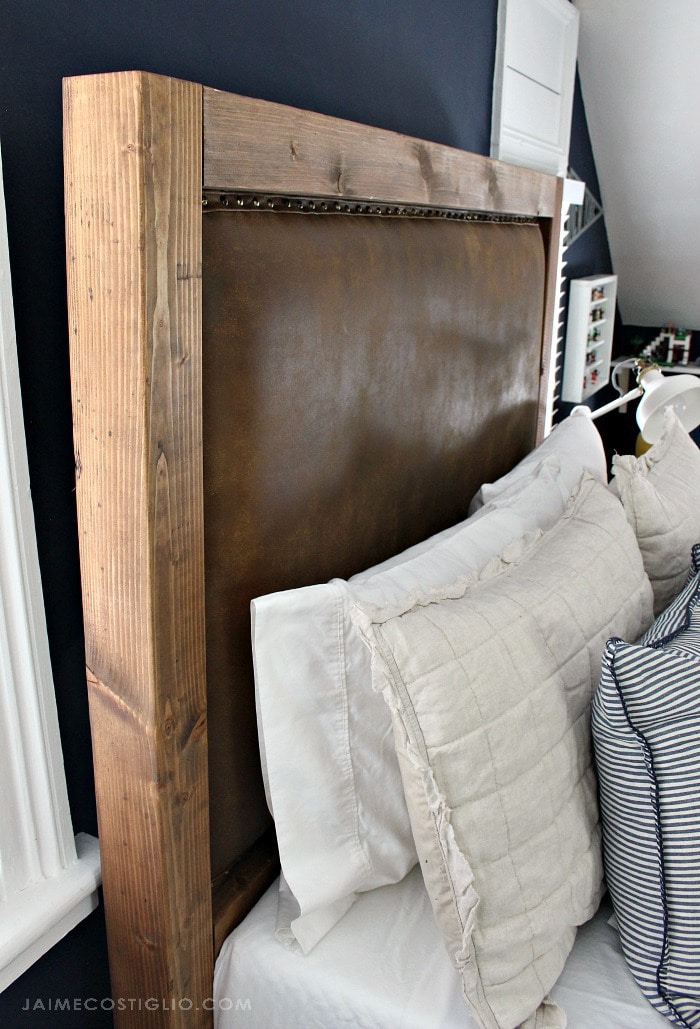
The buckskin I choose pairs perfectly with the stained wood headboard and brass nailheads straight off the shelf. I’m sharing the tutorial below on how to upholster a headboard using leather complete with a video of the process. This is definitely a DIY project almost anyone can tackle and well worth the effort.
See the whole process in action here:
Supplies:
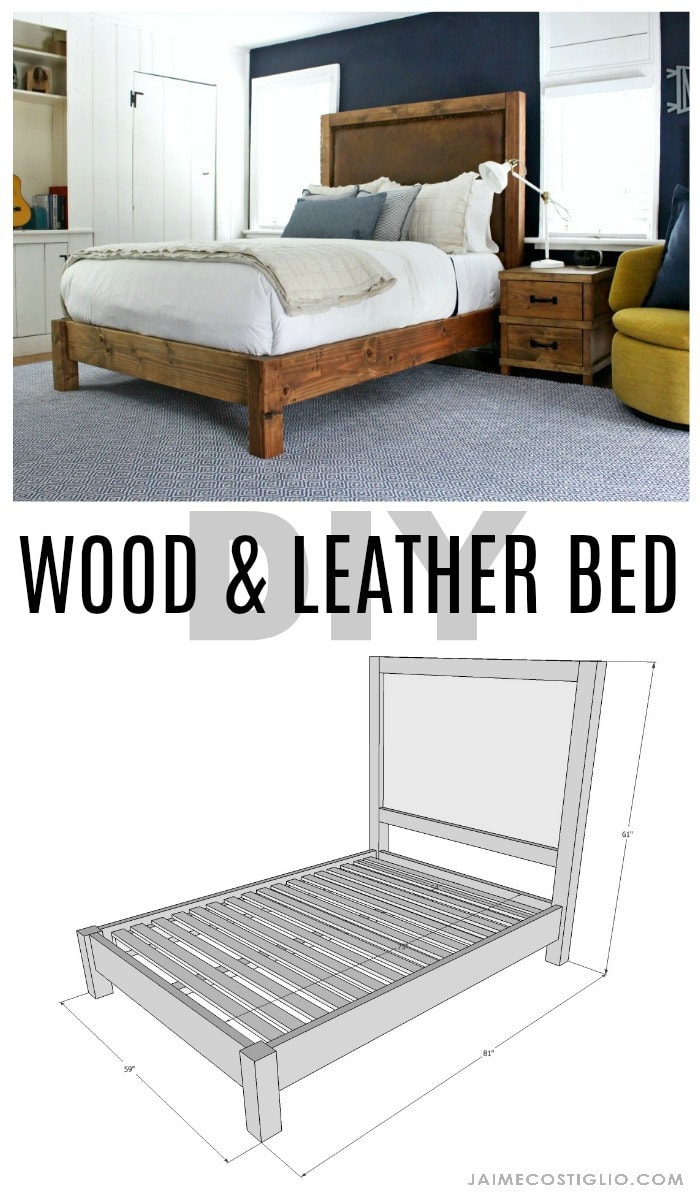
- wood headboard (plans for my headboard here)
- 2″ high density upholstery foam
- spray adhesive
- quilt batting (crib size)
- leather
- staple gun & 1/2″ staples
- exacto knife
- rotary cutter
- self healing mat
- clear quilting ruler or similar straight edge
- sewing machine & denim needle
- quilting or carpet thread
- hot glue gun
- scissors
- dark colored sharpie
- drill & 1/8″ drill bit
- nailheads
- hammer
- nail punch
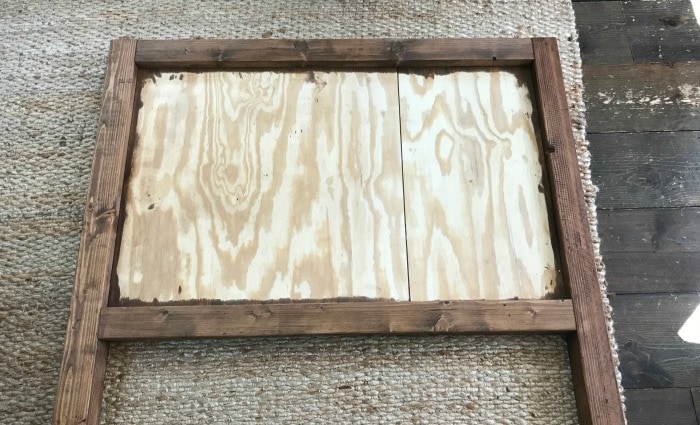
Step 1: Build the wood headboard (use my plans here or another wood headboard surface).
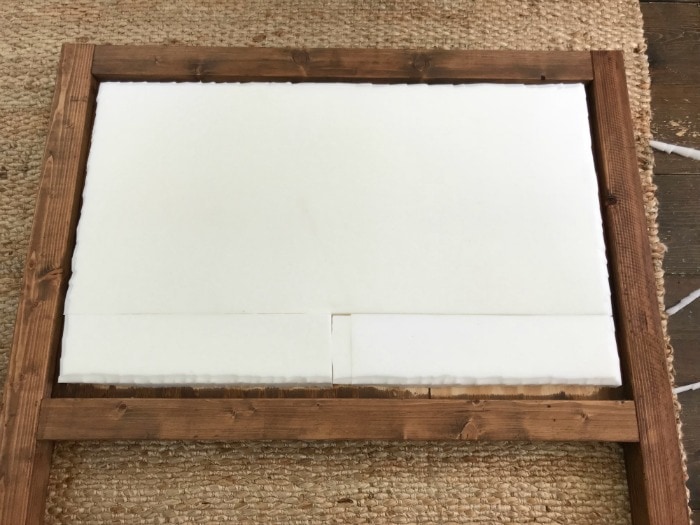
Step 2: Apply 2″ high density foam. Use spray adhesive to ensure foam won’t slip and trim outside edges of foam on an angle to remove the sharp edge.
Step 3: Cut quilt batting to fit over the foam. This layer softens the foam edge and covers any seams in the foam.
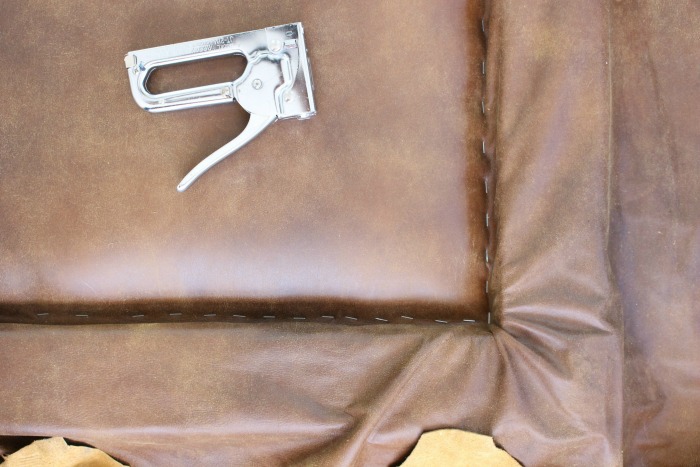
Step 4: Lay out the leather over the foam. Starting at the center, place a few staples as close to the wood edge as possible then pull the leather taught on the opposite side and insert a few staples there. Now move to the sides, pull taught on one side and staple a few, then the other side. Keep repeating this process always attaching the opposite sides a few staples at a time until you reach the corners. The leather should be snug but not overly tight.
Step 5: Using an exacto knife trim off the excess leather right up to the wood edge.
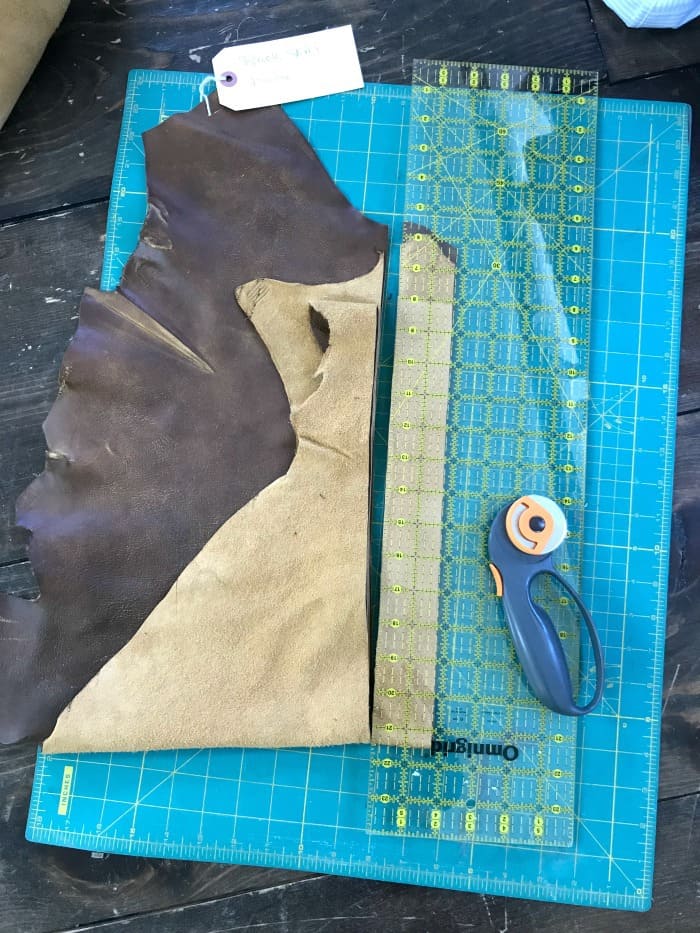
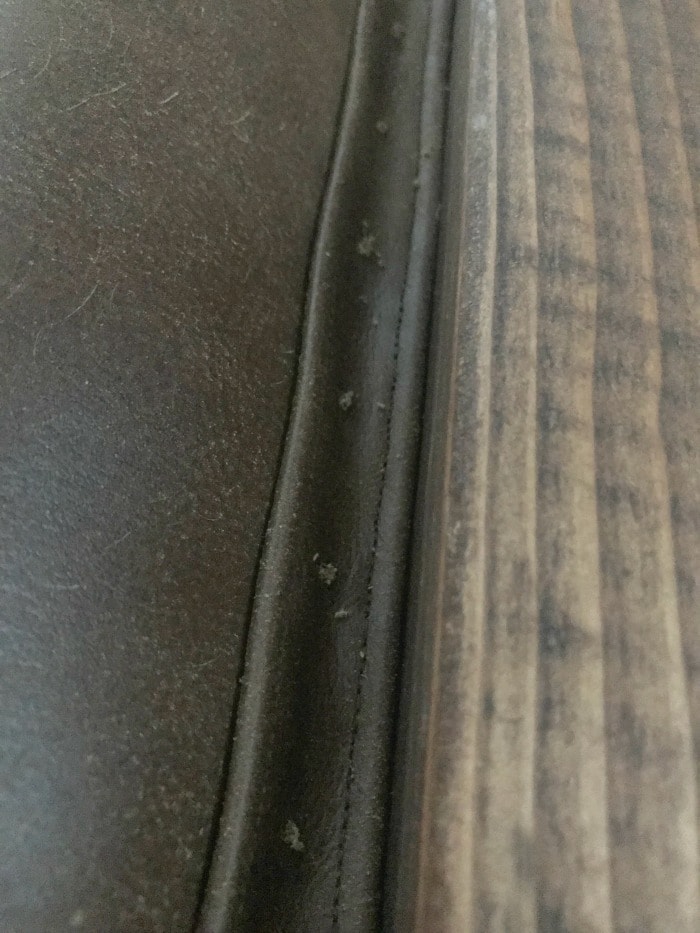
Step 6: To make your own trim cut strips of leather 1 3/4″ wide long enough for each edge.

Step 7: Fold the leather in a generous 1/4″ then stitch 1/8″ from the fold. Repeat for other side of leather making a finished edge trim.
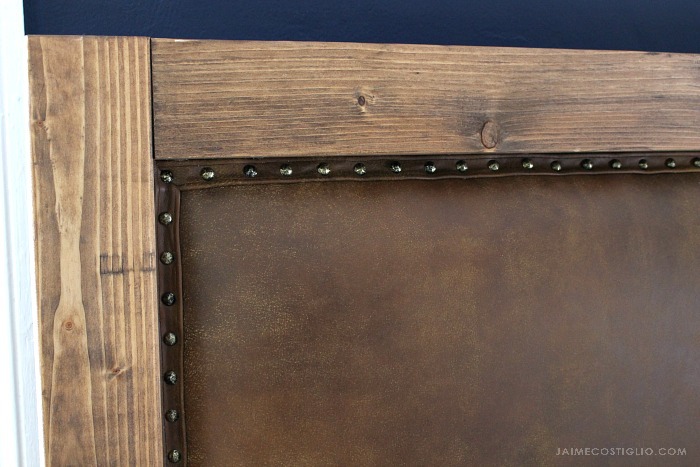
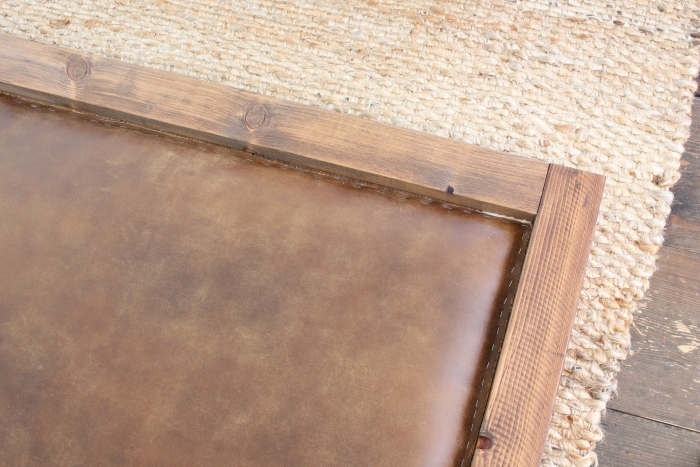
Step 8: Hot glue the leather in place right up against the wood covering the staples. Scroll down a bit to see how I handled the corners. I simply folded the top trim at a 45 degree miter then glue down.
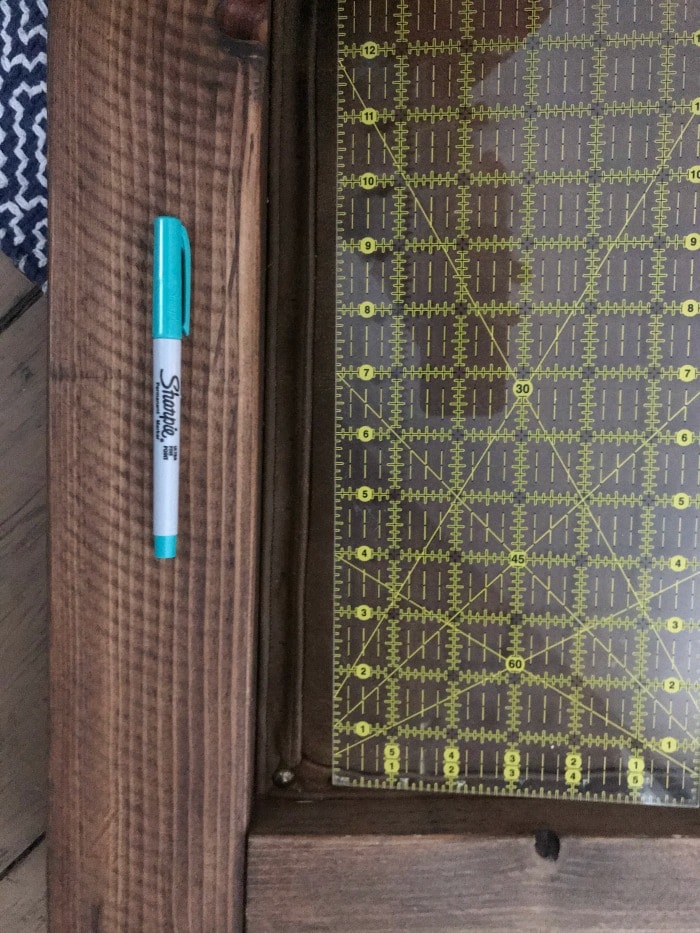
Step 9: Use a clear quilting ruler and a dark sharpie to make evenly spaced marks where the nailheads will be inserted. I spaced my nailheads every 1 1/4″.
Step 10: Use a drill with a small bit (1/8″ or smaller) to predrill a shallow pilot hole through the leather and just barely into the plywood. This will make attaching the nailheads much easier and more precise.
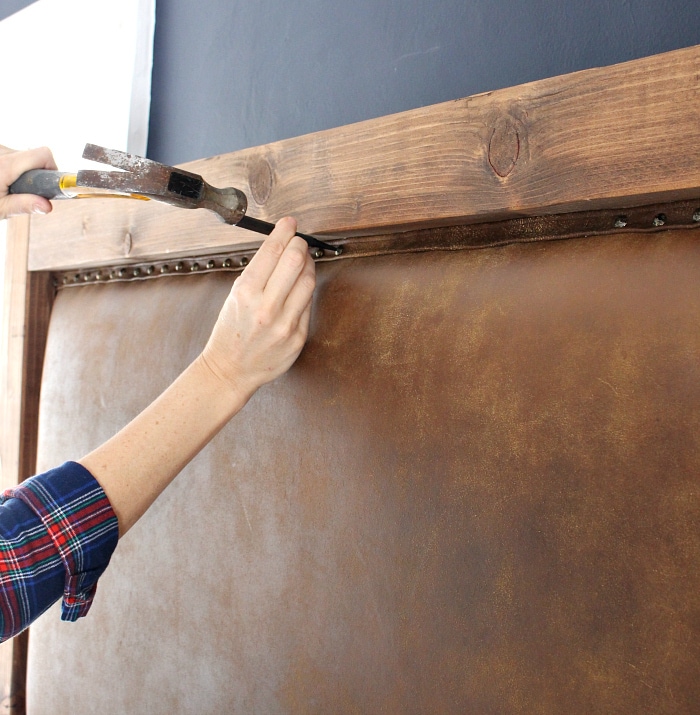
Step 11: Use a nail punch to guide the nailhead into position and hammer down securely. I recommend doing this on a flat surface as in the video. Here I had a few nailheads left to go after I had assembled the bed in the room so I had to finish the process on the upright.
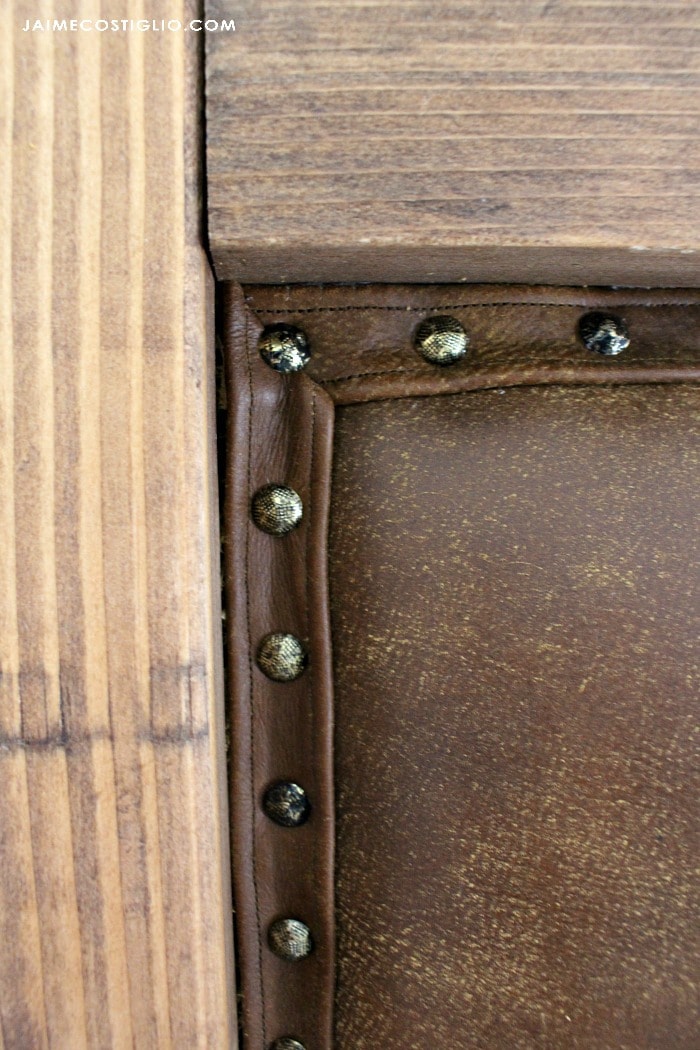
You can see how I handled the corners above placing a nailhead directly over the mitered trim piece. While the nailheads are evenly spaced there is still a bit of rustic handmade feel and I really like that characteristic about this headboard. It’s not perfectly perfect like a machine would make and I just love knowing that I built this piece and made this headboard exactly how I wanted it for my son.
Thanks for joining me for this leather upholstered headboard tutorial. Be sure to follow me on Instagram where I share lots of project sneak peeks and behind the scenes of upcoming projects in stories.
SHOP THIS PROJECT:

For free plans and details on the complete wood and leather bed click here:
very nice job
What size sewing needle and thread type did you use to sew the leather?
Hi Lynne, I used a denim needle and quilting thread to sew the leather.
This looks SO amazing! Thank you for turning our leather into this beautiful headboard!