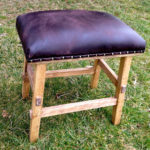
Get comfortable and put those feet up on this DIY round leather ottoman project sponsored by Simpson Strong-Tie. Honestly I’m not sure why we never had an ottoman before but it has quickly become the most loved on piece of furniture.

A DIY tutorial to build a round ottoman and how to upholster it with leather. Create the perfect spot for books, remotes and a place to put those feet up.
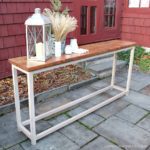
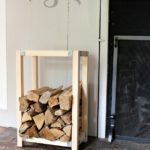
As a Simpson Strong-Tie ambassador I am very proud to use their connectors and fasteners in my projects. You may recall the workbench inspired desk, barn door window coverings or this split rail fence made with easy to install fence brackets, just to name a few. Today I am sharing this round leather ottoman complete with angle connectors to solidify and compliment this extremely useful piece of furniture.

The build process is fairly simple. In a few steps you will have the base constructed and you could even opt to not include the upholstered top cushion (be sure to modify the leg height if you’re not using the cushion). Curious how it all came together? I made a quick video of the process:
This beautiful leather comes from the Leather Hide Store. I had a few pieces leftover from the leather headboard project. It is Montana buckskin and has a worn, distressed matte finish.
This leather ottoman checks off a few of my favorite design details:
- stained wood
- black metal connectors
- warm leather
- carpet tacks

The black metal brackets are A21 angle connectors from Simpson Strong-Tie. They come in a stainless steel finish but for this project I spray painted them a textured black matte finish. Simpson Strong-Tie makes a variety of angle connectors in all sizes which are great additions to your furniture for both strength and added detail.

The black matte on the angle connectors coordinates well with the black carpet tacks. You could also use upholstery tacks but they tend to be larger and more pronounced. I like the subtle nature of the carpet tack and the petite size.

Another fun detail is the center seam on the leather. I was forced to seam the leather because I had used two leftover pieces but I think having the seam breaks up the monotony on the surface and enhances the leather quality. In hindsight I wish I had made another seam going across (to make an X), next time. I overlapped the two pieces of leather by 3/4″ and then sewed two straight topstitched seams. Be sure to use a leather or denim needle and quilting thread when sewing leather.

For the complete build plans and step by step instructions to make a round leather ottoman visit Simpson Strong-Tie’s site here. Be sure to follow along on social media for project updates and sneak peeks.
Instagram / Pinterest / Facebook / Youtube / Twitter
SHOP THIS PROJECT:


I love the ottoman. I also love the look of all of your living room. I was wondering where you got your sectional it is exactly what I have been looking for and not been able to find. Thank you!
Thanks Kraig, the sectional is from West Elm – the Henry line.
Hi Jaime,
Thank you for the design, I’m in the process of finishing it but had a question.
Am I able to use a memory foam under the leather? Are there any other options other then upholstery foam?
Thank you!
Hi Milad, I suppose you could use memory foam. I think upholstery foam is more dense so it might have a better shape. I’m not sure about other options. Good luck!
Hi Jaime, I can see the angle brackets for the legs, but how did you join the bottom cross pieces?
Hi Marge, the bottom cross support pieces are connected using pocket holes. It’s picture in the plans – Step 1.
Where did you purchase your leather?
Hi Andi, The leather is from Leather Hide Store https://www.leatherhidestore.com