This is definitely a chicken before the egg situation. While embarking on the wood star project I quickly realized I needed a wedge jig in order to make a steep miter cut so I made one and I’m sharing the how-to with you.

Let’s make a wedge jig for your miter saw. A DIY tutorial to create a wedge jig for making steep cuts on a miter saw plus a wood star project.
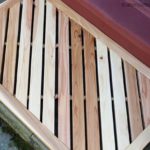
If you saw the recent Pottery Barn catalog chances are you love these wood stars as much as me:

And you quickly thought ‘I can DIY that surely!’. However after much trial and error I consulted fellow buildy blogger Jamison at Rogue Engineer who quickly informed me I needed a 54 degree angle in order to make the five pointed star shape.
BUT MY MITER SAW DOESN’T MAKE A 54 DEGREE CUT?
Never fear I have the solution. If you want to make a five pointed wood star you are going to need a wedge jig and I’m going to show you how to make one because I googled it to death and couldn’t find a tutorial :). PS – I have a new fancy miter saw set up that makes a 60 degree cut!! But this tutorial below is still great for make a wedge jig if you need any steep cut beyond the capacity of your miter saw.
This jig is made using wood scraps from around the shop, no need to buy any supplies just use what you have on hand. It’s a jig after all and although extremely useful it’s not decorative so don’t worry about being fancy here.
Supplies:
- 3/4″ scrap plywood
- 1×2 pine board scrap
- 2″ wood screws
- wood glue
- protractor
- pencil
- miter saw
- drill & drill bits

(You don’t need a measuring tape for this project but somehow it ended up in the picture.)
The wedge jig can be used for most miter cuts that exceed your saw’s settings. In this case we are making a jig for 54 degrees but you can make this jig to fit your necessary miter cut.
Essentially we are moving the fence forward to make a steeper angle.
Below is the tutorial to make a wedge jig for your miter saw. Please read through all the steps before beginning to understand the process. Also this is what worked for me and maybe you have a better version or an update, please feel free to add your notes in the comments. It’s very helpful to others when the can see your insights – thank you!

Step 1: Set your miter saw for a 30 degree miter cut. I choose 30 degrees because it seemed like good middle ground, not too steep.

Step 2: Set the 3/4″ plywood scrap flush to fence and make the cut.

Step 3: Go old school and use a protractor to mark a 36 degree angle off of the fresh miter cut. The goal is to get up to a 54 degree miter cut so 90 – 54 = 36.

Step 4: Draw a line for the 36 degree angle from the red dot through your mark.

Step 5: Glue and attach the 1×2 pine board on the narrow side flush up to the line you just drew (in red above). Predrill and countersink 2″ wood screws down into the 1×2 board. Don’t worry if the 1×2 extends off the plywood at this point.

Step 6: Reset the miter back to 0 degrees and cut the excess 1×2 flush to the plywood. Do this for both ends of the 1×2.

Your wedge jig is complete and ready to use.
Don’t forget to set the miter back to 30 degrees before making any cuts!

Also be sure to use a clamp to keep the jig secure. If you want additional security consider adding a perpendicular wood fence to the plywood (where it meets the saw fence) then you can clamp the wood fence to the saw fence as well.

Now place the board to be cut in front of the wedge – here I used about an 8″ piece of 1×3 pine. Be sure to clamp the board to the wedge fence and cut away.
54 degree miter done on a miter saw using a wedge jig.
Now you can make these wood stars in my post here.

SHOP THIS PROJECT:


So clever! I never could've even dreamed this up! I've had to do a few cuts that weren't 'set' on my miter saw and ended up using a protractor and probably a very dangerous cutting method…you've single-handedly saved me time and possibly a few fingers!!
wow ~ thanks for posting this thurough tutorial. love your blog!
We made these! My husband figured out to change the angle of the wedge jig slightly so that he wouldn't have to keep resetting the miter saw angle after each cut. Instead of 30 degrees he put the miter saw at 36 and made the wedge jig to accommodate the difference. Then the miter saw is all set for the 36 degree cut. 🙂 Thanks for the instructions!
I am trying my hardest to understand your comment so it makes life easier, but what angle did he put the wedge jig at to compensate? I am so lost in math it's infuriating. I know it's a very old comment, but perhaps you'll see it 🙂
The angle from the edge of the jig needs to be 36 degrees no matter what angle you decided use for the edge of the jig.
Thanks for the tutorial. Always battled with angles larger than 45 degrees. Going to improve the jig though and will share with all. I have thought of a way the jig can be fully adjustable from 45 to 90 degrees so that you don't have to reset the machine all the time. Thanks for the foundation.
PETER CAN YOU SHARE THE ADJUSTABLE JIG YOU MADE FOR ALL OF US? THANKS
What was the size of the plywood that you started with? i am guessing 24×18?
I am a new follower! Love your blog and your ideas! Can't wait to make these stars 🙂
Ugh…..I’m not doing something right. It says to nail the short piece to the long piece. Shouldn’t they all be the same size? Each piece 6” ?
So, you use the jig and cut at 30 degrees. Then remove jig and flip board……so that your just using the mitre saw. Change to 36 degrees and make the second cut?
The one thing I’m not following is why you cut the plywood on an angle. Couldn’t it have stayed squared off, and make your 36 degree jig from the edge?
Hi Greg, the reason for the initial cut on the plywood at an angle is so that your 36 degree fence is not so steep. Yes you could probably leave the plywood square and attach the fence no problem. For some reason that’s just how I did it. Thanks for chiming in, always good to hear other’s ideas.
Although I am not a fan of miter saws, ( I have never figured out what I could do with one that I couldn’t do quicker, or easier with a table saw, or radial arm saw), I do like this jig for this application . One thing which could possibly improve it, would be to make it adjustable, so it could be used for other angles on the same jig.
Can you share how you did this on the table saw?
I still don’t understand how the 56 degree cut will happen with a 36 jig and the mitter setting left at 30.
Do I need to move the mitter setting to Be able to cut the 56 degree? Example 54-36=18?
Hi David, For this project we need a 54 degree angle. 90-54 = 36. The 30 degree cut is arbitrary, you can make the jig using any angle you like. I picked 30 because it seemed good middle ground. Make the 36 degree mark off of that cut angle and then keep your saw at that angle (30 or whatever you choose) to make the steeper cuts using the jig. Hope that helps.
make a 18 degree jig instead, set your miter saw to 36 degree to make 54 degree angle.
then remove jig for 36 degree angle.
would it be easier?
Hi Kj, Yes you could definitely go this route. 18 is pretty shallow – I just choose 30/36 because it seemed good middle ground.
Question, why not just make a right angle out of wood and just use that. All you have to do is set the miter saw to 36 degrees and never move it again. Make your 36 degree cut (board is on its skinny side, body against the fence of the miter saw) Then put the right angle on the left side of the board you just cut, basically like an upside down, backwards L (uncut end of board towards saw blade, still laying on its skinny side, small uncut end against miter saw fence) then that will give you your 54 degree cut. Clamp the board to the right angle jig for stability if needed.
I hate angles unfortunatly i have to deal with them everyday
Is a “sliding” miter saw required?
Hi Joshua, Depends on how wide your miter saw will cut. Technically no you don’t need a slider but your base piece of plywood will be shorter because the stationary saw can’t make as long a cut as a slider.
Hi – love the idea of using the jig – just curious why you chose not to use an 18 degree angle for the star points? Is it easier to build this way? Am I right in thinking the 2 angles you are aiming for are 54 degrees and 36?
Hi Jamie,
I don’t know if you are still monitoring your posts but if you are I could really use your help. I followed your instructions precisely and the angle of the where I affixed the 1X2 is exactly 36 degrees (per my nifty new birthday digital gauge that my wife bought me.)
Now for the dumb question. I understand the first 36 degree cut using the jig, but how do you make the 54 degree angled cut? I know this is the whole point of the jig so clearly I am missing something. (It could also be that I am not getting enough fresh air through my mask and depriving my brain of much needed oxygen)! (-:
Thank you for your help and kind assistance.
Hi Bruce, to make the 54 degree cut we are moving the fence forward (making it steeper) with the jig. Check the last process step photo – see how the new fence pushes the lumber forward (towards you) and is capable of making a steeper cut safely. Be sure your miter is set to 30 degrees first, clamp the jig in place and then clamp the board to the jig fence. I hope that helps.
You don’t need a jig at all. Just set your saw to 36* and make your cut. 0 on the saw is actually a 90* cut. 10* is actually 80*. 20*=70* 30*=60* 36*=54* cut.
Osea tú dices que haga todos los cortes en 36° y lista mi estrella…
THANK YOU! YOU HIT THE NAIL ON THE HEAD! SORT OF SPEAK! LOL DON G.
My angles are not matching up and the lengths are different than stated. Made the jig per instructions but????? Don’t know what I am doing wrong.
Can this jig be used on a table saw?
No this jig is not set up for use on a table saw.
Bummer :(. Thanks
Hola; ojala pueda responderme; pero se podria usar esa guia sin yo tener una ingleteadora asi de sofisticada es que no tengo, sòlo una caja de ingletes pequeña una caladora manual y una de mesa Dremel motosaw pequeña
I’m so glad I have a fifty four degree angle.im having problems with the jigs.I will catch on some day soon..