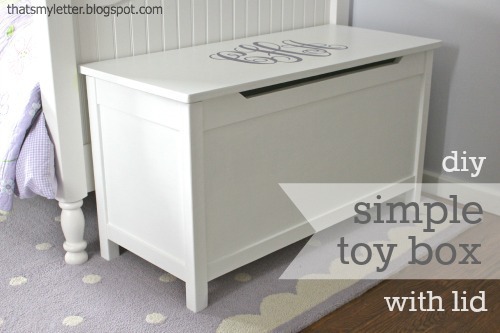
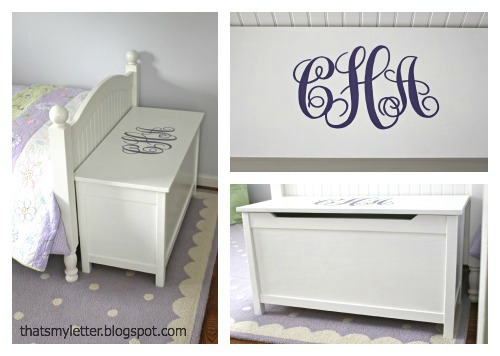
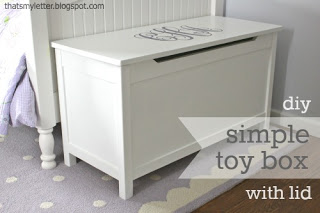
A simple childhood staple – the toy box – is something you can build. Let’s make a diy simple toy box with a lid to corral all those toys.
How to build a simple toy box with a lid including the hardware I used to avoid pinching those little fingers.
I teamed up with Ana White to build this perfectly simple yet functional toy box with a lid.
Ana drew up the plans and I built this toy box complete with a torsion hinged lid so no little fingers get pinched!
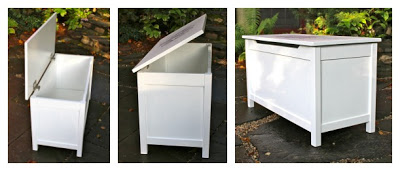
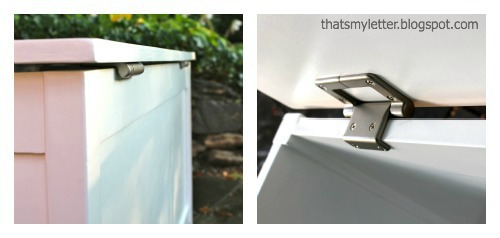
The hinges operate exactly like your lap top, the lid stays in the position you leave it until you push it down to close:
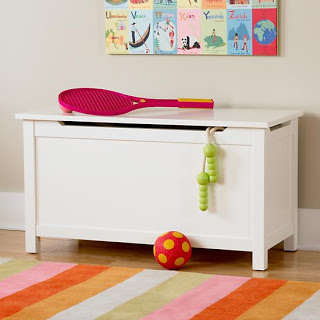
The inspiration for this simple toy box with lid came from Land of Nod’s I’m Just a Toy Box:
Using Ana’s plans you’ll be able to make this toy box for a fraction of the retail price AND you can personalize it to coordinate with your space.
The lumber for this project runs about $60 and the hinges are $50 (but worth every penny!).
Some more detailed shots of the hinges, they are functional, easy on the eyes and most importantly provide a gap between the lid and the box so no fingers get trapped:
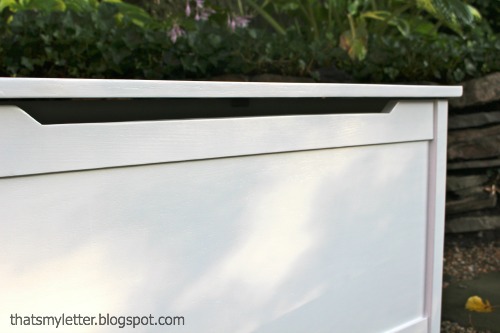
Ana even included the cut out detail at front center, easy to do with your jig saw:
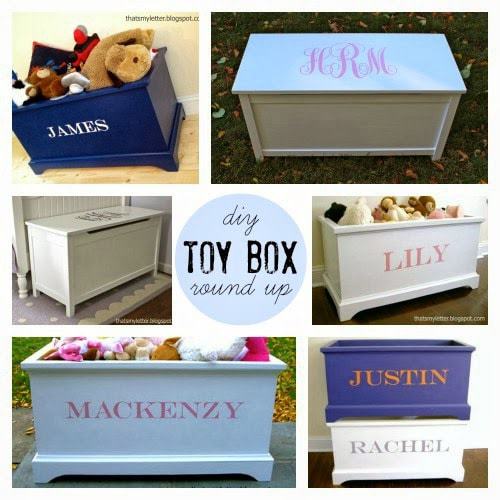
For more DIY toy box styles and inspiration:
How to build the simple toy box with lid:
1. Use Ana White’s plans to cut your lumber and assemble. The trick to getting the inset walls is to use 1/2″ plywood.
2. Predrill all your pocket holes and attach the top and bottom trim flush to the back:
3. In order to attach the sides to the legs with an even 1/4″ inset I simply placed a piece of 1/4″ scrap under the sides and then screwed into the legs:
4. Main box assembled:
5. Add base cross supports:
(and spill your pocket hole plugs all over the ground :))
6. This toy box uses pocket hole assembly which is wonderful for ease and square but does leave a ton of pocket holes on the interior. Personally I prefer to plug the holes for a smooth finish but it’s not necessary.
If you do use plugs you’ll definitely want this Ryobi Multi Tool which makes quick work of slicing off any protruding pocket hole plug:
A little wood putty and sanding and your pocket hole is now invisible:
7. Prime and paint the toy box and lid.
8. To attach the lid I choose to use Rockler lid stay torsion hinges:
(The alternative would be a piano hinge and slow close lid support hinge.)

9. Use the instructions included to mark the hinges, predrill then attach.
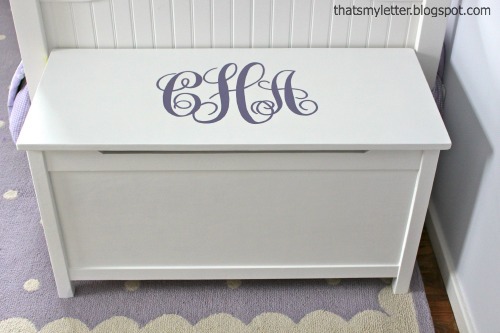
10. For the monogram I used Monogram KK font at 600 and 700 point.
Print out the letters. I made a paper piece about the size of the monogram area, place the prints out behind the paper piece as desired (I overlapped the side letters onto the middle H a bit) and trace to get your layout:
11. Take your final layout and center on toy box lid. Using a ballpoint pen trace around the edge of the letters with heavy pressure:
12. The pressure of the pen creates an indent in the wood, this is where you will paint:
13. Using a fine brush and acrylic paints fill in the monogram:
14. Seal the monogram with clear satin poly spray.
Thank you Ana White for such perfect plans, little Miss Charlotte thanks you too!
SHOP THIS PROJECT:





It's so pretty and functional. 🙂 I love the monogram on it too.
i totally want to make this! i definitely don't even need something as fancy. soo gorgeous
This is generally a very good design (just finished one for the grand kids) but I'd suggest one small change: Place the back panel so that it is flush with the back edges of the legs so that there is no inset on that side.
That will provide greater flexibility in the types of hinges you can use. For example, you could use no-mortice hinges with a soft closer instead of being limited to the torsion hinges. That would also save a bit of money in the process.
Hi Carl – thanks for the feedback about the back panel being flush. I have had a difficult time getting the hinges on properly with the inlet. I did not use the torsion hinges, and suggestions beside3s making the back flush?
Hi Jamie…I'm making your tool box, and am getting ready to drill my pocket holes into the side panels, which is the half inch…but even though the kreg "says" 1/2 inch, it wont come up to the 1/2" mark. How did you make your holes successfully???
debbie.
I meant toy box
Can you please tell me what paint was used for this toy box?
Thank you!
White semi-gloss paint.
When explained like that it doesn’t seems to be so complicated anymore. Will need to force my hubby to make similar thing!
Thanks Beata, I agree everything is easier if you go step by step.
How do you get the monogram to print large I downloaded but does not allow me to select what I would like. By the way love the look of the toy box. Hope to build one for my grand daughter.
Hi Mark, To make the monogram open a word document, select the your desired font and size and then print. Depending on your computer you may have to install the new font – once it’s downloaded click on the file and hit install then restart Word and it should be in your font options. Hope that helps.
Hi! Quick question–what set of hinges did you end up ordering? Looks like there are different inch-pound ratings. Thanks!
Hi Andrew, I don’t remember exactly but I do know I used this calculator to figure out http://go.rockler.com/wizard_torsion.cfm? Hope that helps.
Just wanted to mention that I ordered the wrong size hinges. I calculated 60 lb instead of 30 lb because I entered the wrong dimensions in to the calculator. The lid will not close all of the way and when I did a chat with Rockler he told me that was why. So I have done an exchange on the hinges. Does anyone know if this would really make that much of a difference? The lid pops back up at least a couple of inches when I try to close it.
I talked to the rep at Rockler today and he suggested ordering the 40 inch pound hinges so I ordered 2 for the toy box lid. Ordered them by phone and should receive within a week.
Wondering how well this might hold up as a bench-chest. Looking for storage and additional seating in our living room.
Great idea Kell
Did you put a seal on the entire toy box to eliminate later chipping or anything?
Just trying to decide how I should seal the white to keep it in good shape!
These are amazing, thank you!
Hi Sammi, no seal. I used semi-gloss white which is the same paint I use on all the trim, moulding and door casings so it’s pretty durable. You could opt for an enamel that would help too.
Love it!! Can you please tell me the dimensions of the toy box? Length, width, and height. Thank you so much!!
Thanks Katie. All the dimensions are on the plans but overall the toybox I built here is 36″w x 16″d x 19 1/4″h. Hope that helps.
Hi Jamie!
Just wondering if there are any instructions for where to put the pocket holes?
Thanks
Hi Chelsea, You can see the actual pocket holes in my construction photos above. Is there a particular step you have in question? In general pocket holes are placed about 1″ from the edge and spaced 6-8″ apart. Hope that helps.
Based on the images of your toy box at the back where the hinge is attached, there is a gap between the bottom of the lid and the top of toy box. Did you do anything special at the front of the toy box where the lid sits on the frame? What is the gap thickness (probably hinge thickness) and does the lid look like it slopes down to the front? I like the type of hinge you used but I’m not sure if I would like how the lid slopes down. What are your thoughts?
Hi Mark, Yes there is an almost 1/4″ gap. I added felt bumpers (the thick hard circular style) to the underside of the lid where it meets the front corners. Hope that helps.
Did you use 3/4 inch MDF for the top?
Hi Gary, I used 3/4″ birch plywood for the top.
Thanks Jaime. How did you finish the plywood edges?.
I believe I used iron on edge banding.
Jaime, in your plans for lumber sizes do you use nominal or actual dimensions?
Hi Mike, I use nominal dimensions for all lumber in my plans.
Question the plans call for a 3/4″ project panel but I don’t see where in the plans it’s used….I see plywood being used. Where is the project panel used? The lid perhaps?
Hi Mike, correct the 3/4″ project panel (3/4″ plywood at 2′ x 4′) is the lid.
Hi Jaime, I want to build this for my grandson for Christmas. I am thinking about a stained project as apposed to painted. Thoughts? what finished wood might you recommend?
Hi Dave, You could use cabinet grade plywood like birch or something fancier than would stain nice.
Thank you Jamie. One other thing. I want to order the hinges but have not purchased the material yet. Might you remember that weight of the lid. I need it to get the right tension.
Thanks so much. Really excited to do the project.
Hi Dave, I don’t remember the weight of the lid but I do know there is a website where you can plug in the dimensions and material that will calculate the weight.
Hi Jaime – I love the toy chest. I bought birch plywood and want to know if you sand the plywood? It has a smooth finish, however, it is my understanding that all wood regardless should be sanded before finished.
I appreciate your feedback.
Hi Joanne, The birch plywood is pretty smooth but yes a quick sanding is necessary and then again after primer. Good luck!
Hi Jaime –
Do you have any instruction/plans/videos on how to attach the hinges to the lid and the chest.
I would appreciate any suggestions you may have.
Thanks- Joanne K
Hi Joanne, I don’t have any details on how to attach the hinges. I just marked, predrilled and attached. Maybe on Rockler’s site in the reviews area? https://www.rockler.com/lid-stay-torsion-hinge-lid-support-satin-nickel
Good luck!
Hi Jaime – Thanks for getting back to me so quickly. I love the chest, it came out beautiful. I will attach a photo when it is complete.
Joanne
Good morning just wondering Exactly what hinges you used on your toy box?
I want to duplicate exactly as your plans describe.
Thx Jim
Hi Jaime,
What type of Drafting program do you use and is it available online?
Thanks for you help and time
Hi Rex, I use SketchUp for all my digital plans. Yes it’s online at https://www.sketchup.com and there’s a free basic version to start.
Jaime,
Is the Sketchup file for DIY Simple Toy Box with Lid available for download. I need to make some modifications to fit in my son and daughter-in-law’s home.
Hi Mike, the plans for this toy box belong to Ana White. It’s possible she may still have the sketch up file.
Jamie,
After building your table saw cart, now I have something to build using the table saw and the cart.
what is the difference between project panel and hardwood plywood? I have some 1/2″ birch plywood left over from a project. Would that “qualify” as the 1/2″ hardwood plywood? as for the project panel. Suggestions?
Thanks!
I’ve got all my wood cut and I’m ready to start assembly.
Regarding the 1/4 inset shown in your photos. Are ALL the plywood inset like that? Reason I’m wondering is because you say “Predrill all your pocket holes and attach the top and bottom trim flush to the back” I’m a bit confused when you say “flush to the back”
Thanks so much!
Hi Patrick, To answer you question about Step 2 – the top and bottom trim gets attached to the side panels flush to the back (interior side with the pocket holes) this leaves a small 1/4″ reveal on the exterior side because the trim is 3/4″ thick and the side panels are 1/2″ thick. Hope that helps.
Hi Jaime,
We just built this toy box and there is a gap on each side of the bottom? Is it supposed to be that way or did we cut the bottom wrong?
Thanks, Kelli
Hi Kelli, there should not be a gap at the bottom. Did you inset the sides on the legs? If I had to guess that might be why you have a gap. Easy fix though, just add a filler piece on the interior or leave the gap for ventilation! 🙂
Hi Jaime, hope you had a nice holiday!
For the 1/2 inch pocket hole screws, the screws protrude from the wood once they’re fully screwed in. Is that right? I assumed that’s just the nature of pocket holes in 1/2-inch wood but I’m curious if you were able to get around that because I don’t see protruding screws in your pictures.
Hi Chris, For pocket holes in 1/2″ plywood use the pan head Kreg screws, they should bury just enough. I’ve also been known to use spax screws in my pocket holes (shhhh) and they definitely bury and allow for the wood plug. Good luck!
Thanks for the quick response!