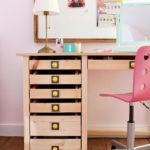
Hello readers! I’m over at Simpon Strong Tie’s blog today sharing my industrial workbench inspired desk. I built this desk using their Workbench or Shelving Hardware Kit and basic off the shelf lumber. It’s got plenty of workspace, open shelves for storage and it’s solid as a rock.

A DIY tutorial to build a workbench inspired desk. Use Simpson Strong-Tie connectors and fasteners to build a solid wood desk with shelving.
Simpson Strong-Tie makes an awesome hardware kit that has everything you need to build a basic workbench or shelving, I used one kit plus additional connectors and fasteners to complete this desk. If you’re looking for more DIY project ideas using Simpson Strong-Tie hardware visit their blog here, they’ve got lots of building projects:
- planter
- chicken coop
- tables
- outdoor structures
- shelving
- desks and more!

Click here for a free printable version of the plans complete with step by step instructions, materials and cut lists. You’ll have a grand workspace that you’ll never want to leave!

I love the contrast of the metal hardware against the warm wood, wouldn’t this be fun in a office setting with lots of different configurations?! You can easily modify this to fit your space and make it custom.

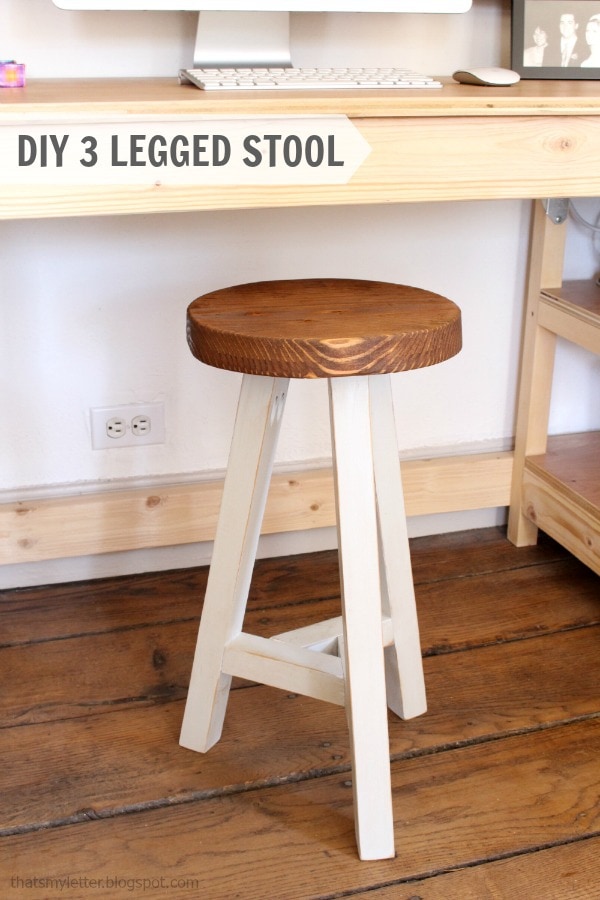
And if you’re curious about the stool click here for plans.
Disclaimer: I have partnered with Simpson Strong Tie to bring you this desk. I was provided materials and/or compensation to create and construct this desk. All opinions and thoughts are my own.
Looks fantastic. So functional too.
love this! the industrial look is so great, and it looks so stylish and useful!
Oh my gosh, I love this so much. What a great desk!
So beautiful! LOVE that massive workspace!
looks great! is there a single document download available?
IN the instructions it says you used RTR connectors to attach the plywood on top. Did you mean to write A21 connectors. If so what size screws did you use to attach the top of the desk.
Did you ever get an answer for this? I was just looking at the plans and noticed the same thing. Help please!
Thanks for flagging this, yes Shawn is correct it should be A21 connectors to attach the top.
Thank you Shawn yes the plywood top is attached using A21 connectors and I used #8 – 1/2″ screws.
Thank you for these plans! I’m gathering materials for a slight modification for a desk for my wife’s workspace.
The A21 angle brackets – because you list 14 needed for the project, i’m guessing that’s 2 for each of 4 shelves, plus 6 for the desktop surface. Is that enough? Seems like if the lumber was not perfect it might gap in the corners or warp over time.
Thank you
Hi Geoff, yes I only used 14 A21 brackets. No gapping or warping here and I’ve been using this desk for 5 years now.
Need 10 RTC2Z connectors, not 2 as the PDF shows
Thanks Austin, the materials list on the PDF includes (1) DIY Project Kit which contains (8) RTC2Z. So the 2 is the extra to make a total of 10. Yes you could purchase them all separately as well.
Ahhh, thank you! I apologize for the confusion.
Hey there, love this desk!! How much would you say the materials cost you total?
Thanks Tori. I’d estimate the lumber under $100.
Hi – great desk! I’m planning on building this with and for my daughter and have a question on the interior top shelf supports.
In the plans, it shows using the RTA2Z connectors on both the outer and inner supports as well as for the back end of the interior top support. But the pictures don’t show you used those brackets in the interior top shelf supports. Is a 3″ wood screw strong enough at that interior back corner for each support?
Hi Joel, You are correct in that those top shelf cross supports are attached using 3″ screws. You could use the connector (it’s not necessary and adds more hardware to the look of the piece) if you wanted to. Good luck!
Only suggestion I would make is, if possible, is regarding attaching the 2×2 support that supports the upper shelves at the front of the desk.
In your plans you use an end-screw; aesthetically and/or structurally it might be better to use a pocket hole screw on the underside of that 2×2 to fasten to the 2×4 (outer) and 2×2 (interior) legs.
Hi Jaime!
Thank you for your post! What type of finish/stain did you use? Thanks so much!
Ali
Hi Ali, The finish on this desk is clear satin poly, two coats and the top has three coats.
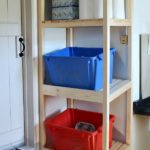
Hello, Thanks for this tutorial. My husband made it for my sons room and now I’m trying to find baskets. I see you have a couple natural woven bins. Can you tell me where you got them from? I’m having trouble finding anything the right dimensions. Are they 18×18? Thank you
Hi Lindsey, I believe I found the baskets at Homegoods (a few years back). They measure 18″ x 20″ x 6″. You could also make wood pull out bins (for the meanwhile since I know baskets can be elusive!). Good luck!
Hi Jamie I just found this tutorial on Pinterest so I hope you are still hard at work and reading these comments. I love the rustic and metal combination. I want to use your plans with a couple modifications for a kitchen island. I have a 24″x60″ butcher block piece that I finished with Tung oil for the top. I want to use a stool on each side of the island so can I eliminate the bottom cross piece between the towers? I am going to paint the bottom instead of staining or poly. If you have any further ideas/modifications I’d really appreciate the input. TYIA
Annie