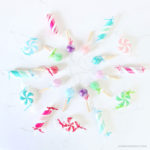
Making gifts is one of my very favorite things. The idea of creating something unique that can’t be found in a store makes my heart flutter. Today I’m sharing these small wood gift boxes with lids that I made to fit a yummy little candle gift.

A DIY tutorial to make small wood gift boxes with a lid. How to create simple wood gift boxes with removable lid and leather loop hardware pull.
This past Christmas I sent out these wood gift boxes with a custom candle to a few friends and I thought I would share how I made the wood boxes. I ordered the candles from Jessica at North + 29 Candle Co. in the fir scent with my logo. They smell delicious and include a wood wick, how fitting 🙂 Jessica has a variety of scents to choose from and you can customize the label to fit your needs. I highly recommend checking out her shop here.

At any rate the candles arrived in their cute little metal tins and I wanted to create a gift box to fit the candles and create more of a gift presentation. I designed these little wood boxes using 1/4″ poplar hobby boards. Poplar hobby boards are readily available in multiple widths x 4′ lengths which makes them very easy to manage. Also the different size widths means you can customize this wood box to fit your gift size. I designed this box using the 1/4″ thickness x 3″ width because it was perfect size for the candle tin height.

Lids:
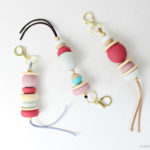
For the lids I used 1/4″ plywood scrap pieces and attached a small piece of the poplar board on the center interior to prevent the lid from sliding around. Then I took a bit of flat leather cording and some metal washers and made a sweet little loop pull at the center top.

My hope is that the gift recipients use the candle and also make use of the small wood box for containing trinkets or other small items. It’s even perfect on it’s own just as decor.

If you want to see me make these wood boxes then watch the video below.

Enough beauty shots, let’s get on with the tutorial. Scroll down below for instructions and details on how to assemble these wood gift boxes.

Below are the instructions to make small wood boxes with a lid. Be sure to read through entirely before beginning and follow all safety precautions when operating power tools.

Click here for a PDF printable version of the wood gift box plans.
Supplies:
- pin nailer
- 5/8″ – 23 gauge pin nails
- wood glue
- micro zip gator
- super glue gel
- #6 flat washer
- leather cording

Each box is composed of 5 pieces (3 – 2 1/2″ squares and 2 – 3″ long sides). This makes the best use of the 1/4″ x 3″ poplar board and creates the perfect size for the metal candle tin.

Be sure to sand everything well and smooth after assembly. I prefer to use this little micro zip gator sanding block.

Lid Hardware:
For the leather loop handle pull use flat leather cording and #6 flat washers. First predrill a hole in the center of the lid and then push the cut ends of the leather down through a washer and into the hole. After you have your desired loop size flip the lid over and tie a knot on the underside. Finally add a dab of super glue gel to keep the leather loop and washer in place. Once the glue is dry trim the excess leather ends.

I hope you found this wood gift box tutorial useful. If you enjoy making gifts as much as I do then I’m certain you’ll be making a few wood gift boxes in the near future. Also be sure to follow me on social media where I share sneak peeks and project progress videos:
Instagram / Pinterest / Facebook / Youtube / Twitter
SHOP THIS PROJECT:


These are adorable!! You’ve done it again – amazingness!
Thanks Shelly. Can’t help myself making all the itty bitties 🙂
How do you make the lid? You skip the important part with the two pieces of wood.
Hi Brittney, the lid details are written above and included in the printable plans. It is a piece of 1/4″ plywood cut at 3″ x 3″ and then cut a smaller piece of the poplar to fit inside the opening of your box. Glue the poplar to the plywood. Good luck!
There is no dimensions for the lid here.
Hi Paul, the dimensions and cut lists are in the plans linked above.
Love little boxes! Great tutorial. Thank you….
Thanks Jacqueline, fun to share and give all the things. Enjoy your day.
I LOVE these little gift boxes…I was asked to make wooden boxes for someone and couldn’t decide on the lid, ended up using hinges, but this method is much better! I will definitely be making these…thanks!
Thanks Marcie, little boxes are so much fun. I can imagine the hinges might be frustrating but they keep the lid attached versus this method. Cheers to all the making!
I am still a begginer at this stuff, so I may ask something that may look trivial to others, but, what kind of wood did you use? Does it have a name? Or any type of wood would do? Thank you so much.
This is 1/4″ poplar. They are ‘hobby boards’ but any 1/4″ wood will be fine.