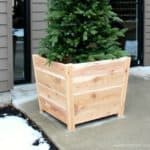
Wedding season is upon us as the outdoor events start to ramp up in the spring and summer. Of course anytime of the year is perfectly wonderful for a wedding and even better if it’s a DIY wedding! This self standing wood arch is great for both outdoor and indoor weddings because it’s self standing, you can set it up where ever you’d like. Create the perfect backdrop to frame your ceremony, make a grand reception entrance, highlight the cake table or create a special photo area.

Make it a DIY wedding with a self standing wood arch. A tutorial to create a wood arch perfect for a wedding ceremony area, special event and more.
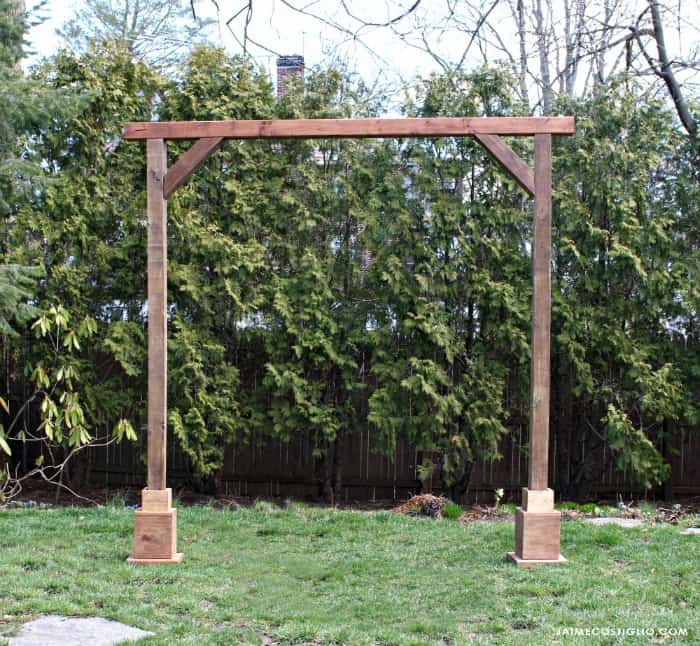
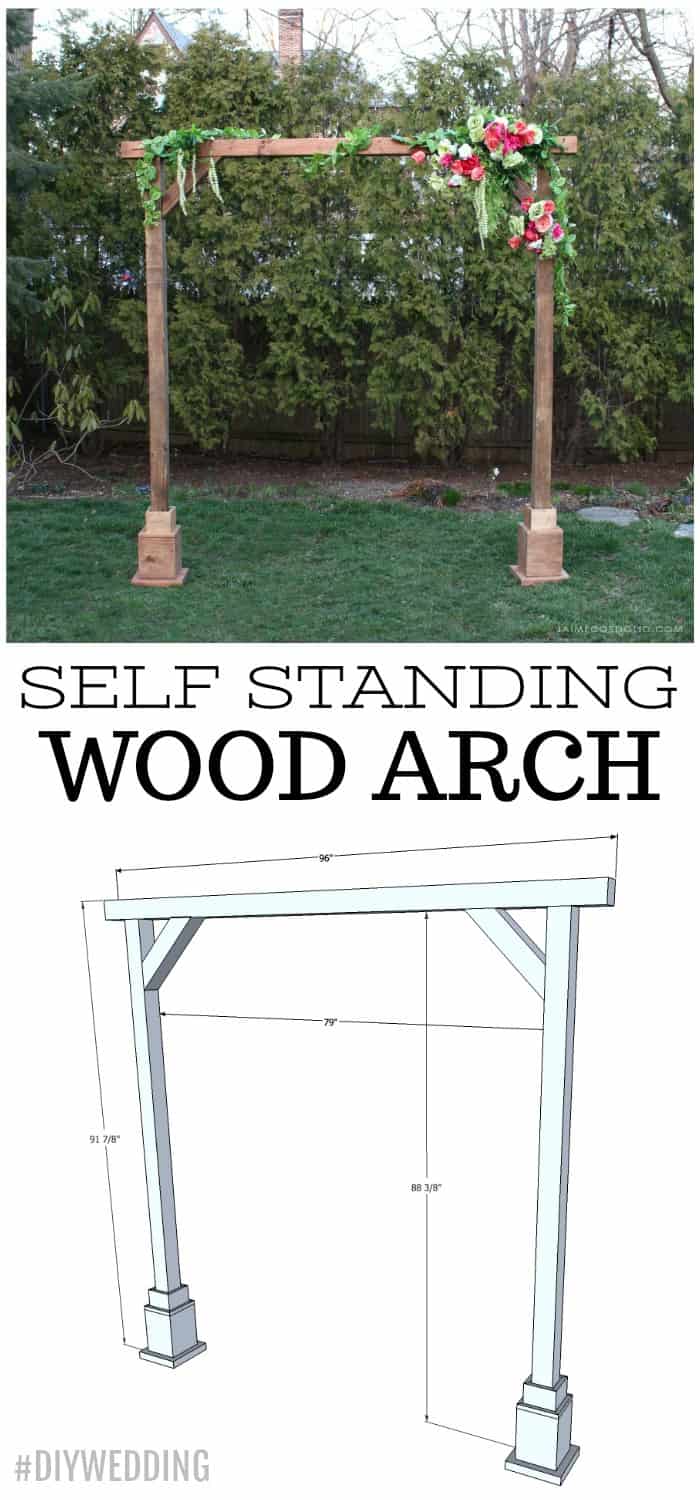
Wood Arch
Using off the shelf 4 x 4 posts and a little concrete you can build this arch in three portable pieces and easily assemble at your location. Leave the wood natural or decorate it.
- flowers
- greenery
- fabric
- lights or anything to coordinate with your theme and decor
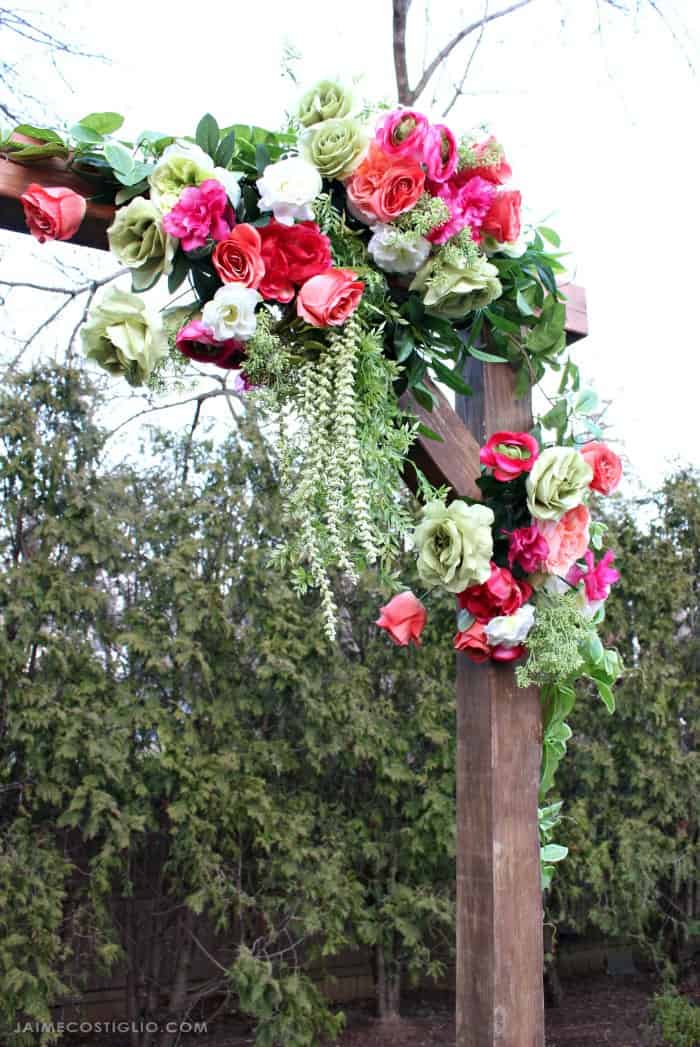
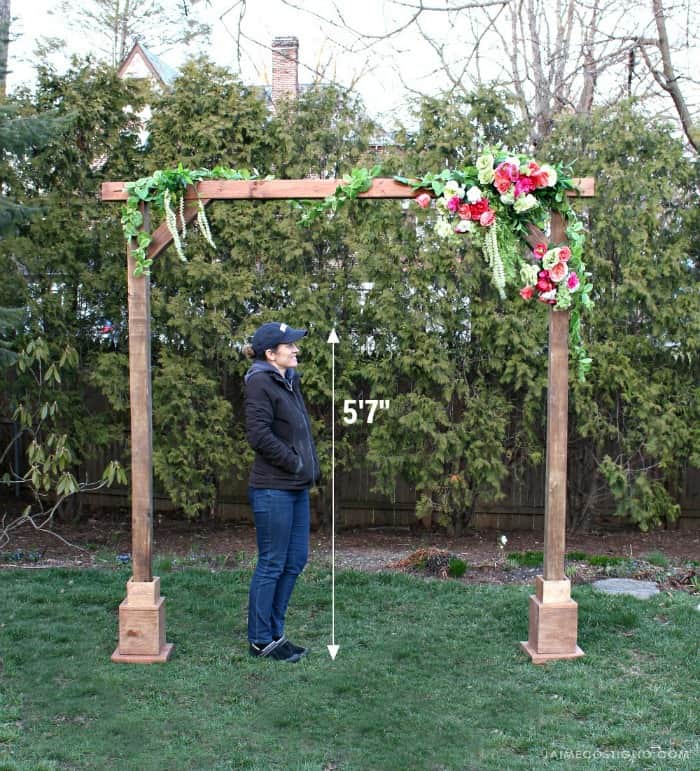
Don’t tell anyone but those are fake flowers and I just stapled them to the wood frame, super simple and easy. Below is a photo for scale of me standing under the wood arch, you could easily fit three people to use this size wood arch for your ceremony.
For the complete step by step instructions to build and assemble this self standing wood arch visit Sprucd Market here.
Below is a quick video for visual reference:
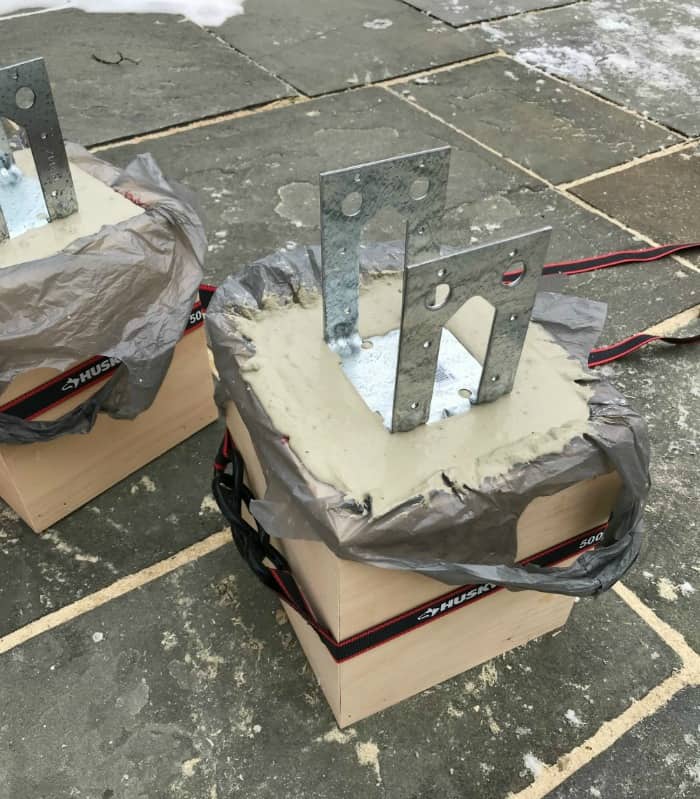
Build Base Supports
*This post contains affiliate links.
Start by building the base box support. The secret here is concrete with hardware post base supports.
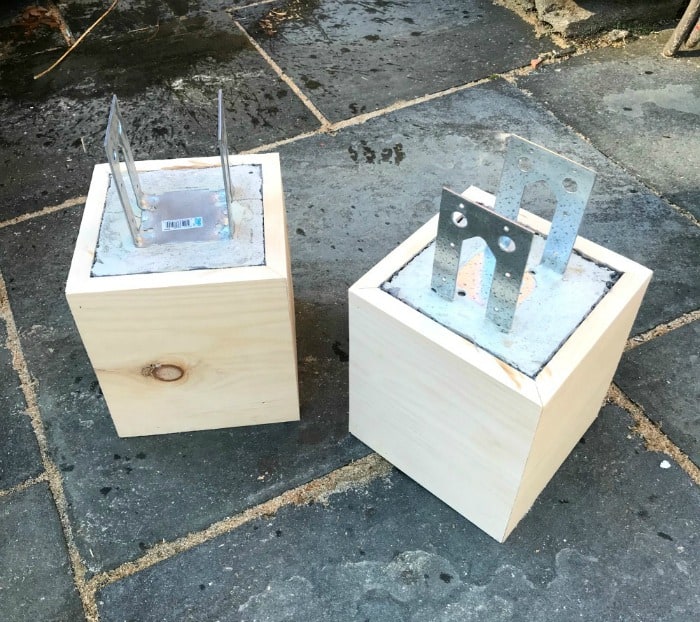
Once the concrete was cured I trimmed off the excess plastic and finished the base build.
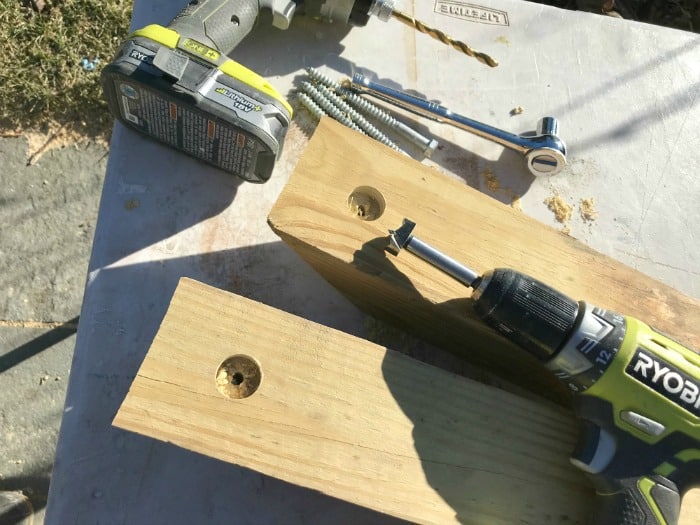
Be sure to predrill both a hole for the lag screw and a recessed hole for the head large enough to fit your socket wrench. This will hide the hardware once installed. Then stain all the pieces before assembly.
SHOP THIS PROJECT:

Got a wedding in your future? Or maybe a special event where a self standing wood arch would make a big impact? Get the plans here and start building!

I always love your projects because of the detail you give on how to go about DIY. From the pictures, to the videos and product lists…everything is laid out perfectly. I’ve already completed one of your DIY’s and couldn’t be happier. Thank you for your superior posts!
Thanks Karen, so nice to hear from readers making the projects.
Minus the embellishments and tools what do you estimate thie cost to build the free standing arch?
Hi Linda, lumber and hardware should cost less than $100 depending on your location. Hope that helps!
Where can I find the diy and tutorial for this project? I love the photos, but you have a supply list, a cut list and instructions available? I would love to have that! I searched throughout your sight but didn’t find a link to the plans. Did I overlook it? That altogether possible because planning my daughter’s wedding has made me somehow crazy at the moment. Thanks for your help!!
Hi Tami, the step by step tutorial is linked above within the post but I will also leave the link here: https://www.ryobitools.com/nation/how-tos/self-standing-arch_11618 Good luck with all the wedding planning!
I ran across your YouTube video of this DIY arch and was extremely happy to find that you have a more detailed post about it here! I do have a couple questions, how much did all the materials cost? Do you think this arch is sturdy enough for an outside, windy wedding day? This is exactly what I am looking for!
Hi Nikki, thanks for your interest in my arch. Regarding materials it varies greatly based on location, source and lumber but my lumber was about $80. It is quite sturdy with the concrete bases but if you’re concerned about wind maybe consider making larger bases or a back anchor (2×4 angled into the earth and secured to post). Good luck with your big day!
Could you please let me know the price for the wooden arch please
My mistake didn’t read it properly, I follow now you are advising tools, equipment and how to build it,thank you
Hi, I’m just wondering how long your support pieces are? Also I’m guessing that they are on a 45 degree angle?
Hi Ryan, The cut list details are linked above. I don’t remember exactly how long the supports are but yes they are 45 degree miters on both ends not parallel.
Hi I love the arch and would like to make it for my daughter’s up coming wedding but not sure how it’s portable Do the top beam and sides stay connected when transporting?
Hi Susan, Yes the arch is portable. It is 2 cement bases, 2 vertical posts, one cross beam and 2 angled corner pieces. You can precut and dry fit at home and then transport and assemble on location.
Jaime, I am getting ready to build. The plans call for (2) 8′ vertical 4×4 posts. Since they both set on top of the 11″ tall bases filled with concrete, the 96″ long 4×4’s would need to be cut down to 77 3/8″ to fit according to plans, which state the height from ground to the bottom of top horizontal 4×4 is only 88 3/8. However there is no mention in the instructions or your video to cut them down. Was this an oversight or am I missing something? Thanks
Never-ending, I see they are 80″ not 96″. Geez!! Still doesn’t quite work out mathematically, but close enough. THANKS
I’m looking to make this arch t go behind my wedding party table. If I was to make it the same but 16 ft long, would I need an additional center support to make it stable or would it support itself still?
Hi Samantha, I’m not an engineer but I think you could make it 16′ across the top however I would beef up the side base supports then. Maybe something like the bases on these posts: https://jaimecostiglio.com/field-day-station-signs/ but bigger and beefier. Good luck!
I am about to have someone make this arch but I want to clarify something on the 2 angled cross beams. They are 4×4’s but I don’t see any mention of cuts for those Do they get cut from 2 of the 8’ beams?
Hi Susan, for the short angled cross supports I would just use the off cuts from the vertical posts. Or depending on how wide / long you need the horizontal post you may have excess there as well.