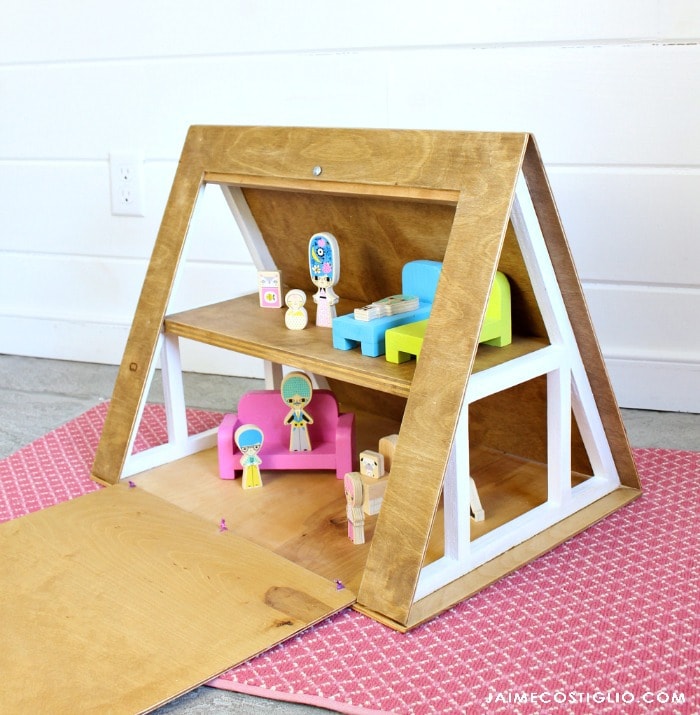
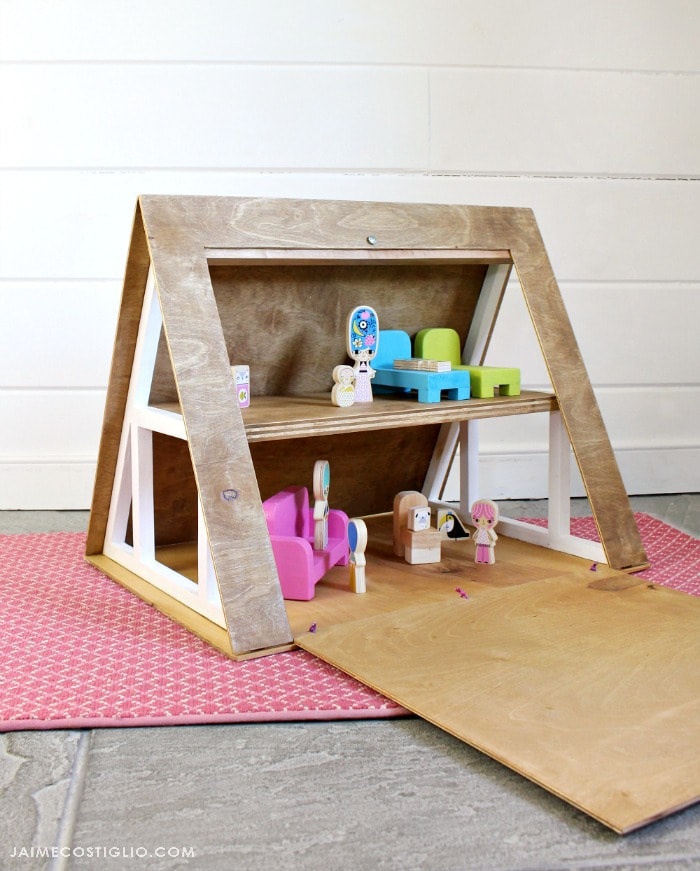
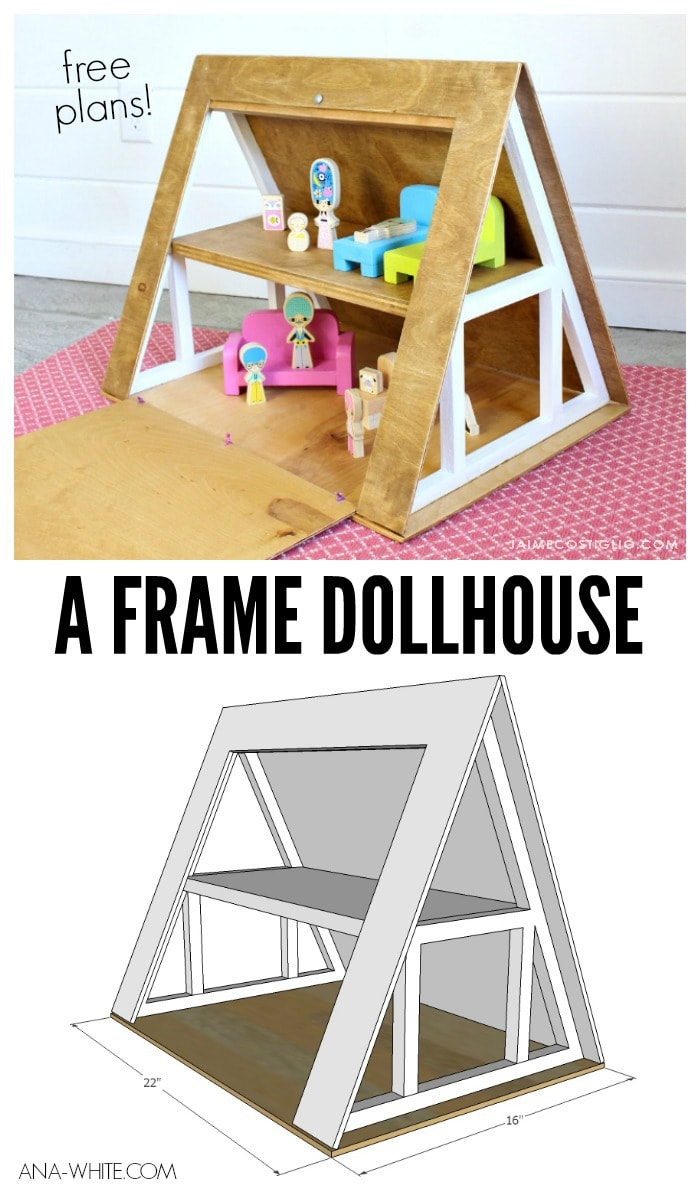
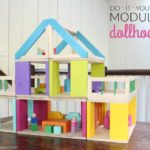
Three weeks friends and we still have plenty of time to build all the gifts this holiday season. Today Ana White and I are sharing free plans for this A frame dollhouse, it’s unique, modern and sleek.
Every Friday since early October Ana and I have been posting new gift plans for you to build, all the fun toys, accessories and projects for those lucky people on your holiday list. We’ve got a full catalog of past and present projects here, you’re sure to find something just right.
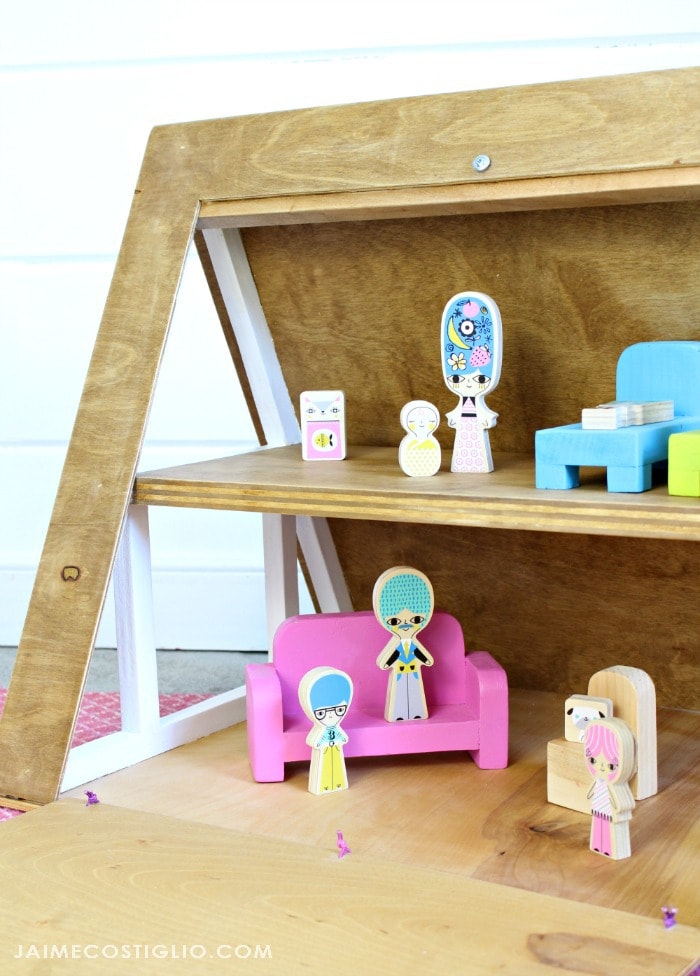
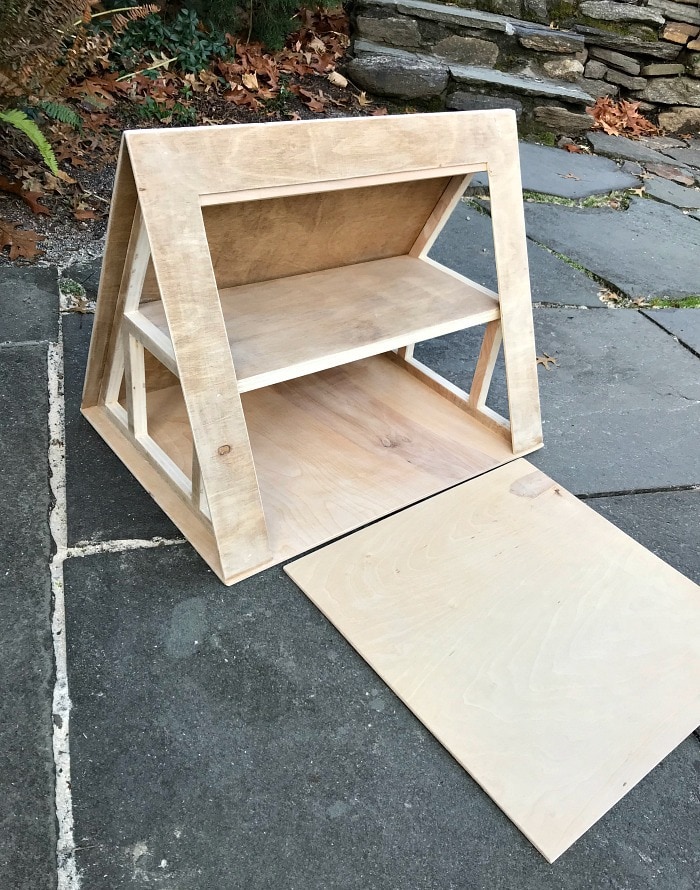
This A frame style dollhouse is a great addition to our gift plan catalog. It’s a simple build that requires only a few boards and a little patience with the jigsaw. And if you don’t enjoy the jigsaw you could leave the side panels as solid triangles and the dollhouse will still be functional, just not quite as cute.
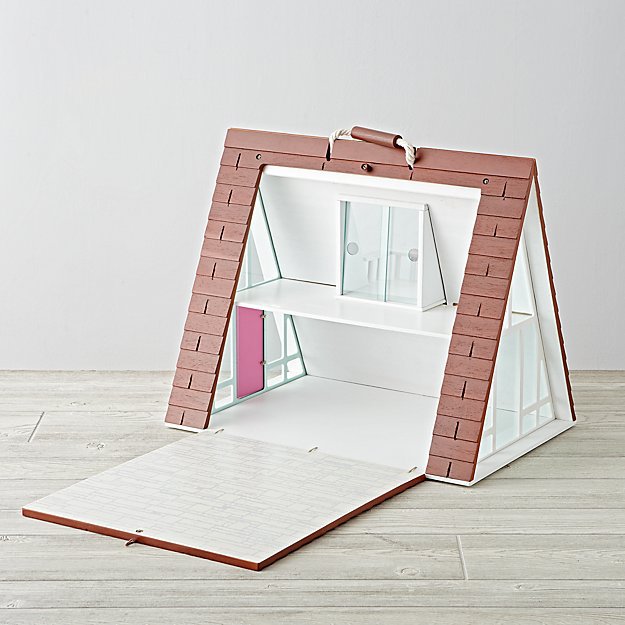
You may have seen this dollhouse over at Land of Nod (no longer available), we were inspired by their A-Frame Dollhouse however the retail price isn’t so inspiring.
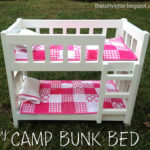
I did purchase the Land of Nod dollhouse family though and I used scrap wood furniture from this plan here.
Ana simplified the look and made the plans user friendly by building with plywood and standard boards.
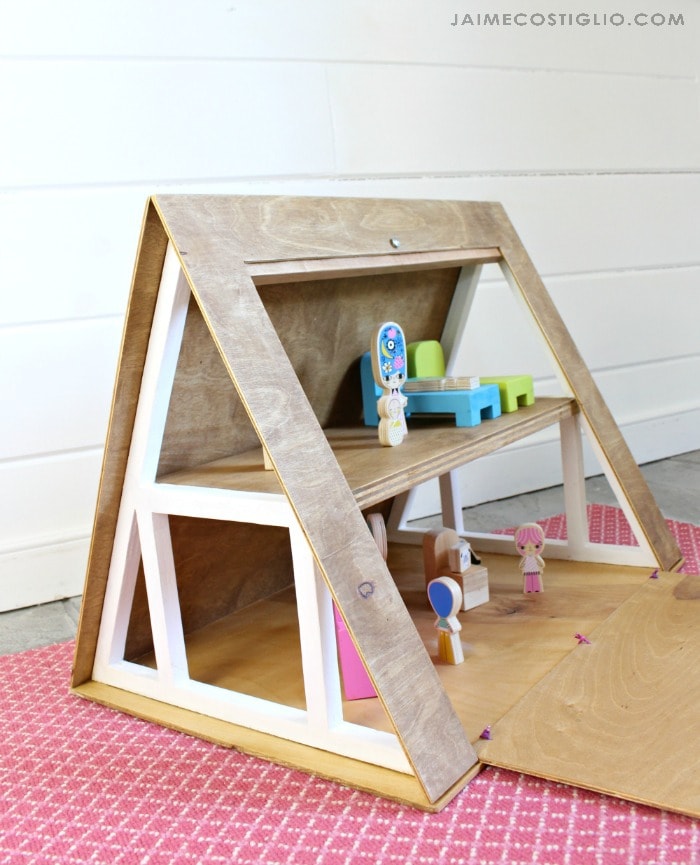
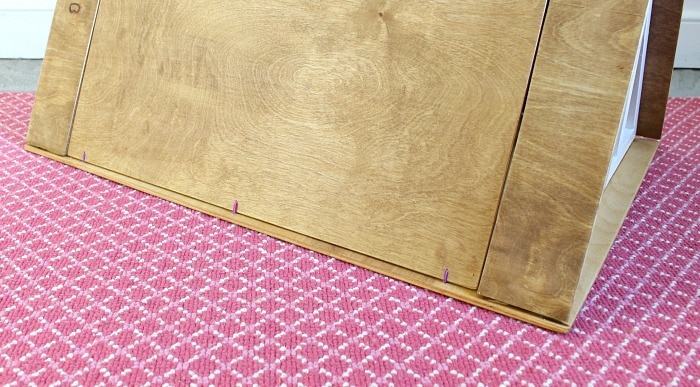
The large door opening in the roof means easy access to the house. No fancy hardware here, we followed Land of Nod’s lead and used elastic cording to make the hinges and closure loop. I’ll show you how I installed the hinges down below.

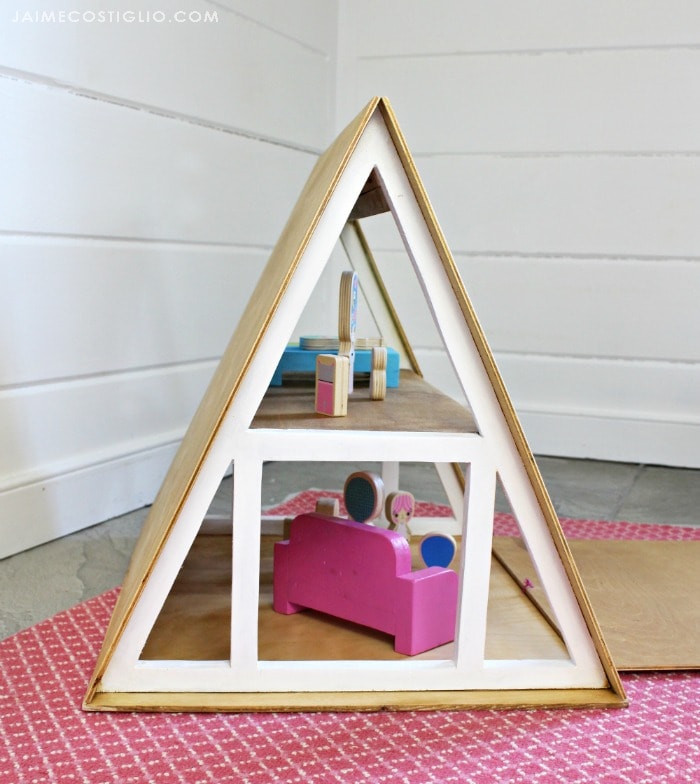
Ana has the plans here. She designed the cut out windows on the side panels from one board for stability and ease. You could even add a piece of plexiglass if you wanted true windows.
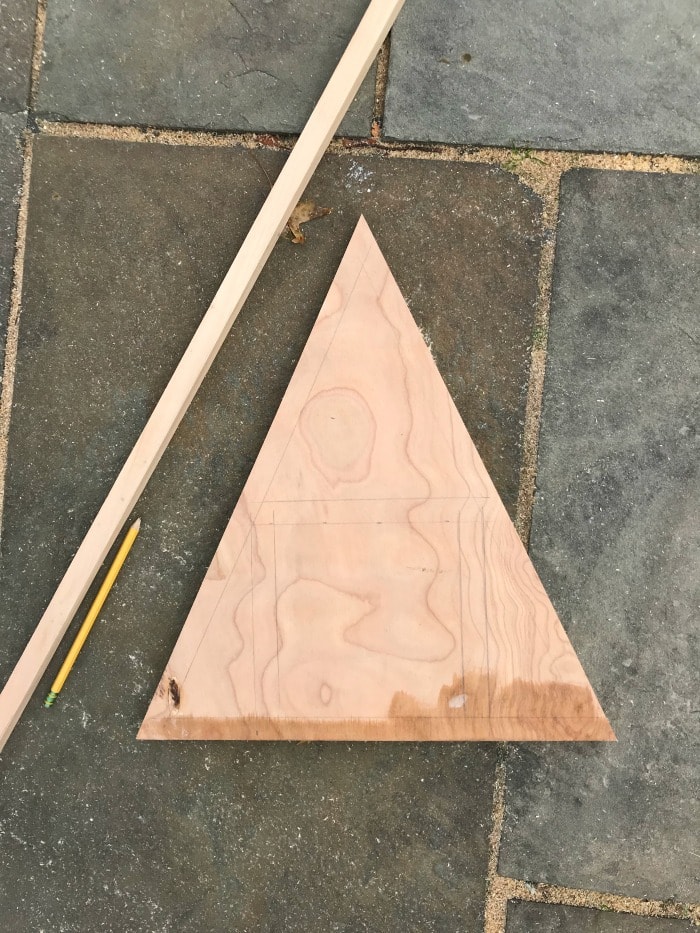
To sketch the side panels I used a scrap 3/4″ square dowel to insure all the thicknesses were the same. Predrill a center hole in each opening to get the jig saw blade through and then cut out each area.
I highly suggest painting the side panels before constructing the dollhouse.
To make the hinges on the door panel I used stringing elastic cord. You can get it in white, black or this fun rainbow version.
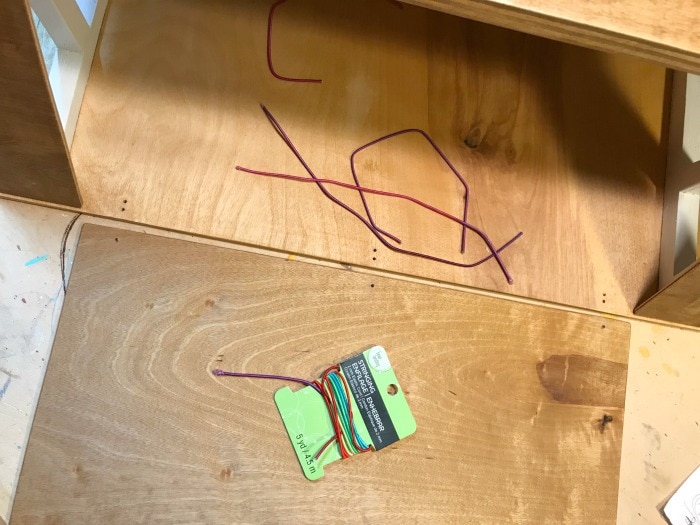
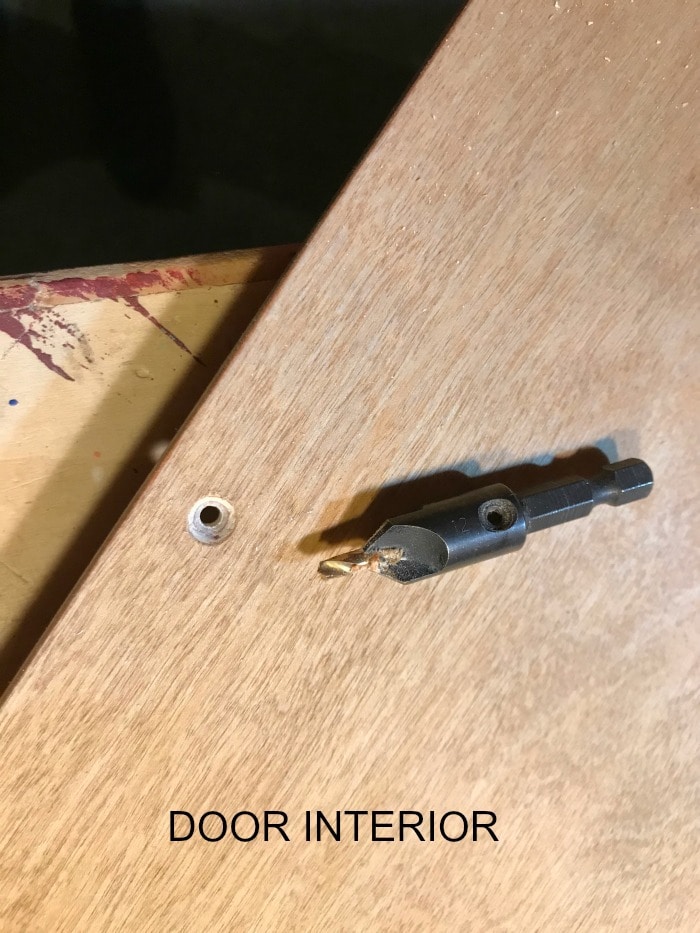
Step 1: Predrill 1/8″ holes on the door panel and into the base of the dollhouse as per the above photo. Cut 3 pieces of 2 mm elastic cord about 8″ long.
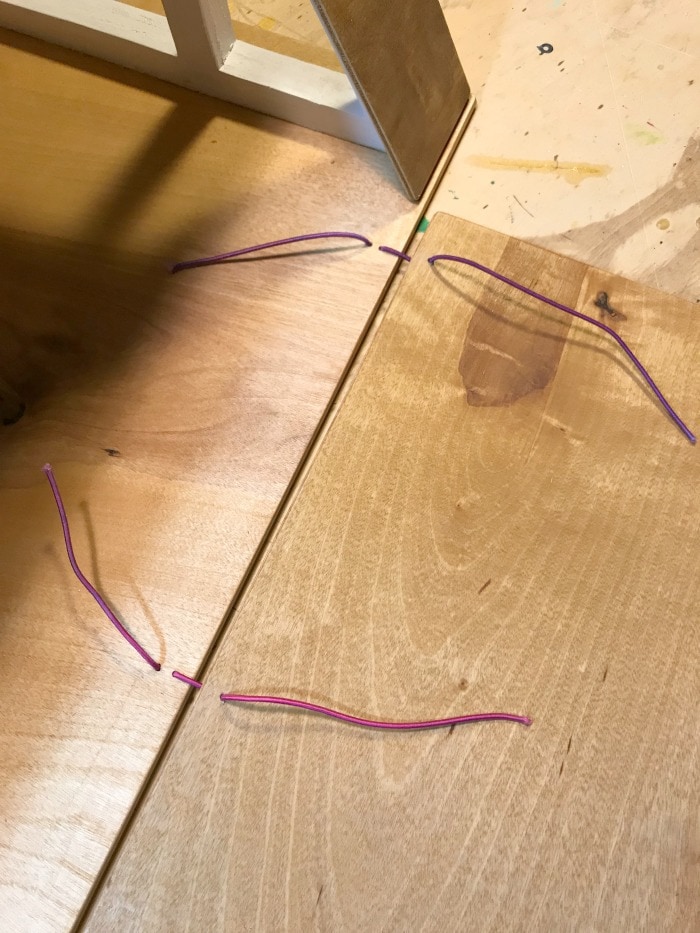
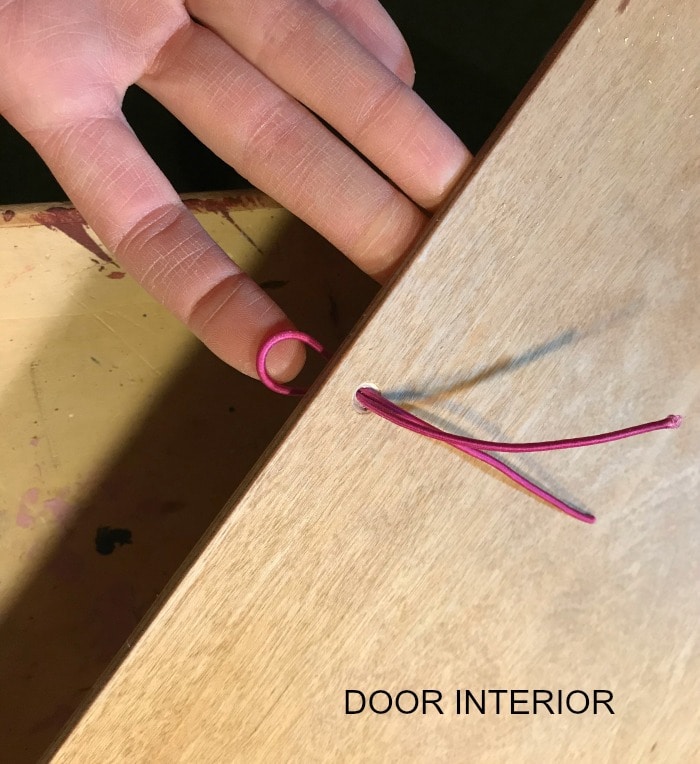
Step 2: Thread the elastic through the dollhouse base and door. Then tie a knot.
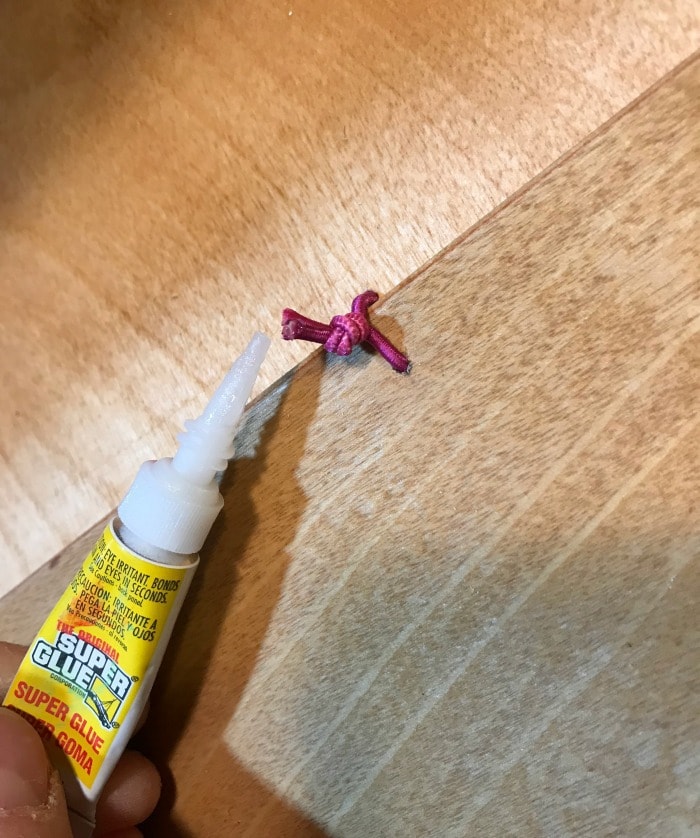
Step 3: Trim the excess cord and seal the cut end with super glue or burn it.
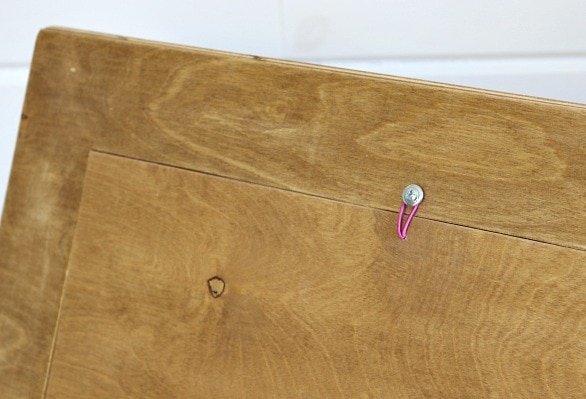
For the door closure latch again I used the same stringing elastic cord and a 3/4″ lath screw.
Step 1: Predrill a countersunk hole at the center of the door panel. The countersunk portion should be on the door interior. This gives a place for the cord knot to rest allowing the door to close flat.
Step 2: Push the cord through the hole making a loop on the exterior side. Tie the loose ends into a knot, trim ends and seal with super glue. Add a dab of hot glue to keep the knot in position.
We will be back next Friday with another fun gift plan you don’t want to miss. Until then cheers to all the building and making!
SHOP THIS PROJECT:


Leave a Reply