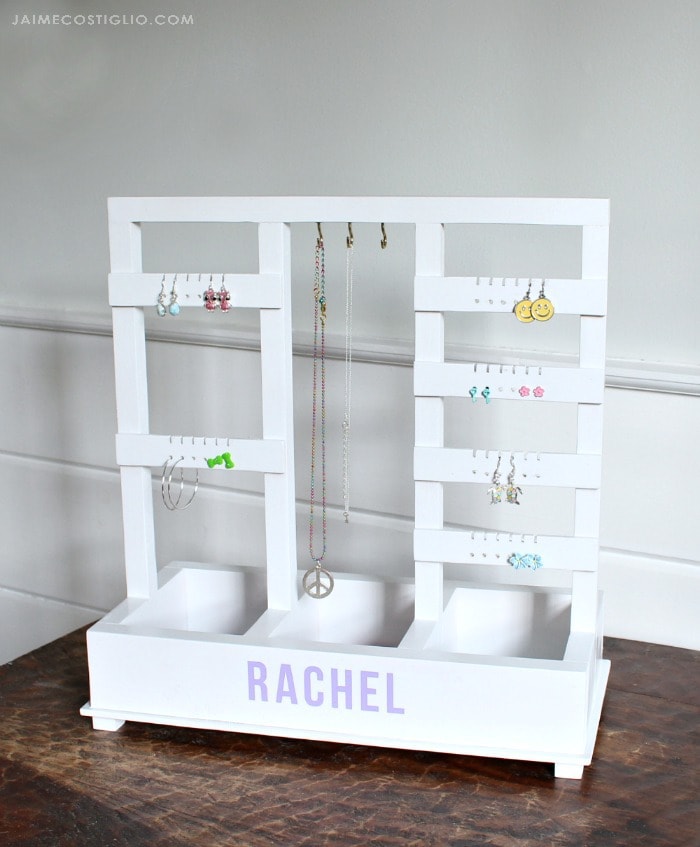
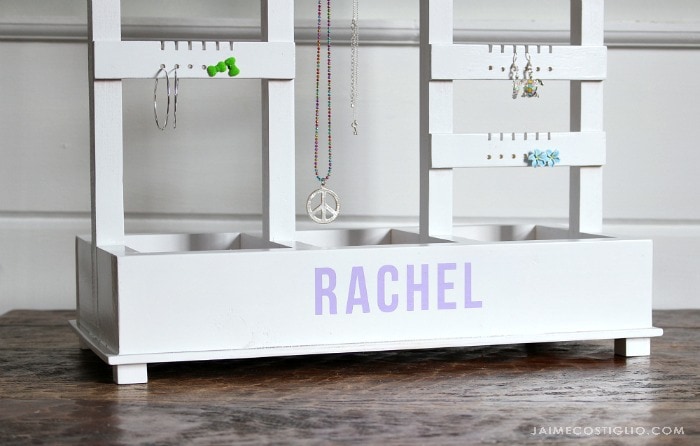
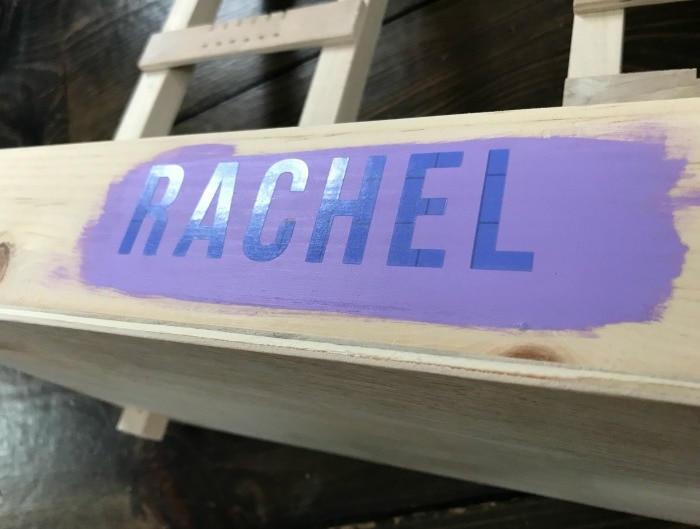
Well my daughter almost shed a tear when she saw the name Rachel painted on this diy jewelry holder I just built. My daughter’s name is not Rachel and she was very upset to find out that this gift build was not for her. Thanks to Ana White and myself for creating free plans for this jewelry holder now I can make another one just for my daughter.
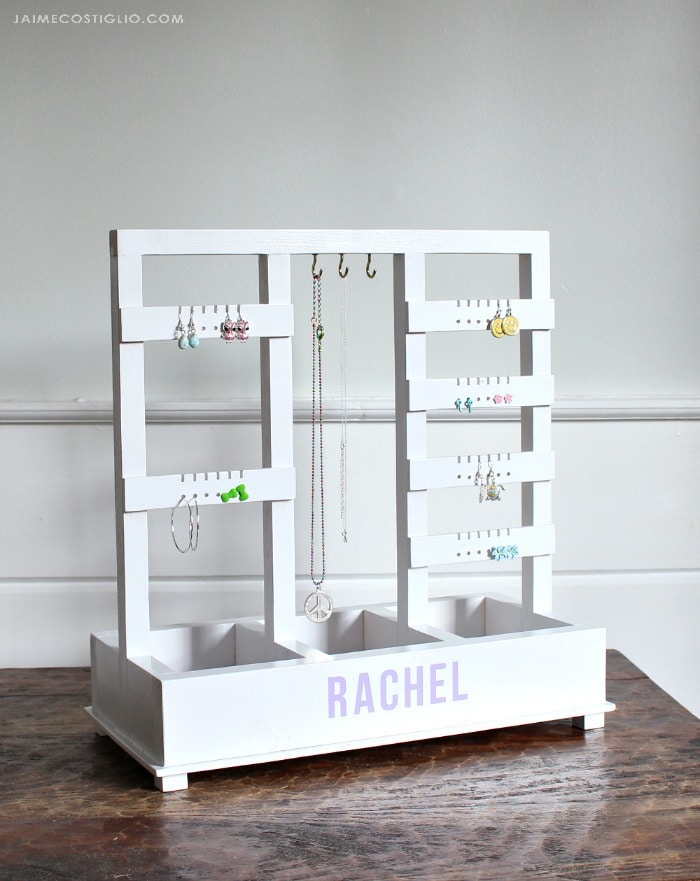
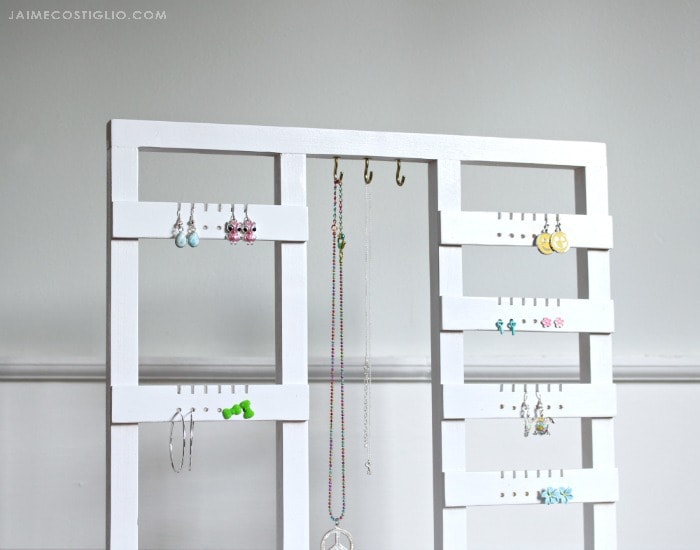
It’s Handbuilt Holiday gift plan day and we are fast approaching the big day now that the calendar says December! Today we are sharing plans for this beautiful and extremely useful jewelry holder. You probably have just the perfect person on your Christmas list who would really appreciate a jewelry holder gift.
Ana and I have put together a new gift plan every Friday during the holiday season for the past 5 years. We have dozens of gift ideas you can build, from big projects to small easy projects using scrap wood you probably already have in your garage. Check out the catalog of projects here.
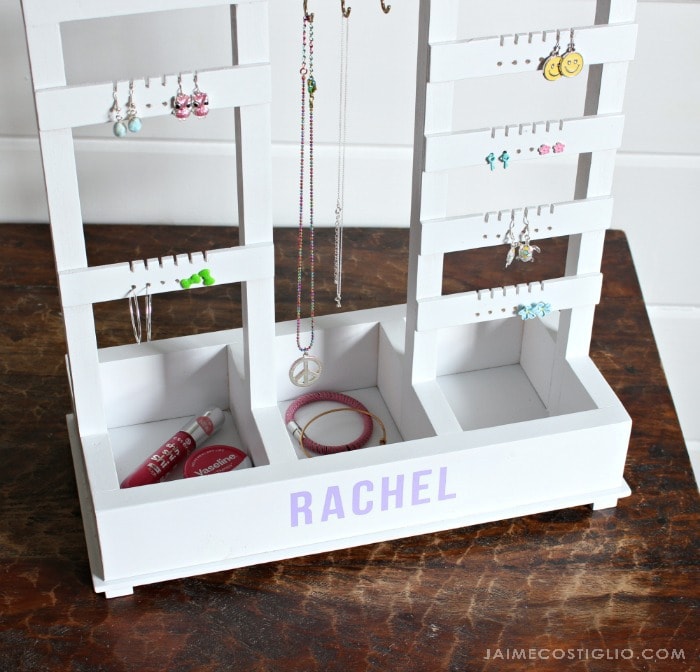
Seriously I’m going to have to pry this jewelry holder out of my daughter’s hands in order to wrap it up for Rachel. My 11 year old desperately wants to keep this one for herself and I completely understand why. Just look at all that organized storage for all kinds of jewelry – earrings, necklaces, bracelets and more!
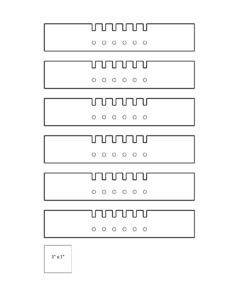
I designed a template for the earring panels to make it easier and more accurate when making those small cuts. Click on the template below and you can print the one page document at home to use as your guide when making the panels.
I opted to paint this diy jewelry holder in white gloss and I highly recommend spray paint to get in all those nooks and crannies. To make the personalization I used a vinyl stencil but you could also paint it freehand or try my other handpainted method here.
Click on over to Ana’s site here to get the free step by step plans. Be sure to read my notes below and details on the building and finish process before you begin.
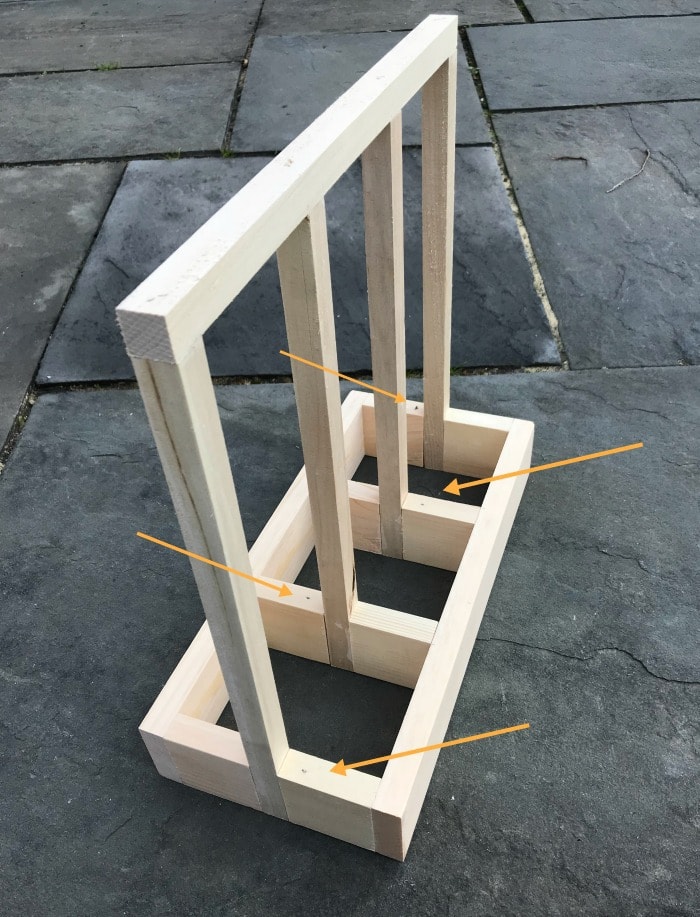
When constructing the frame I opted to build it in two halves alternating where the posts where attached. Above I connected the toe halves by toenailing (on the underside too not pictured). Then once the base is attached you can further strengthen the posts and cross supports by nailing through the base. Be sure to sink those nail heads before painting.
*This post contains affiliate links below.

To make the earring panels print out my template here. You will need repositionable spray adhesive.
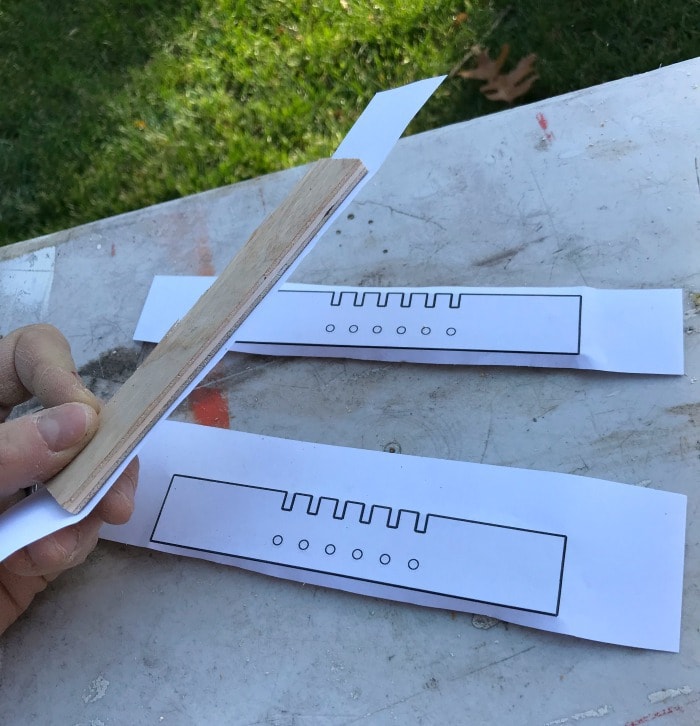
Cut the template into manageable pieces and apply spray adhesive to back side. Firmly press the paper template onto the 1/4″ plywood piece making sure to line up the outside edges with the template shape. It helps to hold the pieces up to the sunlight when aligning the paper.
Now make your cuts and drill the holes. Use a scroll saw for the slots and an 1/8″ drill bit for the holes.
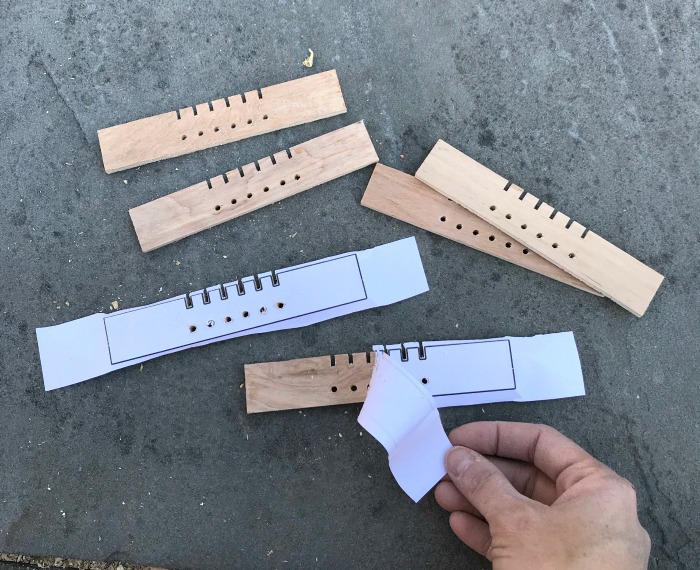
Once complete peel back the paper template. There should be very little adhesive residue on the plywood and any excess can be sanded off.
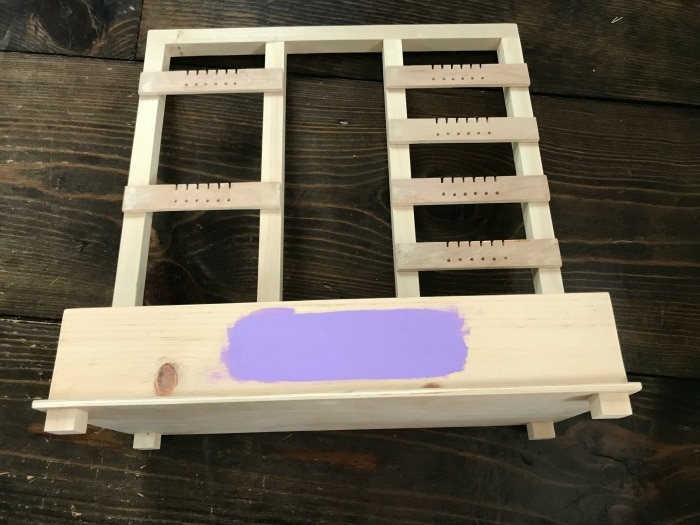
To prepare for the personalization paint the area in your desired color.
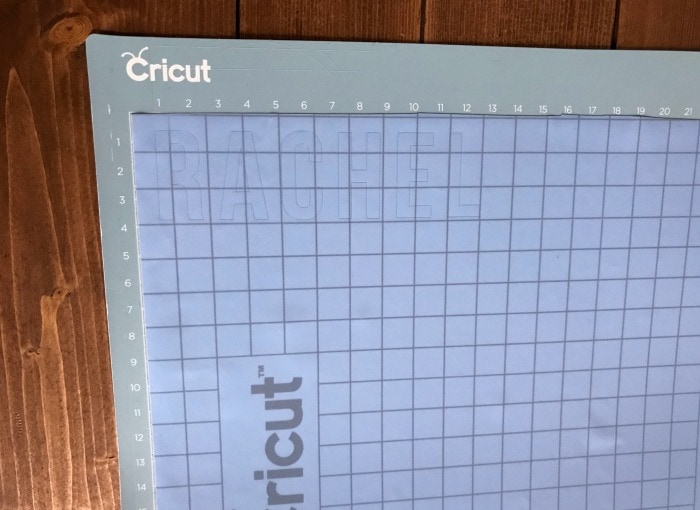
Step 1: Create a vinyl template of the letters using stencil vinyl and your desired font and size.
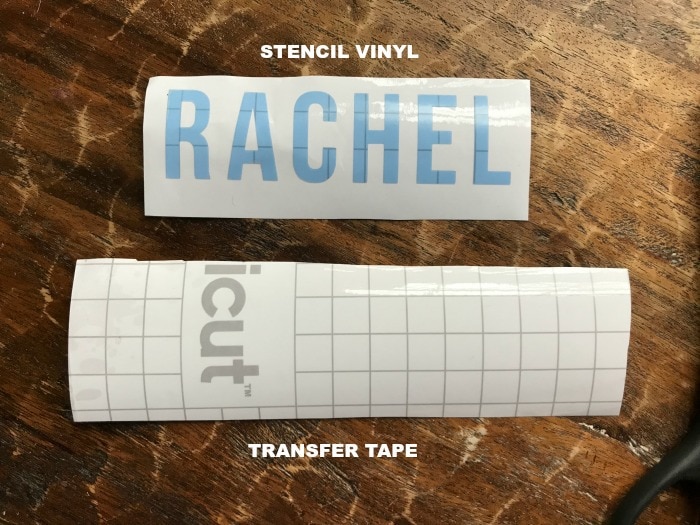
Step 2: Peel away the negative of the stencil vinyl and cut a piece of transfer tape just slightly larger than your stencil.
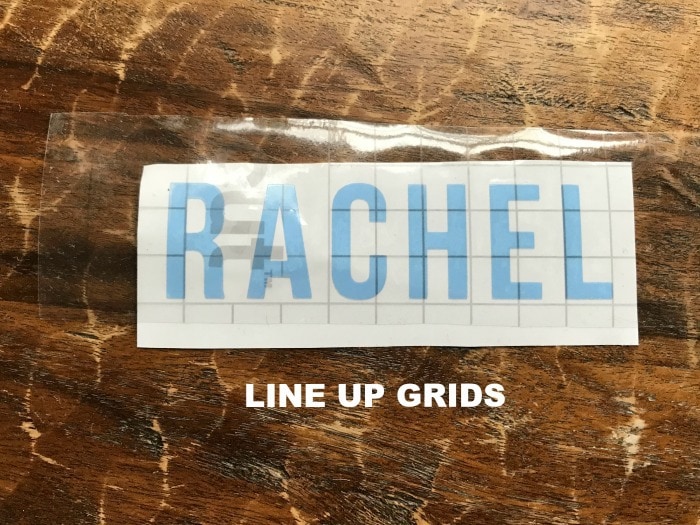
Step 3: Apply the transfer tape on top of the stencil vinyl. It helps if you can line up the grids on both pieces for straight placement onto your final piece later. Gently pull back on the transfer tape to lift the stencil vinyl off its backing.
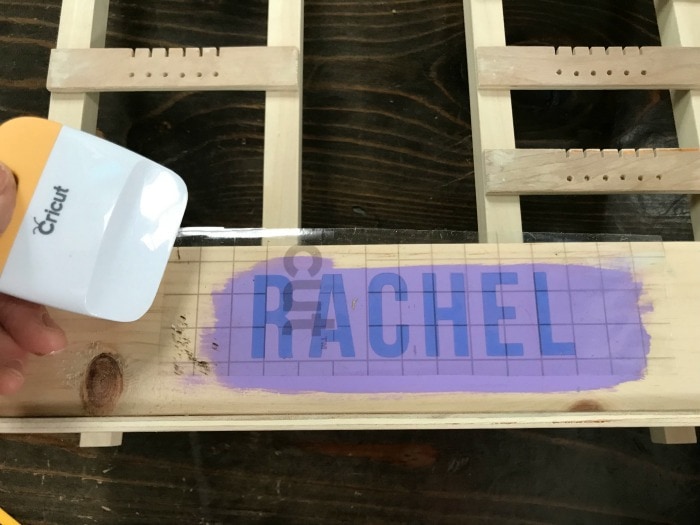
Step 4: Determine where the stencil will be placed and press the transfer tape in place. Use the burnishing tool to really press the stencil vinyl pieces in place.
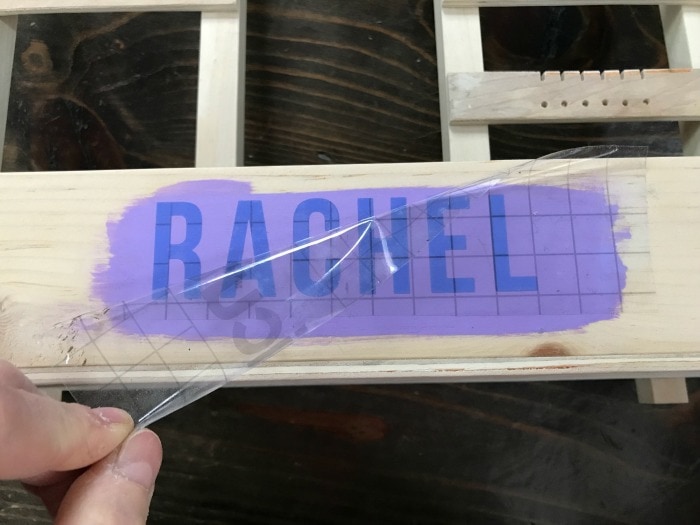
Step 5: Gently pull back on the transfer tape to release the stencil vinyl.
Now your stencil is perfectly in place and you are ready to paint the jewelry holder. I used spray primer and then two good coats of white gloss spray paint.

Step 6: Once your paint has completely dried use the weeding tool to pick out and peel off the stencil vinyl to reveal your personalization!
I hope you enjoyed this holiday gift plan project. We still have a few more weeks of gift building to go so stay tuned for more fun projects.
SHOP THIS PROJECT:


Lookin g exact measurement of wooden jewllery stand
Regards